Lesson N10 - How to make cat ears - part 2
We have begun to perform the rim "Felineears "crochet. If you accidentally hit the page on a search selection, use the link to move to the first part of the lesson: If you are in the right part, I suggest you continue! ? 18. On the white yarn, leave a long tail 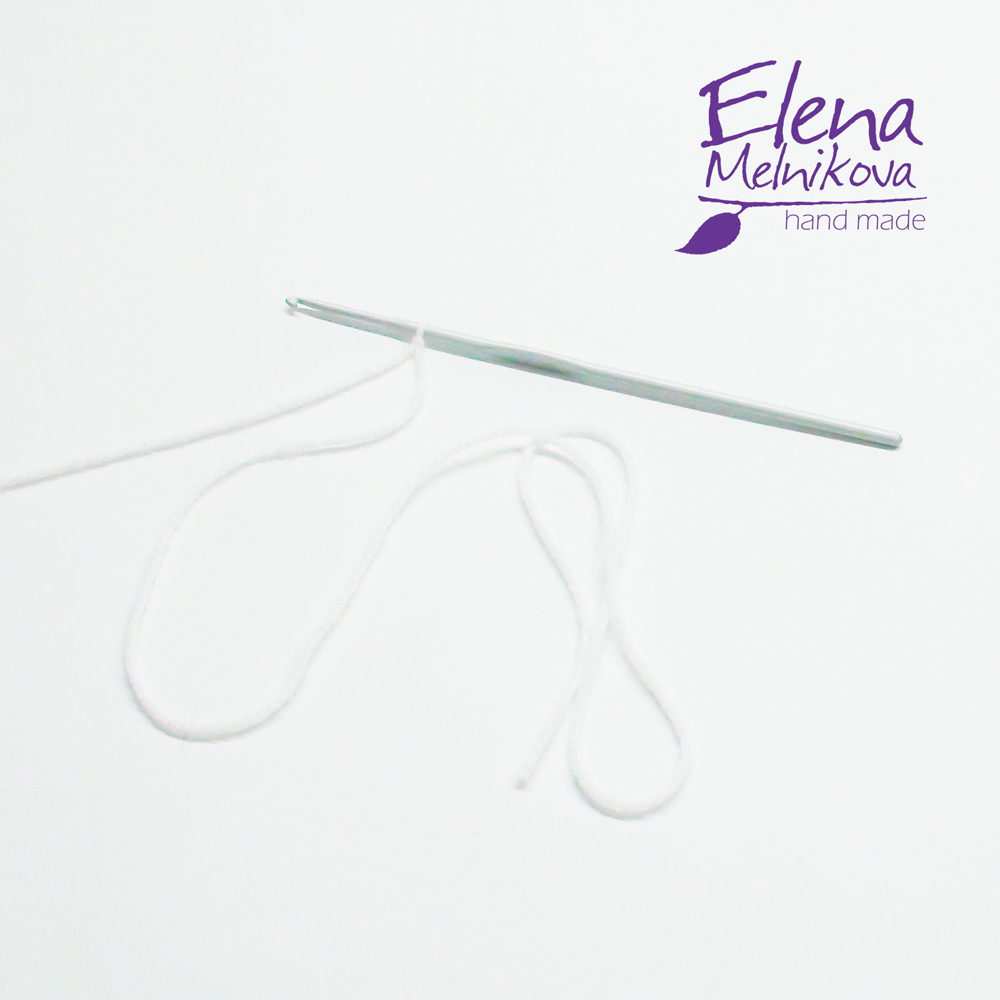 nineteen. If you knit the same yarn, then you need to dial the number equal to the number of pink yarn recruited. If you are different from me, then you need to try on. Dialing a chain of nine air loops
 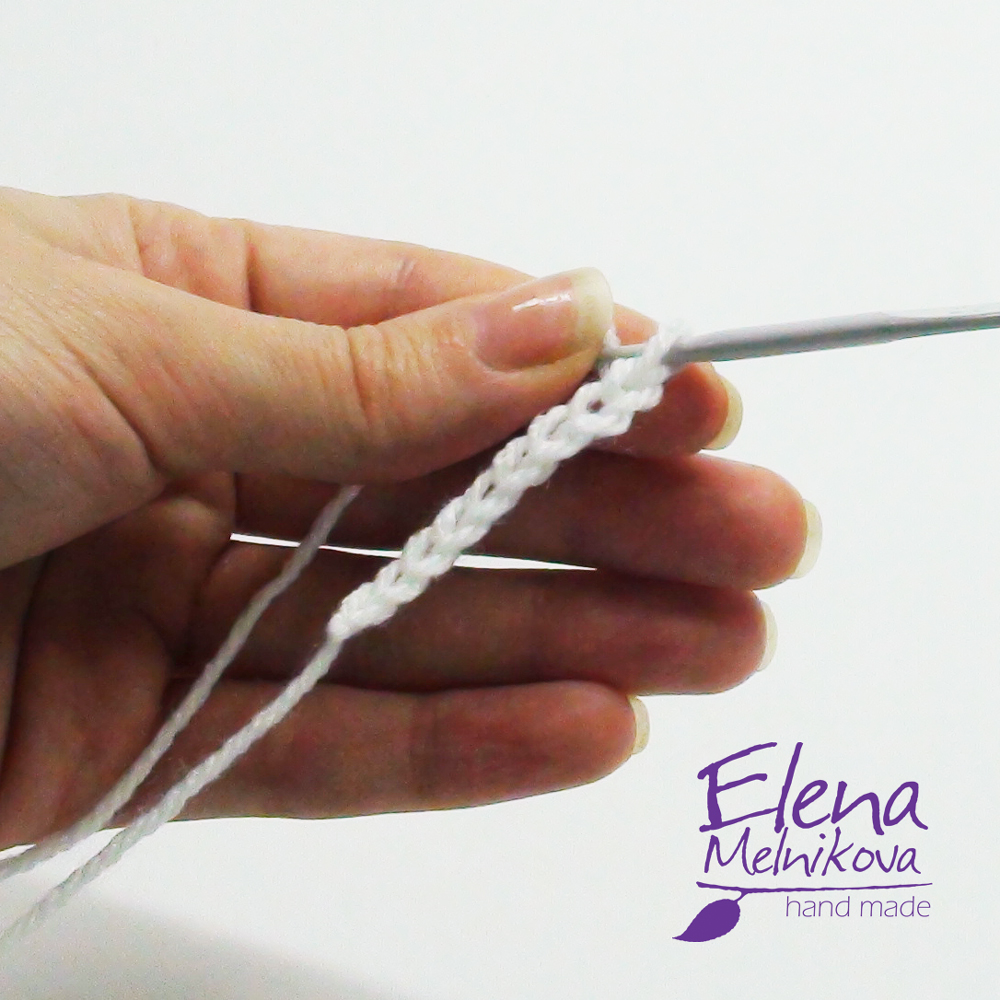 20. A single crochet post in the fourth loop from the hook and knit to the end of the row
  21. Compare the size of the pink and white parts in width, they should be equal
  22. We knit so many rows, so that the bezel in the girth across was tightly wrapped. I had two rows for this.
  23. Two lift air loops
  24. Next row we will knit or behind the back wall of the loop (for the right ear)
  25. Or for the front wall of the loop (for the left ear)
 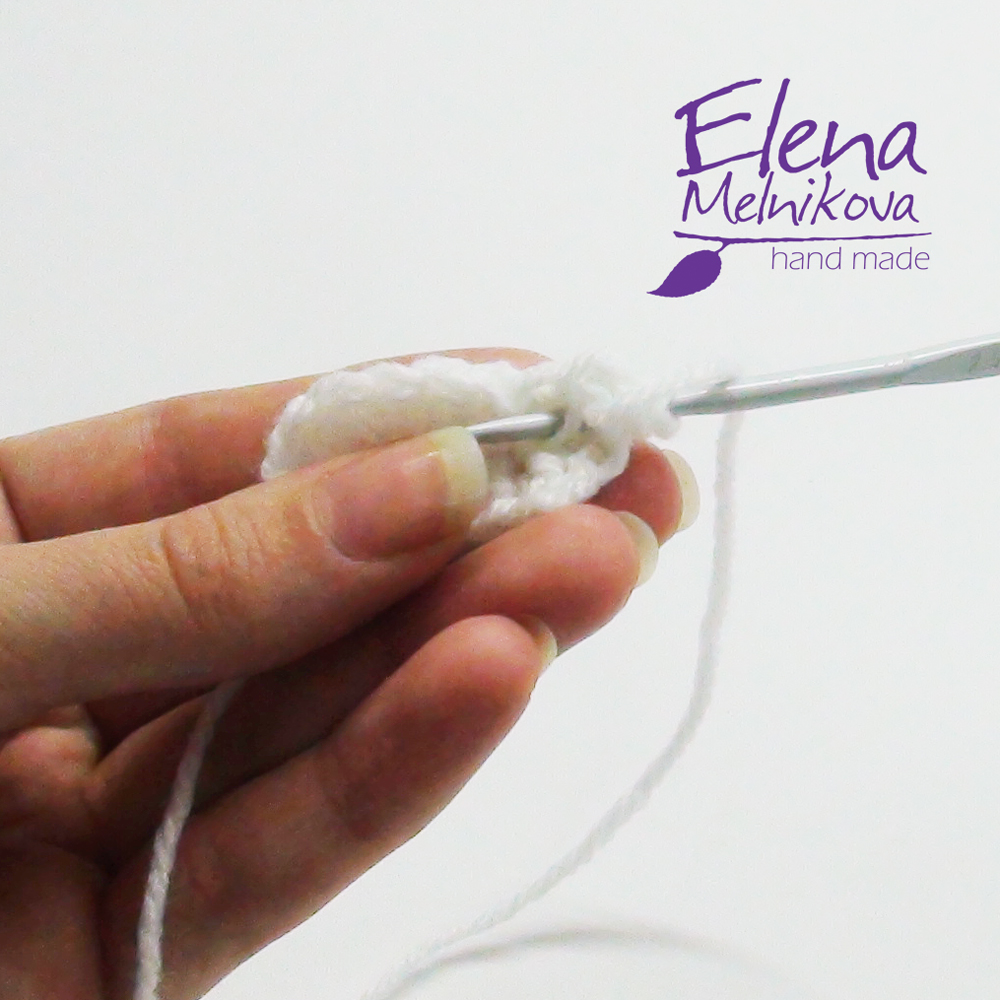 26 I am now knitting the left ear, so I knit the next row behind the front wall. If you knit with the same yarn, then we also knit this row behind one of the walls, but according to the description of the pink part - paragraphs 4-16. The last two columns are knitting together.
  27. Turn, two lift air loops
  28. We knit a series of double crochets and do not forget to make a decrease at the beginning of the previous row leaving a column of air loops unplugged, at the edge we knit two columns together
  29. Two lift air loops, two double crochets are joined, the last column is left
  30. It turns out that this ear is the white part.
  31. On one side, we got such a groove
  32. We attach two parts to each other, note that the pink part also has a difference - the side of the slope, but we just turn it upside down by one side or the other, and the white part should be turned to the pink "groove"
  33. And then we begin to tie two parts together alongside from
  34. Here we tied one side of the ear, in the extreme loop we knit two columns without single crochet
 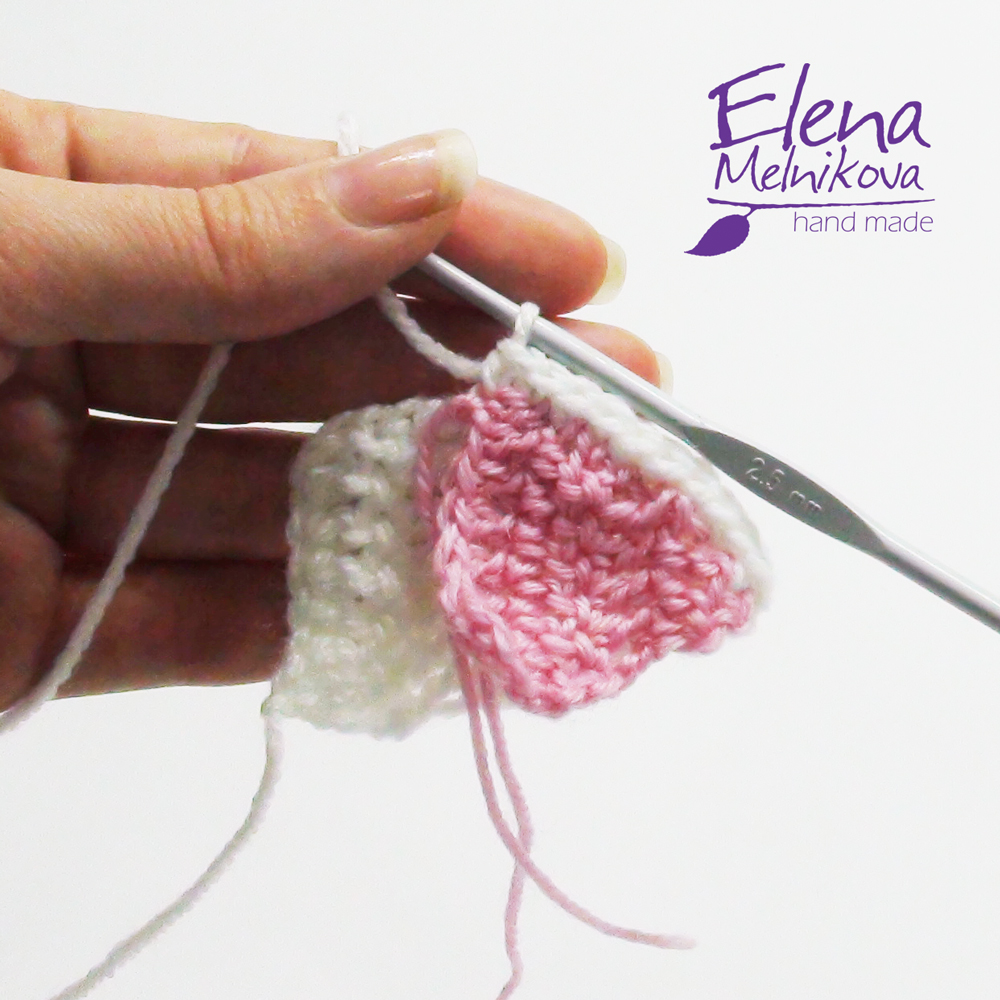 35. And now we tie the side connecting the edge of the pink part and the "groove" of the white
  36. That is how it will turn out, in the extreme loop there are two columns without a single crochet
  37. Hiding the tips of the pink part inside
 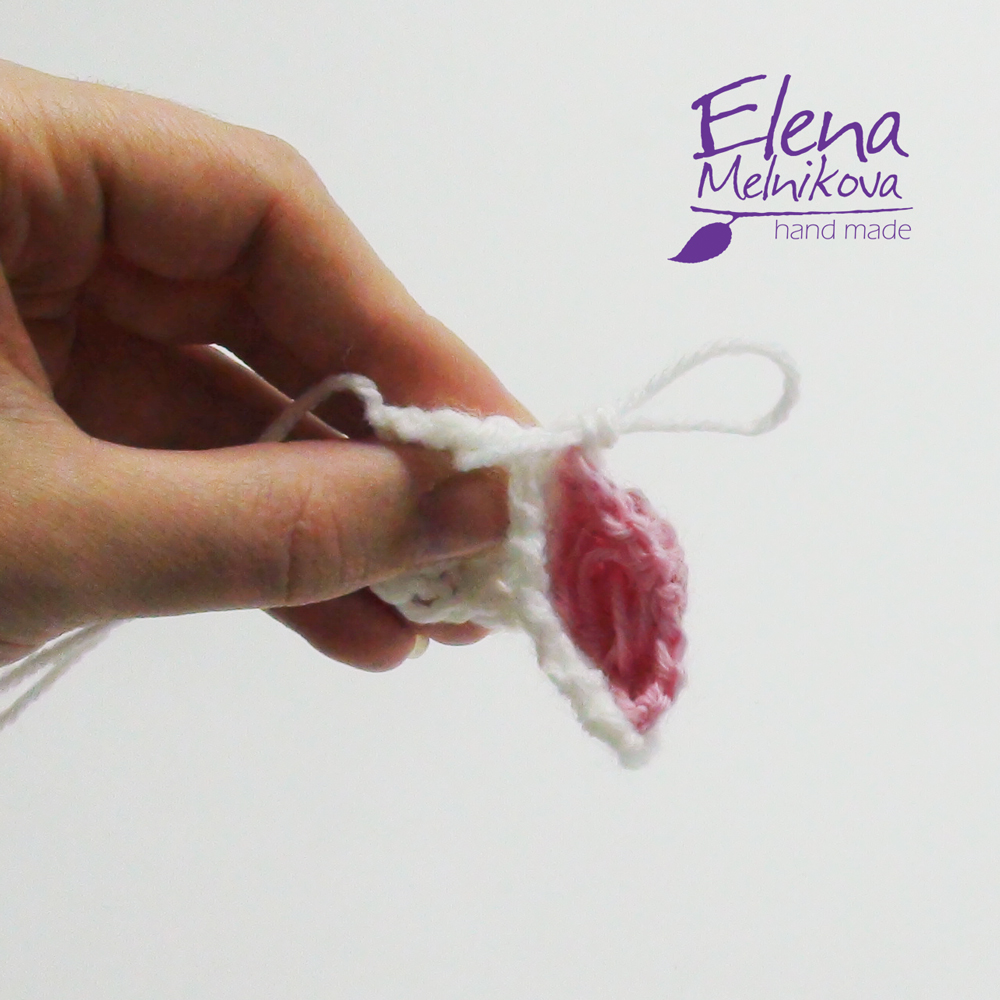 38. tying the last side
  39. We connect with the beginning obvyazachnogo series connecting column
  40. That's what happens
  41
41  42. Knit the second ear.
  43. And now attach the ears to the rim stitching the edges of the rows
  44. Well, that's all, our cat ears rim ready.
  45. Knitting pattern for ears with the same yarn (I don’t consider different ones, as everything will depend on the yarn)
  This is how it looks on our doll! =)
  Ears for reincarnation in the pussy ready?
  You are well done, another milestone passed! You made ears, learned new tricks! ) Do not miss outgoing lessons, be the first to know about them !!! You are always up to date by subscribing!
Comments
Related posts:
 How to make a pattern for beginners in the form of snowflakes - a lesson and a master class
 How to make a tank using the origami scheme of paper? Assembly diagram and lesson
 How to make a fish from beads: a turn-based lesson of weaving (photo)
 How to make a New Year card with quilling technique? A lesson for children