
Lessons from the weaving of the rubber on photo and video master-class
Content
- Lesson on weaving rings on fingers
- A lesson on weaving a New Year's keychain on forks
- Lesson on braiding bracelet
- Video: Bracelet "The tail of a mermaid" on a slingshot
There are many different ways of weaving from rubber. Some of them are more suitable for skilled craftsmen, while others are created especially for beginner needlewomen.
Today we want to tell you about how to weaveOf rubber on fingers, forks and a machine. Thanks to detailed step-by-step instructions even beginners can create their own original
.


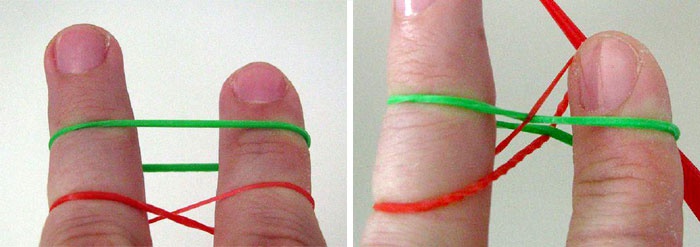
Lesson on weaving rings on fingers
Fingers are a unique "tool", givenTo us by nature itself. They are always "at hand" and with the help of them you can easily master the initial course of weaving of silicone rubber bands. Before you begin to study the first lesson with detailed step-by-step instructions, you must prepare yourself beforehand:
- Red and green rubber bands;
- Small clasp;
- hook.
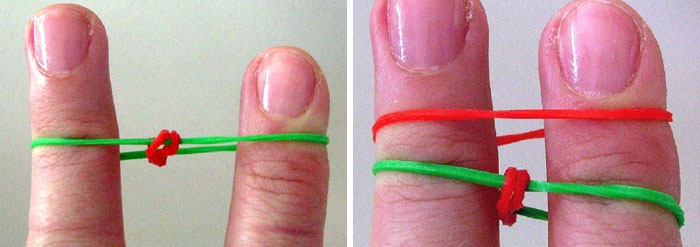
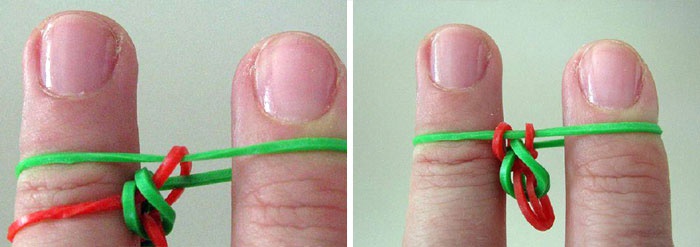
Let's start the first lesson for beginners. Put the first rubber on your fingers, twisting it with this figure-eight. After that, the detail of the other color is not twisted. Then throw the lower loops to the middle.
Without twisting we put on 1 red. We continue to weave on such a scheme until the chain grows to the required length. At the end of the lesson, attach 1 tip of the lock to the very first loop, and 2 attach to the loops located on the fingers. We remove the ring from the fingers of the left hand and try on it.

Learn the initial course of weaving simple jewelryYou can not only by step-by-step instructions with the photo, but also with the help of short training videos. So, for example, after studying this small video lesson, even a novice needlewoman will learn to weave more complex rings with beads.

Video: Weaving ring without machine
A lesson on weaving a New Year's keychain on forks
Many beginners are familiar with the techniqueWeaving from rubber bands in the process of making keyrings. And this is quite understandable, because to weave the key chain is very simple! In order to learn the secrets of weaving key fobs, you do not need to attend special courses, it's enough just to carefully study the step-by-step instructions. And also purchase some materials and tools:
- Purple, red, as well as dark and light green rubber;
- Forks - 2 pcs;
- hook.
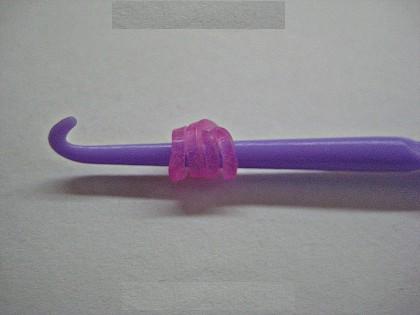
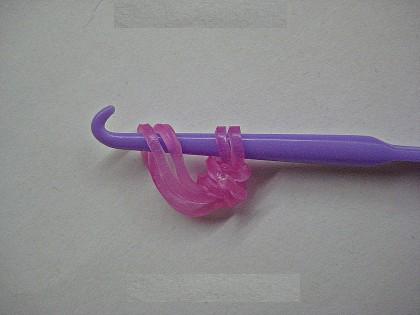
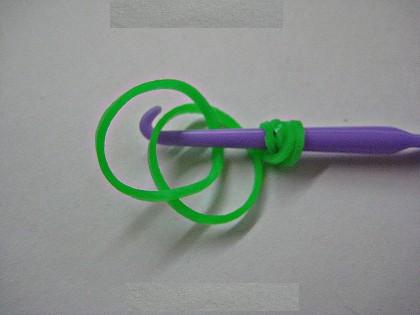
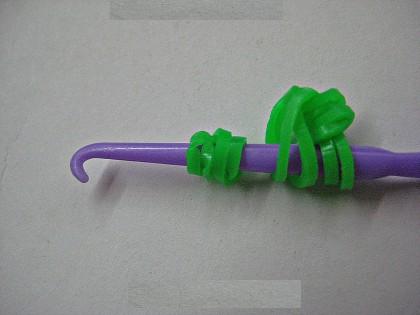
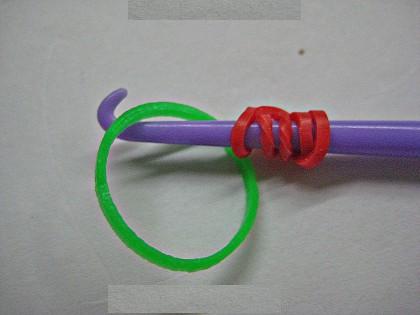
Instruction for weaving a keychain called "Christmas tree". Wrap around the hook 4 times a purple gum. After that, throw a purple pair on the hook.
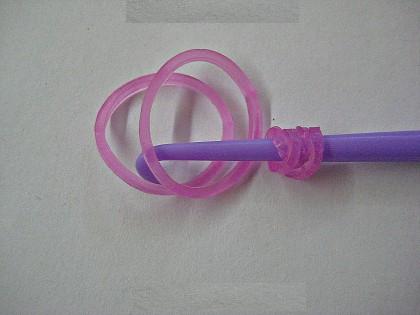
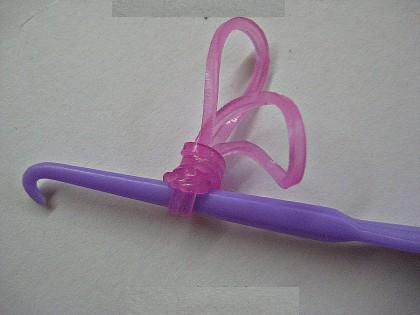
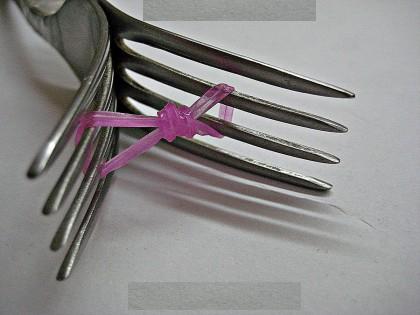
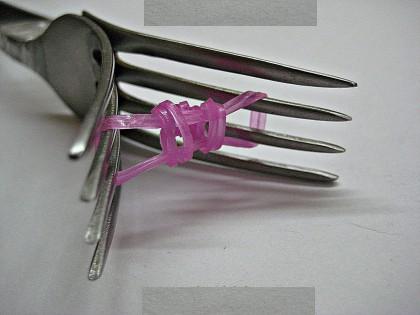
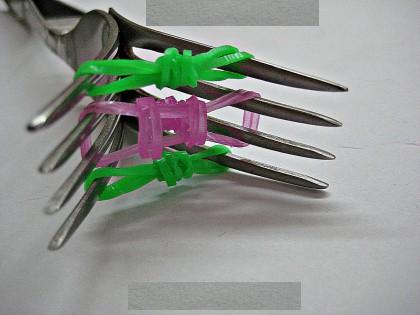
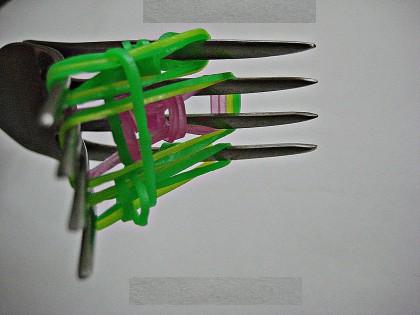
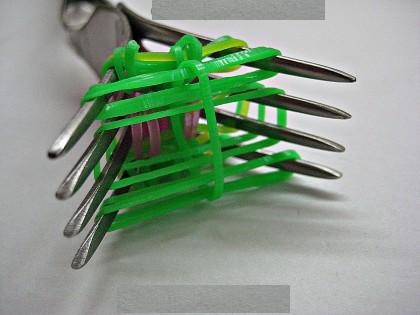
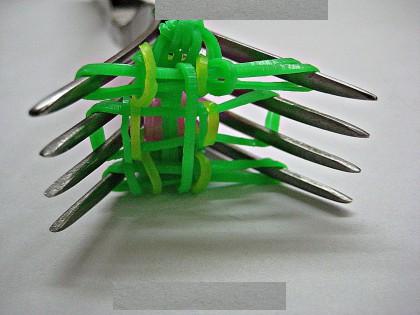
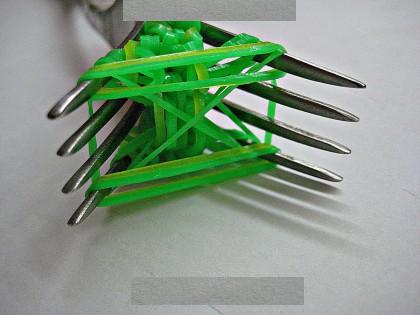
Pull out the newly thrown rubber bands throughWorkpiece. Place loose loops on the working tool. At the next stage of the tutorial, we will weave rubber bands on forks. In order to begin further study of the instructions, we must first prepare a self-made "machine". That is, attach the forks to each other and wrap the tape, as shown in the photo. With a working tool fixed tape in one position will be much easier to weave, so this preparatory stage is not recommended to pass!
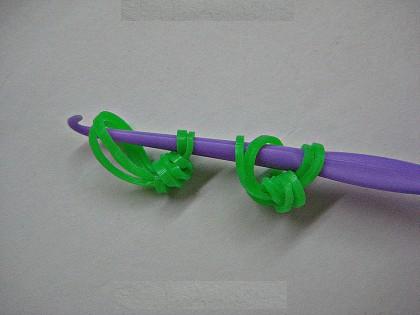
Further on the central teeth of one forkIt is necessary to transfer the last pair of rubber bands from the hook. The rest of the pair must be transferred to the teeth of the second fork. Now, on top of these details, pull 2 more purple.
We catch the first 2 elastic bands on one fork and move them to the middle. By the same scheme it is necessary to reset the eyelets from the denticles located opposite.
Further in the lesson, we trample on the needles forTree. To do this, first wrap 4 times around the hook a dark green detail. Then, after throwing 2 elastic bands, pull them through the workpiece. Pick up loose loops.

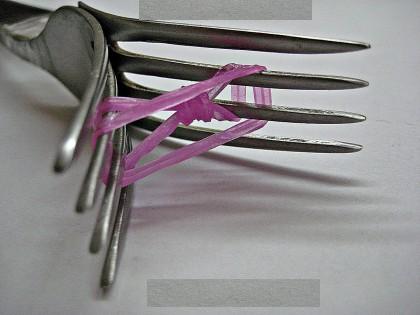
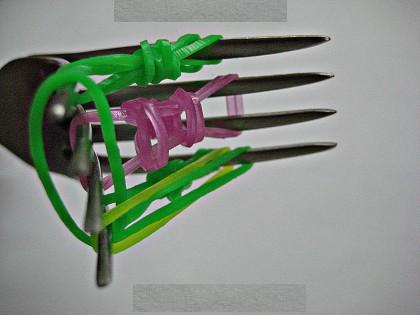
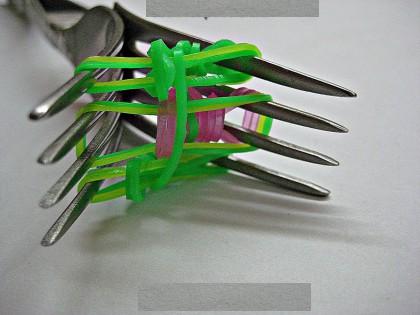
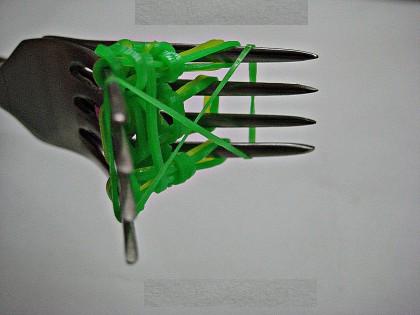
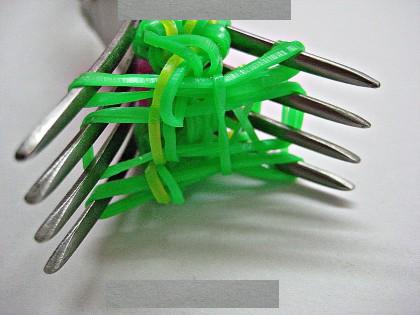
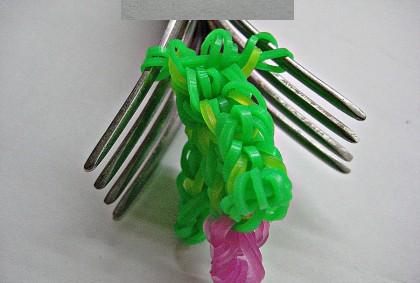
By the same scheme, the second workpiece is plaited. We throw the workpieces on a self-made "machine", placing them as shown in the photo. We throw on all the teeth of one of the forks elastic.

We take 2 pieces of different colors. And pull them between the denticles. We place the same blanks between the middle and upper teeth.
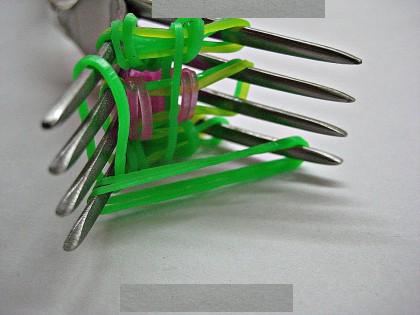
Then we catch the rubber band, thrown on all the denticles. We move it to the middle of the weaving. Alternately, we transfer the first parts from this fork to the middle of the weaving.

Then we do the same with elastic bands on the second fork. At the next stage of the training course on weaving, we throw an elastic band on the teeth. Now between the opposing prongs, pull 2 pcs.
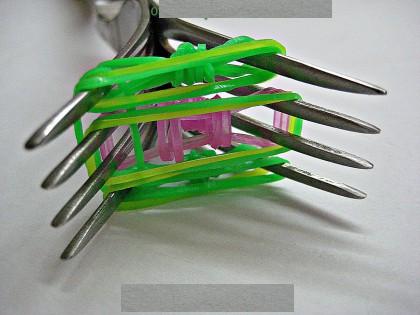
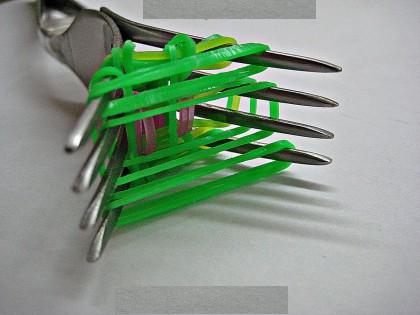
We move all the lower parts to the center again. We pull 1 rubber. We throw a two-color pair on both forks.
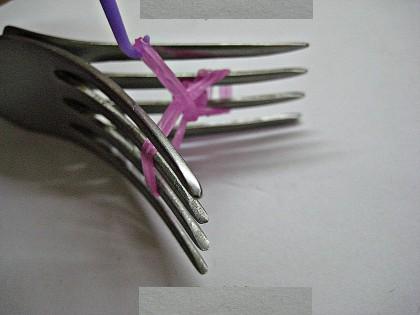
First we move to the center a wide rubber band, and then those that are below. We put on 1 piece, bored as a figure eight. Once again, we stretch the gum between the teeth and again throw them into the middle.
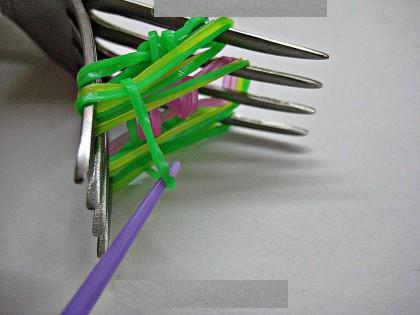
Crochet the top piece from the centralTeeth. We move it to the right ledge. The rest of the central loop is moved to the left ledge. The same is done with loops from the second fork. We throw the eight. Between the extreme protrusions we catch 2 pcs.


Reset the twisted piece inMiddle. The three lower parts from both forks are moved to the center. Stretch the eight. On top of it, put on 1 elastic band on the outer ledges. Lower parts are thrown into the center of the weaving.


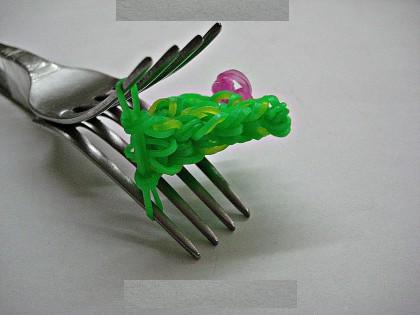
We put on 1 elastic band. We transfer the workpiece to it. We toss one loop to the second and tighten the knot.
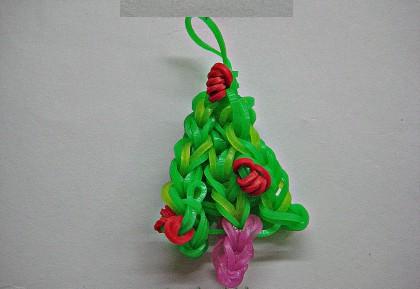
Express course, through which eachBeginning needlewoman will be able to make a keychain in the form of a Christmas tree, completed. At the end of the lesson you need to weave for the finished Christmas tree decorations. For this purpose, the red rubber band is wrapped around the working tool 5 times. Then through it stretches a green rubber. The hook starts under the noose on the Christmas tree. And grabs one side of the workpiece.
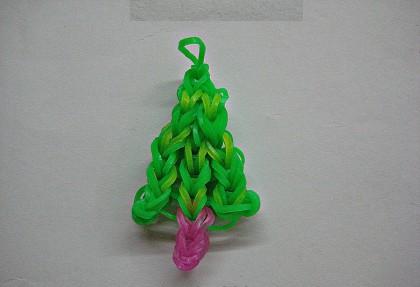
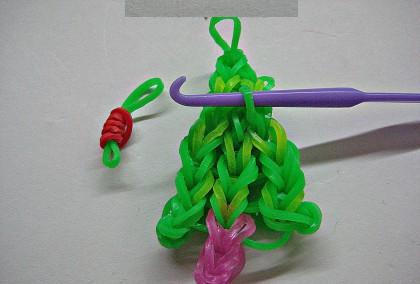
The second part of the parison is stretched throughThe resulting loop. Extra hinges are hidden inside the weave. By the same scheme at the end of the lesson, the novice craftsmen will need to weave 2 more balls for the Christmas tree.
Teaching express courses on weaving help youPersonally make simple rings and key chains. Beginning needlewoman, mastering the basic ways of weaving, without problems will be able to proceed to create more complex ornaments, toys and souvenirs!
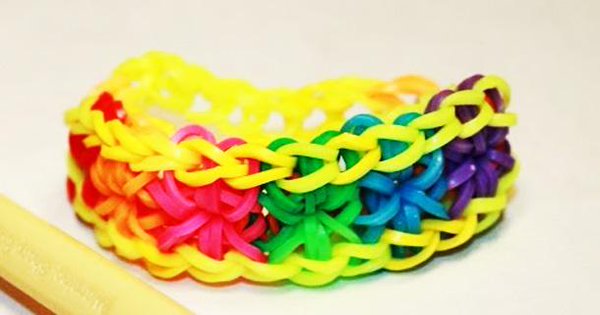
Lesson on braiding bracelet

This lesson is devoted to weaving a simple brightA bracelet called "You and I". There are different ways of weaving this bracelet, but today we will tell you how to make it on the machine. Each novice master knows that before you start working you need to prepare everything you need. Therefore, before you start the lesson and start reading the instructions, we recommend that you put in front of you in advance:
- Small machine;
- Rubber: black, pink and light green;
- Lock;
- Usual hook.
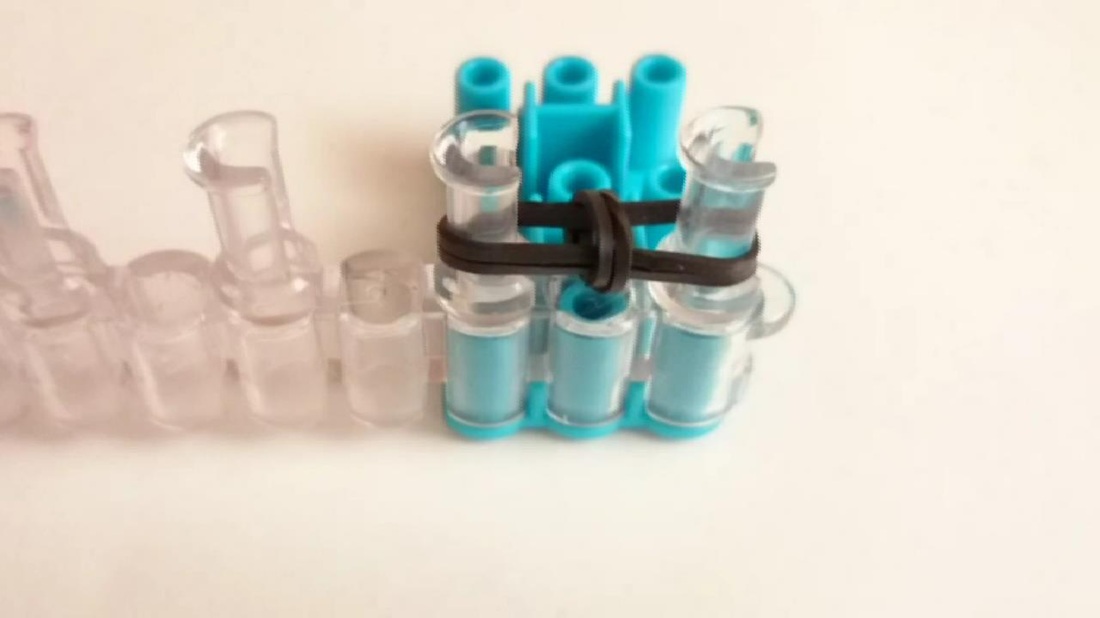
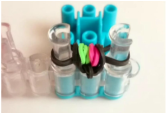
Step by step instruction on weaving the originalStylish bracelet. Usually the training courses on weaving on the machine start with the correct installation of this device. Therefore, before starting work, install the machine, as shown in the photo. Wrap the rubber band in black 2 turns around the outer column. On top of the jump a couple more.
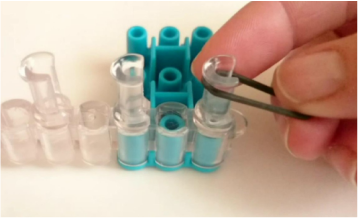


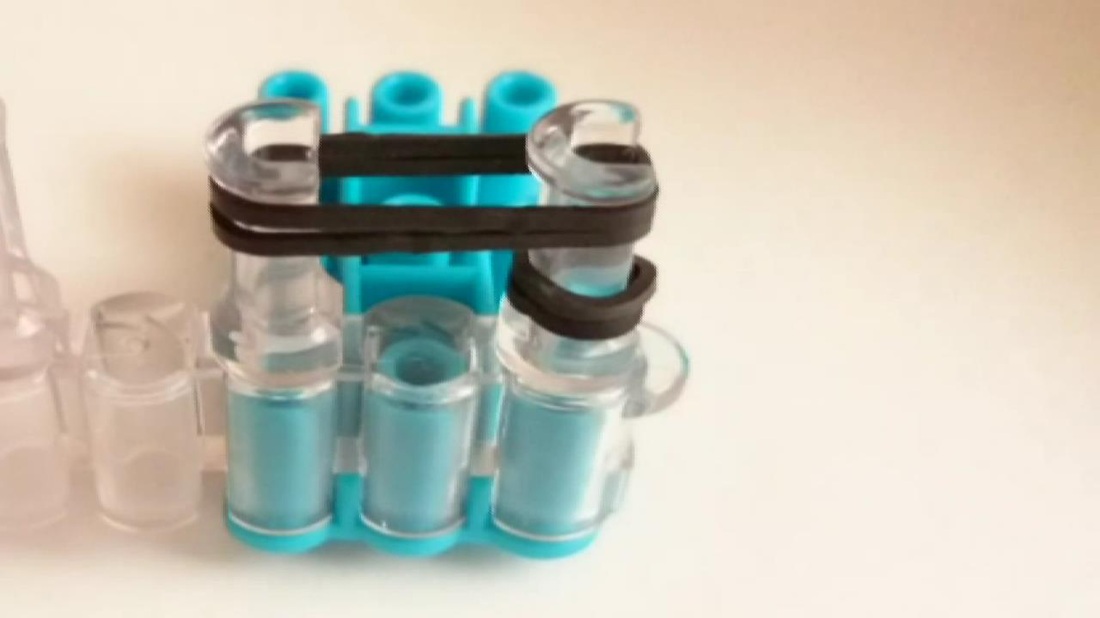
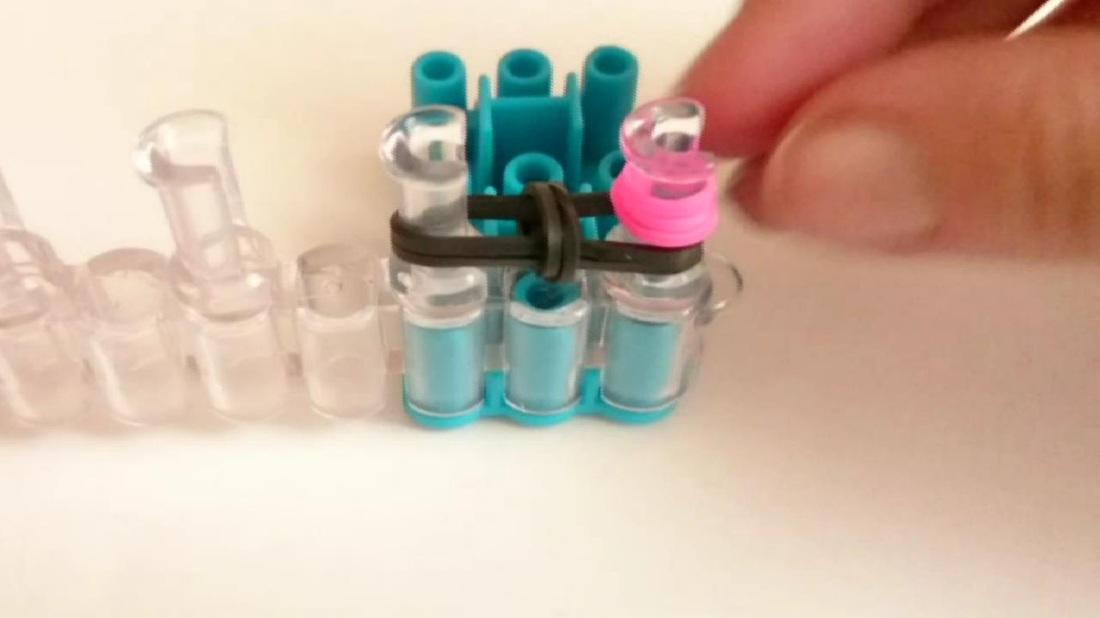
Two lower loops throw in the middle. On the right ledge, form 3 pink rings. And on the left - 3 light green.
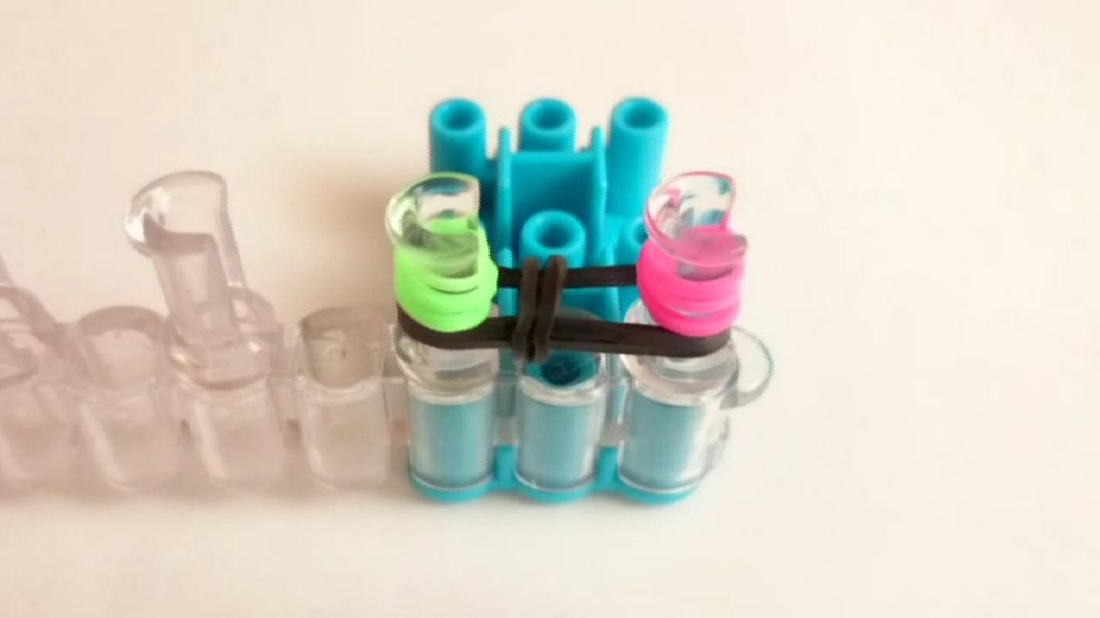
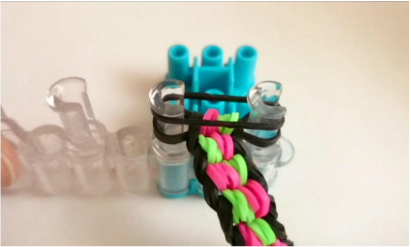
Throw a black pair on the pegs of the machine. Move the colored hinges to the center. Now transfer to the center the bottom black layer, which consists of 2 parts. Accurately following the instructions of this training course, weave until the size of the bracelet grows to the length you need. After that, pounce the black pegs on the pegs.

Then move the hinges to it. Remove from the right peg an eyelet and put on the left. Attach the lock, remove the bracelet from the machine. The second half of the lock is attached to the loop on the opposite side of the bracelet.
The bracelet is ready!
We hope that these simple weaving lessons fromRubberies have helped you from a beginner craftsman to turn into a real professional. And now you can not only wove your own beautiful ornaments, cute key chains, funny animals, but also personally conduct weaving lessons from rubber bands, in order to demonstrate by your example that every novice needlewoman who has studied the initial course on weaving can eventually become a real pro!
Video: Bracelet "The tail of a mermaid" on a slingshot
Comments
Related posts:
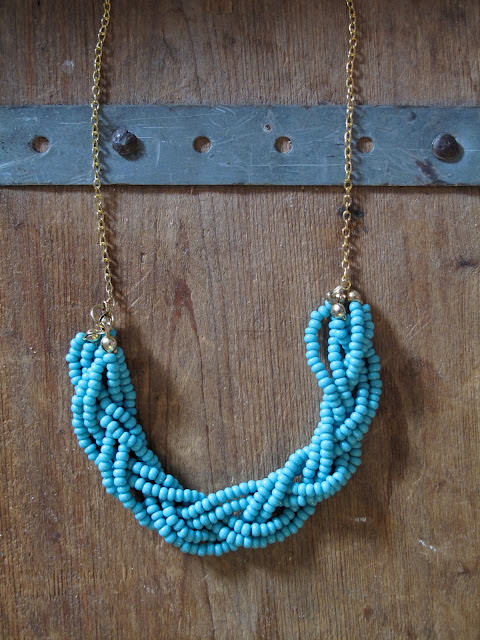 Necklace of beads: the lessons of weaving their own hands (photo and video)
 We learn how to weave a butterfly from rubber bands on photos and videos to a master class
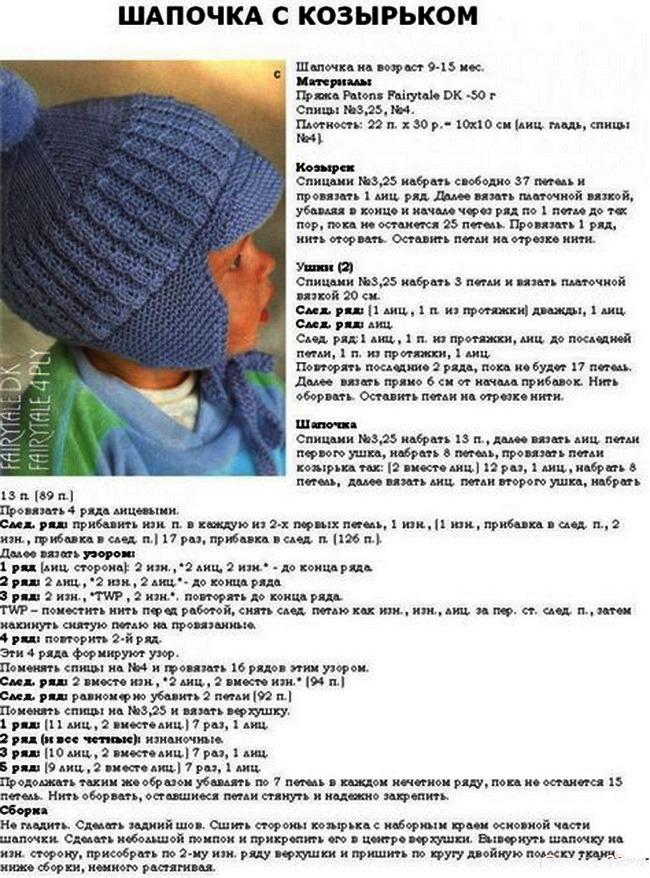 Knitting spokes hats with earflaps photo and video master class
 Video and photo workshop netting fish from the gums