
Letters of felt with their own hands, photo, instruction, patterns / Toys with their hands, patterns, video, MK
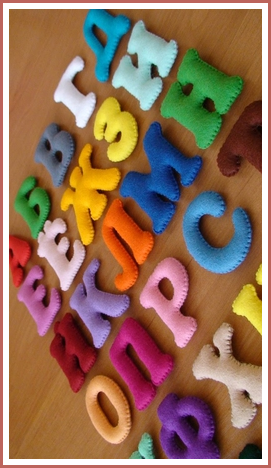
In recent years, development letters of felt have become very popular because of the availability of material and ease of execution. You can make a whole textile alphabet with your own hands in a couple of evenings.
Alphabet from felt
 You will need the following materials:
- multi-colored felt;
- scissors;
- thread of floss for sewing;
- needle;
- sintepon or holofayber for packing;
- buttons, beads for decoration;
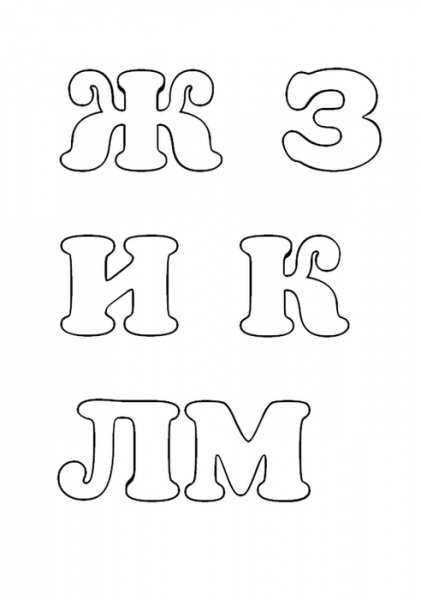
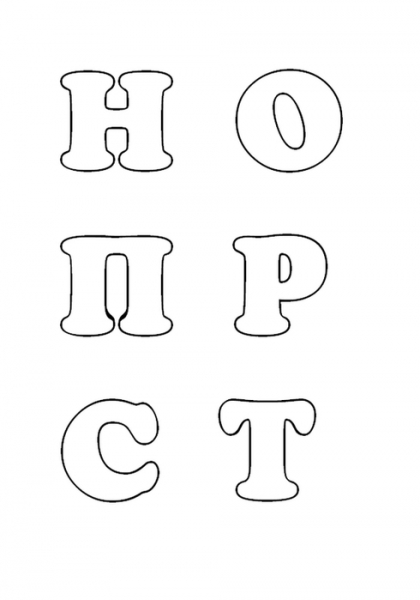
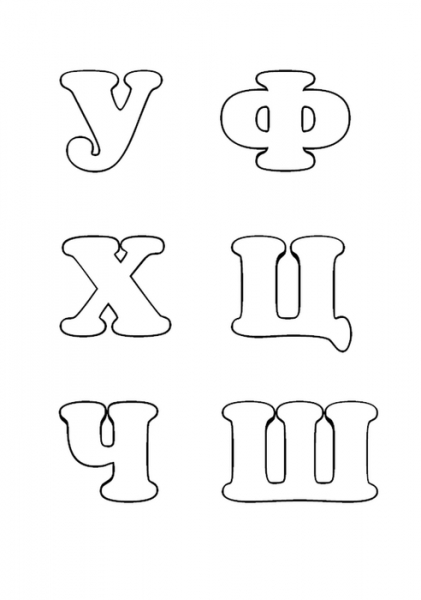
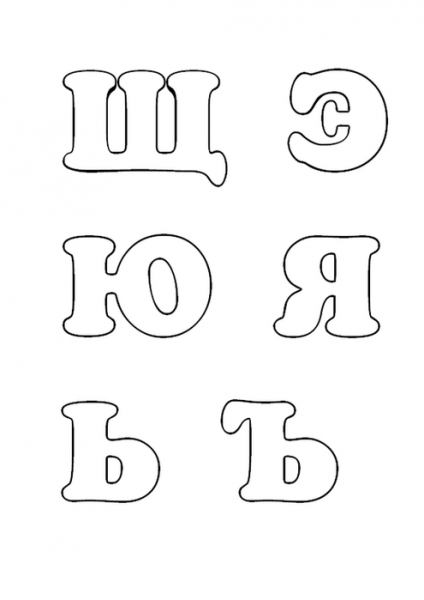
- Patterns;
- chalk, pencil or marker;
- pieces of Velcro;
- a rectangular cut of the sheathed fabric.
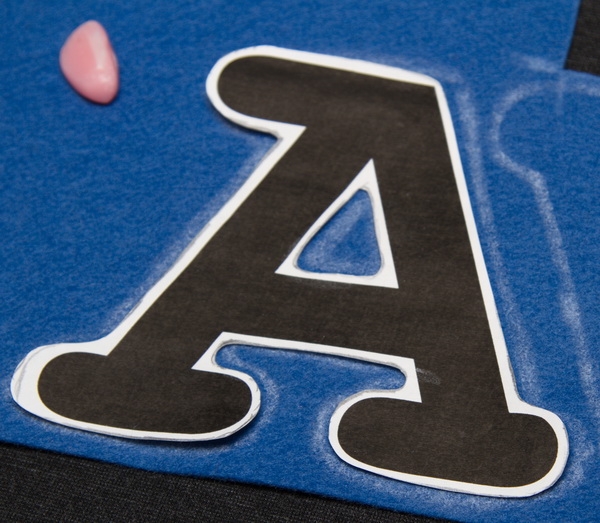
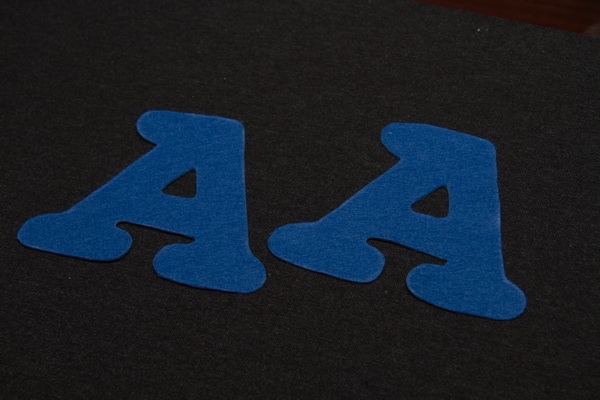
To begin with, we print out patterns andWe circle them on the cardboard so as to round off all the turns. Do not forget to leave allowances for stitching. Each letter must be cut one by one in each side and the resulting parts are folded with the wrong side. You can prepare the decorations for a toy from a bright felt: bows, flowers, butterflies, multicolored mugs of different sizes. Select the thread color with which you will trim the toys. Equally suitable are contrasting (for example, a combination of lilac threads with an orange cloth) and the same thread. In order for the letters to be voluminous it is worth taking a thin material 1 mm thick. 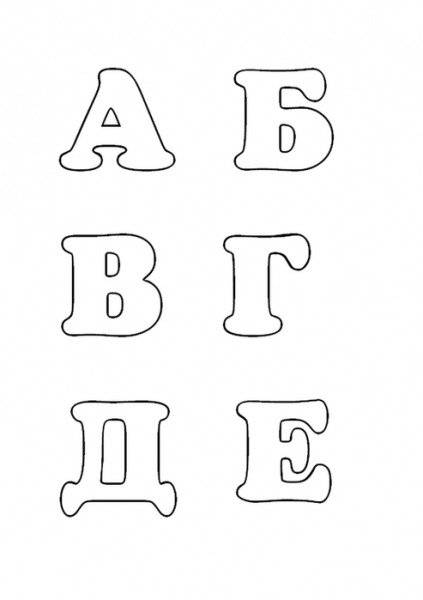

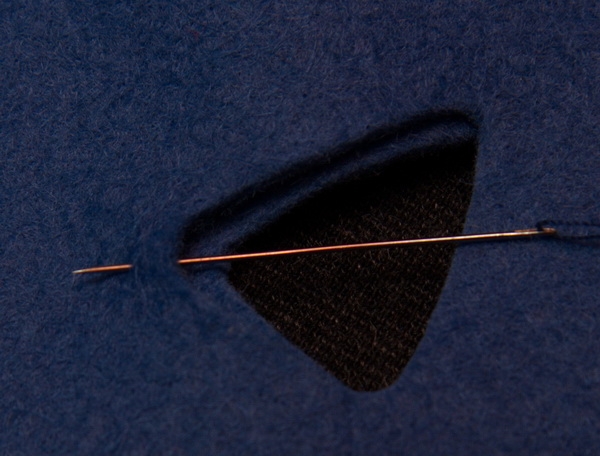
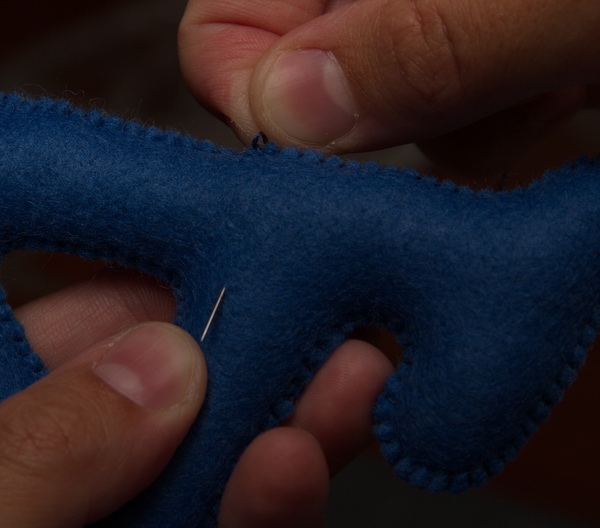 Stages of work:
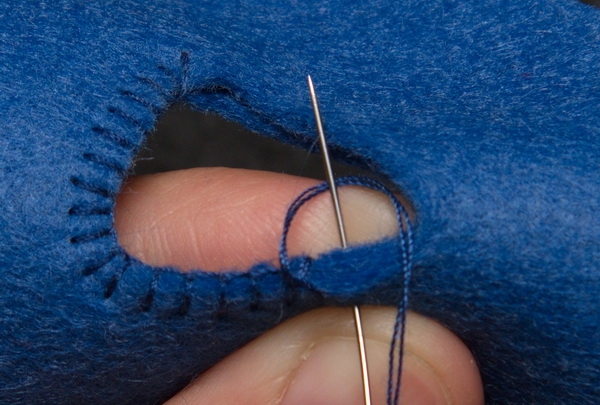
As you can see, sewing soft toys from felt is easy andinteresting. The main thing is to carefully and accurately perform the stitch suture, without tightening it. Use a pre-prepared sheathed piece of fabric so that the child can make up words on it and correctly arrange the letters in alphabetical order. 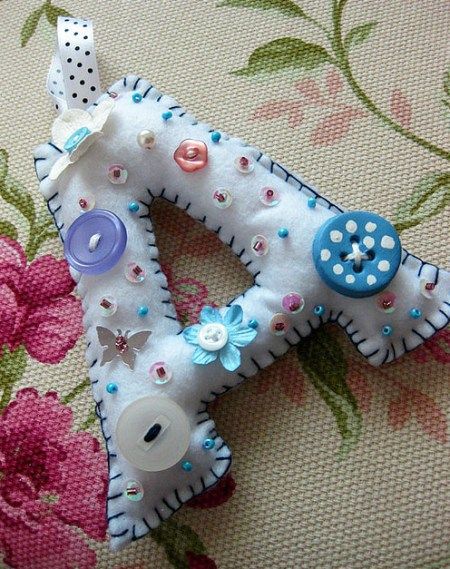 Also, you can sew a pattern on them with beads, sothe kid will be more interesting to touch them (but take into account the age of the child so that he does not swallow the torn parts). And if you need large letters,
Letters on a soft basis
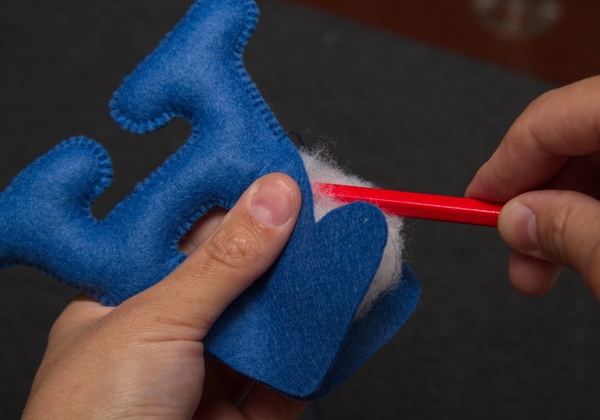
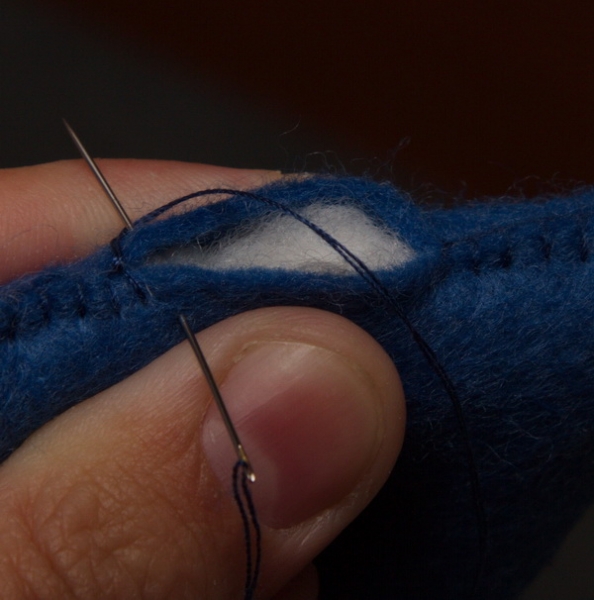
To diversify and complicate the task forbaby, sew the letters on the textile base. It can be any shape you like: round, square, triangular, in the shape of a star or a heart. A very beautiful variant of such a base is made of two round details with a carved wavy line along the edge. Also, pre-prepared flat letters of thin felt, one for each base, and circles of 6-7 mm less than curly details. 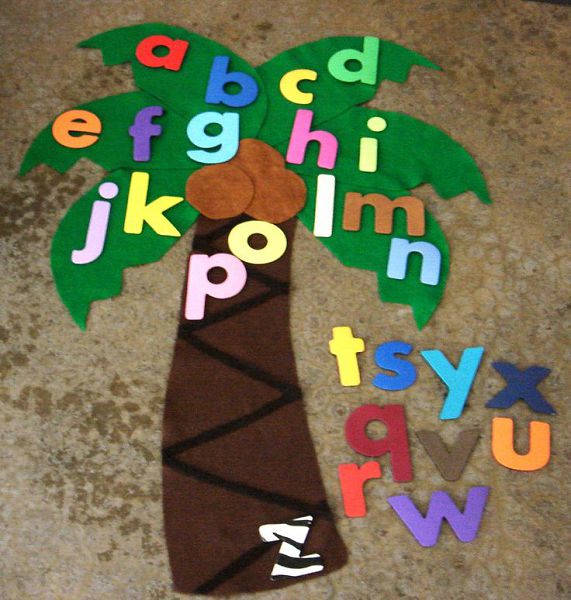 First, sew a small circle to one of thegreat details. Then we sew stitches of the same length with stitches around the central part (always at regular intervals). After we sew two curly pieces together. We fill the base with filler, finish and hide the tip of the thread. To make the game interactive, you can sew a velcro or hook to the back of the three-dimensional base, sew a magnet under the cloth.
 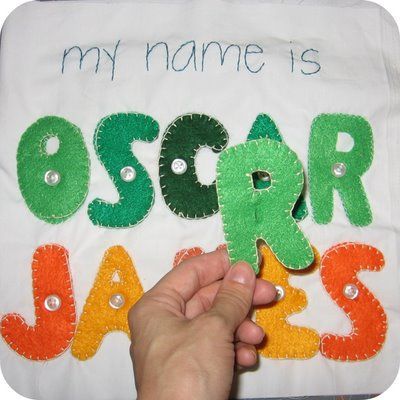 Another way to improve the game is,to sew on one side of the base of the loop, and on the other - a beautiful button. It is most convenient to do this with the basics in the form of a heart, a star, or an inverted triangle. The button is sewn at the end of the sewing of a textile toy, and the eyelet is sewed while sewing the curly details to each other. So, the kid will be able to collect his name or leave a small message to his parents, fixing him by the eyebolts.
Wall Alphabet
To accustom a child to order and learn how toyou can more new words and names of animals, we will make a volumetric wall alphabet. It is an oblong rectangle made of cloth with small pockets in the form of semicircles.  We already have a ready-made soft alphabet onVelcro, so by the size of the letters we cut out 33 semicircles or a rectangle with rounded bottom corners. By the size of the pockets, we calculate the necessary width and length of the cut of the fabric to which they will be fastened. The base is lined around the edges and sewed on top of the braid to hang our textile alphabet. Also, it can be strengthened by a sheet of cardboard. At the end we sew the pockets of felt with a stitch and gently sew them to the prepared fabric.
 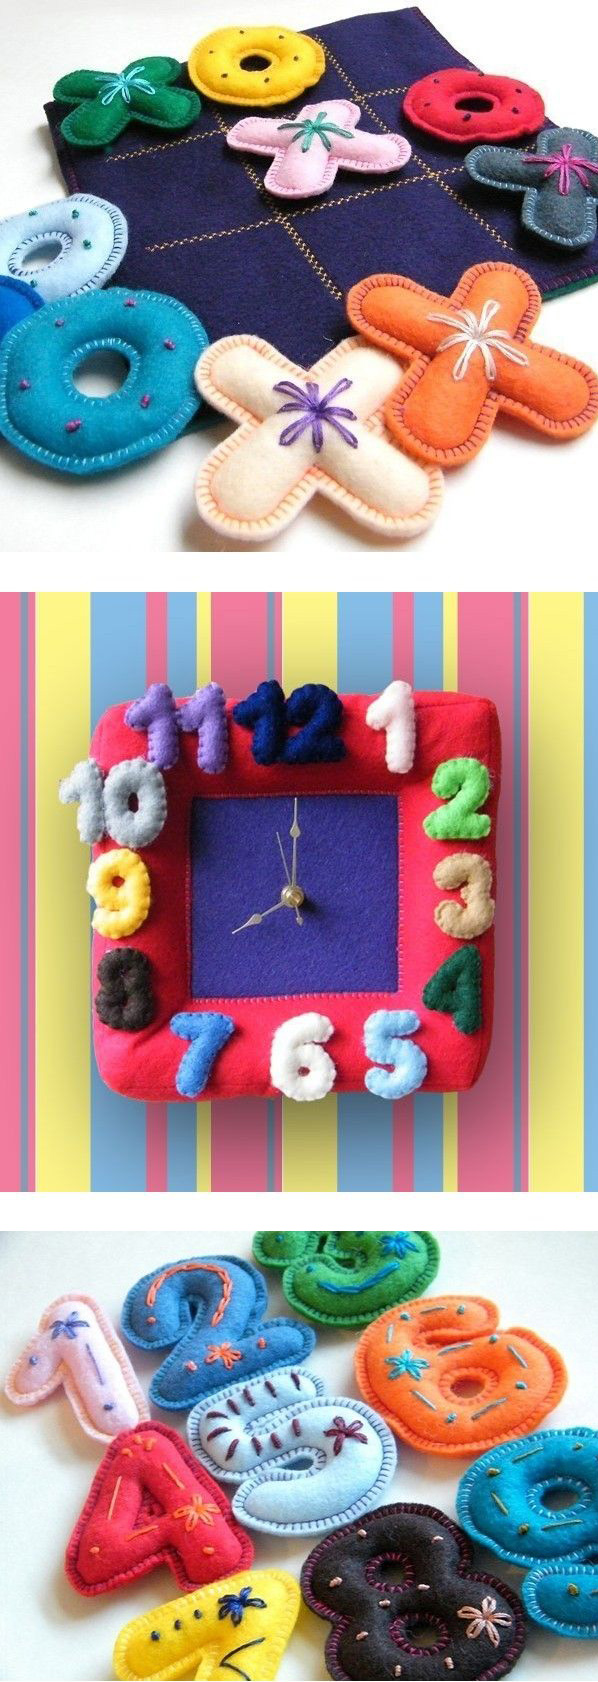 By the same principle as letters, you can sew small animals, fruits and vegetables for pockets. They can be made from a minimum of detail, only by outlining the contours of the animal or food.
Comments
Related posts:
 Letters of felt with their own hands, photo, instruction, patterns / Toys with their hands, patterns, video, MK
 Developing toys from felt, photo, instruction / Toys with own hands, patterns, video, MK
 How to make a snowman with your own hands, photo, instructions / Toys with own hands, patterns, video, MK
 Knitted knitting needles for beginners, photo, instruction, video / Toys by hand, patterns, video, MK
 Montessori toys with their own hands, master class, photo, instruction / Toys with own hands, patterns, video, MK