How to work with the front and back loop? Instructions for beginners
Knitting is a difficult task, and shapingPatterns - this is one of the very important sections of knitting. To master your work, you need to take into account all the factors and clearly distinguish how and how the loops are formed. In total, there are two versions of loops or so-called basic loops. They are called, respectively, purl and facial. There is a classic version of knitting and a variation of the old lot. The correct one will be considered the first, where the stubble is tied with the front wall, which by default is suitable for describing the knitted patterns of many patterns. The second method is not suitable because knitting occurs through the back walls. This method is easier, but if you immediately learn the classical - the difference will not be noticeable.
How to work with the front and back loop? Instructions for beginners
 But, about this further. Today we will consider several variants of knitting loops in different types in order to form their ideas. Face loop of the classical type.
 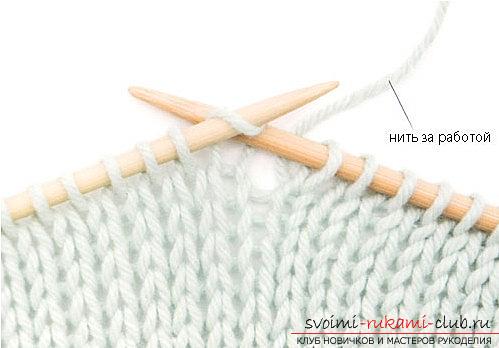 It is knit with the help of a knitting needle, on which we type loops, and then we place it in the left hand. In the right hand is placed a free spoke. The thread (work) must be behind your work.
 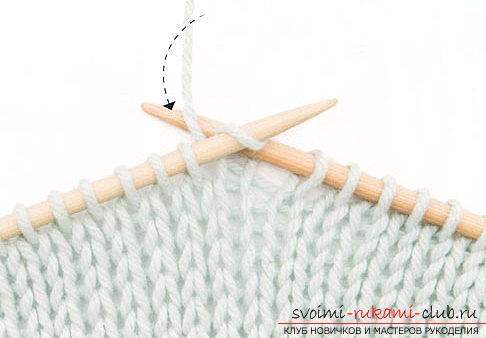 Then, you need to enter the end of the right knitting needle inloop through the motion "from left to right" in the front of the wall. Then, it is necessary to pick up the thread and hold it with the right knitting needle. The tension of the thread is not long to be observed with excessive tightness or weakness. Then, it is necessary to stretch the thread (picked up) through the eyelet on the left side of the knitting needle and form a new loop.
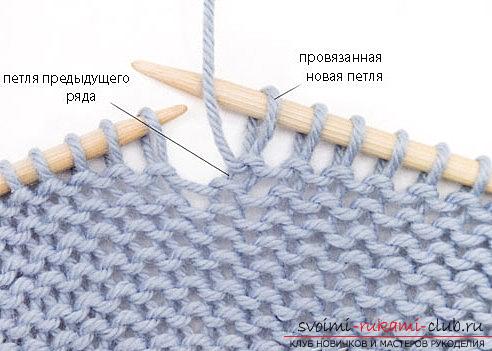
 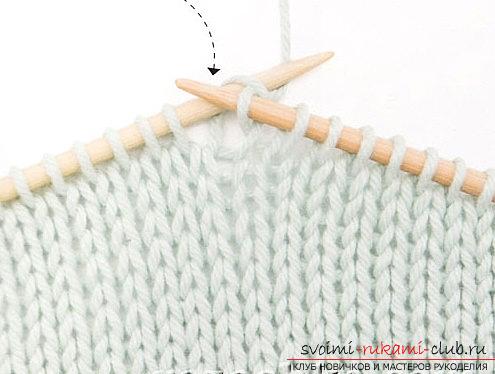 Then, it is necessary to remove the knotted loop from the leftpart of the knitting needle. We will get a classic version of the facial loop. Then, you need to tie all the loops on the spoke using the same method. When the series is finished, it is necessary to start a new series.
 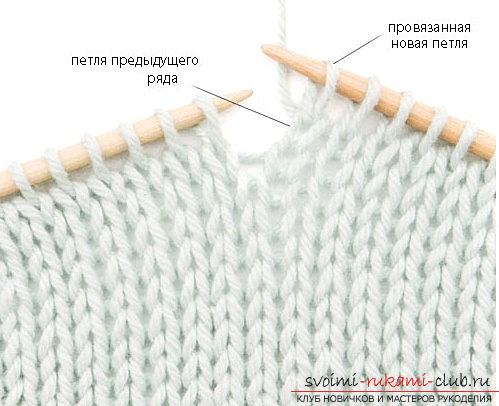 For this we turn our knitting and shiftA tool with a tied loop in the left hand from the right. A free tool must be put in a loose hand and continue knitting. Wrong loop of the classical type.
  Here we also take the knitting needles, where we have hinges and place them in the left hand. For the free hand, we place the next spoke. The working thread must be "in front" of our product.
 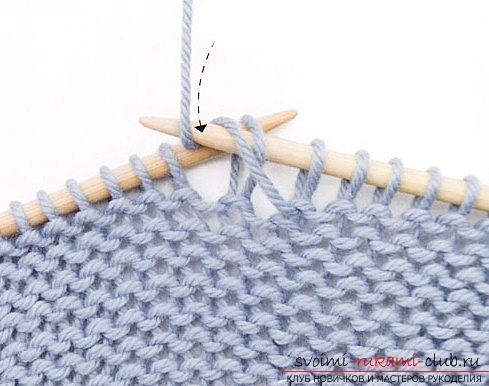 Next, you need to enter the end of the righttool for the loop in the "right-left" motion to the front wall. Then, it is necessary to wrap the end with the right spoke with the help of a working thread with the help of the movement against the arrow (hour).
 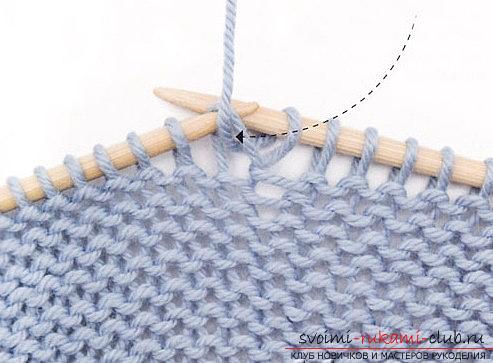 You can also use your index fingerin the left hand, to wrap the working thread around the end of the needle (right) with the movement coming from you. The thread must be in the spoke (right) on the front. Then, it is necessary to stretch the needle through the loop and adjust the thread and its tension in a uniform position. Next, it is necessary to remove the knotted loop from the left instrument. We will get a version of the classical looppurl type. further, we will fasten each loop on the spoke using the same method. At the moment when the series ends, you need to start knitting a new row. To do this, turn knitting in the opposite direction and perform the shifting of the instrument in different hands.
Comments
Related posts:
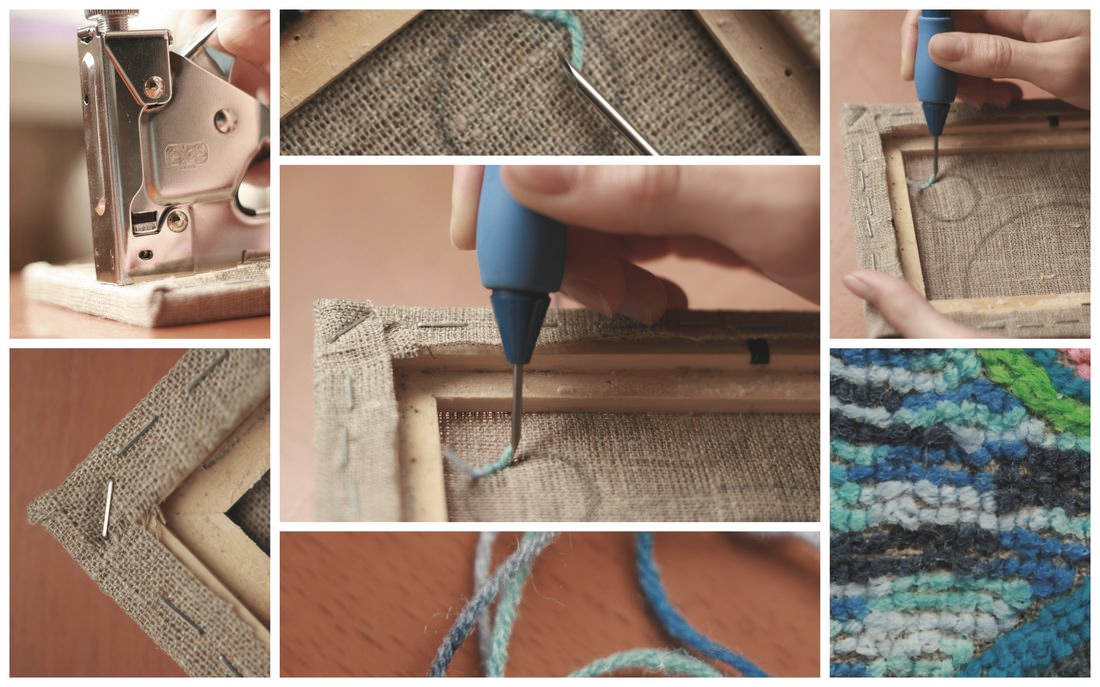 Gobelin stitch and embroidery looped in photos and video tutorial
 We knit the shirt with knitting needles: a step-by-step instruction and patterns of patterns
 A dress crocheted turquoise - step by step instruction with patterns
 Step by step drawing of still life with watercolor paints is a simple task even for beginners
 Knitting a scarf with knitting needles for beginners. A simple scheme of knitting a scarf-pipe and the availability of a job description