Christmas tree bells with their own hands: new ways of decorating a Christmas tree and a house
It is not a secret that the cones are onefrom frequently used objects or materials to create various crafts. Creation of the autumn manages to keep in itself the smell of spruce, which reminds us of a wonderful New Year holiday. Sometimes it seems that the usual cone does not look too festive, and therefore - is not suitable for decorating a herringbone.
Christmas tree bells with their own hands: new ways of decorating a Christmas tree and a house
 Absolutely not so. After all, it is quite possible, using modern resources and skills, to make from the ordinary cone a much more interesting version of the craft. To such an article can attract even a small child, who with the help of cones can realize its potential and participate in the preparation of the New Year's holiday. It is for these reasons, it is necessary to gather together with the family in the autumn for a walk through the forest, so that in the future it will be possible to gather as many future Christmas tree toys as possible. How to prepare lumps for New Year's crafts? Tips for Beginners
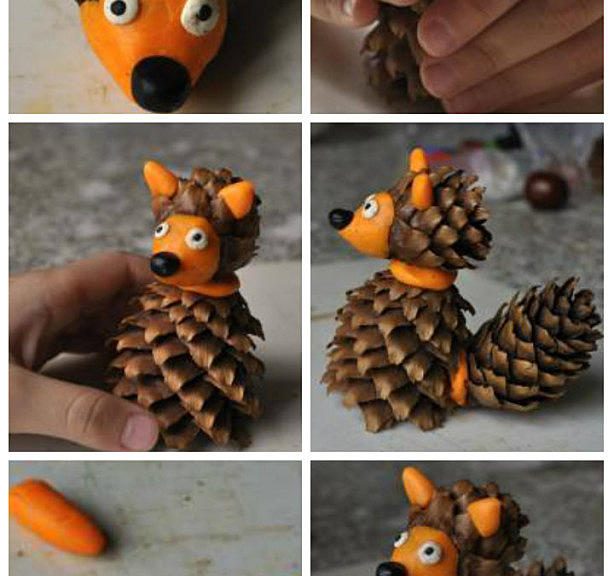
  Many know that the cones fall in a closedform, but eventually become more open. The pine cone becomes like a small Christmas tree, while the fir-tree looks like a small hedgehog. Ideally, if the shape of such material will match with your wishes. However, the product may lose its appearance with time. Therefore, we will get acquainted with some tips that will help keep the form.
  For example, you can take carpentry glue,to dip a fir-tree bump there. The gift of nature should be held in such a sticky liquid for half a minute. In case you need to open the knob, then you can use other tips: Some, for example, cook bumps for 30 minutes. Then, they dry them on the battery. Someone likes to bake bumps with the oven, using a temperature of 250 degrees. Such treatment will kill microbes inside the cones and make the material of nature completely suitable and safe for work. You can correct the shape of the knob with water. Then, when the craft gets wet, it must be dried, before that - tie it with a thread.
 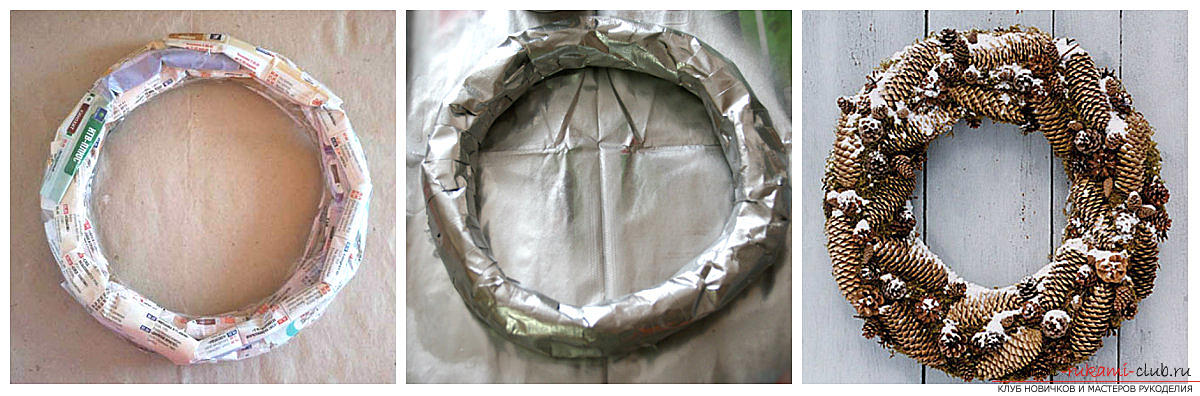 To whiten the cones, they must be soaked inbleach and water and for 5 hours to keep in the composition of 1 to 1. Then, they need to be washed and then dried. The handicraft will look more perfect. What do they make of cones? Cones - oddly enough, one of those materials and gifts of autumn, which is great for creating crafts in the New Year period. If you still decide to get out together with your family for a walk, be sure to take as many copies as possible, as there are a lot of lessons for their decor. In addition, this hand-craft not only develops your needlework skills, but also allows you to save considerably on toys.
  Christmas tree on the basis of autumn cones To begin with, let's try to realize the idea of a Christmas tree. For this we need one hour of time and a small amount of materials for work:
- Take a large number of cones
- Scissors for processing
- Glue gun
- Ballon for spraying paint in gold and silver hue
- Cone made of cardboard in brown shade
- Circle of cardboard in brown shade
 In order to begin work on the craft,it is necessary to clean each bump from debris. Then, they must be rinsed in water and then dried. After - produce paint spraying, in order to make the craft more shiny, for the New Year format. For those who want to preserve the natural look of the cone - this stage can be missed. Then, the circle and the cone need to be fixed together. Using a circular scheme, we glue the knobs for the cardboard. You need to start with the biggest cones that you have. On the next row, pick up the smaller bumps until you reach the top. All cones should be in tight contact with each other. It remains only to decorate our new tree and for this we will need different decor items. Cone-sphere
 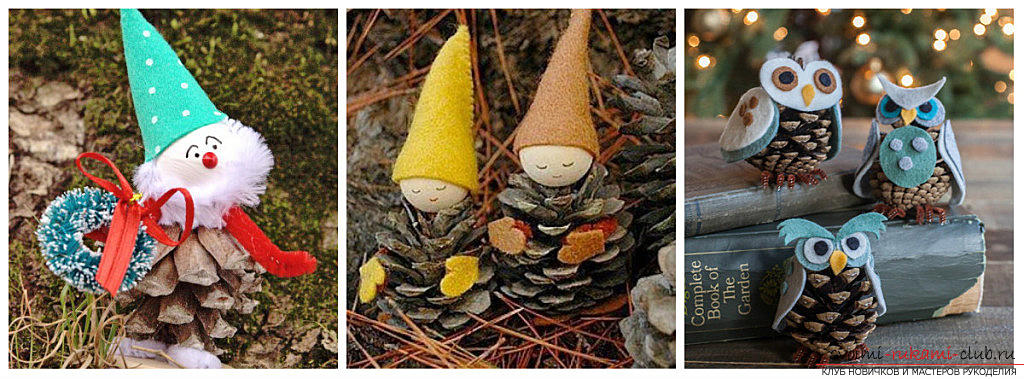 Many of us probably have seen more than once in our livesa large and beautiful disco-ball, which can still be found in old clubs or at retro parties from eight-headed. Such a product can also be made with the usual cone, so that the New Year is diluted with a completely new atmosphere. To do this, you need a certain material:
- Take a conventional balloon
- Prepare a roll of toilet paper
- Take the sticky substance PVA
- Take the brown paint
- Bumps are required
- Take the ribbon
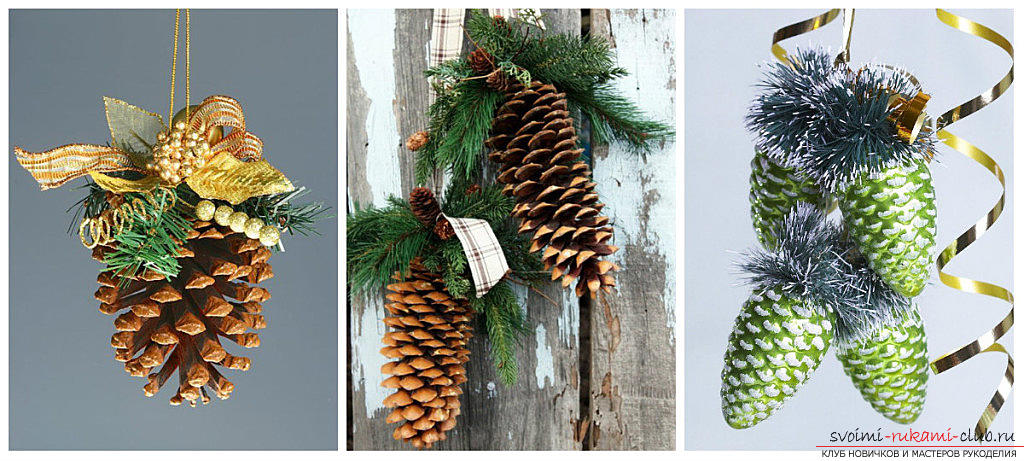
A ready-made version of the workpiece can be bought inshop, but we are not looking for easy ways. Therefore, prepare to inflate the ball to the size you need and then, make its winding with the usual toilet paper, which must first be moistened in the mixture, which consists of water and glue in a ratio of 2 to 1. Next, we expect for the day before that pores until the paper ball has dried. Then, it needs to be painted with a brown paint, so that gray does not appear accidentally between one of the bumps. Then, we also wait until the material completely dries. Preparation of ball sphere of cones 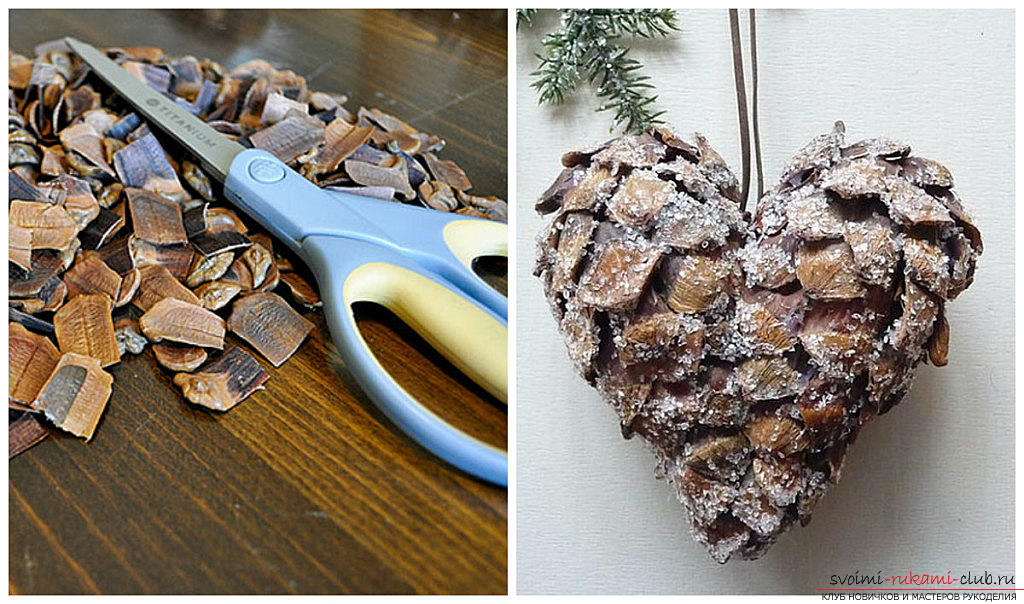 Then, with neat movements, one to onewe glue our bumps. It is very important not to make large gaps between small materials. Then, from above we glue the tape from the satin. The ball can be suspended under a chandelier, or simply hung on the ceiling. But, nevertheless, is something missing? If you want, you can buy an aerosol varnish for decoration and paint our bumps in the color of silver, or gold. Also, the ball can be wrapped with an ordinary garland. If, however, you want to make of your ball an exotic version of the decoration, you can make a binder and a stand and put the ball inside any potty. Spruce bumps are also suitable for creating compositions in their original form. For example, from spruce cones you can get a very beautiful and successful New Year's version of the wreath. How to make a wreath of cones ate? By traditional weaving from spruce branches we create a skeleton of the future decoration. Now, you can add and tinsel, decorate the craft with ribbons and of course, with the help of paper flowers, Christmas tree balls.
- Newspaper for processing
- Adhesive tape for sizing
- Stapler for fastening
- You will also need spruce cones (you can add pine trees for harmony)
- Take the spray paint
- Take the scissors
- It will take a gun-glue
- Take the spruce twigs
- Prepare ribbons and beads for decoration
To begin with, we have to make a basis. To do this, you need to take paper from the newspaper and twist out of it a large, long tube. Then, the tube is rolled into a bagel and then fixed at the edges with a conventional stapler. Next, we produce an additional winding of the blank with the help of strips of the newspaper's remains, which will need to be cut into small strips. After - we wrap the whole craft with the adhesive tape, so that the product is immune to deformation. Then, to conceal the tape, it is necessary to cover the basis of all our artifacts with an aerosol paint. Later, it will remain to fix the bumps inside the craft, using sticky substance and, of course, add a few decorative ornaments, for example - Christmas toys, or other decor options. Star-cone  You can also prepare a cone star. This work stands out for its excessive simplicity and minimal amount of materials that you may need during the decoration process
We use wire in order to prepareour skewers and then, you need to connect them together, bending at the center of the product, so that the shape of the star is formed into five ends (in the future). Next, you need to string each little knob on our skewers to form a decoration. Again, you can make additional decorations with the help of other decor items. It is also necessary to do the strapping with a tape and then, the star suspension on the base of the door. It will look great next to the fireplace, or at the entrance, if you live in a country house.
Comments
Related posts:
 How to make a ladybird in a quilling technique with your own hands - new schemes for working
 Creation of an artwork of Santa Claus and herringbone by own hands - a master class of quilling
 Master class on the scrapbooking of a New Year's card with your own hands - step by step instruction
 Christmas tree made of pine cones by own hands
 Topiary with your hands + MC and new ideas.