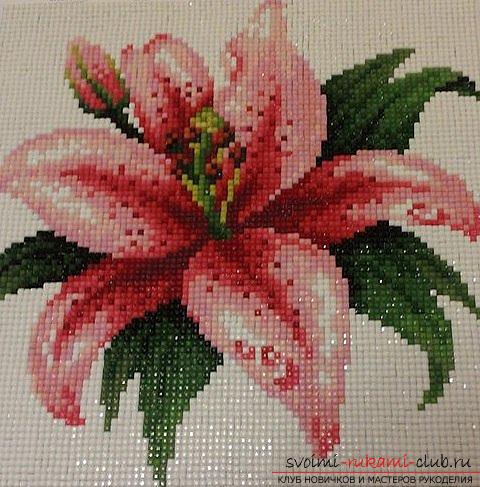
Make diamond embroidery with rhinestones with their own hands with a step-by-step description, photos and diagrams.
Transmission from generation to generation by maternalthe line of knowledge of embroidery with cross and smoothness has saved this kind of needlework to this day. Due to the curiosity of women who are in constant search, many new and bright styles and techniques of decorative and applied art are born, which are also transferred from the older generation to the younger. A new embroidery technique - diamond, called the mosaic, still has a relatively young age. Of course, this type of needlework can not be called fully embroidered, because it does not use the needle and thread at all. Those who had the happiness to contemplate the finished works performed by experienced masters will agree that this technique has a great future for women's handicrafts. Select any special stories in this technique is impossible, so that you do not try to portray, will gain an exciting appearance. 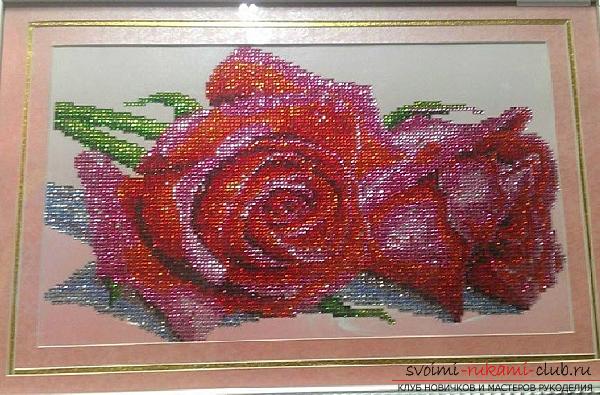 About tools for diamond mosaic. Before creating your first diamond picture, you should prepare the necessary tools. Let's start with the embroidery kit. Of the elements required in this technique, everything is sold exclusively ready-made. They contain the required number of materials required when creating the corresponding image. It is not advisable to initially select large drawings. When they are made, you will encounter difficulties in laying small parts and faces, and then connecting them with each other. This will require you to be extremely diligent in the work. It is better to practice first on small images. More experienced needlewomen, who have already encountered this technique, can try their hand at the triptych, three separate pictures that make up a single composition.
 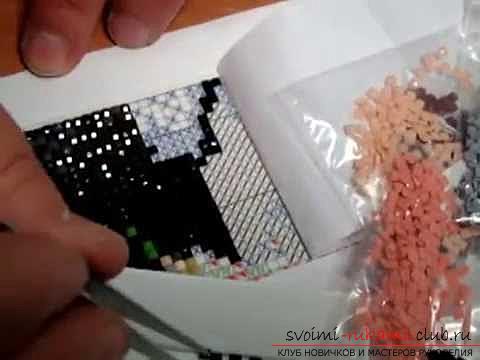 Having decided upon the set and purchasing it, you canto begin work. Make sure that the place where you will build the mosaic from the crystals is well lit. This is extremely important in such a painstaking work, requiring every minute eye strain. It is also desirable that the workplace is very spacious.
 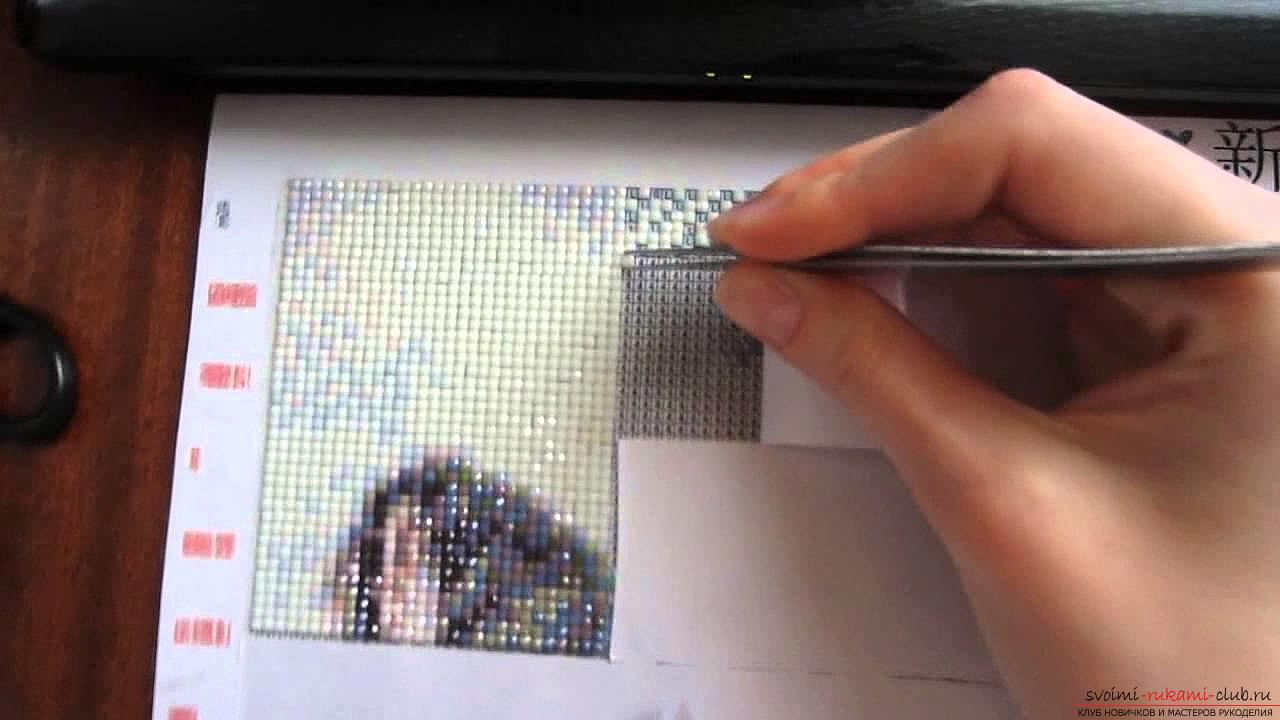 At first, the scheme is unfolded and is located on theA table where it is desirable to fix something. Place the rhinestones immediately, dividing by the shades. Prepare the pincer. Think about which side of the image will be initial. Laying out the rhinestones on the canvas should be made in a row, starting from the side that is more convenient for you. It is preferable to do this from top to bottom, in order not to touch stones that are already laid out inadvertently.
 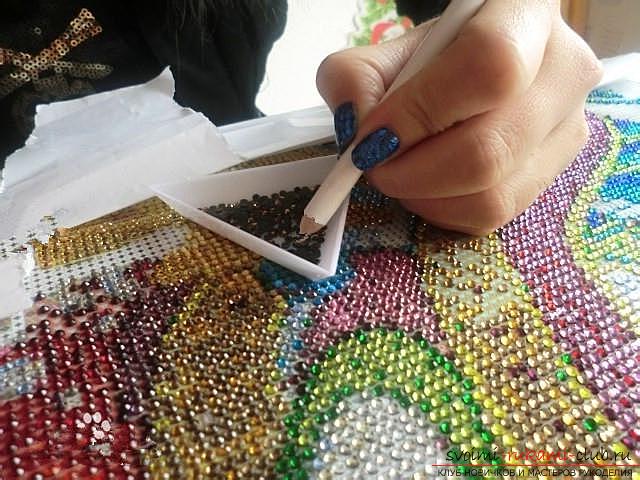 Now we need to separate the toptransparent layer from the circuit. Having removed it, you will have seven days in stock, during which the pattern remains suitable for embroidery. If you are not confident in your abilities and understand that the work can take a longer time, then you need to separate the top layer in parts. Once you have removed a sticky layer from a certain area, use a pair of tweezers to take a rhinestone of the desired shade and carefully place it on the diagram. Make sure that the edges of the rhinestones coincide with the edges, which are indicated on the diagram. In case of uneven gluing of the crystal, the overall appearance of the picture will deteriorate: it will be crooked or have gaps in the image.
 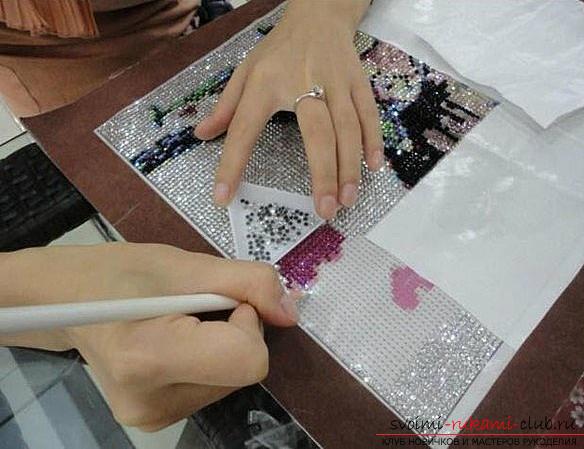 If necessary, you can fix the rhinestonecanvas with tweezers. Having made the necessary manipulations for its alignment, it is necessary to press in the end from above, in order to fix the stone. The subsequent rhinestones are laid back to the previous one. At the end of filling one row, we equal the metal ruler of it, so that the rhinestones are placed in one line. Similar actions are performed until the entire image is full.
  Having finished the work, we should put the picture there,where no one will touch it, and let it dry. For greater confidence that everything is securely grasped, the picture must lie for at least a day. Naturally, the size of the picture scheme exceeds the size of the finished image. In this connection, scissors or a clerical knife cut off excess parts of the circuit from the image. This completes the picture. For hardening the rhinestones, the image is coveredwith a fixer, which is easily replaced with a thin layer of colorless glue or varnish. Let the fixer dry properly, and then wipe the painting with a wool cloth to make it shine even more. In the end, we put the picture in a frame or paste it on the plywood. The finished picture, embroidered with rhinestones, perfectly complement the interior in any style. Also a similar product will be a wonderful present for a loved one. Due to its originality, it will always leave a pleasant impression on you.
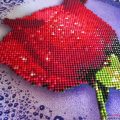
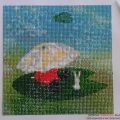
Comments
Related posts:
 To make embroidery a diamond mosaic for beginners with step-by-step description, photos and diagrams.
 We create diamond embroidery (diamond mosaic) for detailed master-classes with photos and diagrams
 How to make a beautiful styling with a bang with your own hands - master classes with step-by-step description and photo.
 How to make a beautiful hairstyle for a wedding with your own hands with a step-by-step description and photo.
 How to make a monochrome cross-stitch embroidery, monochrome cross-stitch for beginners with a photo and description.