Master class with detailed description and photo knitting for babies mittens crocheted.
 Mittens for a baby - a very necessary thing,which, of course, will be a wonderful gift. In addition to the fact that the mittens protect the baby's hands from the cold, they also protect against scratches. These mittens are called scratches. And we in this master class will associate such small and bright scratches for the baby. For work we will need:
- thread of three colors;
- hook.
Yarn for knitting mittens is better to choose softer. And you can take any colors you like. We begin the work with a thread of red color. We dial a chain of 10 air (up) loops, plus one loop for lifting. 1-p. In each loop we sew on the 1-y simple column.  2-r. We begin to make an increase. One for lifting, one simple column, two columns in one loop. Now on 1-y a simple column in a loop. In the penultimate loop of the row we knit 2 columns, we conclude the row with a column without a crochet.
  3-r. Let's make a lifting loop. 1 simple column, 2 columns in the 1-st loop, 1 simple stitch in each loop, in the penultimate loop - row 2 of the column without the crochet, the series ends with a column without a crochet.
  4-r. In this row, we knit along the 1-st simple column in each loop.
  5-r. One loop for lifting. 1 simple column, 2 columns in the 1st loop, then along the 1-st simple column, and in the penultimate loop of 2 columns in the 1-st loop, the row ends with a column without a crochet.
  The next 18 rows we knit in the 1st scheme, according to the first simple column in the loop.
 And one half of the mittens is ready.
 Next, using a thread of red color, we knit the second half of the mitten according to the scheme shown above. That's ready for 2 halves of mittens.
  Now taking the green thread, we tie both halves with columns without a crochet to join the pieces together.
  After we have connected both parts,continue to work a thread of green color. We select five hanging loops, skip one loop of the row, which was earlier, we knit in the 2nd 1 column with 1 cap, 2 wings, we pass one loop, and in the 2nd column - 1 column with 1 cap. So we tie a mitten around in a circle.
  Further we will fasten 1 simple column to bein an arc of two origin. We send 2 loops for lifting, 2 up and in the same arc, 1 column with 1 ring, one for the next and the next one we knit 1 column with 1 cover, 2 up, in the same arc 1 more column with 1 cover. Thus we end the row.
  Knit from the middle of the arc, which was fromtwo former loops. 2 loops for lifting, 1 column with 1 cover, one for the other, 2 more columns with 1 cape in the same arc. In the next arc, we knit 2 columns with 1 cap, one outer loop and in the same arc 2 more columns with 1 cap. So we knit to the end of the row.
  Nnasha mitten is almost ready. Now it's a small thing. Using a white thread, we dial a chain from the previous loops so that it can be fixed on the baby's hand, and we put it into the mitten. Here we have associated such bright and fashionable mittens. Applying and having spent not so much effort and time, you can make such a gift for your little child, as well as for your close and close karapuzov.
Comments
Related posts:
 A master class with a detailed description and photo will show how to crochet a toy-symbol of the year - a monkey on a Christmas tree
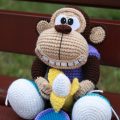 Master class on knitting monkey amigurumi crochet with their own hands with step-by-step description and photo.
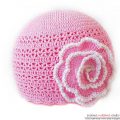
 A detailed master-class with a photo will tell how to tie a set for a girl with a crochet
 Knitting pattern for children - crochet and photo for work
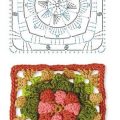 Schemes and description of crochet square motifs