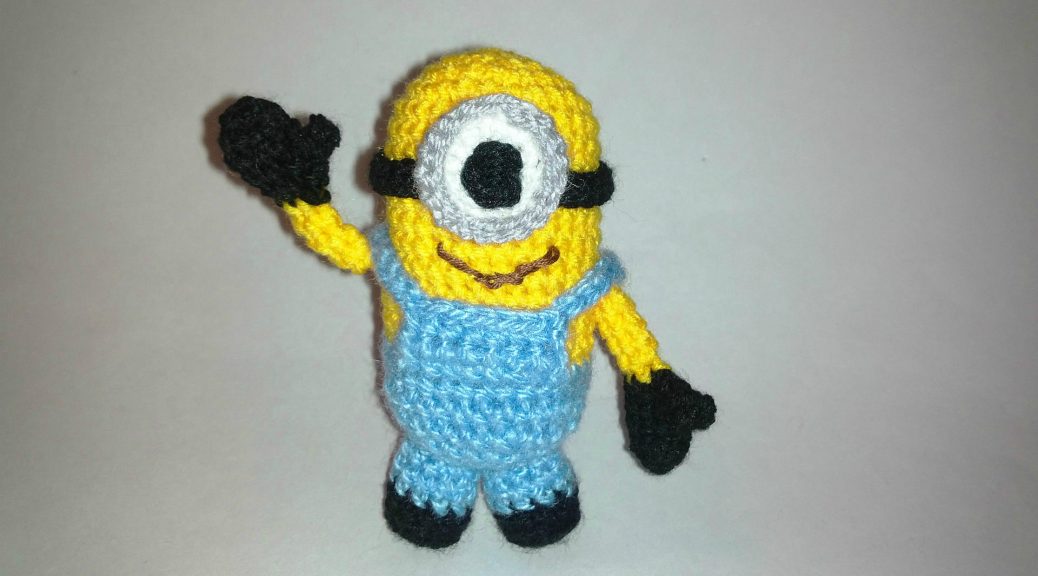
Master-class with detailed photos and step-by-step description will teach how to crochet a toy minion
Many of us watched a cartoon about small andfunny little minions. They are such yellow creatures in blue pants. And in the below MC shows how to crochet a minion named Stuart. By the same principle, it is possible to link other minions, simply by making some changes that are present in their appearance. 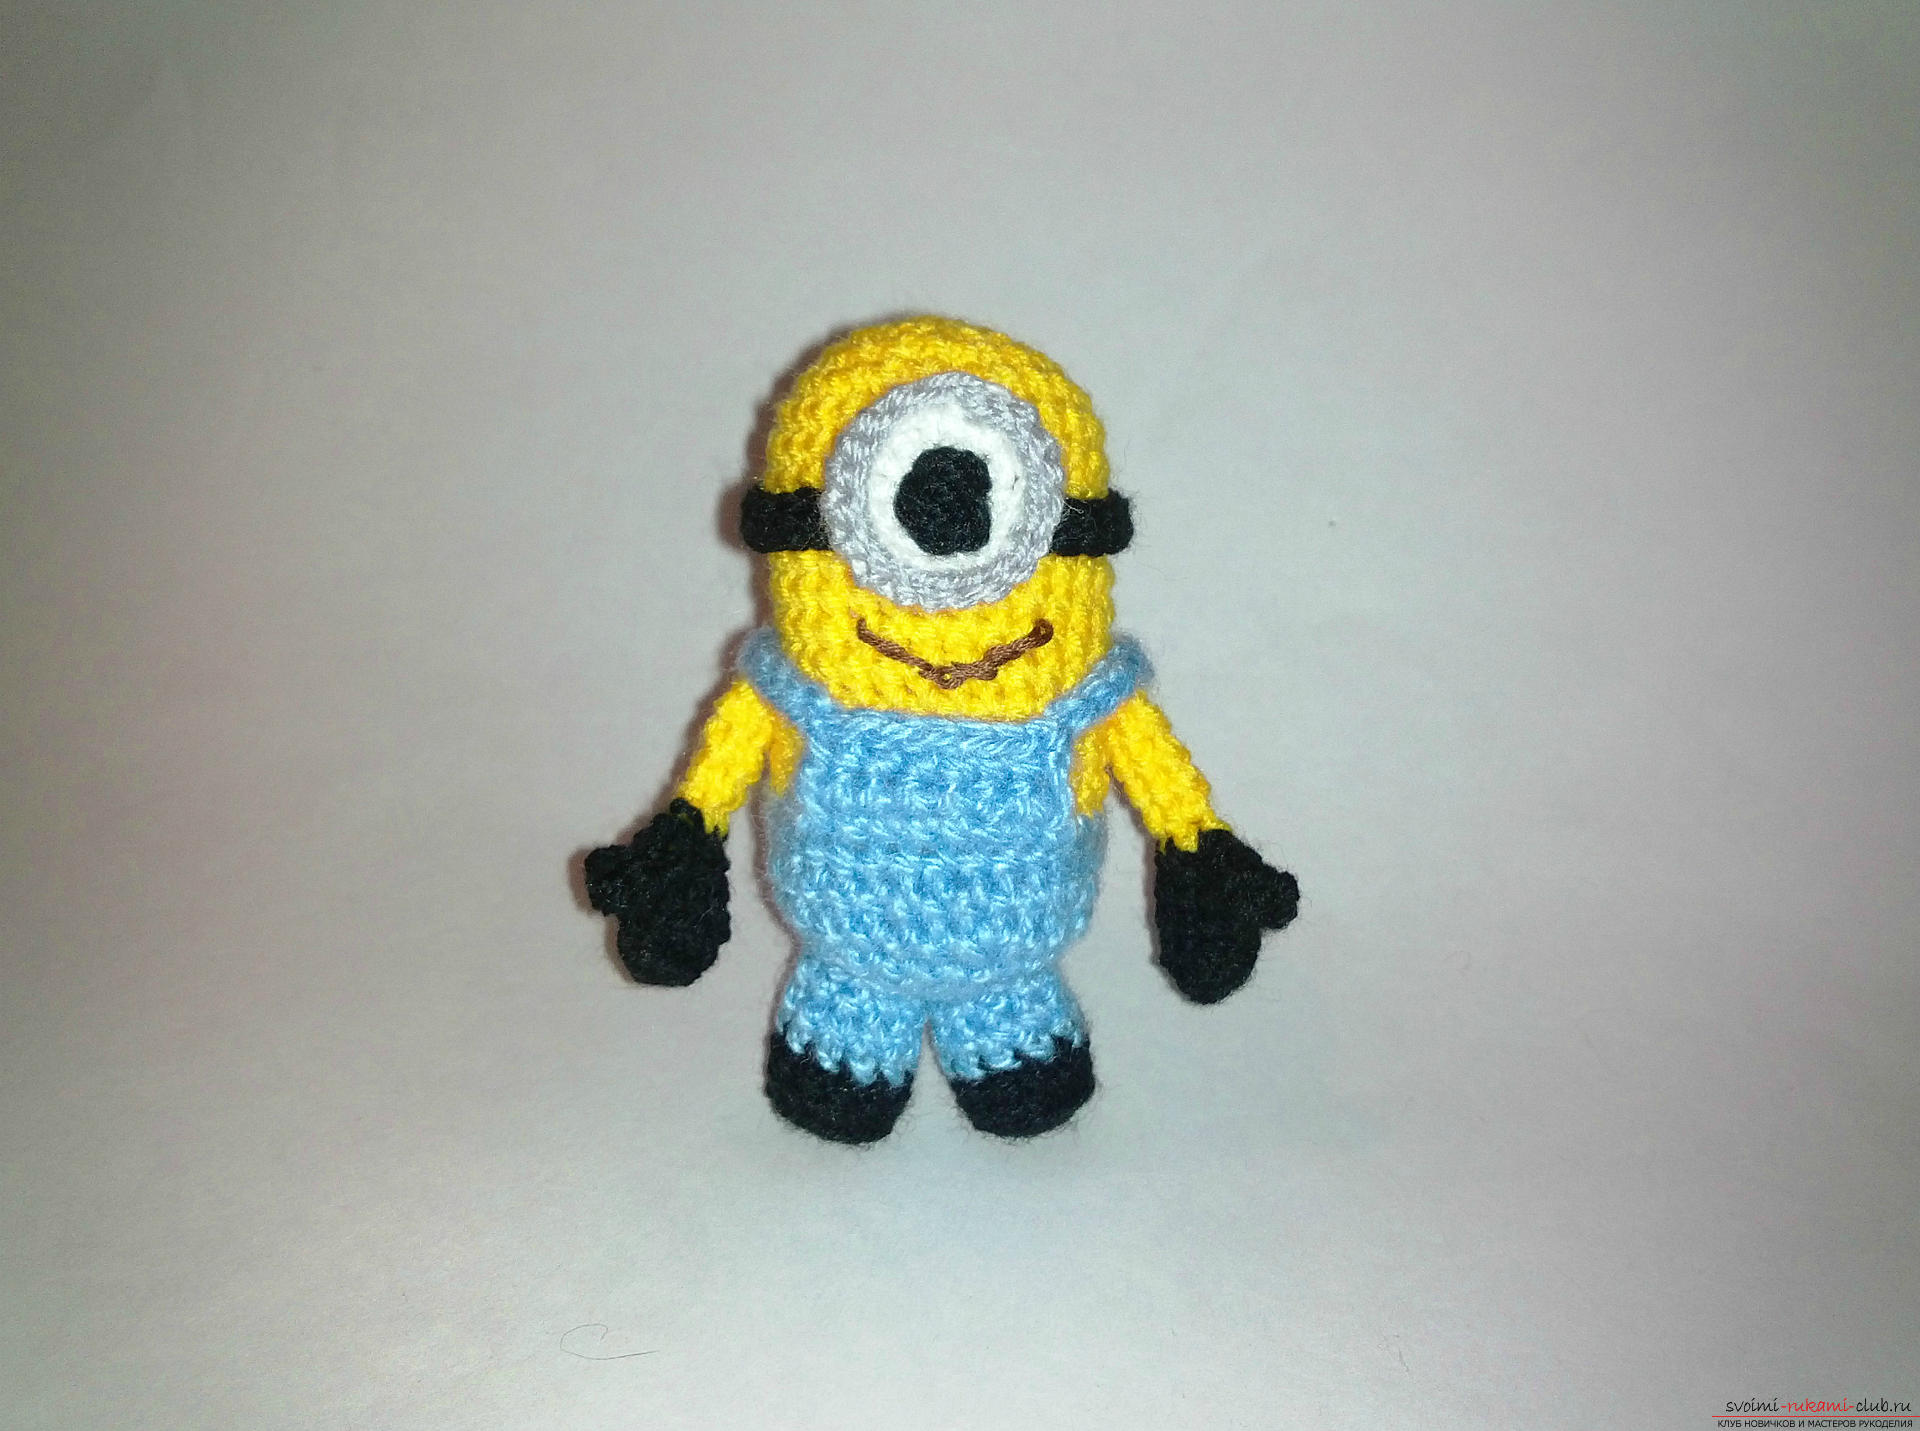 For knitting toys we need:
- yarn;
- hook;
- filler;
- needle;
- thread.
To tie Stewart, we'll take the yellow andblue yarn. For details we will need white, gray and even black yarn. The body of the minion knits very simply and in order to tie it, it will take very little time. You need to start with a yellow yarn, making an initial amigurumi-ring, into which six bars without a crochet are tied. Now we are adding. We knit six increases over four rows. That is, we will connect in total thirty columns. And we'll knit eleven ryadochkov. 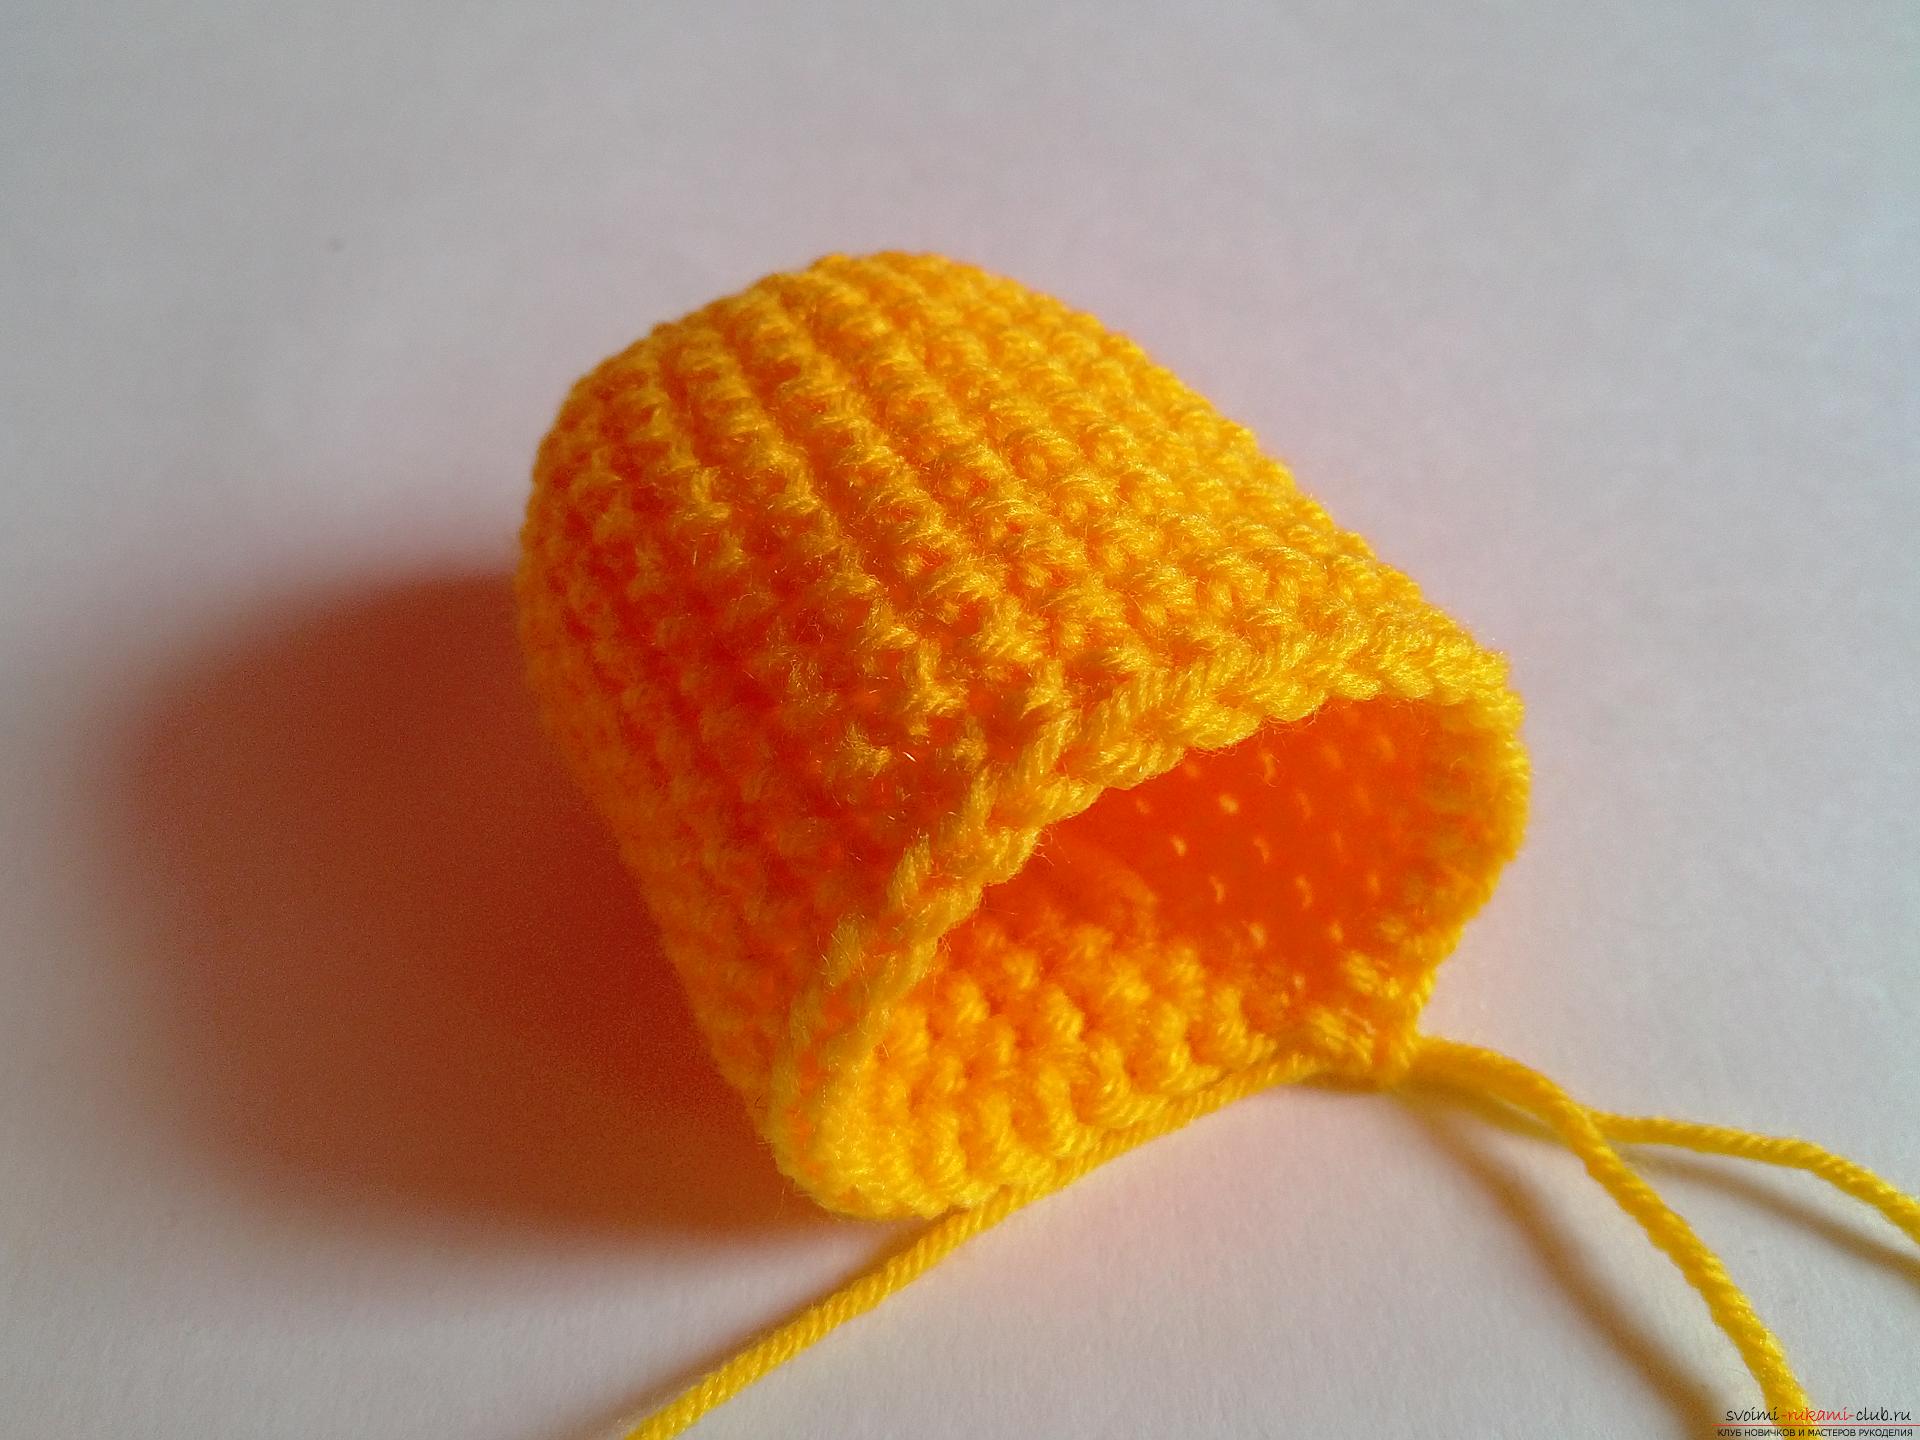 After that, we will change the thread to another one. We will join the blue yarn and continue to knit in the same circle. We will connect at first one row, and in the second we'll knit behind the back walls, so that later we can tie the tongue from the overall to the minion. We will knit only four ryadochka. And then we will do six adjustments to the very end, that is, until the hole is stretched.
 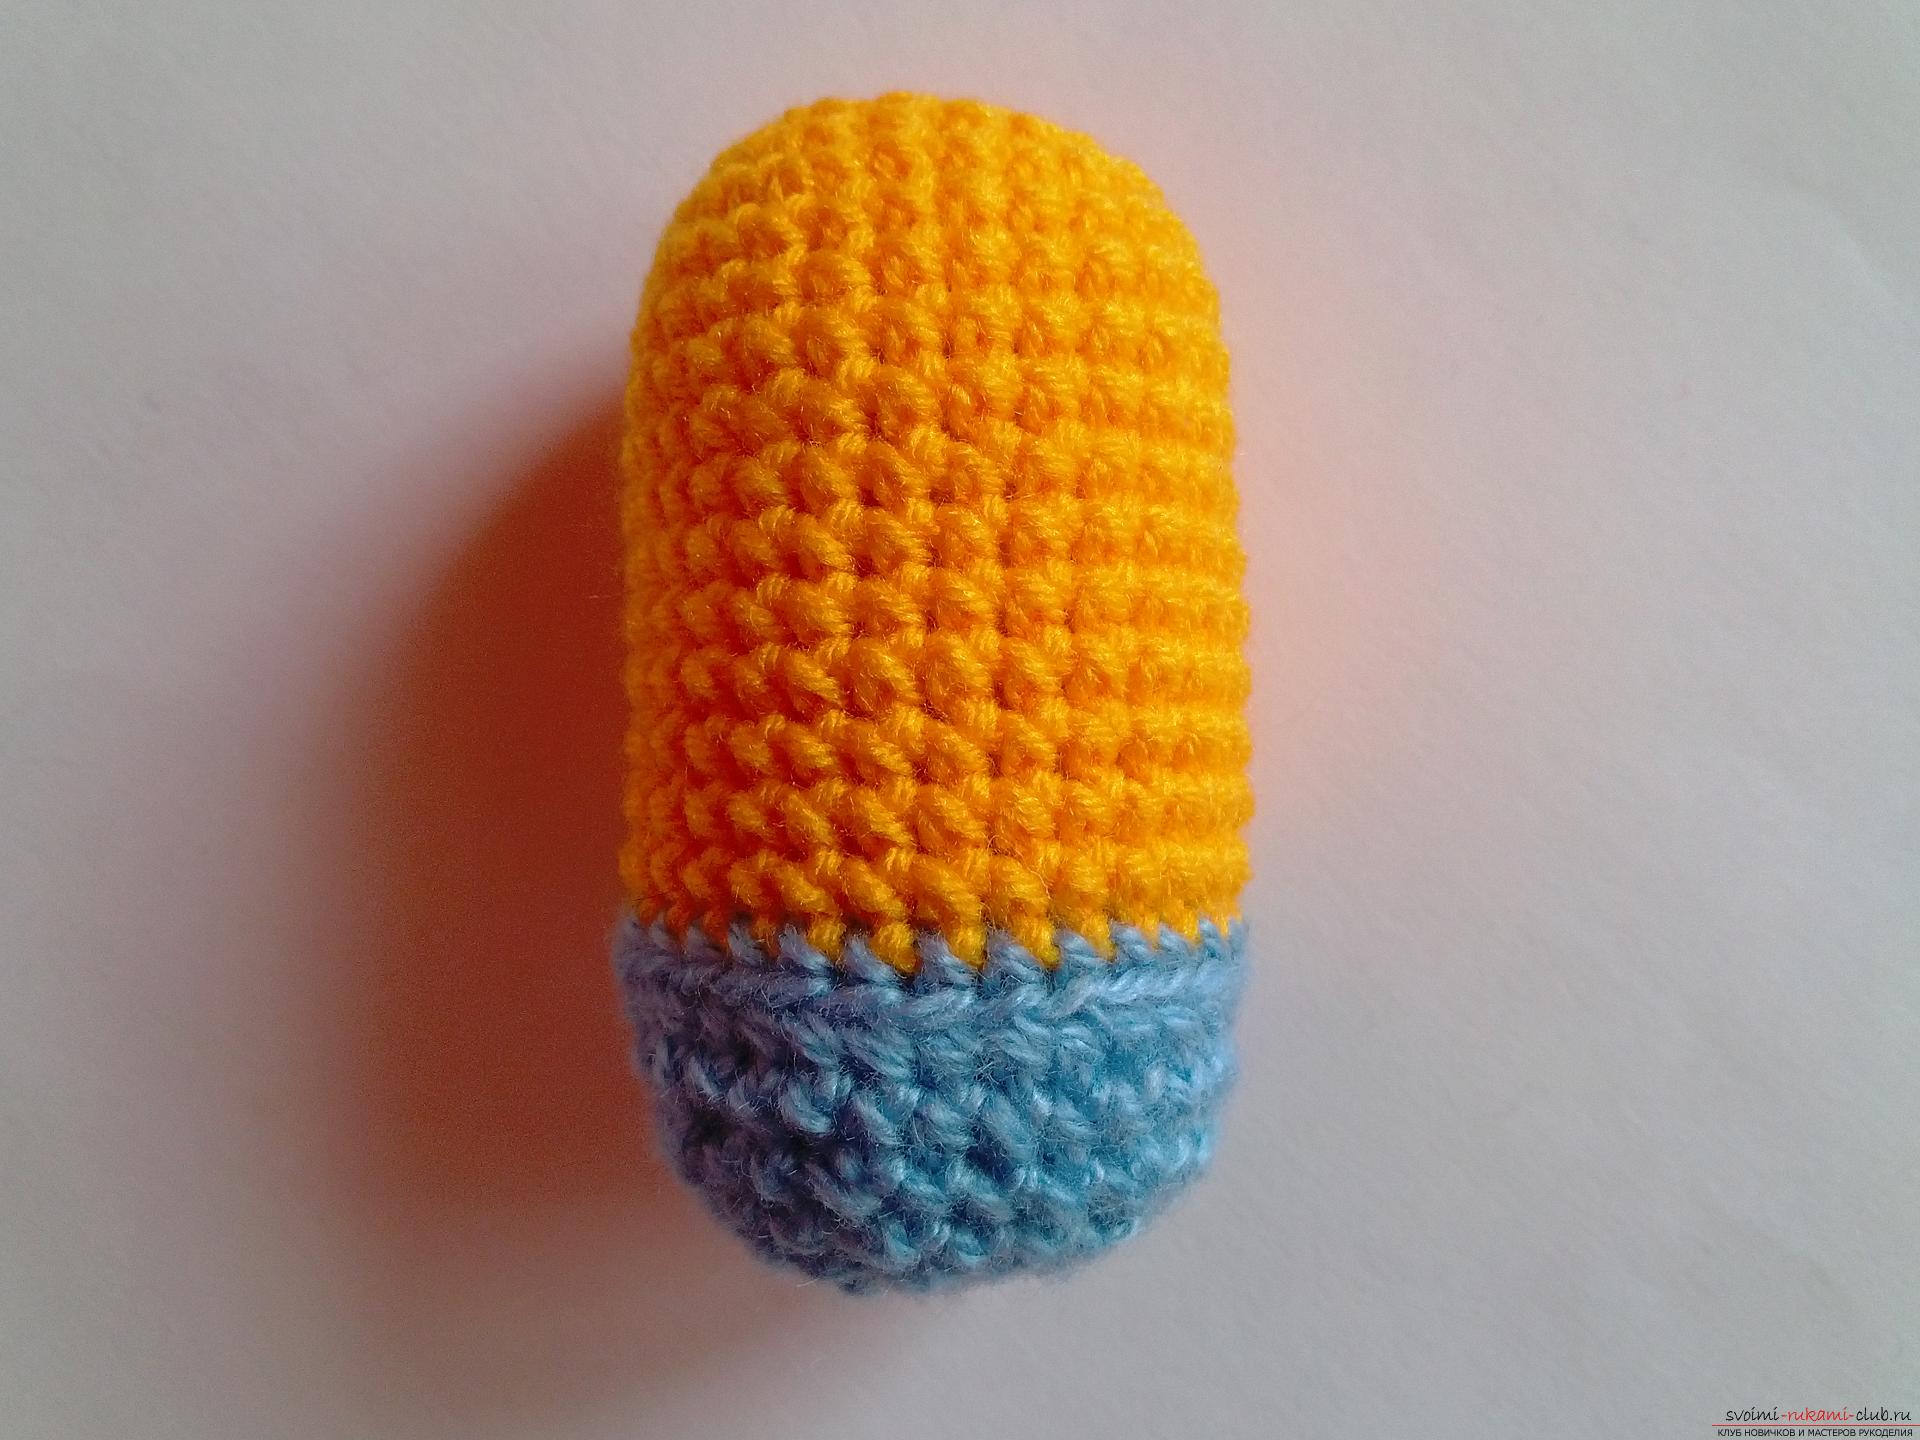 And now that's where we knit behind the back wallswe will attach blue yarn. And we'll fasten the seven bars. We make a loop to go up, and we'll tie another one or two rows. We do the same thing behind. And then we'll do eleven air.
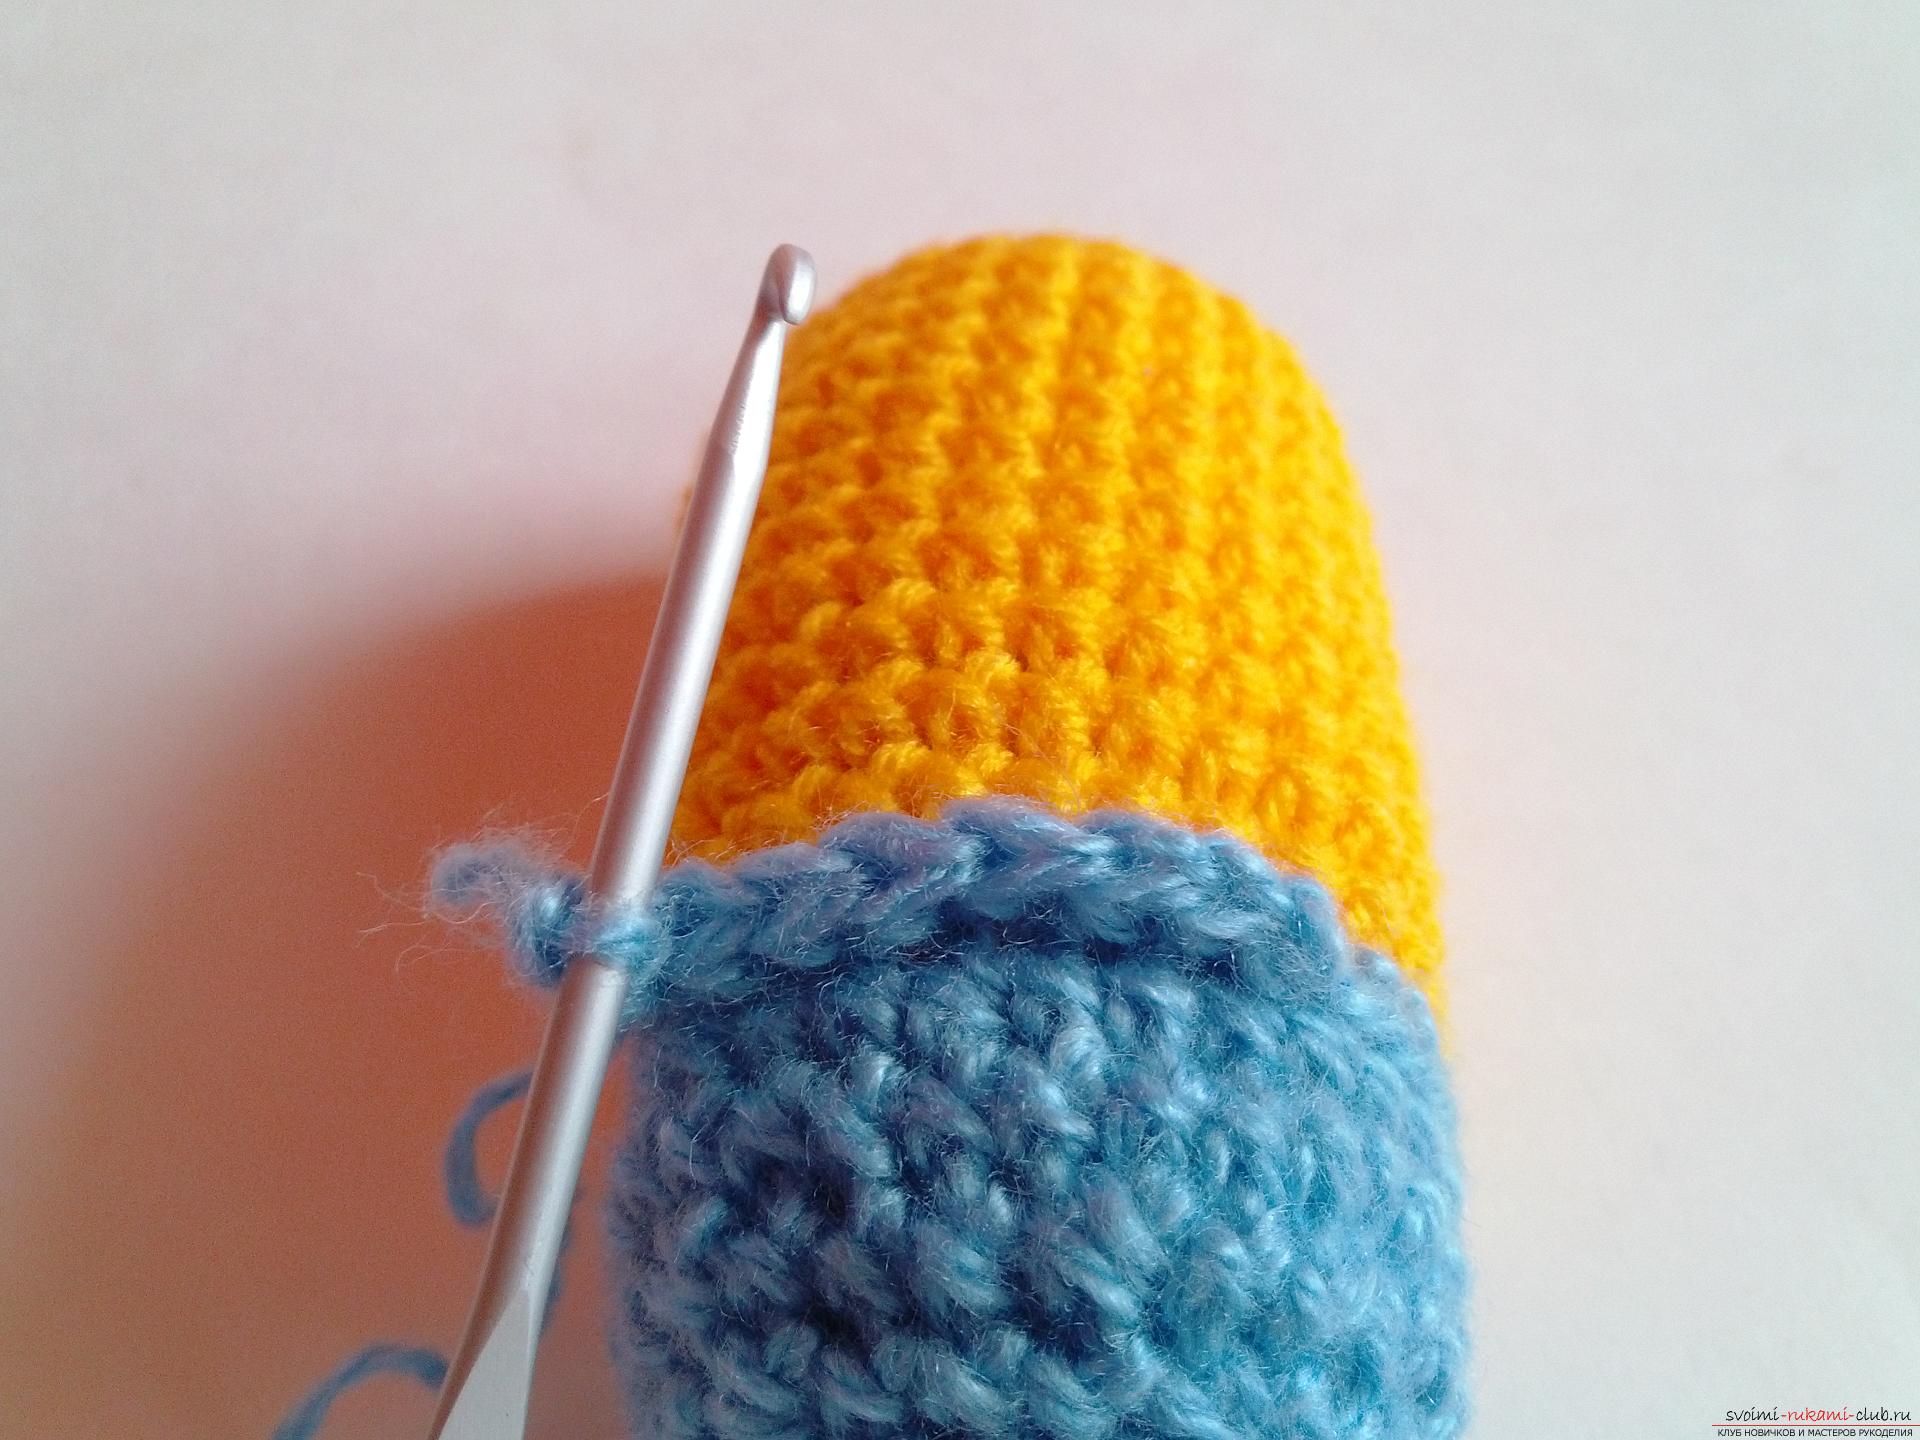
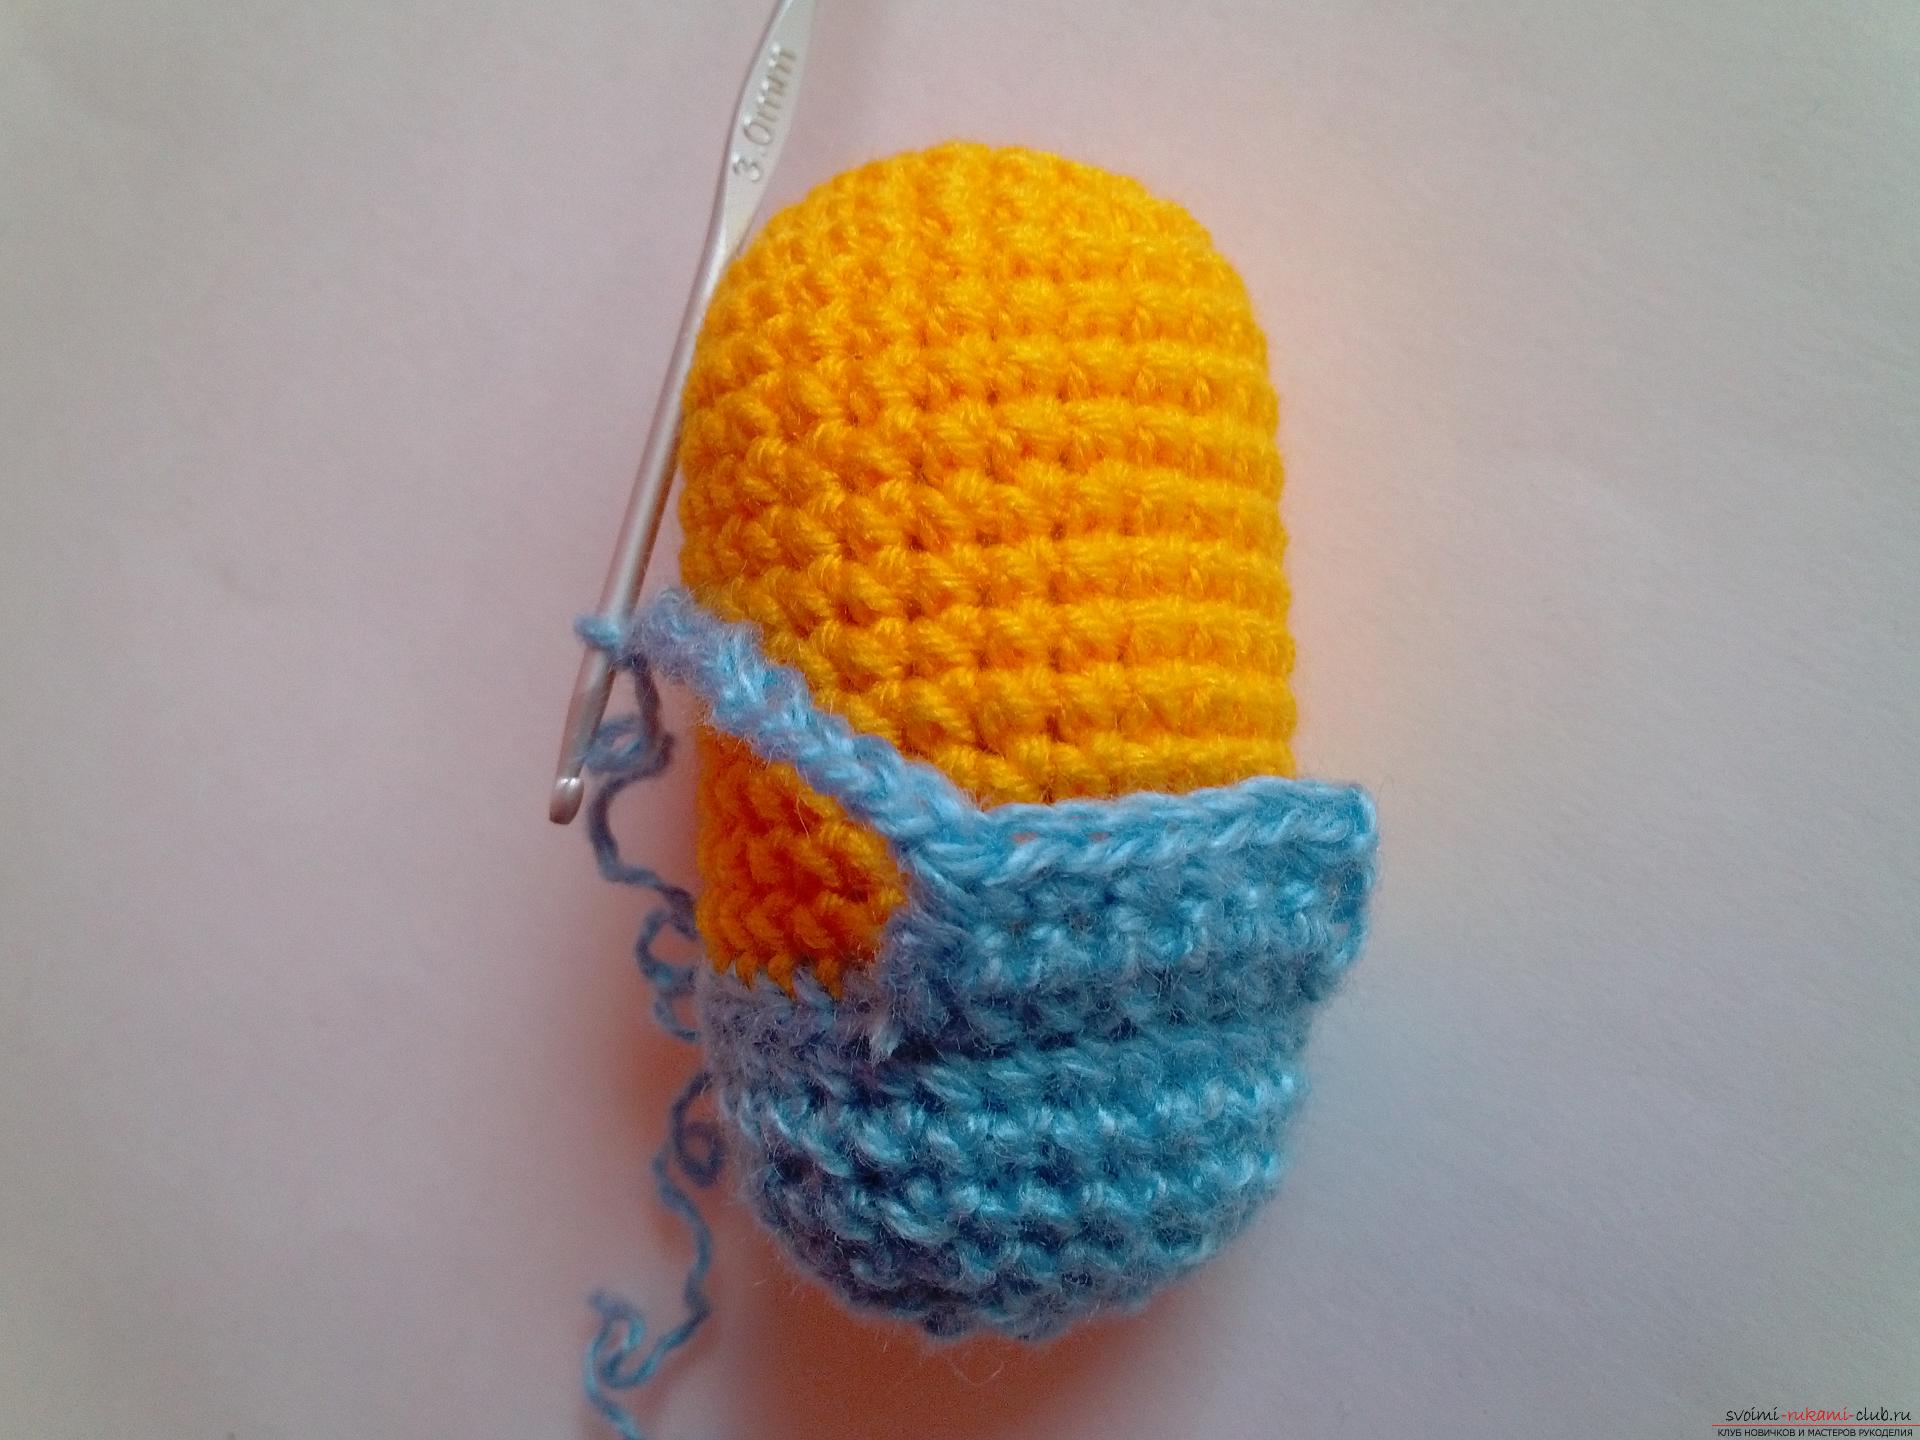 And now we will connect a column of columns and we will fasten this chain with columns without a crochet. Let's do the same on the opposite side.
 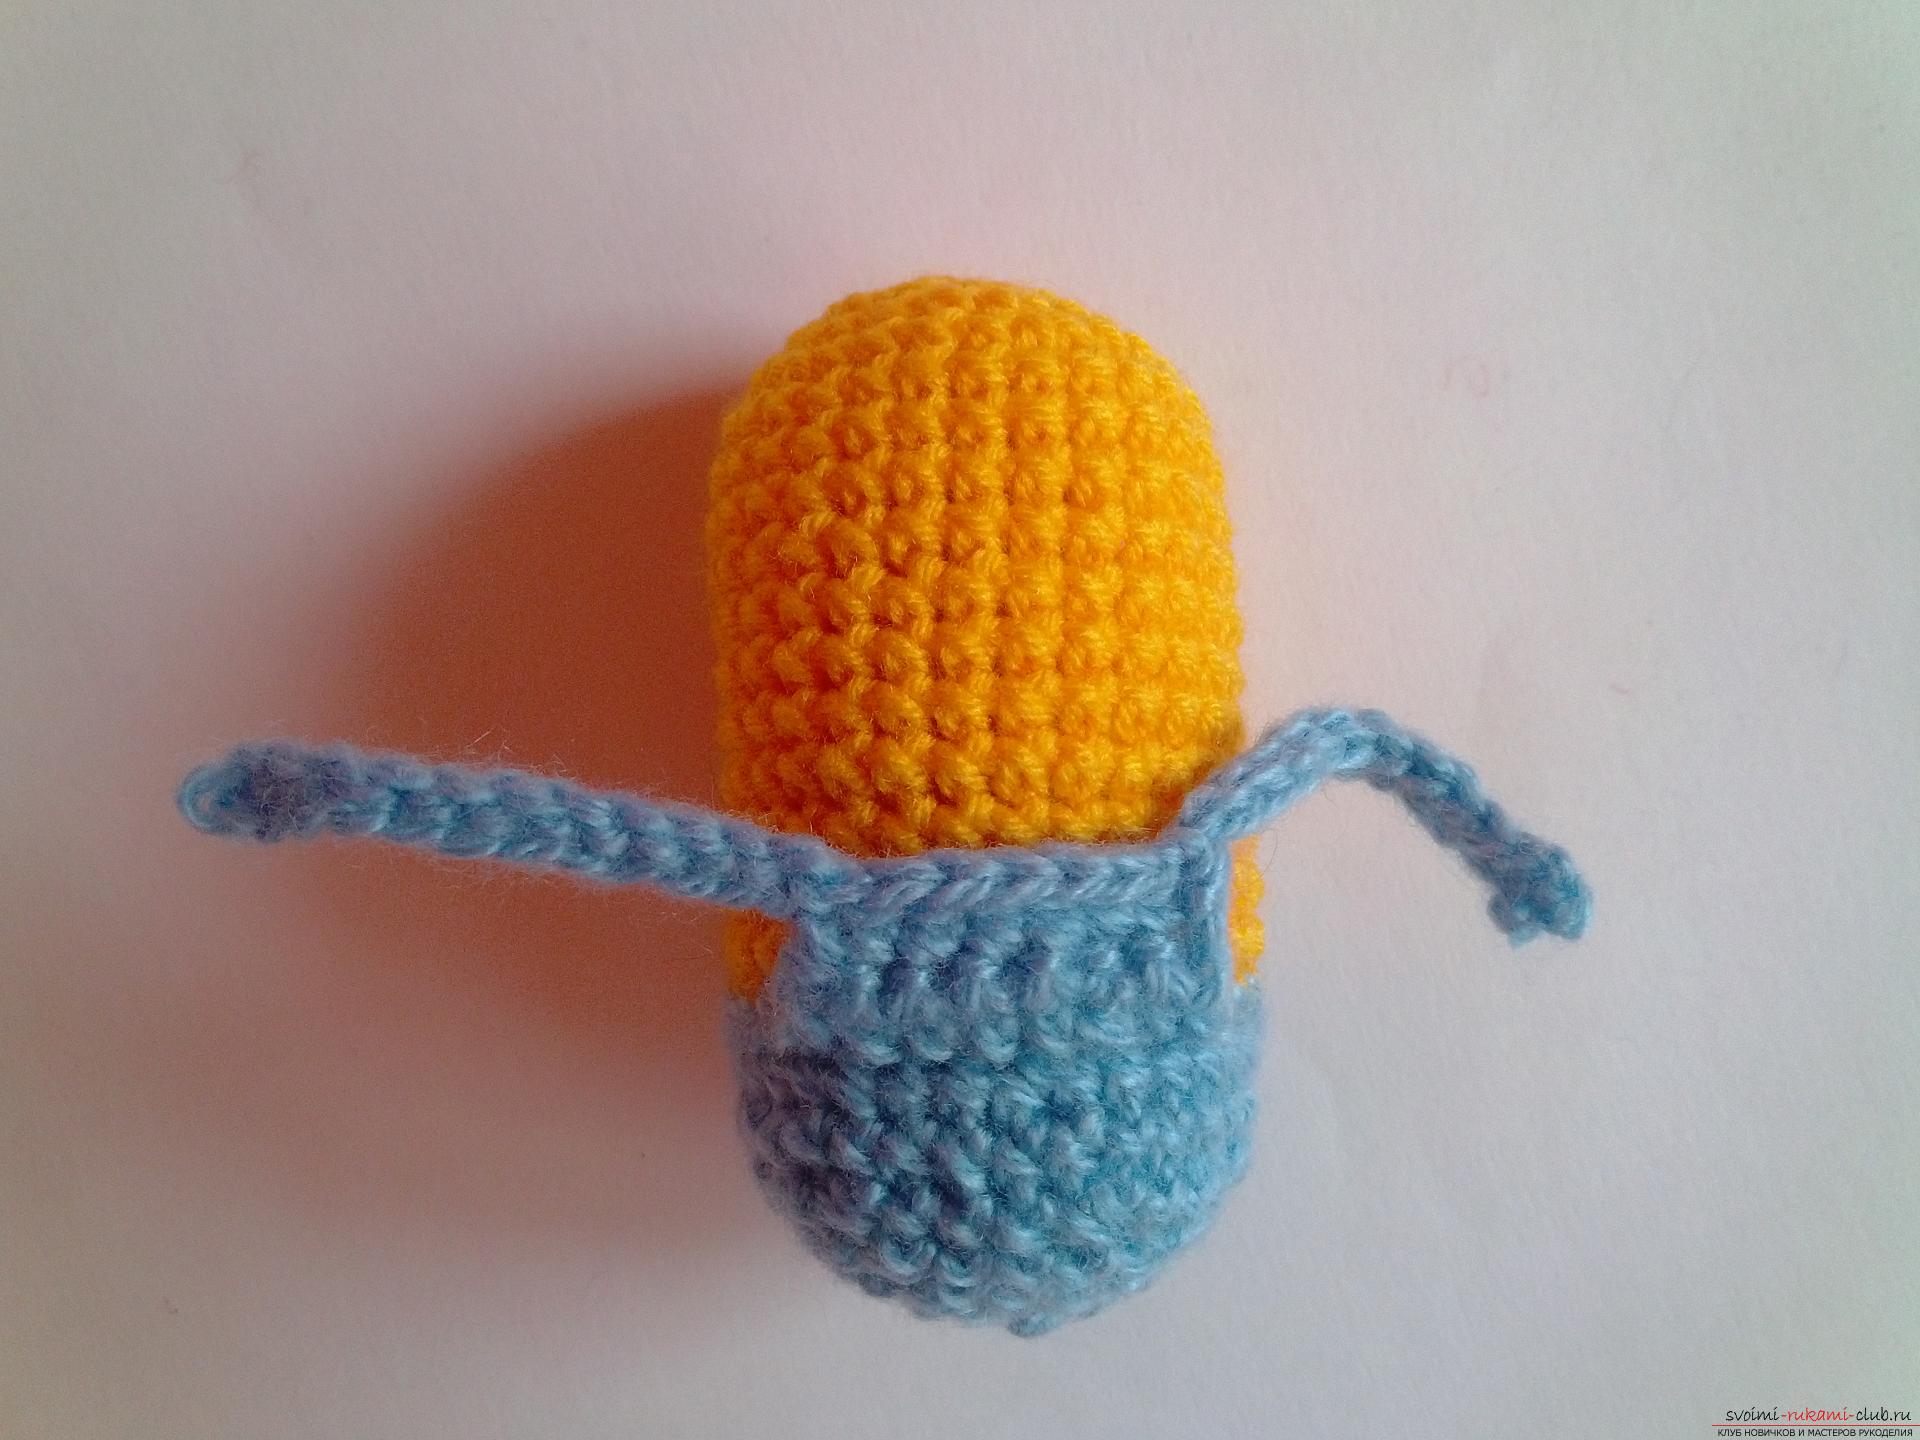 And sew the straps to the back of the overalls.
 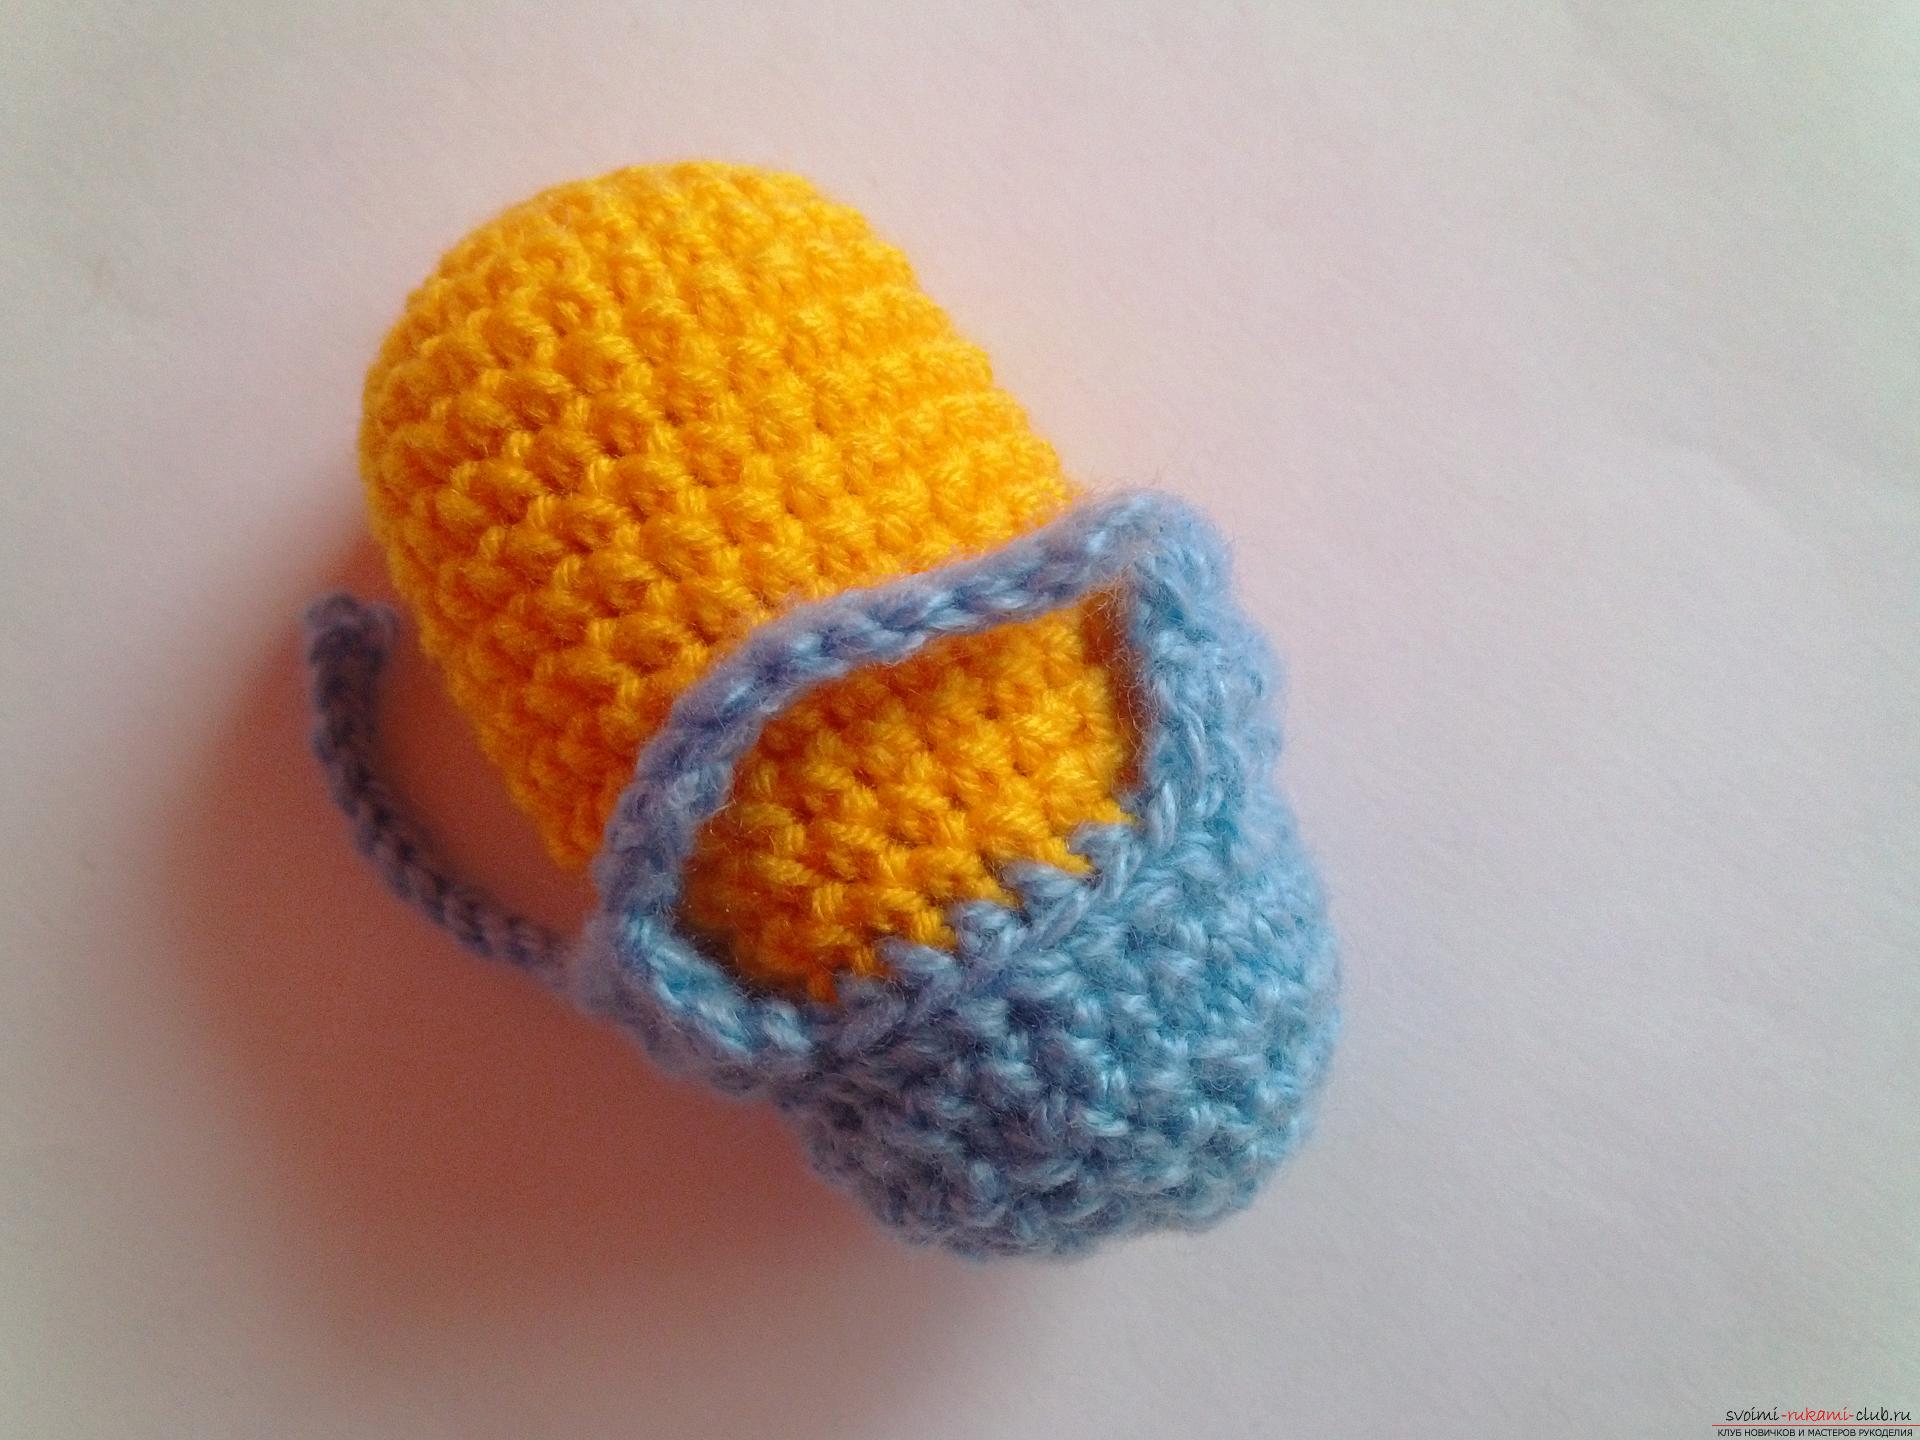 Now we'll knit knobs. This, you can say, is a piece of jewelry, since we will need to connect not just pens, but with a finger. We take the black yarn and, as always, make the initial ring with the six columns tied into it. We will make three increments in the second row. We tie a row and make three air ones, which we will attach to the second loop at the base of our knitting. Let's finish the series.
 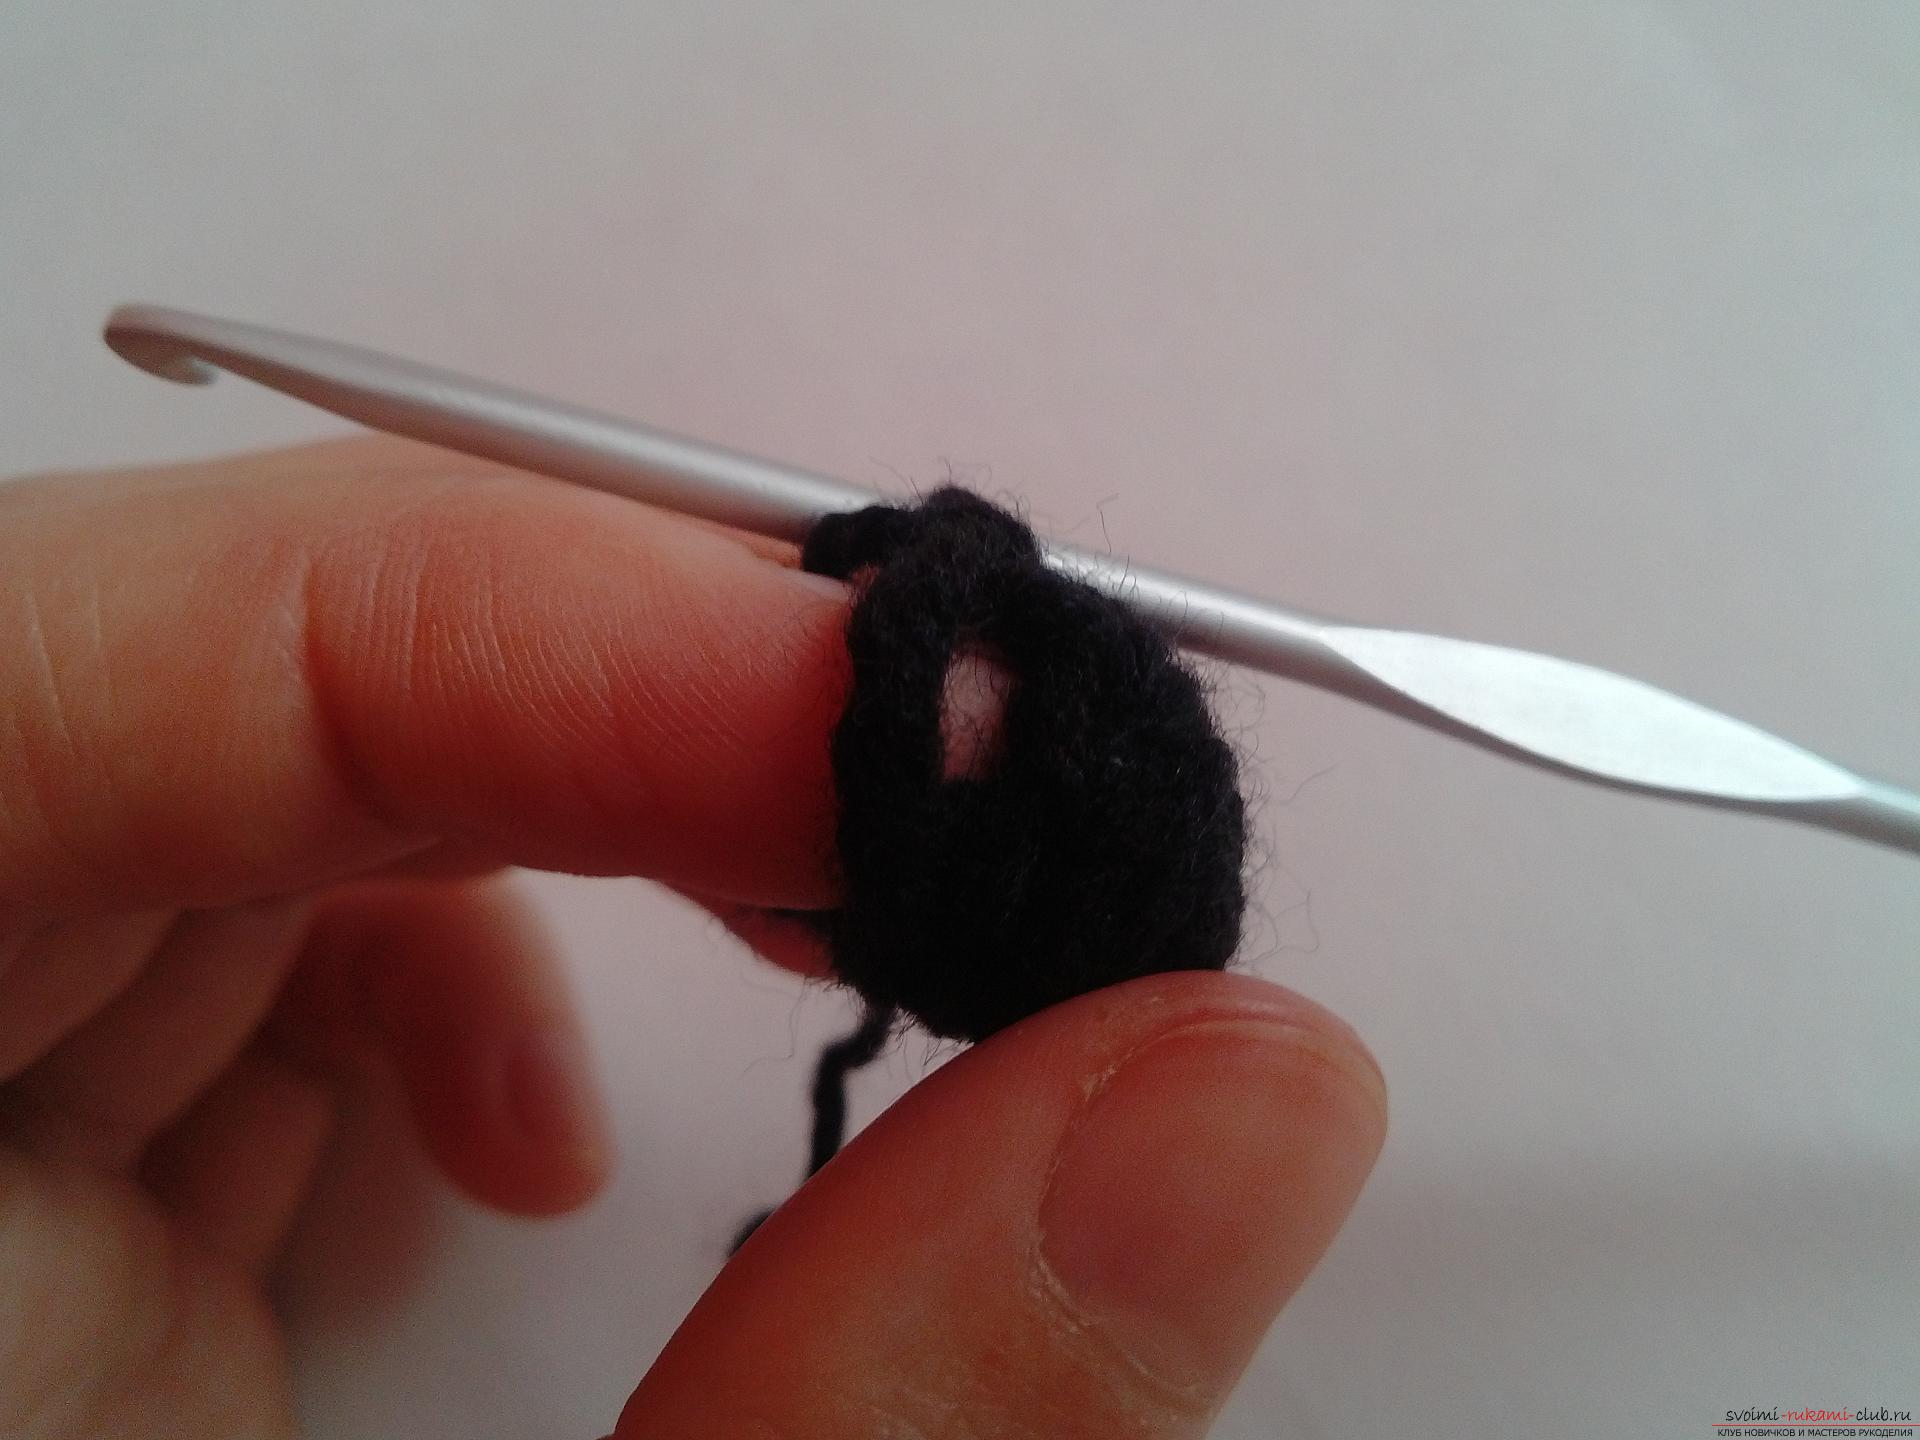 We make three adjustments and tie another row. We tear off the thread and attach it to the tiny hole for the finger. And we will knit two ryadochka. Then we pull these loops together. Here is a mitten for a minion turns.
 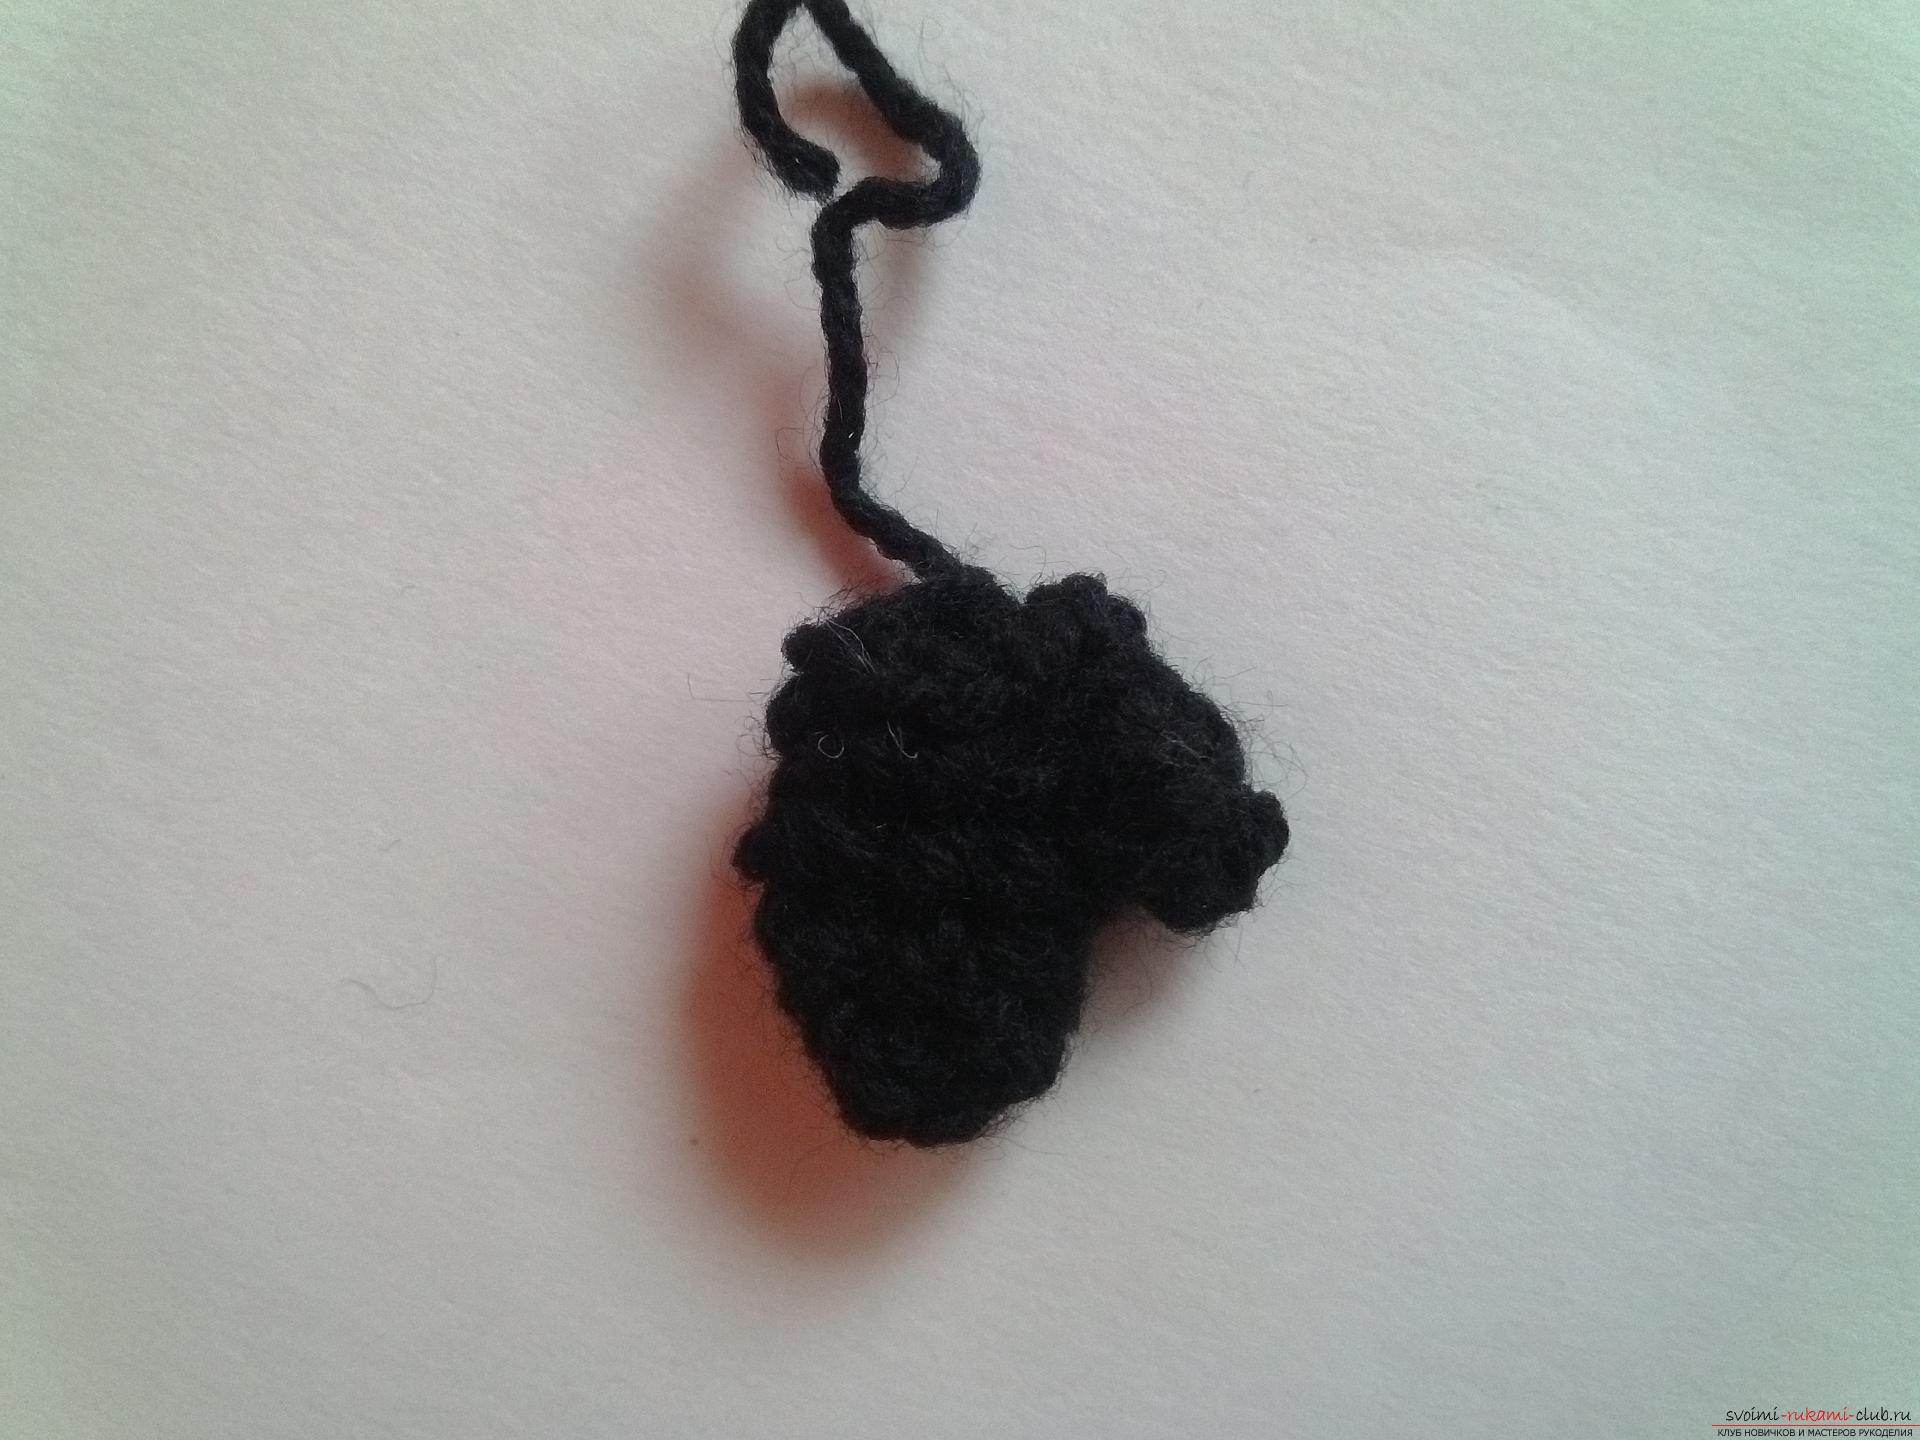 We will attach the yellow yarn from above. And we will fasten five ryadochkov hands.
  You can go to the legs. They are at the minion in the panties of overalls. So here we also need to take two colors. It's blue and black. Take first the black yarn and bind the six columns in the ring, which we do at the very beginning. And add six more columns. Additions are made in the second row. Now the third we will knit for the back half loop. That is, you need to enter the hook not for the entire loop, but for its half, which is behind. And we will tie another series. Let's change the thread to blue. And tie two rows.
 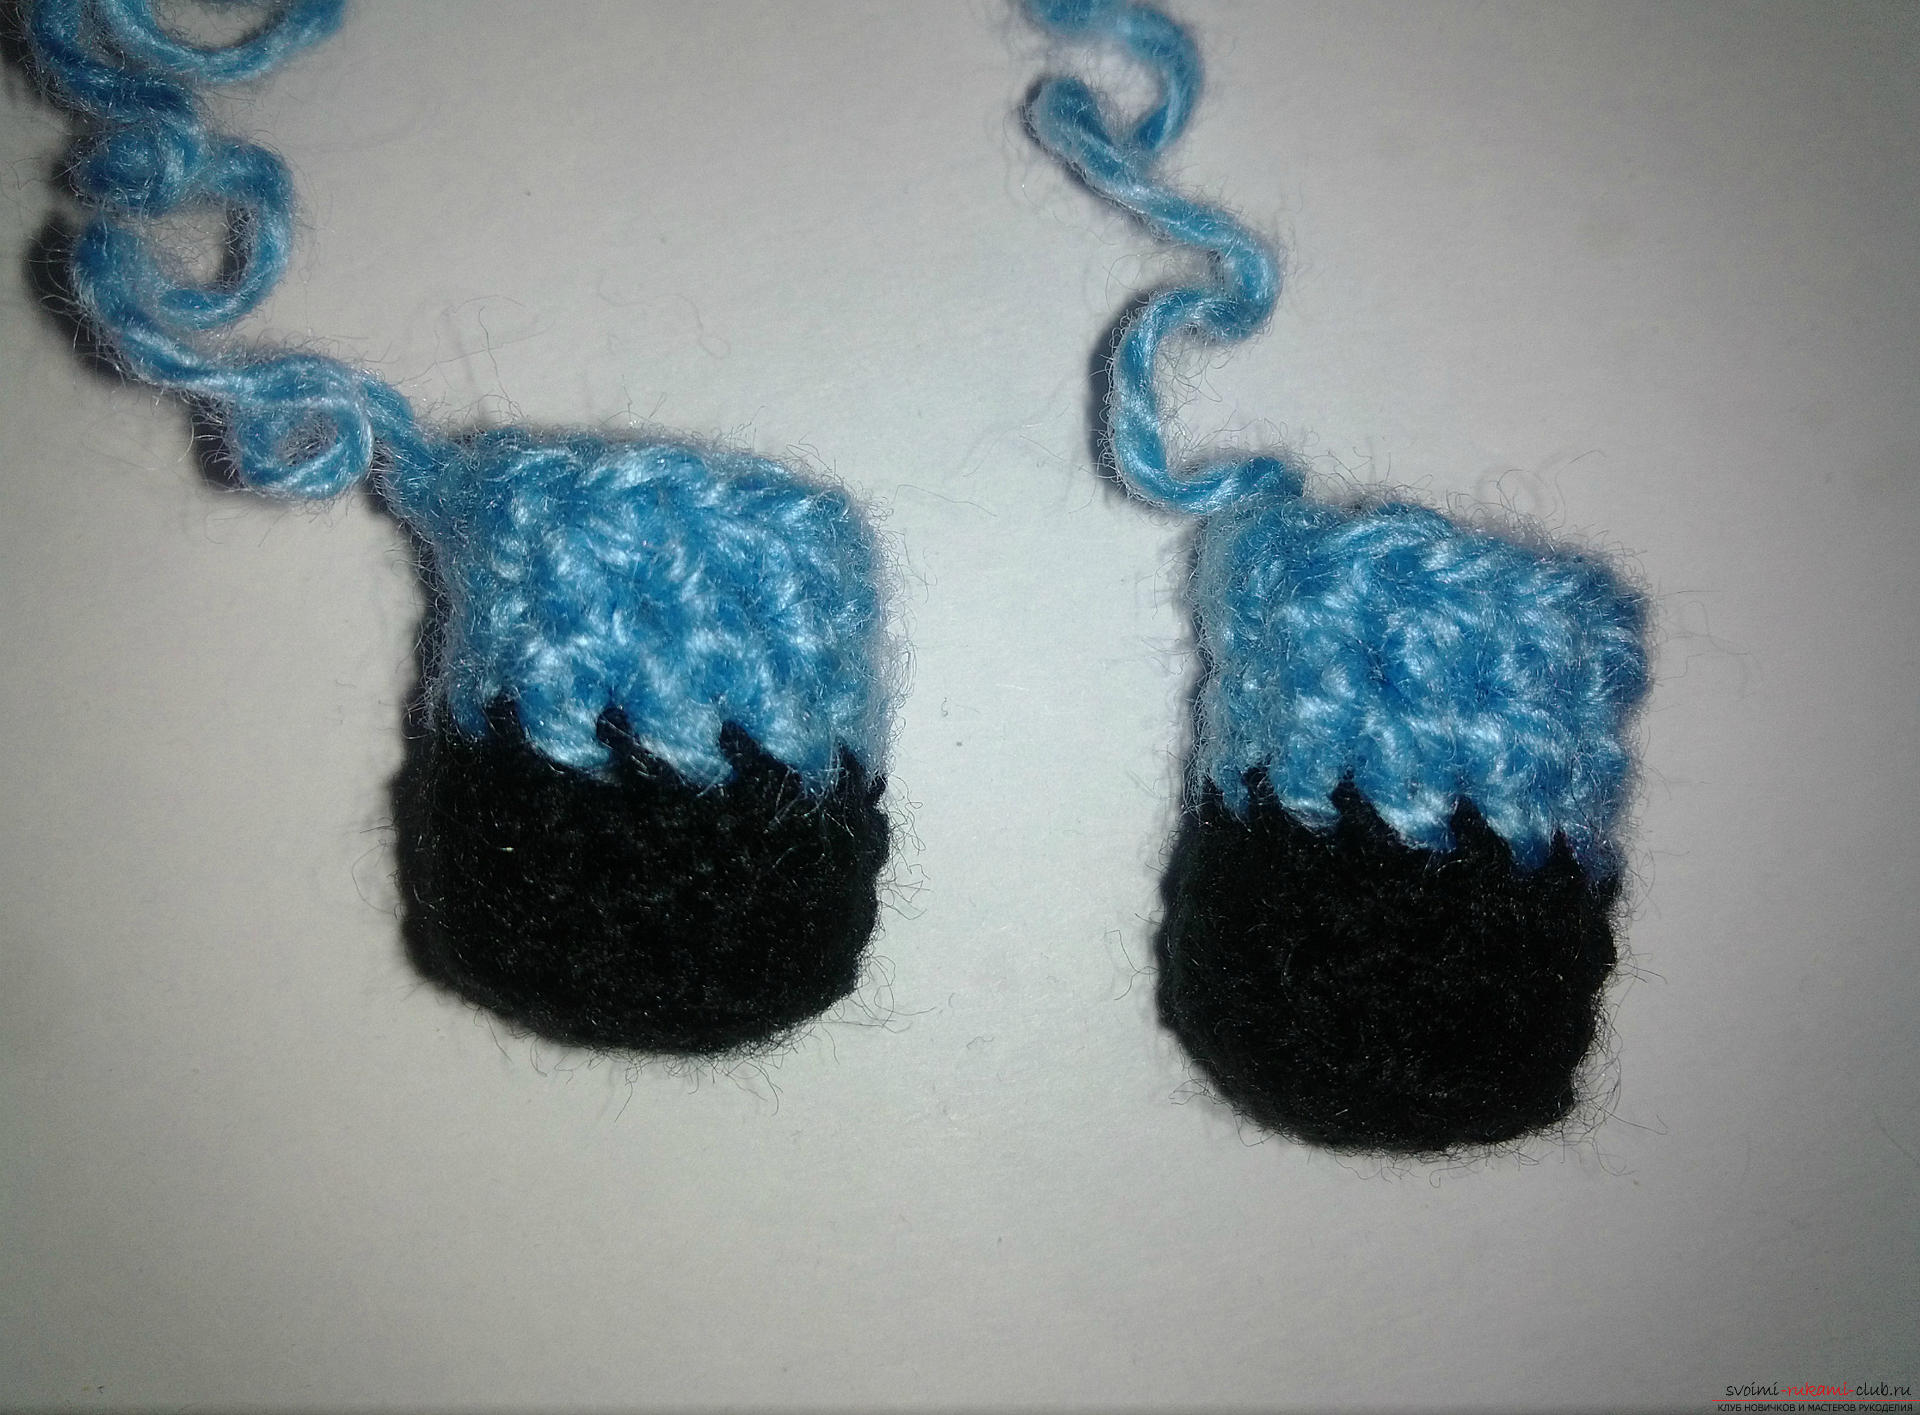 Now the minionchik needs to tie the eyeball. It will be gray-white-black. First, let's take a white color. We make a sliding loop and we will knit ten columns with a crochet into it. We link another row of columns without a crochet and additions to each second loop. Now take the gray thread. Let's make a series and we will make an increase in every fifth loop.
 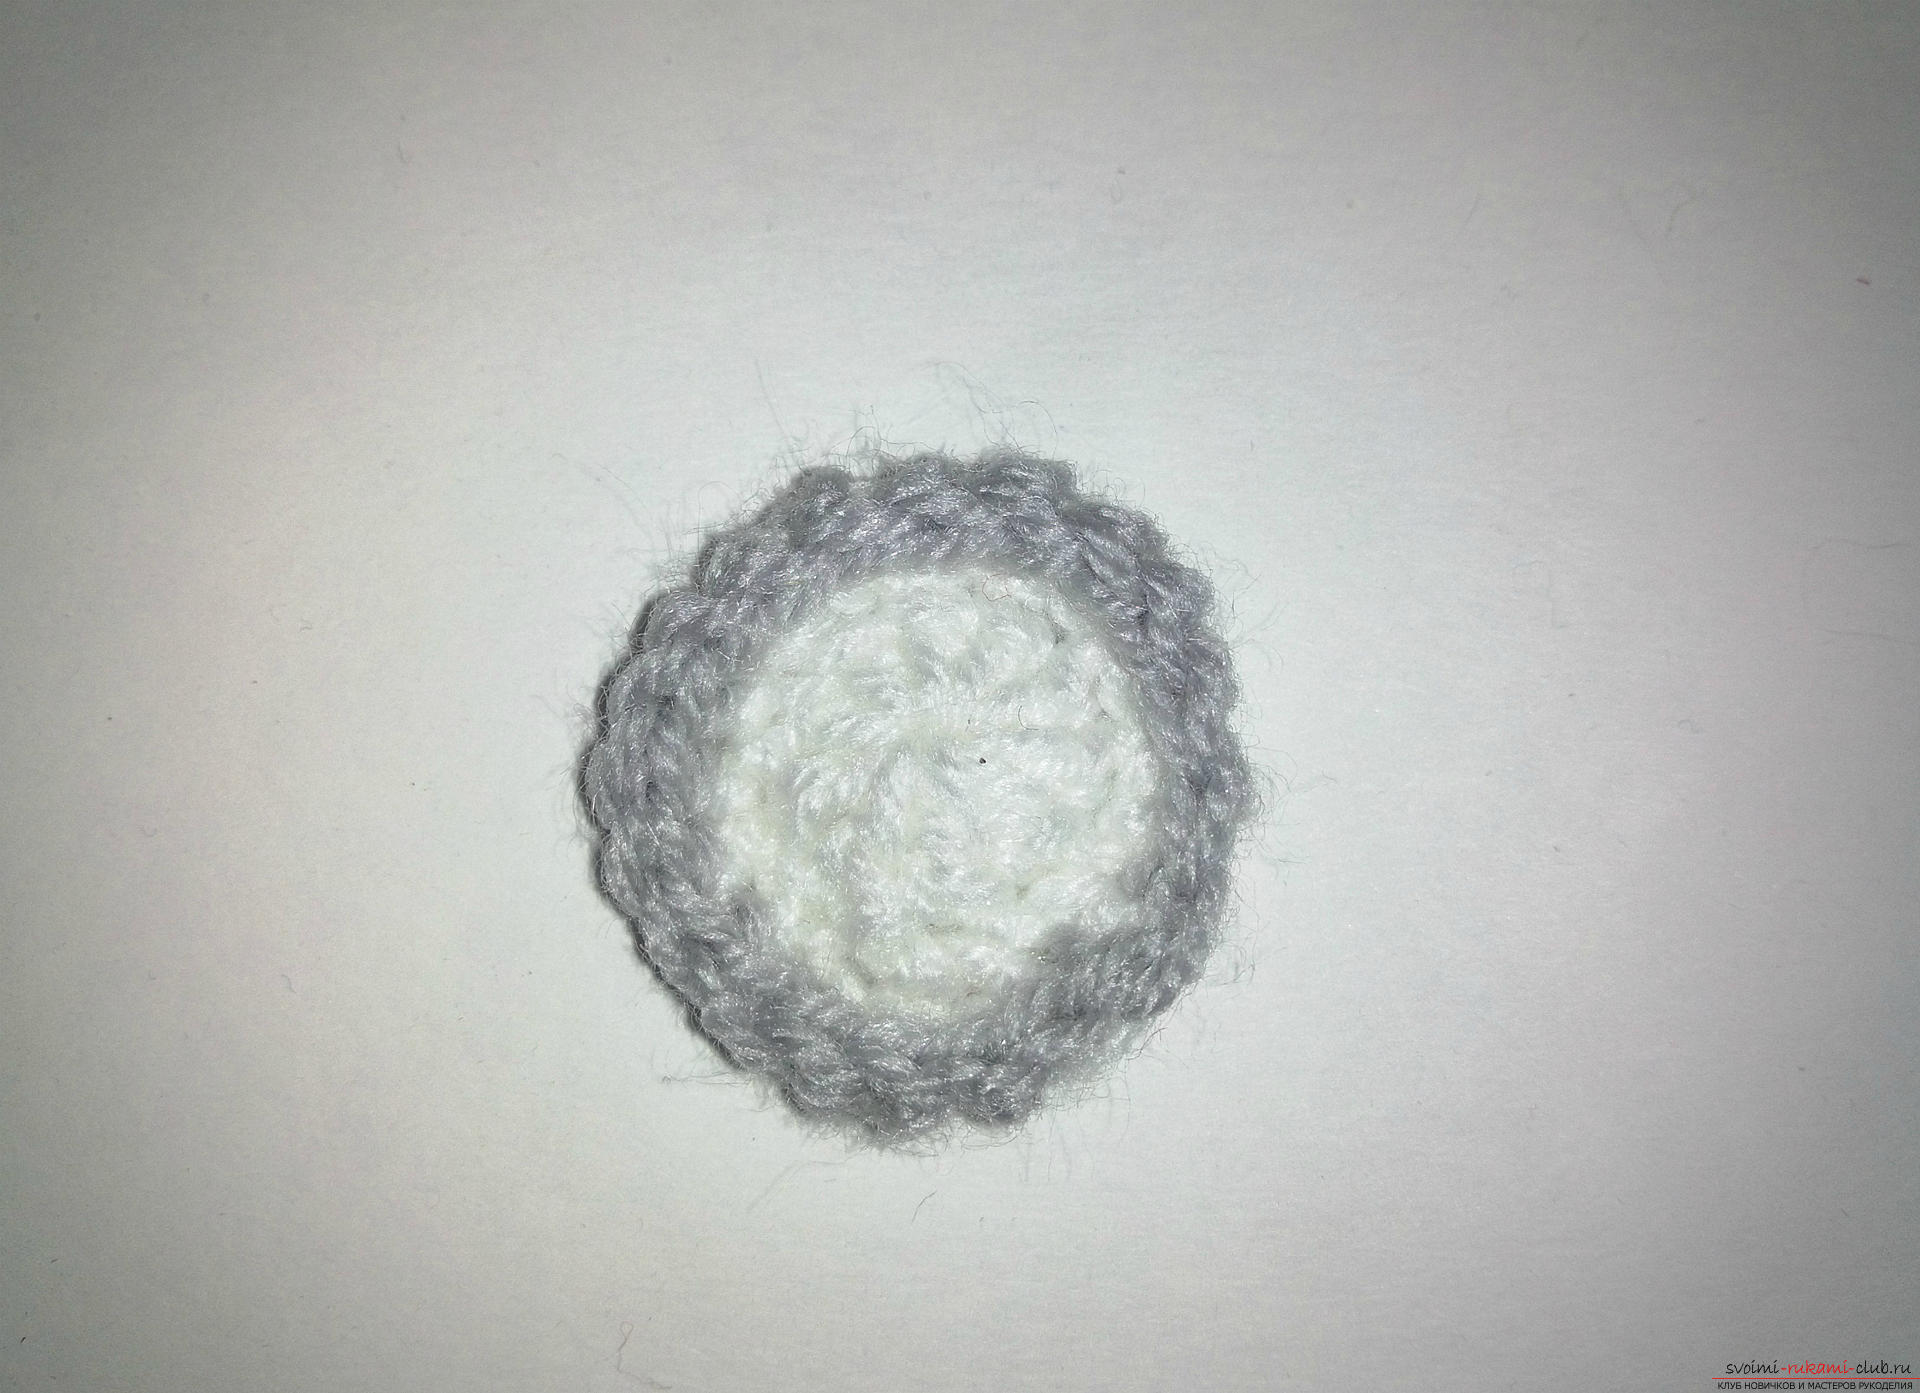 Black yarn tie six columns into an amigurumi-ring. And we'll tie a strip of sticks to the crochet. We knit this length so that it is enough to grab the minion.
  Sew our hands, feet and eyes. And also we embroider a smile. Here is our minion Stewart is ready! This minionchik will please not only children, but even adults.
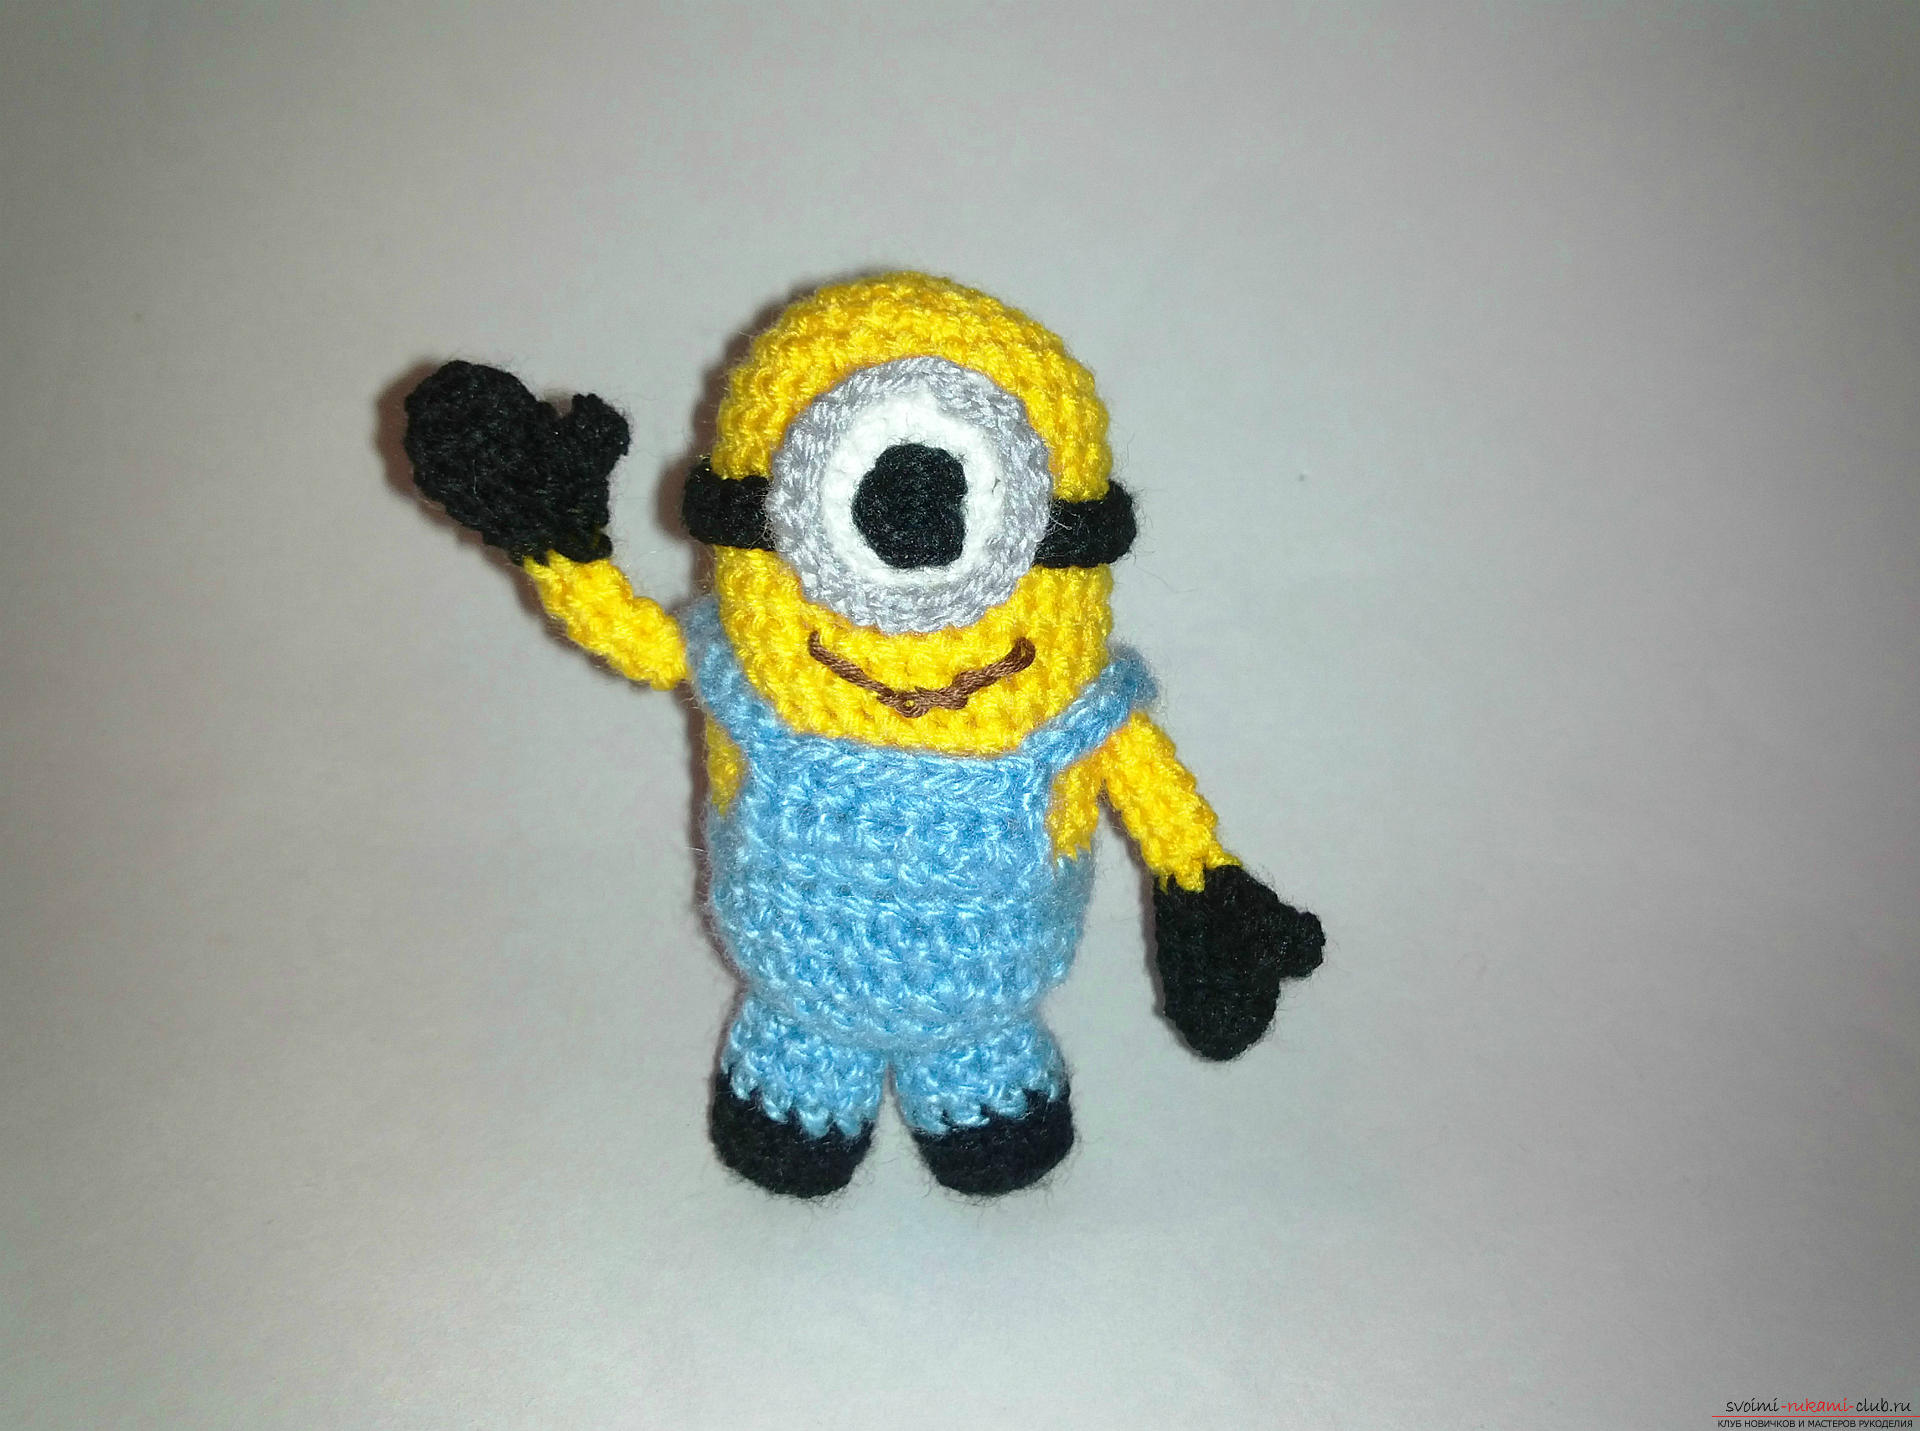
Comments
Related posts:
 Master class with photo and step-by-step description will teach how to tie an amigurumi crochet toy
 Master class with photo and description will teach how to crochet booties for newborns
 A master class with a detailed description and photo will show how to crochet a toy-symbol of the year - a monkey on a Christmas tree
 Master-class with a photo and a description of the process will teach how to tie openwork mitts crochet
 The master class will teach how to crochet a New Year's craft - a knitted Christmas tree toy