Master class decorating bottles with ribbons with their own hands
Content
- We decorate a bottle of champagne
- We decorate the wedding glass
- Boutonniere own hands
- Basket of satin ribbons
- Video: We make wedding accessories with ribbons
The decoration of a wedding celebration is one of theThe most important points that should be given special attention. Now, in view of the popularity of handmade brides, they often create wedding decorations with their own hands, drawing girlfriends to this process. In addition to the solemn design of the premises, special attention is also paid to individual attributes. From this lesson, you will learn how to make original wedding decorations from satin ribbons in Kansas technique using your own hands, for example, a bottle of champagne, a boutonniere, a basket (bag) and wedding glasses.
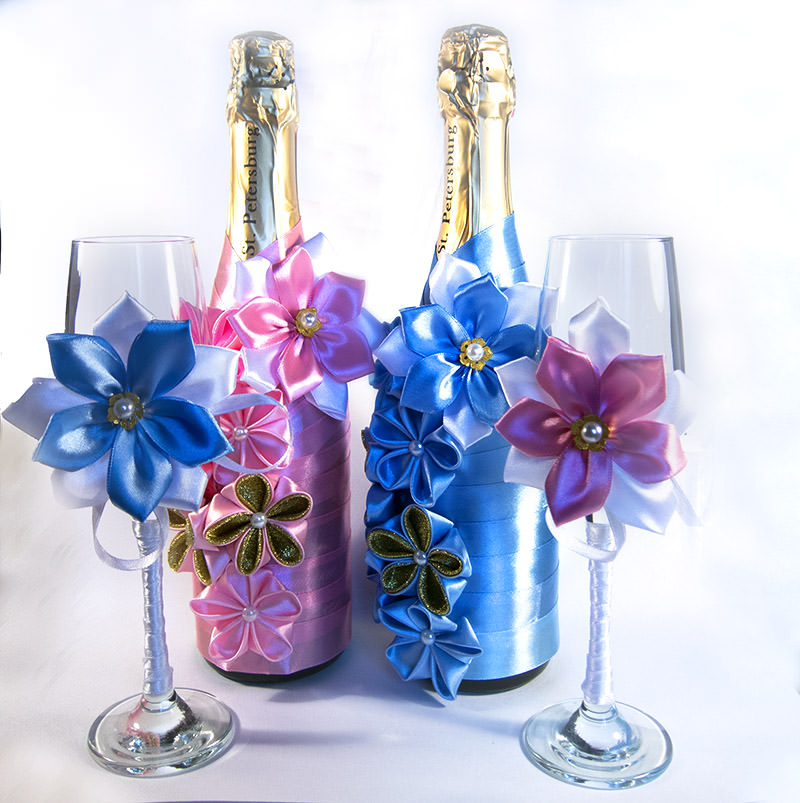
We decorate a bottle of champagne

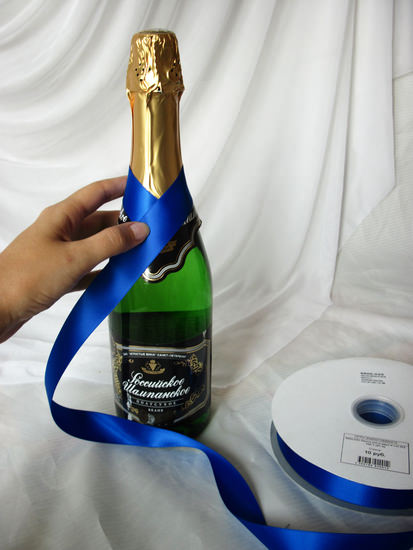
The first master class will consider the design of the bottleChampagne ribbons. Such a weaving will not be difficult to repeat even to novice needlewomen. In addition to the wedding celebration, you can present such a decorative bottle for the new year, birthday, etc.
So, to create an ornament for a bottle of champagne, prepare the following materials:
- A satin ribbon of the chosen shade, about four meters in length;
- Golden brocade tape (about two meters);
- glue;
- scissors;
- A bottle of champagne.
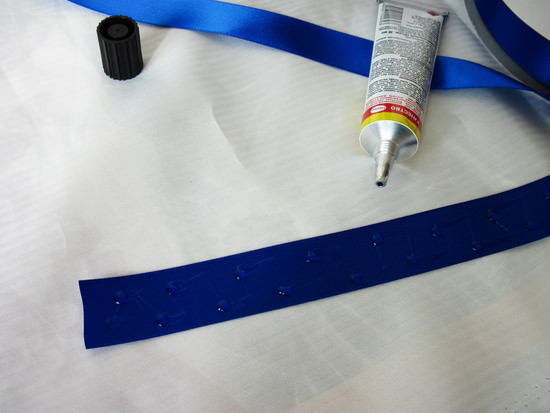
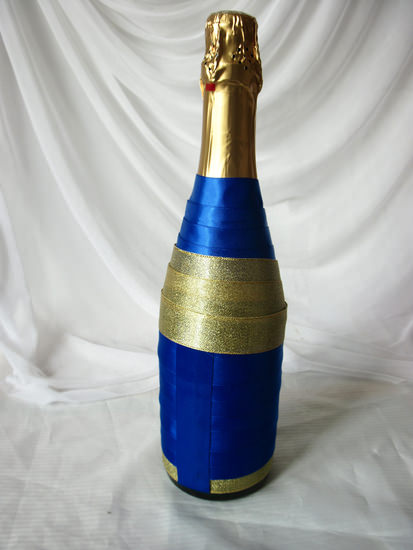
Choose for work champagne framed inGold foil (it is better that the foil does not contain extraneous inscriptions). The required length of the tape is determined from its width. This master class uses a ribbon in 2.5 centimeters. If you have a narrower tape, please note that you will need it more.
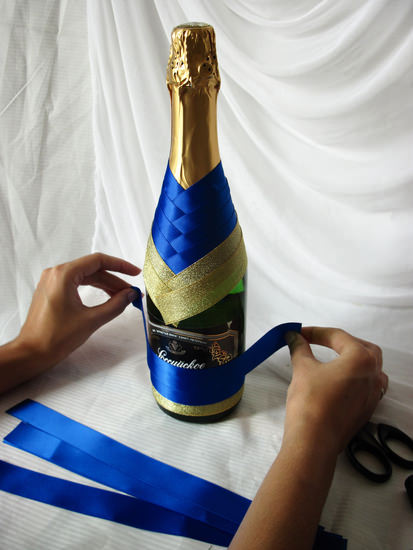
Take a prepared bottle of champagne andMeasure the necessary length of the tape. To do this, attach the tape to the throat of the bottle and estimate the length for the initial coil. Further, the tape is cut off and small points from the glue are put on it. Try not to overdo it so that an unnecessary glutinous surplus does not form on the tape. Glazed with a glue piece of tape should be wrapped around the champagne. Pay attention, at this stage, you need to fix the tape so that the paper label is hidden behind it.
The tape should be well tensioned so that its edgesLay flat and did not stick out. In the next step, measure another piece of tape. Here, the length of the ribbons will be larger, since the bottle of champagne starts to expand from the neck. This cut also needs to be glued. Be sure to fix the ends of the bands in strict order, based on the initial glued element. Thus, you will receive an even weave that looks like a pigtail. In this master class on the top is the right ribbon tip, and on the bottom, respectively, is the left one. Continue the weaving of the ribbons and add the following two segments for the same technology.
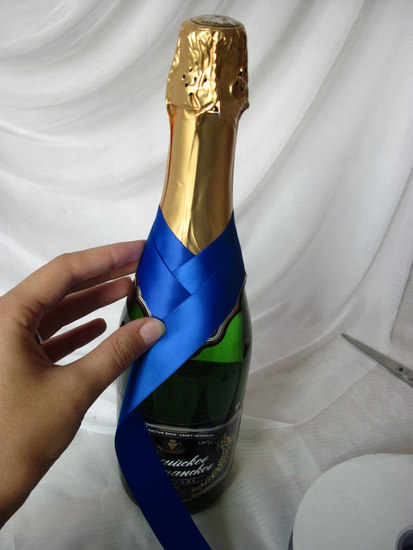

We continue the master class and begin the decor of the bottleChampagne with brocade tape. Teach that using such tapes as decorations can cause certain difficulties. After all, they have a fairly rigid structure and do not stretch well. The weaving itself is based on the previous technology. At first, the tapes are measured, after which they are cut off and fixed with their hands on a bottle of champagne.
The brocade tape is glued in two cuts. At this stage, the master class approached the place of the transitions from the throat to the bottle. In the lower part we will also decorate with golden brocade tape. We perform the same actions for measuring, cutting and gluing. During the fixing process, the seam should be exactly centered on the back side. To understand how to properly do this, look at the photos that this master class is supplied with.
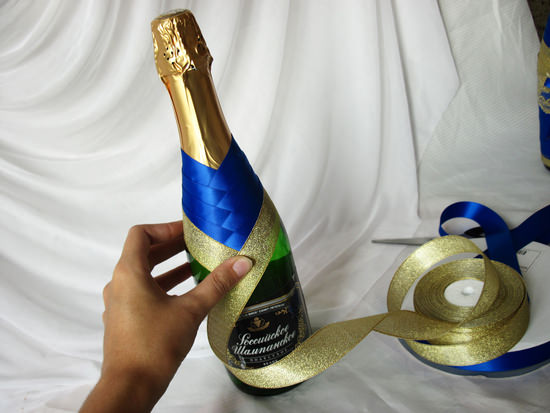
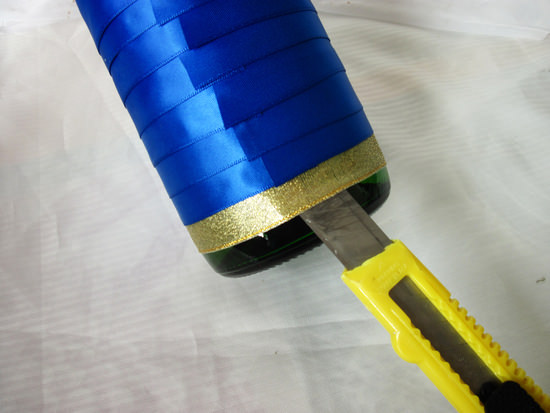
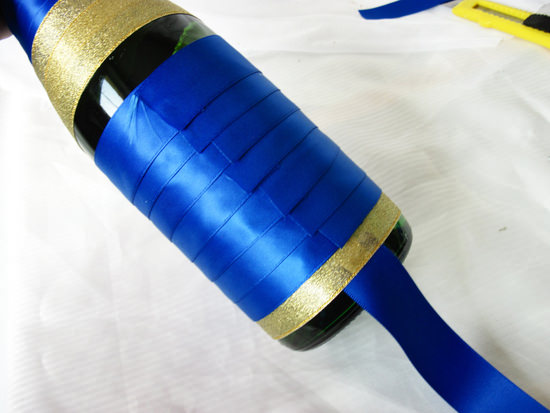
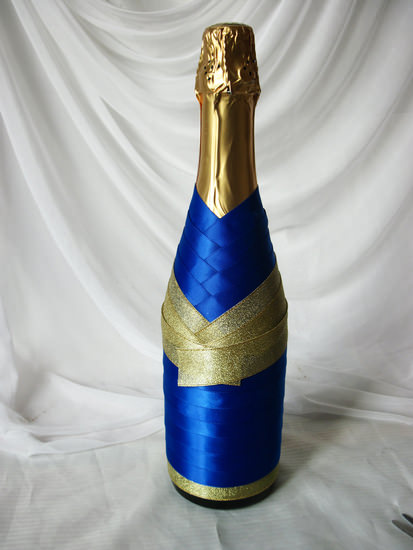
Gradually our champagne is leveled inDiameter, and you can continue to measure pieces of tape of the same length. Cut seven or eight pieces of ribbons of the necessary length to you and with glue fix them on the bottle, slightly pulling. Band the ribbons around the champagne one by one overlapping (half the width of the ribbons). So on the back you get a nice seam and one empty area for a couple of layers. This seam must be sealed, so that our decoration of champagne with ribbons would have a presentable appearance. To do this, we take a thin knife, which needs to slightly lift the fixed ribbon.
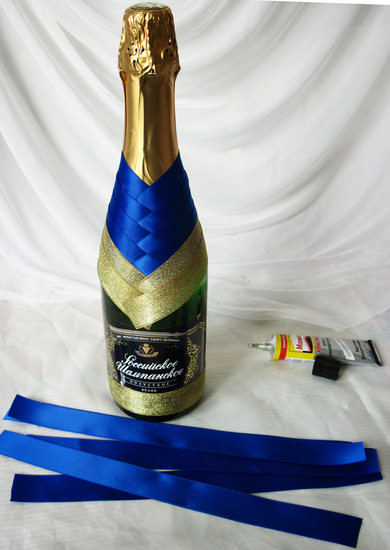
Here, it is necessary to free up a place in which weFix the tip of the ribbon. The photo shows how the process is going. At the end of the tape put a drop of glue and place it in the vacated place. Then the ribbon is completely missed (pay special attention to the edges) and thoroughly presses it against the seam. This way you can close the sloppy seam.


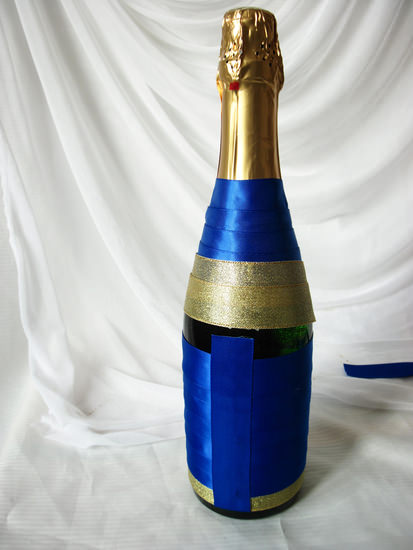
The master class is moving to its completion. At the last stage, attach the final turns from the tapes. Simply trim the protruding corners in the front part. That's all the ribbon base ready. Next, you can continue decorating and decorate a bottle of champagne at your discretion. In the work you can use any improvised decorative material: beads, lace, etc.
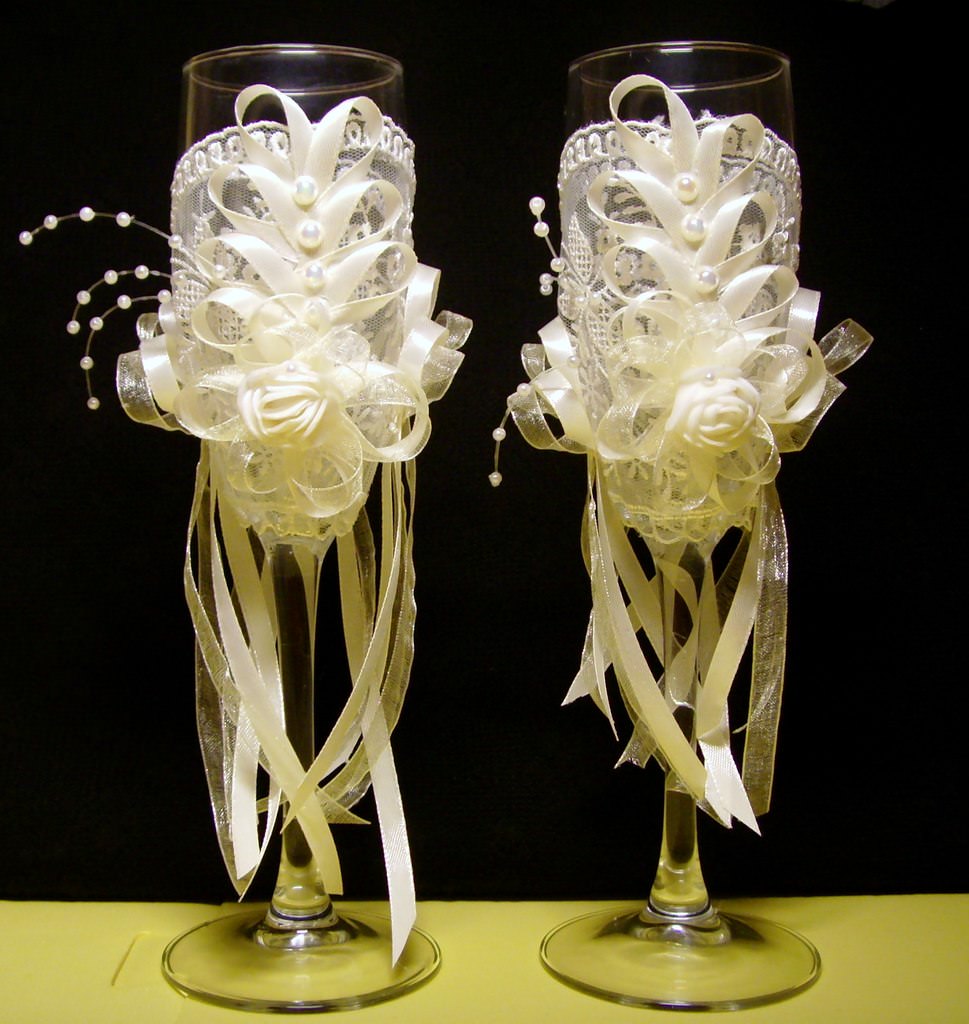
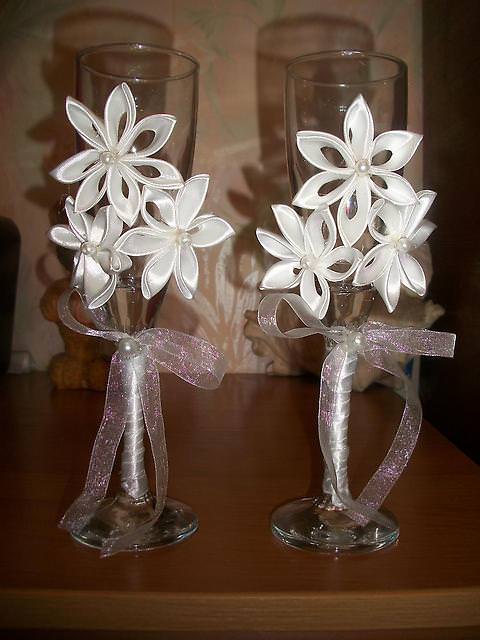
We decorate the wedding glass
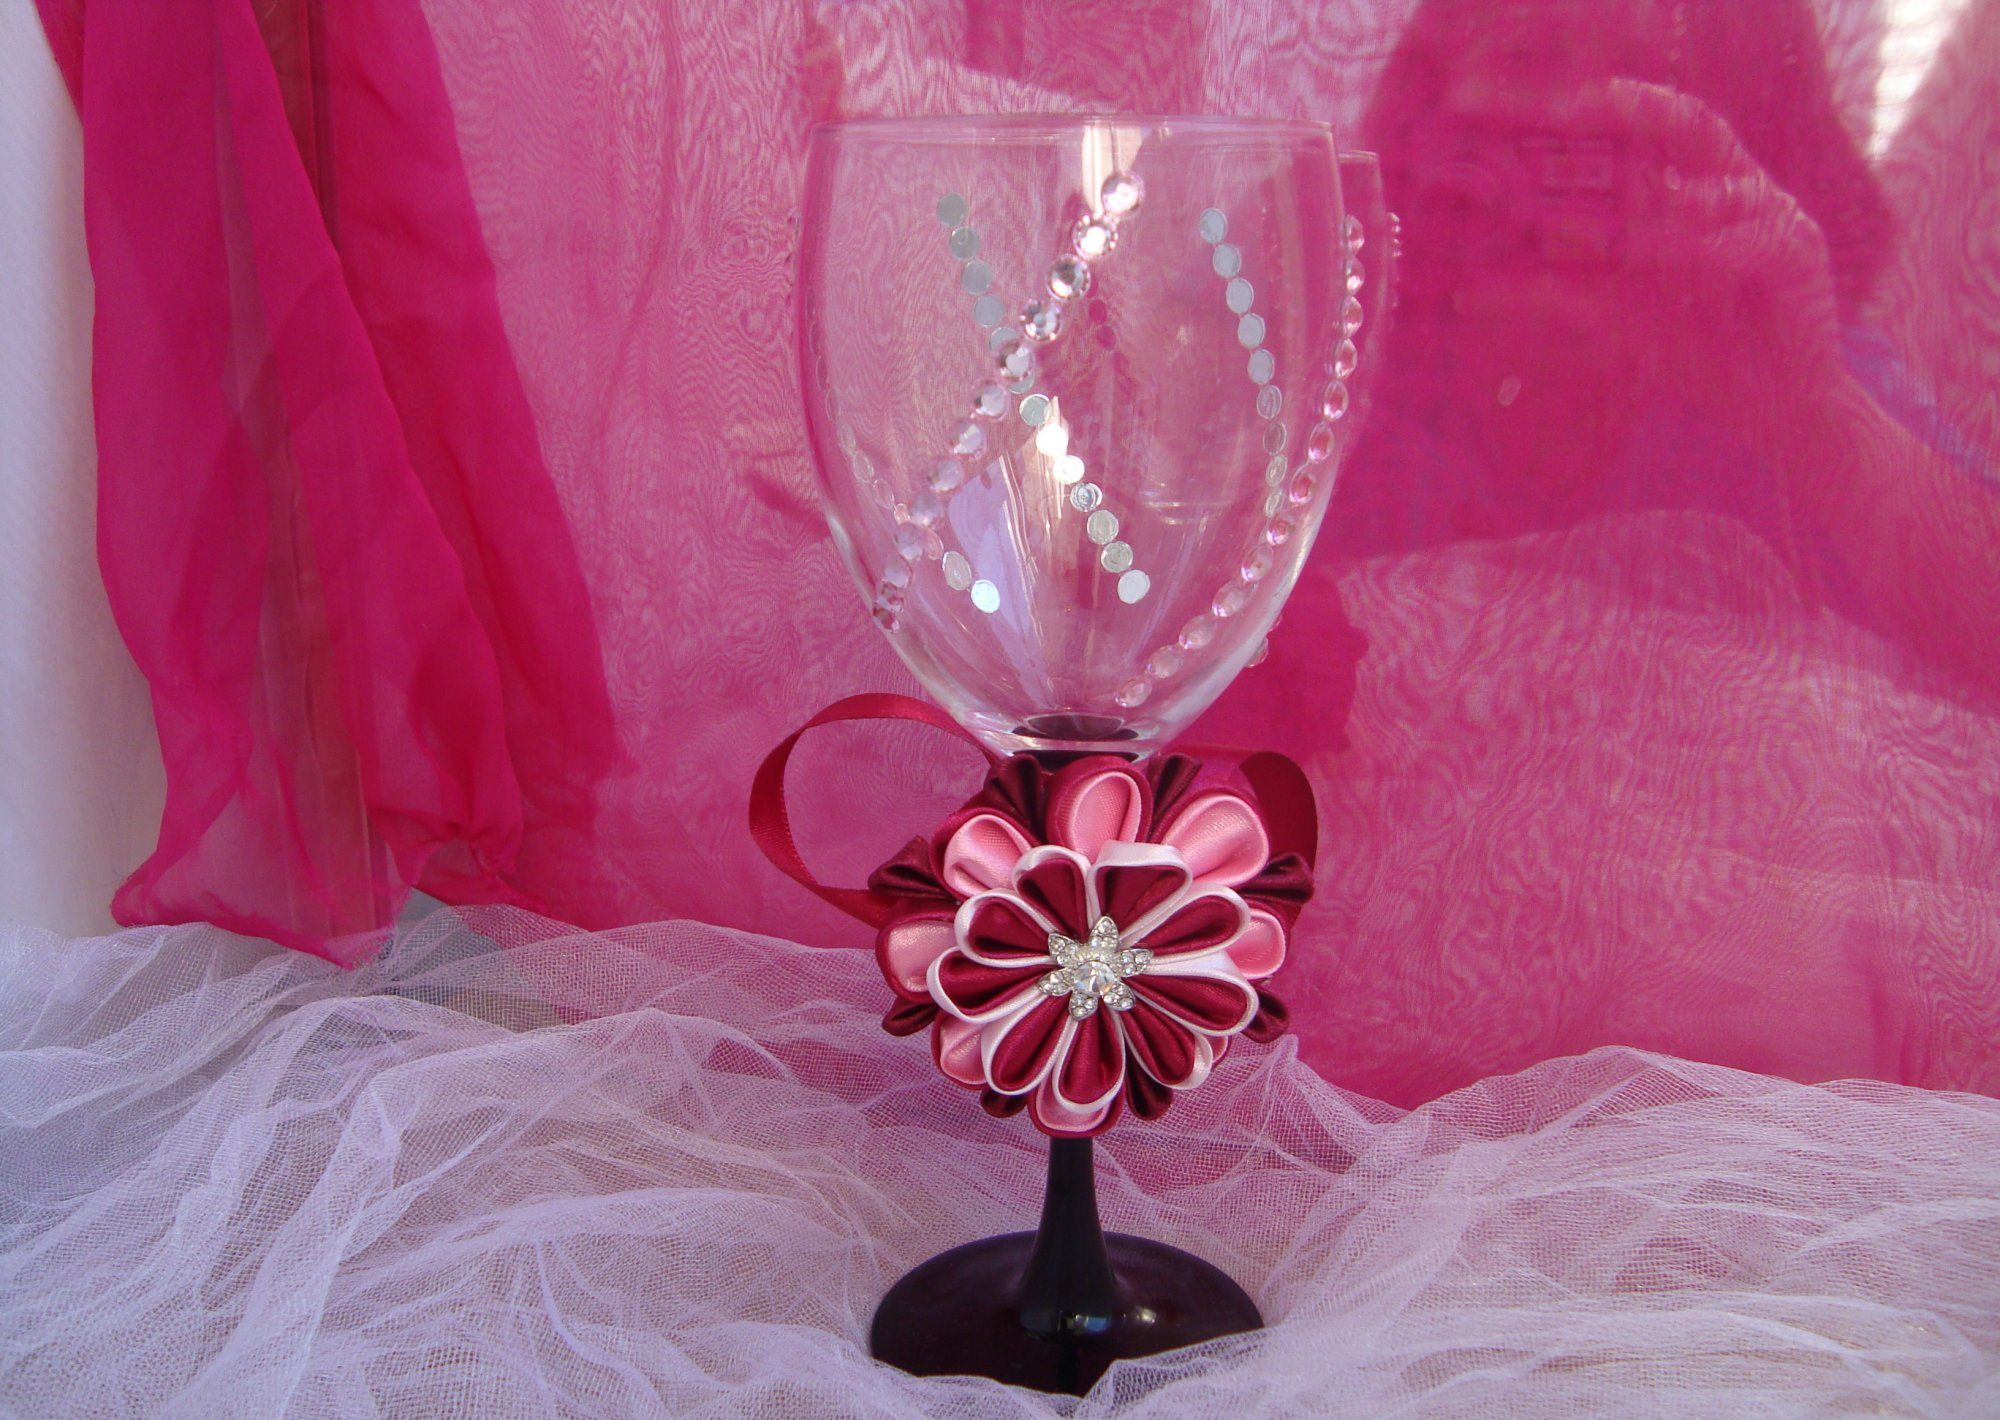
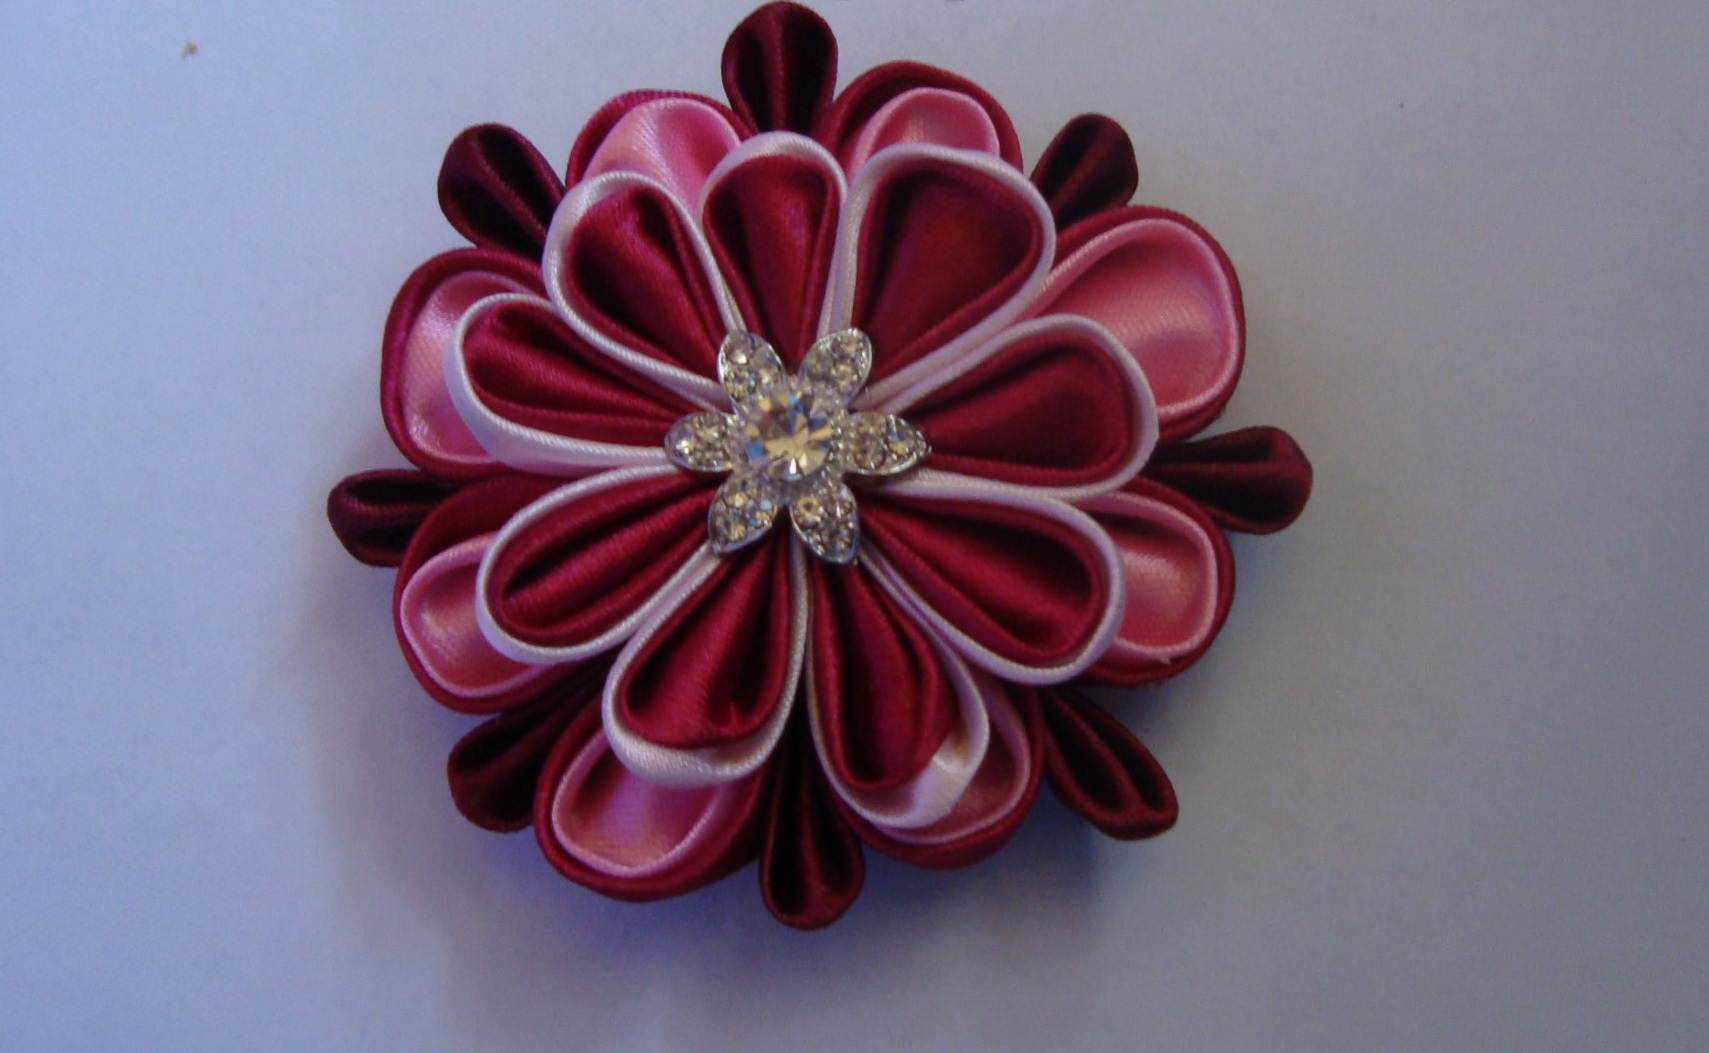
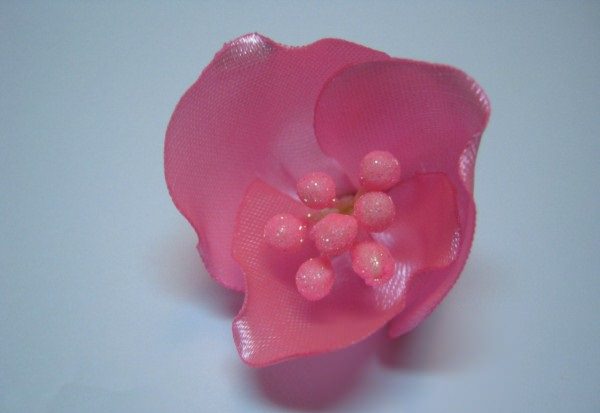
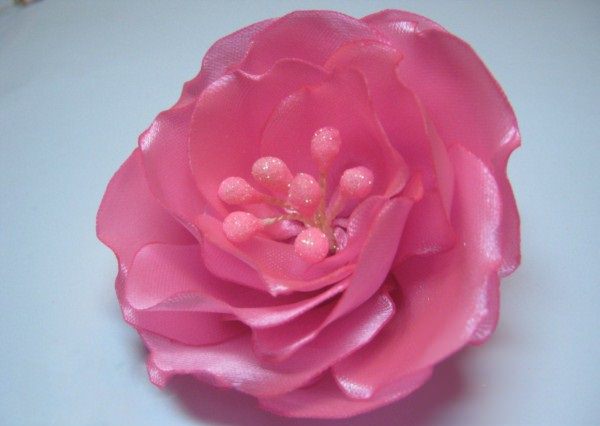
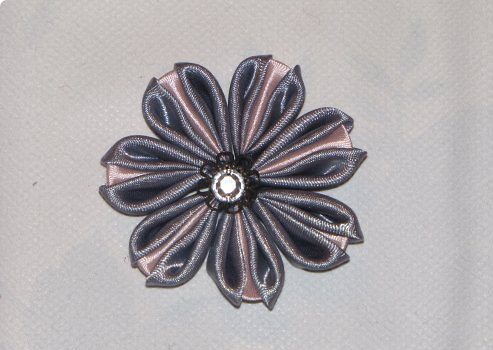
The next master class will consider creatingFlower kanzashi, which you can decorate wedding glasses. This unusual element, it is sure to attract admiring glances, because this decoration of the tapes with a glass of their own hands looks quite original.
Owning the technology of Kanzash, you can easilyWith his own hands will make a similar flower. If you are a novice needlewoman, pay attention to the photos, which supplemented the master class, as well as a video that can be freely accessed on our website.
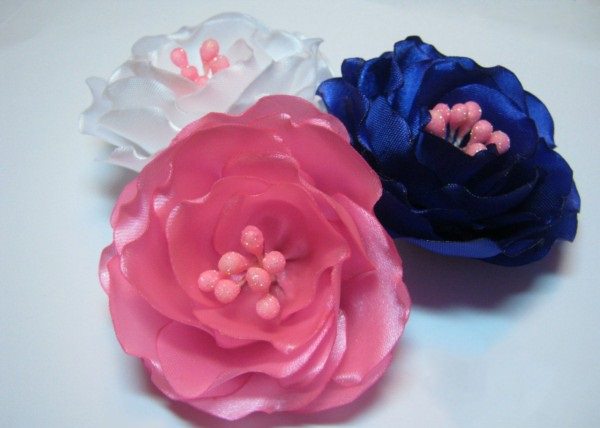
In our time, wedding events are often built on certain color combinations. Based on this, for example, you can also choose the color of ribbons for your glasses.
The design of the glass begins with the preparation of a certain set of materials and tools. Prepare:
- Satin ribbons of several shades (two widths of five and two - four centimeters);
- soldering;
- glue;
- Rhinestones;
- Glasses.
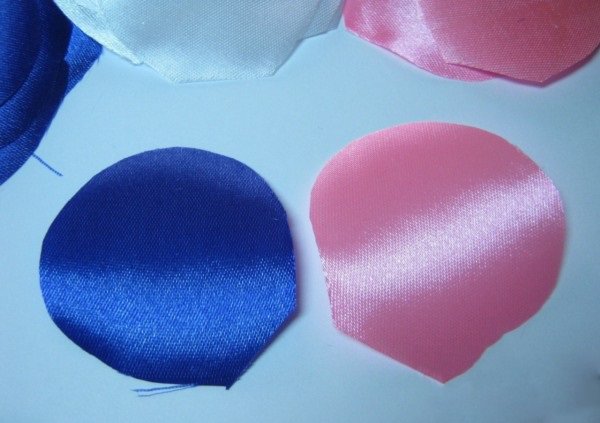
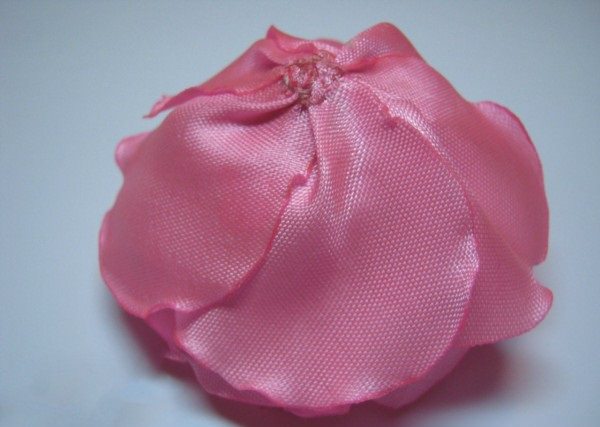
As usual, at the beginning to create elements in theKanzash technique, you need to make square sections of satin ribbons five to five centimeters by your own hands. Next, we take two blanks and make of them a petal of a circular shape. This is one of the basic types of Kansashe petals. How to properly do it you can see by watching a photo or video master class. It is necessary to bend the resulting triangular parts and put these elements one on another at a distance of one millimeter. Further, the corners bend closer to the middle of the base. After that, the work is turned around and the edges are folded.


Now the workpiece must be bent and removedUnnecessary parts with a soldering iron. In the end, we get a rounded shape. We thus make eight petals and collect them in a flower. For these purposes, you can use a needle with a thread or glue.


We pass to the next stage and begin to doKansasi small size petals for the same technology. Behind such elements do not bend, as in the past case, but are pasted among the petals of a large flower.
From two tapes of the following shades, four by four centimeters make large rounded petals and connect them to a flower.

We finish the master class and decorating the glass. To do this, we knit the glass on our own hands
, Fixing it with glue, and already on top of it we paste the obtained flower of Kanzash. As an additional decor, these wedding glasses can be decorated with rhinestones.
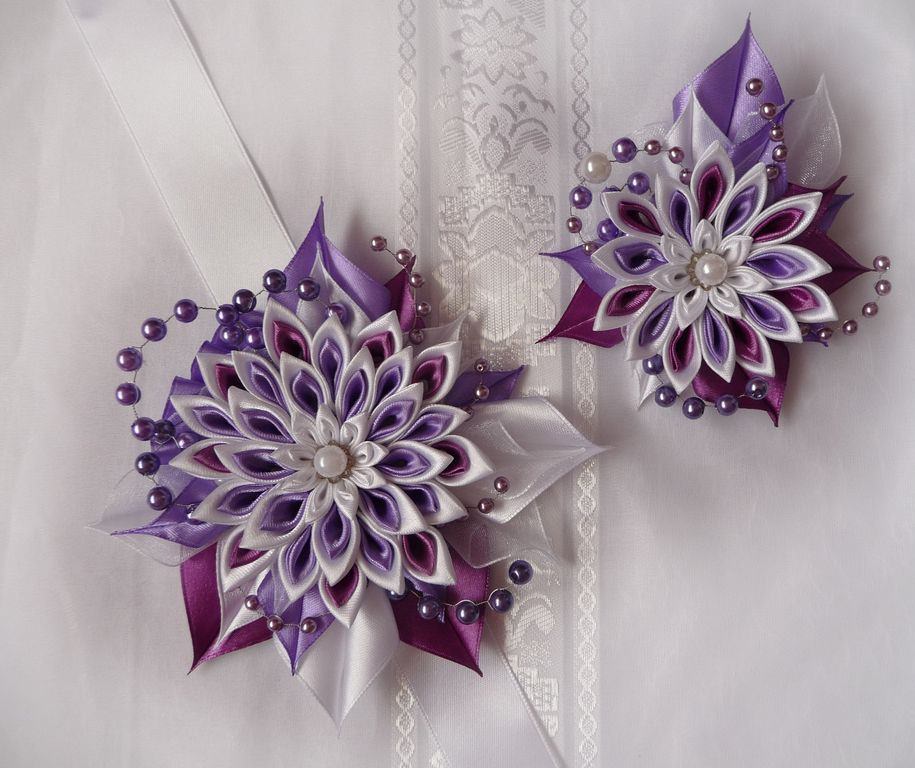
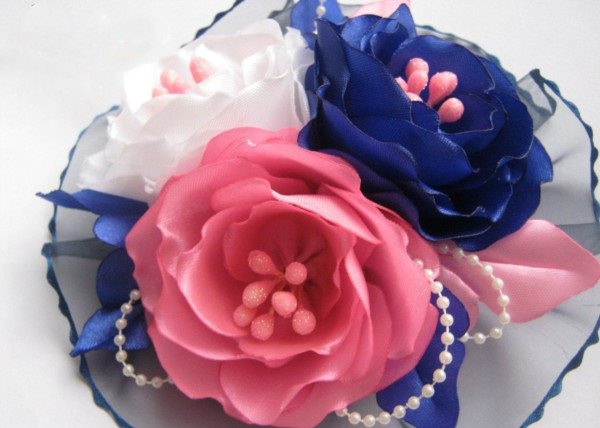
Boutonniere own hands
Such delicious boutonniere can decorate wedding dresses, dresses or bags of bridesmaids.
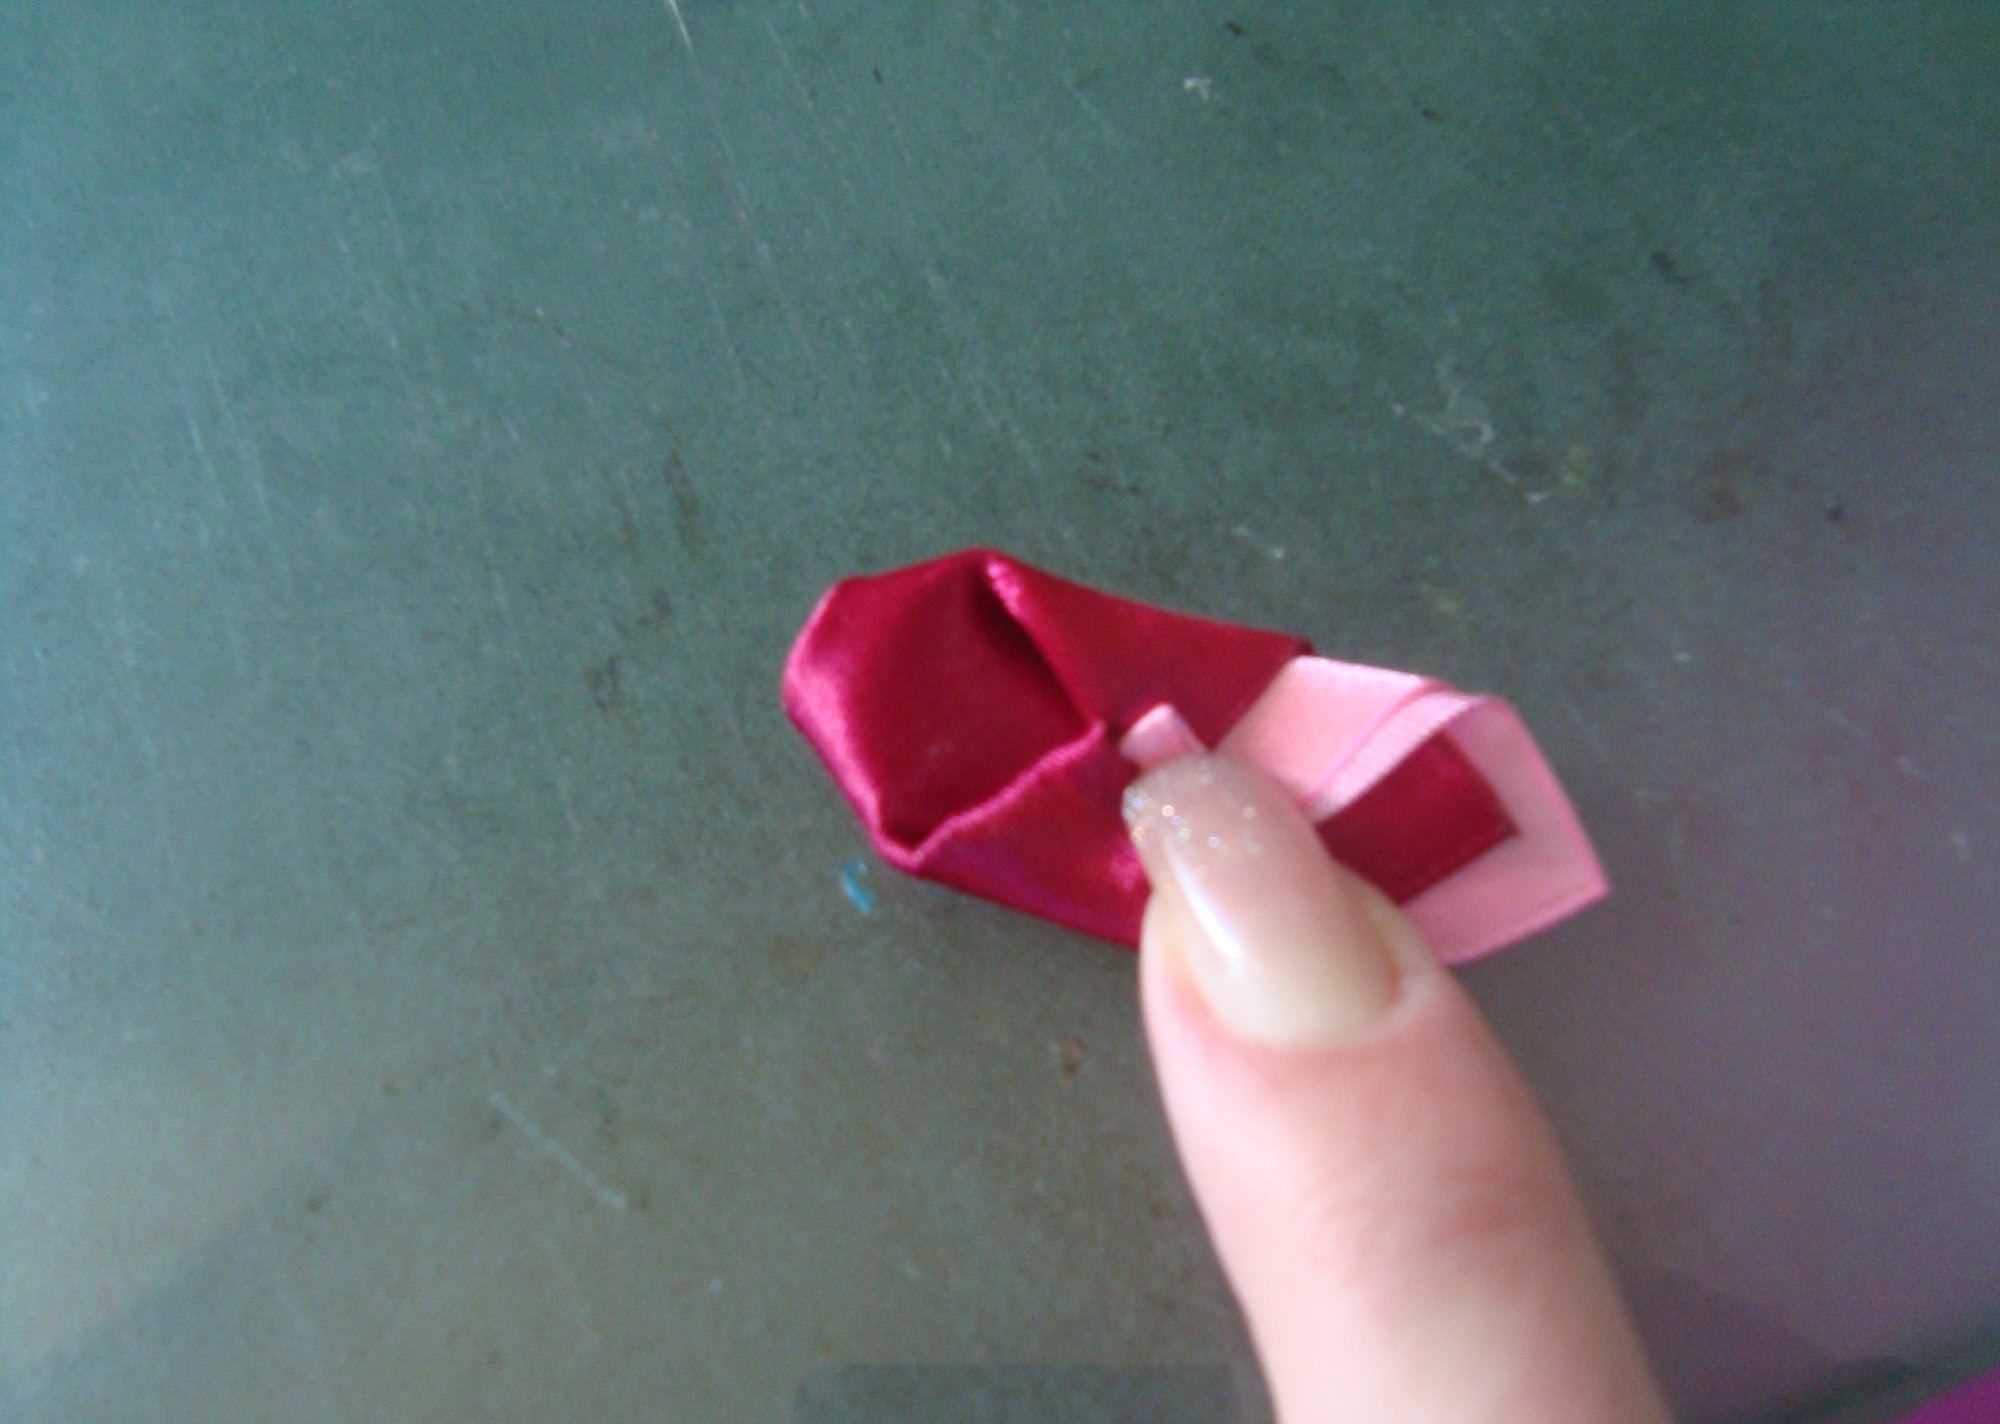
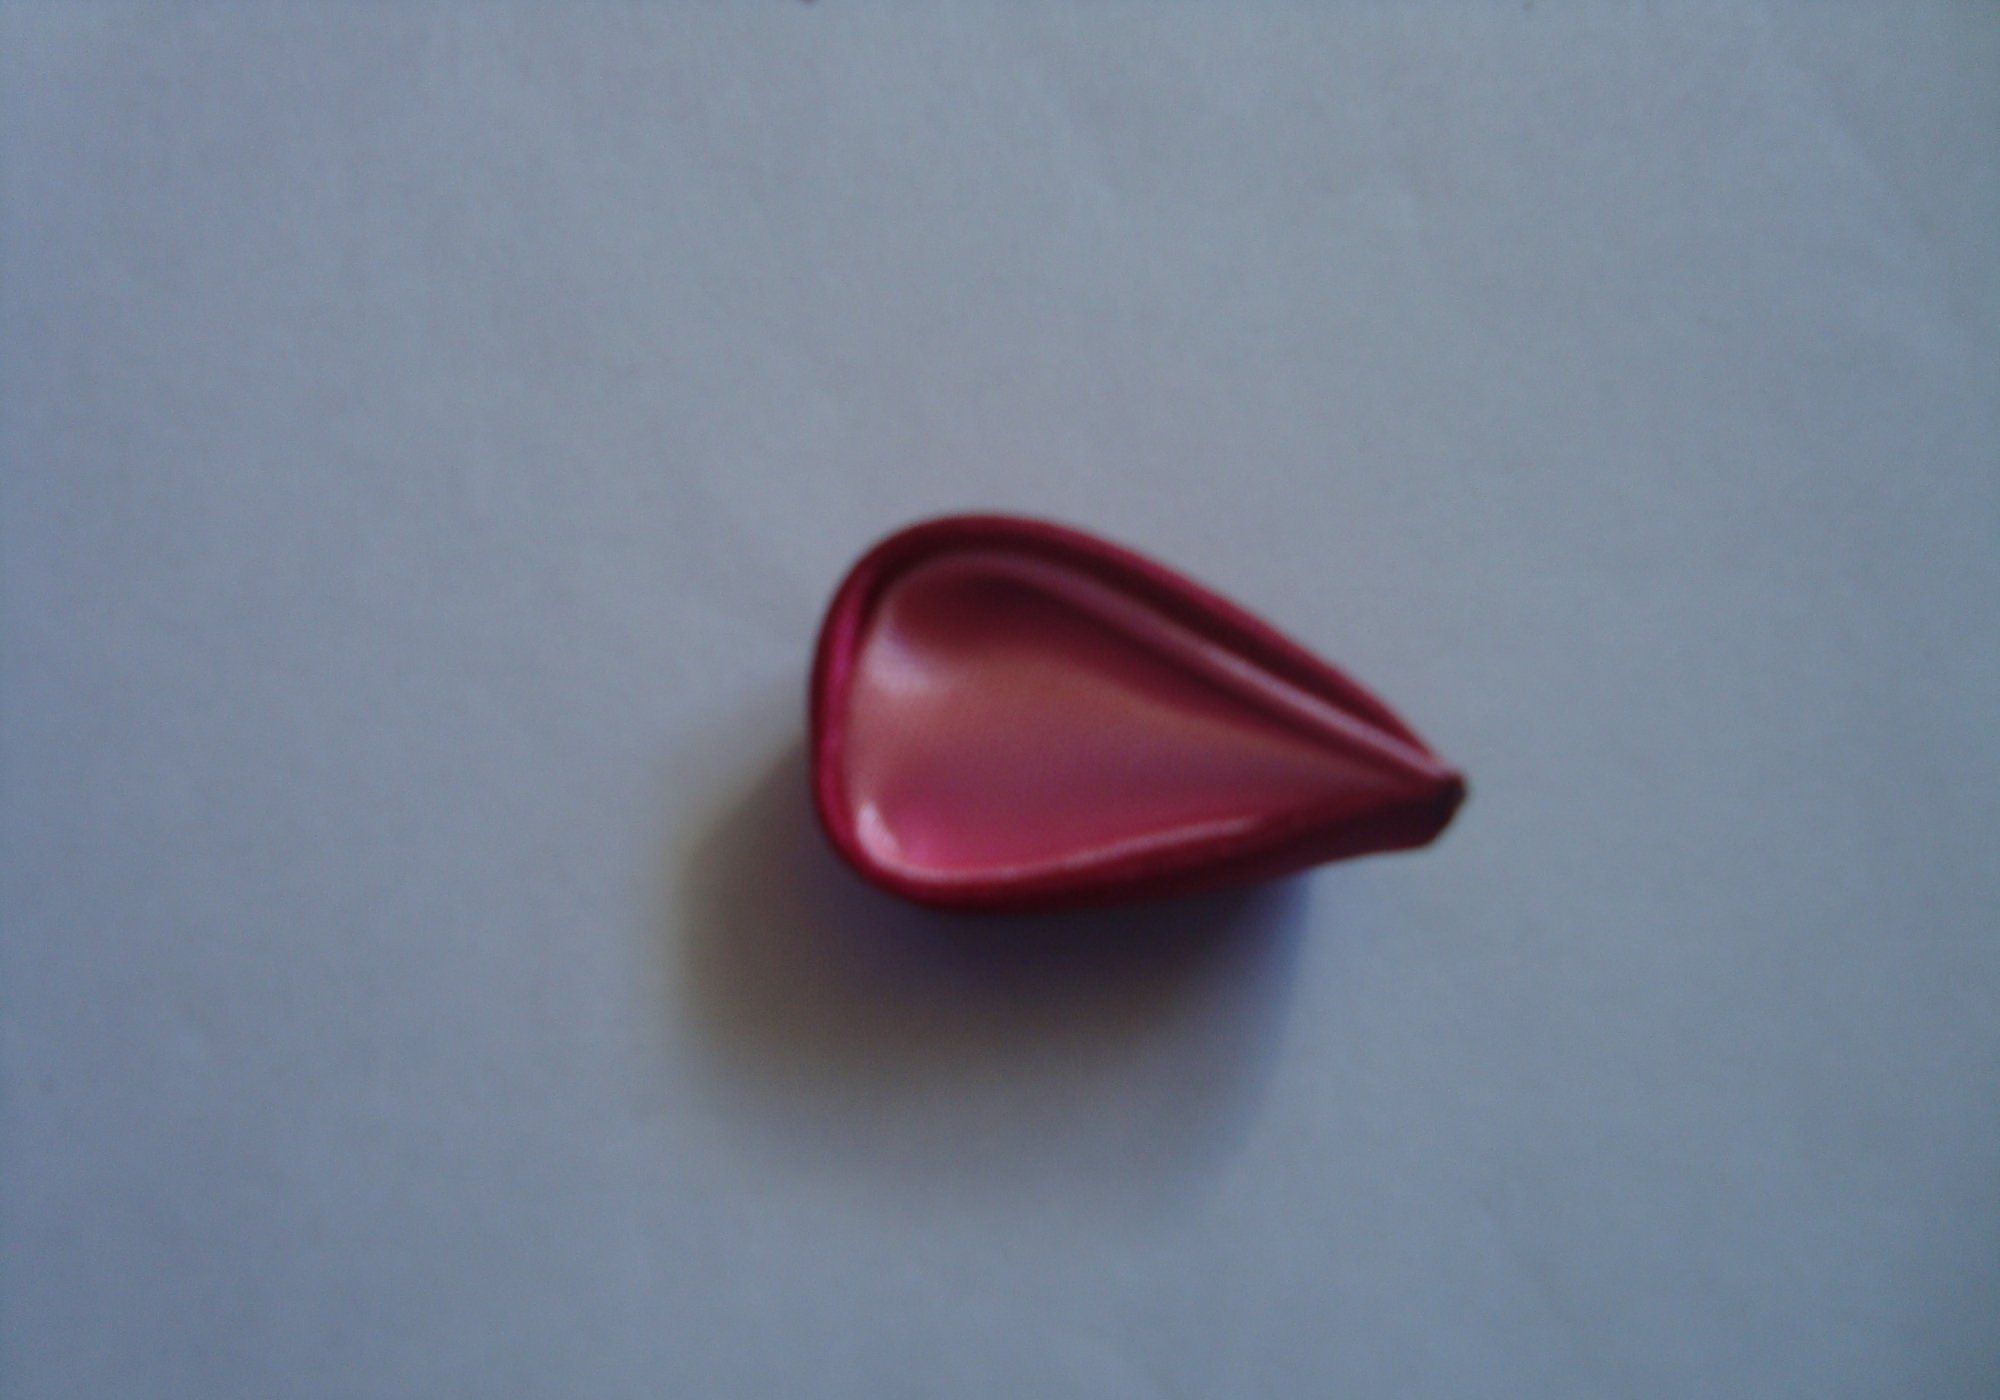
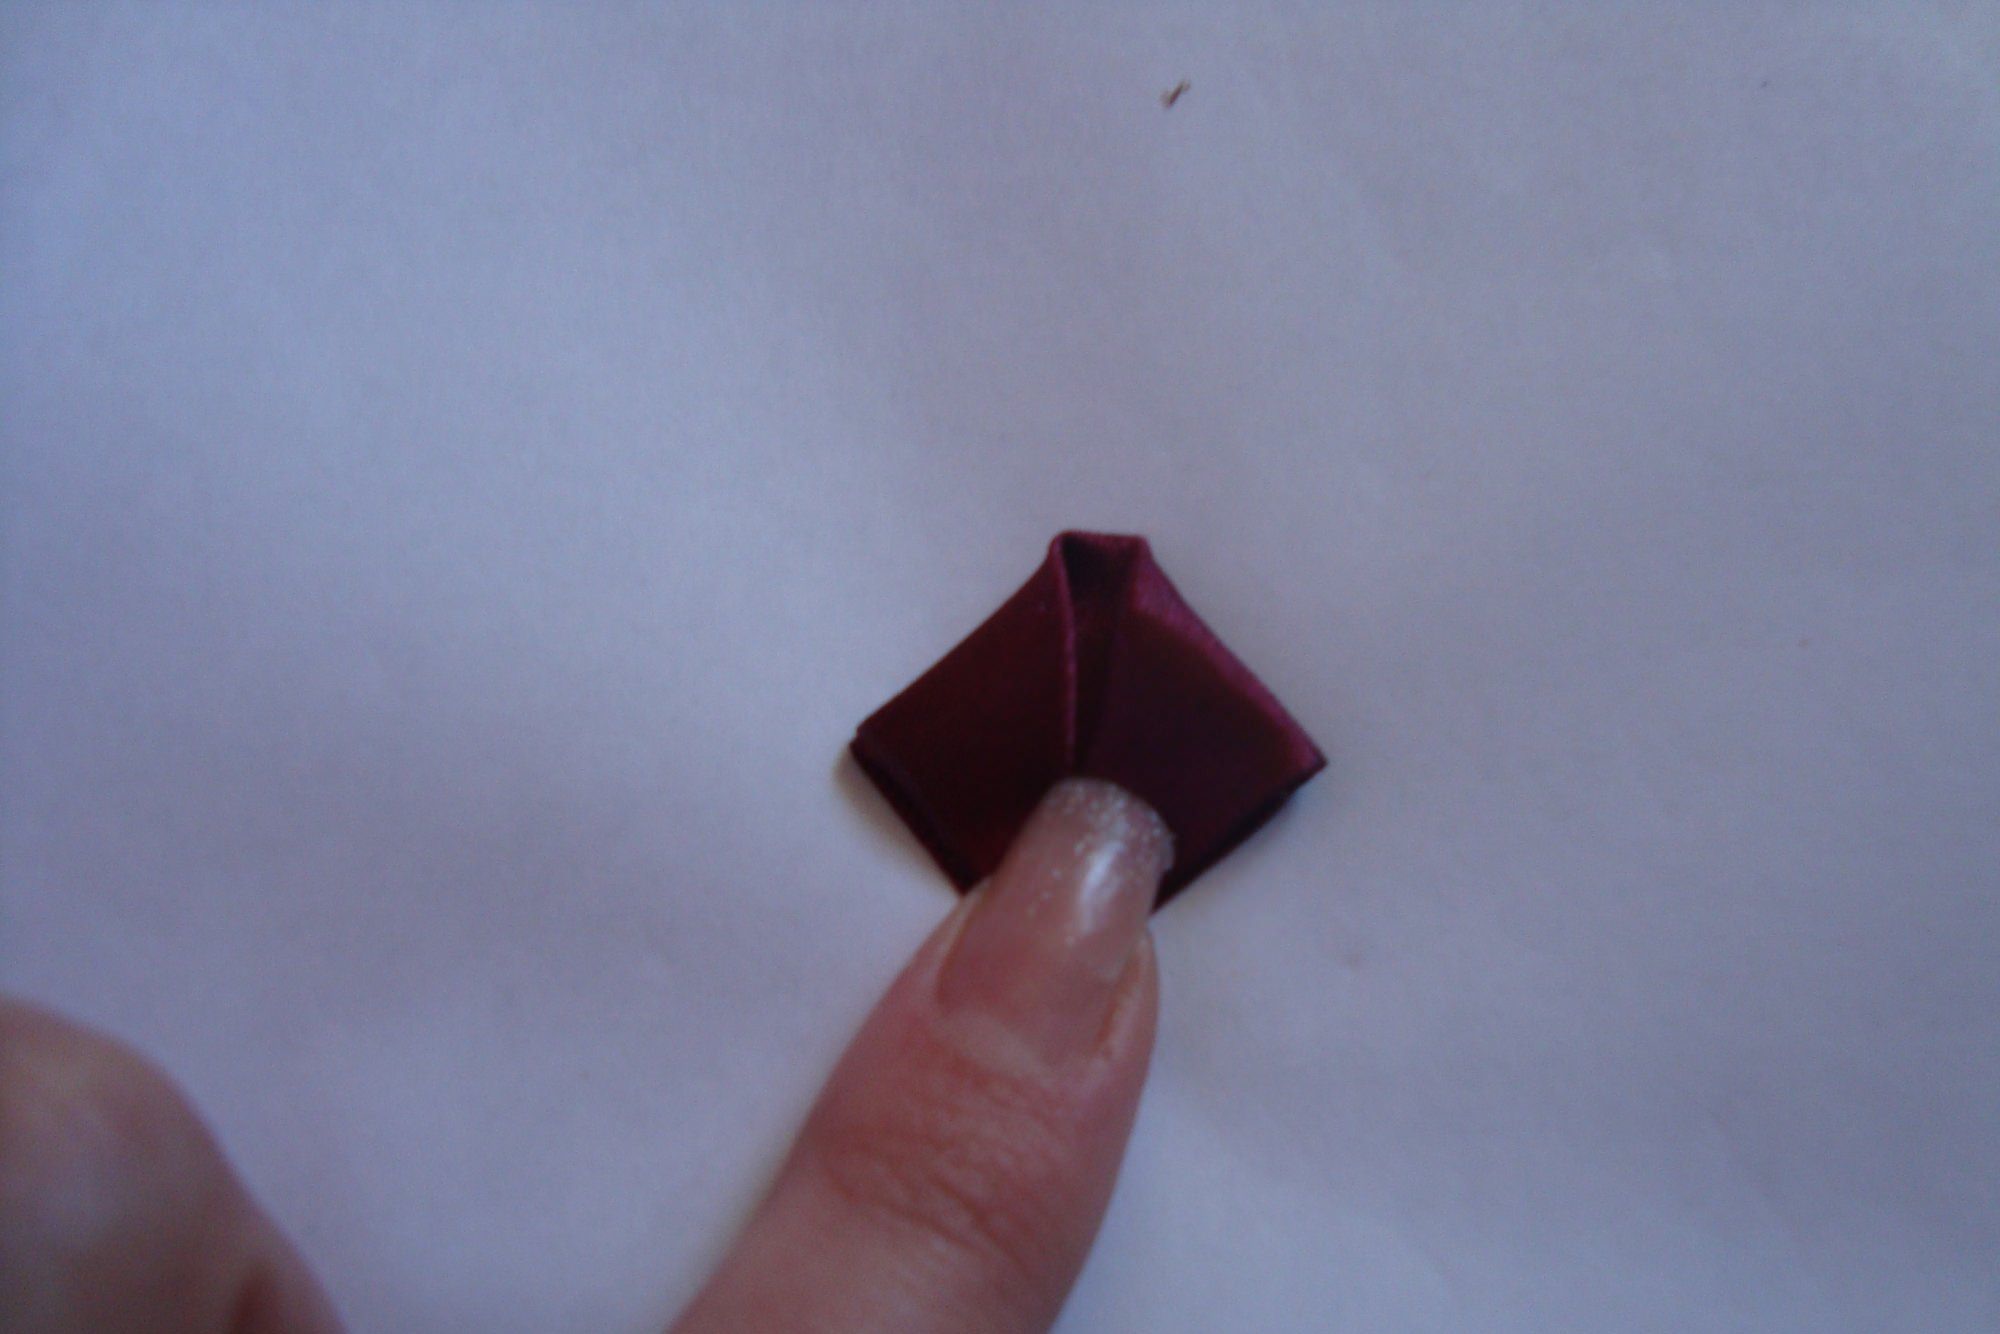
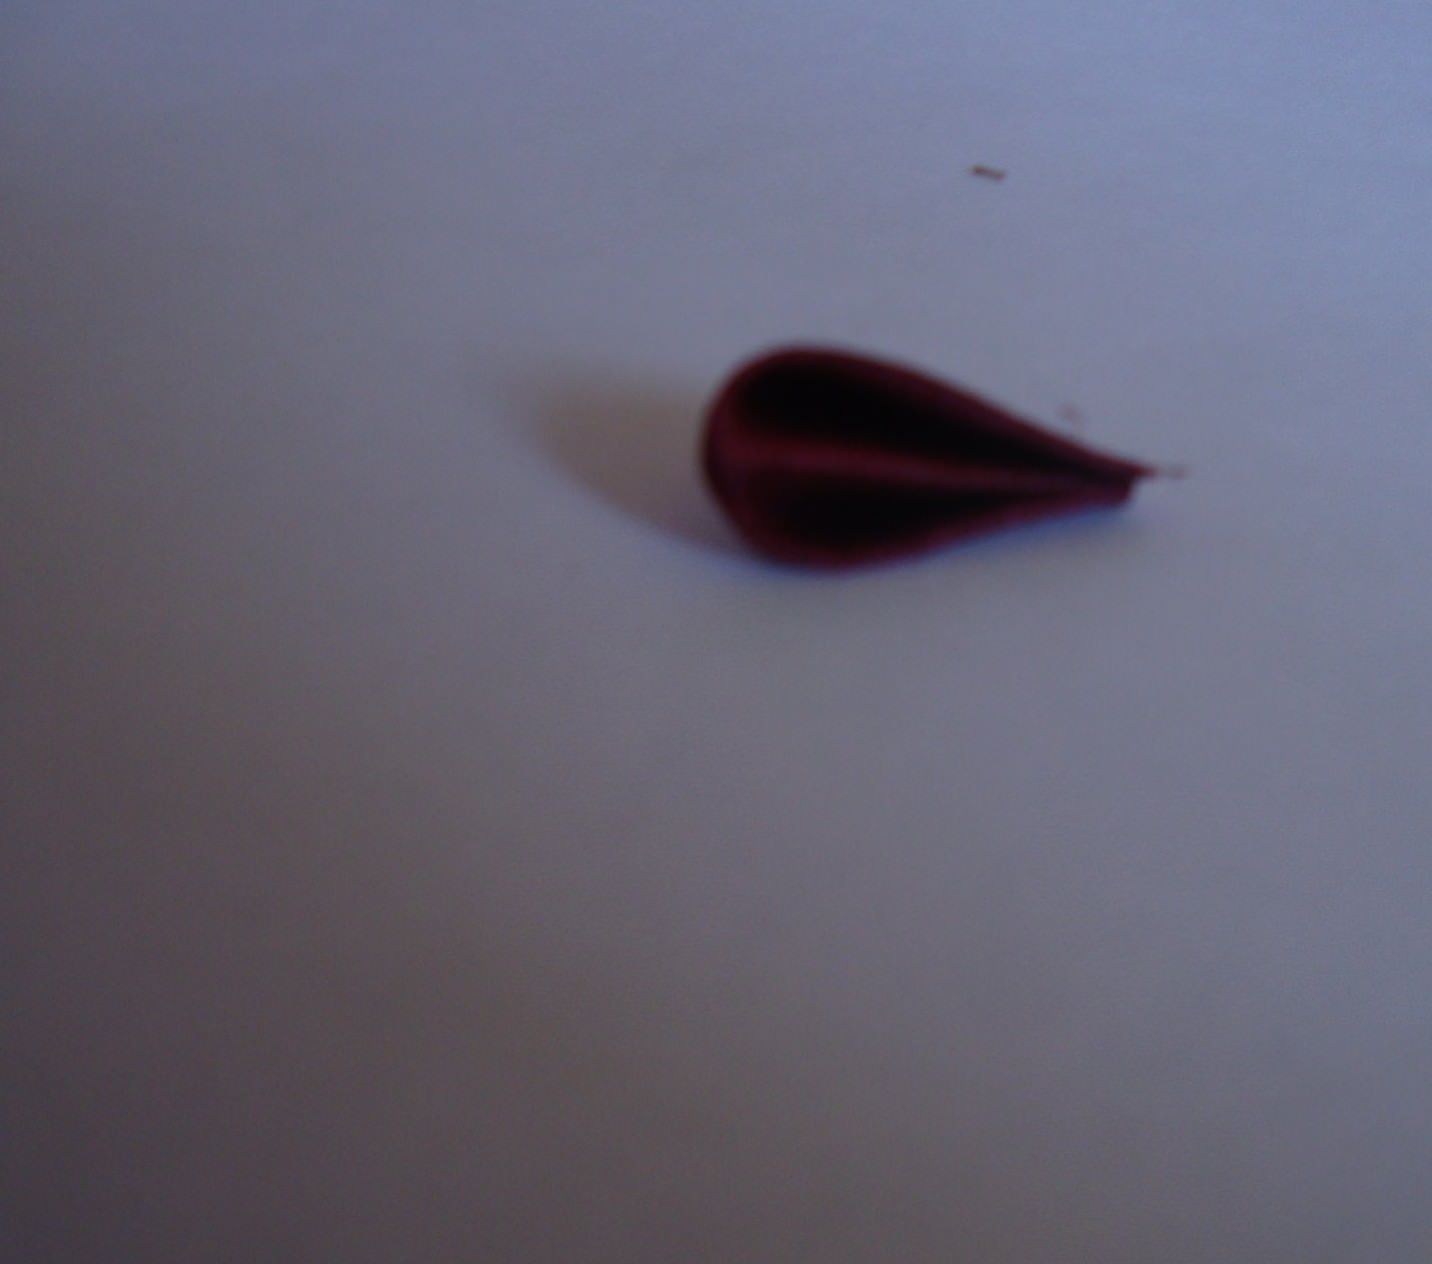
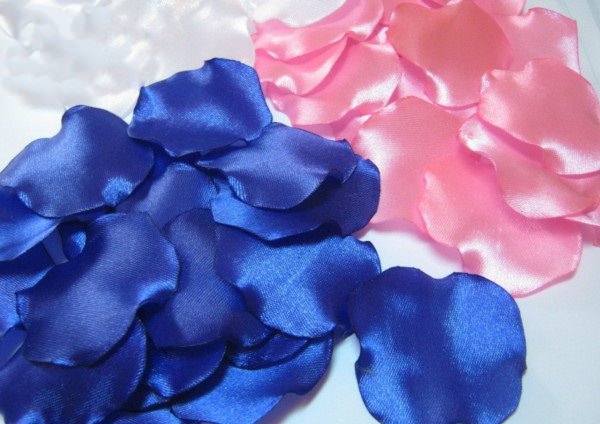
To create your own hands such a boutonnierePrepare square stretches of five by five centimeters. From these elements, cut out the details in the form of droplets. For one Kanzash flower, prepare eighteen such petals. These petals must be burned with a lighter or a candle and stretched.
One flower for a boutonniere for a weddingConsists of four levels, three of which consist of five petals of satin ribbons and one of three. Assembly of the first level begins with the stringing of the first lobe on the needle with the thread. Now you need to tighten the work and fix the thread. Next, another petal is sewn. Again we carry out the contraction and fixation. And so we repeat this action. Fix the petals in the lower tier with glue, so the flower will be well fixed inside the buttonhole.


We are looking at the intermediate stage. In the photo we see that our flower looks attractive enough. Nevertheless, we will continue the master class and create a few more levels, along the way, attaching them to the flower. The fourth level is assembled from three parts, as well as stamens and fixed on a flower. In the end, we get a flower in its shape resembling a cup. In total, for the buttonhole we make three flowers.

Having made all the necessary elements, we begin the assemblyBoutonniere. We take one flower, on the side we put a drop of glue and attach the second one. Try on the flowers before the gluing process to see how they will look better in the overall appearance of the boutonniere. Next, we fix the third flower score and connect it with the initial one. Place flowers on a flat surface with a face and glue them in a slightly suspended state. Try to do this quickly enough without letting the glue dry.


Further, in the center of the buttonhole we put a drop of glue andCotton soaked cavities among the flowers. The boutonniere is almost ready. At this stage, you can add leaves, beads, rhinestones or other decor. After that, prepare a round base, for example, from a plastic box, wrap it with a suitable shade material and glue the flowers. In the photo, we see what a gorgeous boutonniere using Kanzashi technology you can get.


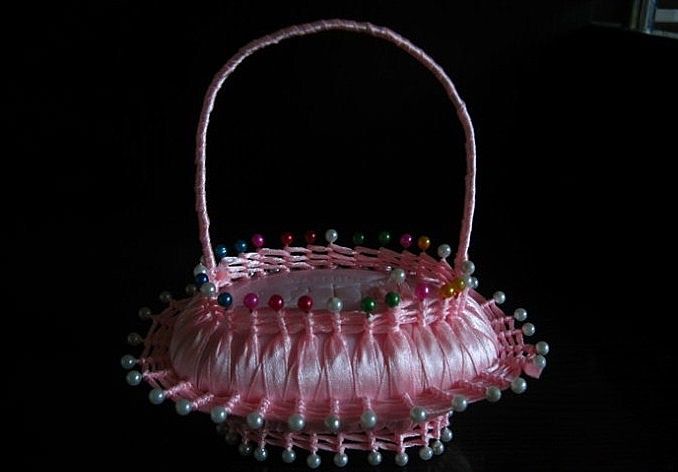
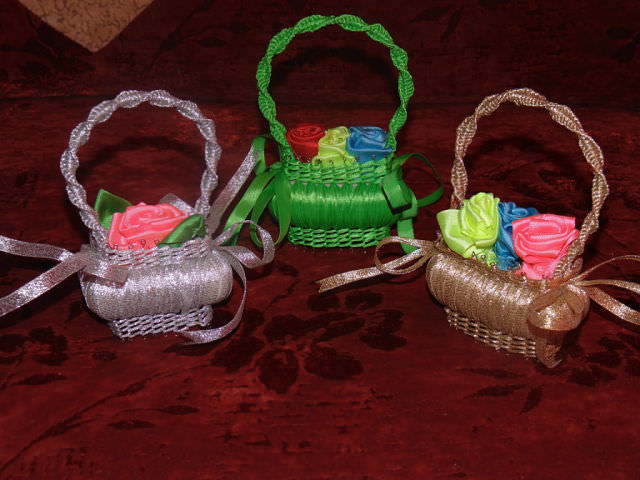
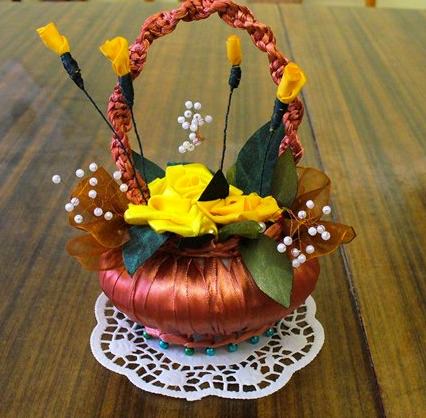
Basket of satin ribbons
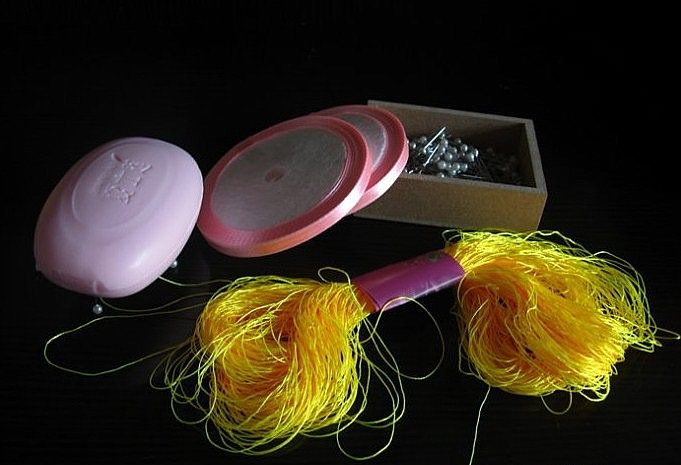
The last master class is dedicated to making a unique basket or wedding bag based on soap and satin ribbons.
At first glance, this process may seem relatively complicated to you, but in fact, you can repeat this process step-by-step with your own hands.
In the work you will find useful:
- Soap (oval or round shape);
- Tapes made of satin (0.5 centimeters wide);
- Special pins, which are also called English.
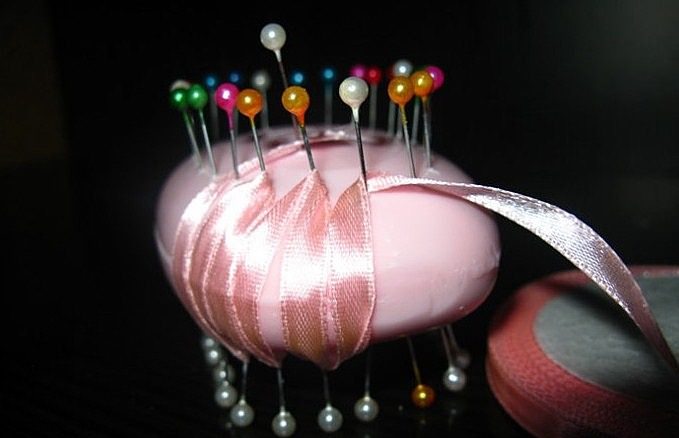
As you probably already guessed the basis forOur basket or bag for the wedding will serve as a soap around which the whole decor will be built. We take pins and start inserting them into our base, as in the photo. Stepping back 0.5 centimeters, you need to stick four pins on opposite sides. Among them, at an equal distance, we fix the remaining ones. Do not stick the pins too deep. The photo shows how the soap with pins should look in the intermediate stage. Please note that at the bottom, the deviation from the edge will be more than 0.5 cm.


It was the turn of the satin ribbons. For their fastening, one of the pins is pulled out and inserted back, simultaneously fixing the tape. To form a basket, carefully draw the tape from the bottom to the top among the pins. We make such a weaving in the form of eights. So we get the side of the basket. After that, we begin to make its edge. After finishing the weaving of the side, the tape is not cut off, but the braiding of the following pins continues.
You can wind in several layers,So the basket will have a more attractive look. Note that in the process of weaving, satin ribbons must cover pins to hide them. To give the basket a more natural look, place the pins at equal intervals in the center part at the sides. After this, continue to weave over these additional elements in the same way as described above. Pins can stick in not directly, but in waves.
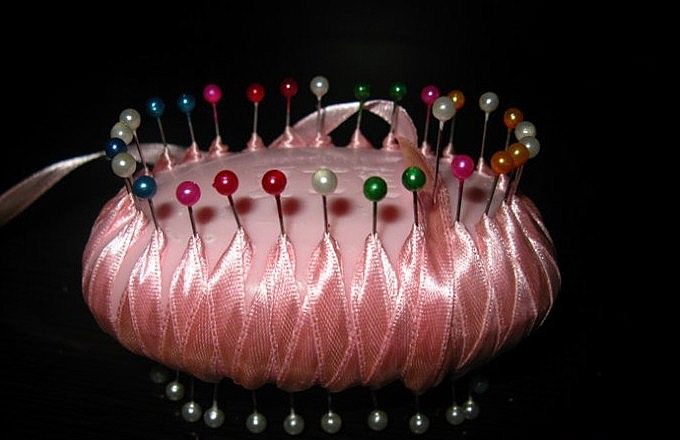


Having finished the process of braiding a basket or bag onWedding, you can make for her decoration. The handle is made of wire, which is wrapped around a tape. Next, it bends and fastens to the base. Decoration of the middle of the base occurs with the help of ribbons, bows or any other decorative details according to your desire.
Video: We make wedding accessories with ribbons
Comments
Related posts:
 Lariat original beaded jewelry with their hands (video)
 Embroidery ribbons for beginners master class rose (video)
 Embroidery ribbons for beginners video lessons and master class
 Embroidery with ribbons master class pansies video and photo
 The flowers of satin ribbons with their hands in master classes