Master class embroidery beaded collar will help yourself to make a beautiful accessory
Master class embroidery beaded collar -a great way to learn how to do beautiful things yourself, accessories with the help of an interesting technique of embroidering beads. From the materials of the article you will learn how to sew and embroider the original collar, which will be a good addition to any along, including the evening gown. Technique embroidery beads - a popular kind of needlework, which is interesting for many needlewomen. Embroider this way you can any image, picture, plot. The use of this technique of needlework is actual not only for creating beautiful paintings or icons. Such paintings, of course, will not leave anyone indifferent, but this is not the only type of product that can be made with a needle, thread and beads. If you make an effort, add a little imagination to them, you can easily make a beautiful accessory, focus on any clothes, made all in the same technique. Nothing complicated in this. A master class embroidery beaded collar will help you in the work. By this principle, in the future you can come up with your own model of this wardrobe element and use your own color scheme, one that fits your wardrobe and your personal preferences. Today we will create a collar of beads and beads, just like you see in the following photos. 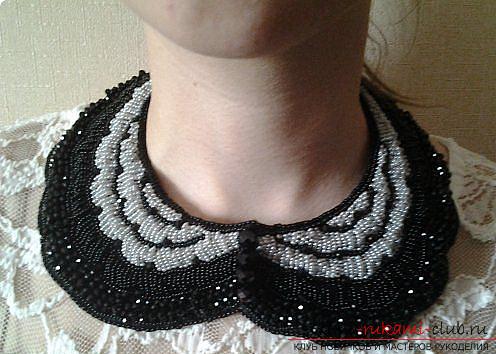 The first thing to do is create a drawing on paper, by which we will cut out our accessory.
 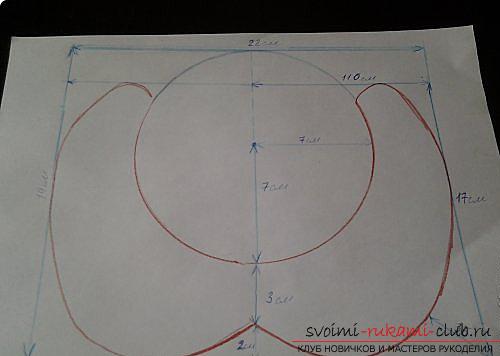 First, we cut out a pattern of paper, and then transfer it to the duplicate. It is necessary that the doublerine be three-layered. After that, cut out the part.
 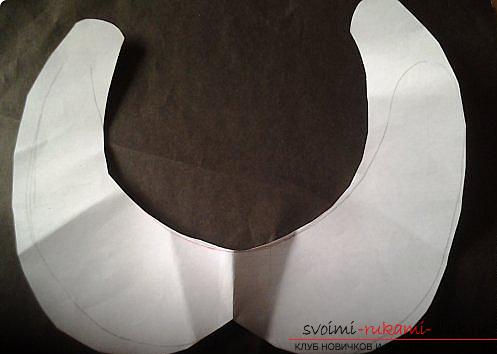 On a pattern from the fabric, we will apply the requireddrawing. You can draw with crayons, remnants and so on, the main thing is that the drawing should be clearly visible to the needlewoman. Then it will be easy and convenient to work on the product. In the photo, we see that one side of the collar is already embroidered. It remains to embroider the second. After the end of the work, the second part should be a mirror image of the first one. At the process of working on the second part of the product, we will learn how to create it ourselves, and at the same time learn how to embroider beads.
 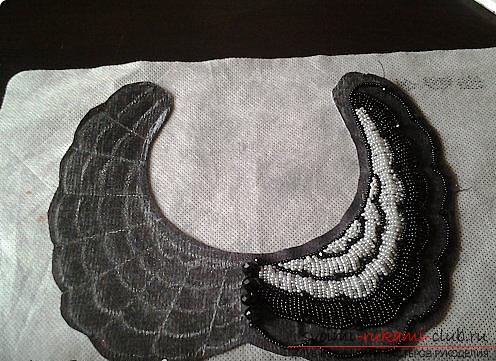 In order to get down to work, we need to take beads and beads:
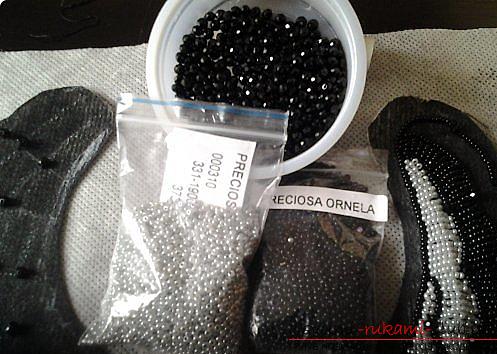
- light gray beads - thirty grams;
- black beads - forty grams;
- faceted beads of black color - five hundred pieces;
- black beads of large size - four pieces.
 First we need to sew black beads. How and where they should be located, you can see in the next photo.
 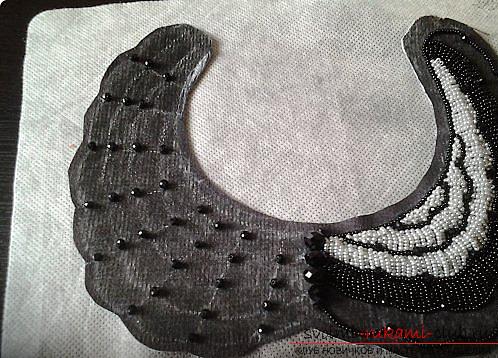 Black beads we need to sew according to the picture. For this we take two beads, string, and then sew.
 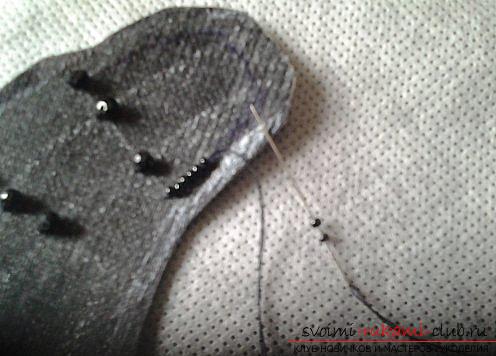 Next, you need to return to the previousbead, pass the needle through it and go through three. After that, we collect the following two beads and sew them in exactly the same way as the previous ones. We carry out the whole drawing in a similar way.
  As a result, we should form even beads of beads, such as we see in the photo.
 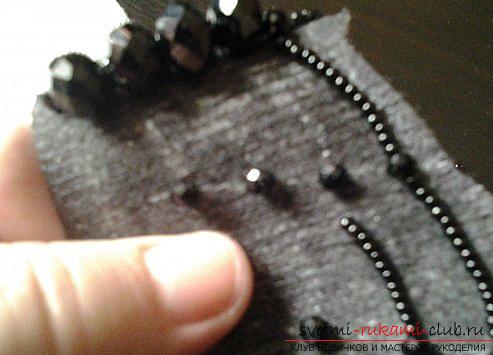 We need to fully embroider all the rows to get the next picture.
  Before we embark on embroidery of vertical, arcuate strips of beads, we will also add a few additional horizontal strips. How it should look, can be seen in the photo.
 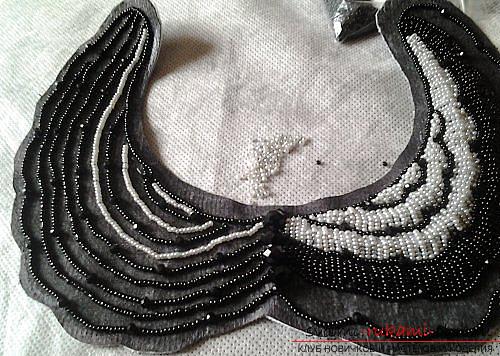 Now left to close embroidered earlier transverse(horizontal) rows. To do this, we need to type on a needle with a string of eight pieces of beads, and then throw them through one of the rows (optional). The result was an arc. So we will continue until we fill all the ranks. As a result, we will have three rows, embroidered with white beads, one row embroidered with black beads. The bottom row, the fifth, we will embroider with beads of black color. On the needle and thread we will put on four beads, and then we will throw them through a row, embroidered with beads.
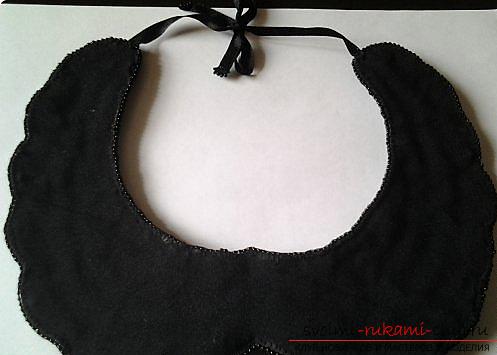
  Master class embroidery beaded collar came up tothe end. Embroidery can be considered complete. It remains to give a proper look to the product and the collar is ready to wear. To accomplish this goal, you need to carefully trim unnecessary at the edges, and then sew them. How to do it, choose you. As obtachki you can take a ribbon, suitable in color.
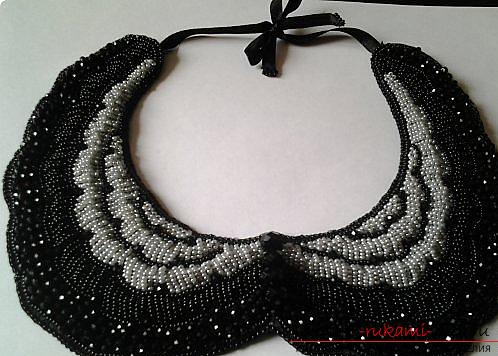
Comments
Related posts:
 Embroidery with beads paintings or icons, detailed master-class with diagrams, photo, for beginners
 A simple master class on sewing a dark mask for sleeping will help yourself to sew a useful thing
 Master-class on embroidery of a small picture with beads will help to master this technique of needlework
 Draw a beautiful flower yourself you will help step by step drawing the tulip in pencil
 Embroidery with beads, detailed master-class with diagrams, photo