Master-class on cross-stitching of delicate roses with a scheme and description.
The popularity of floral ornaments, patterns andmotifs among needlewomen all over the world is undeniable. Not less success is enjoyed also by bright "live" still-lifes with floral compositions, which are embroidered with a cross. In turn, of all colors, roses are one of the most favorite among needlewomen, embroidery schemes of which have been created very much. We offer to your attention several options for embroidering passionate buds and opened flowers with spikes. Believe me, you will have plenty to choose from. 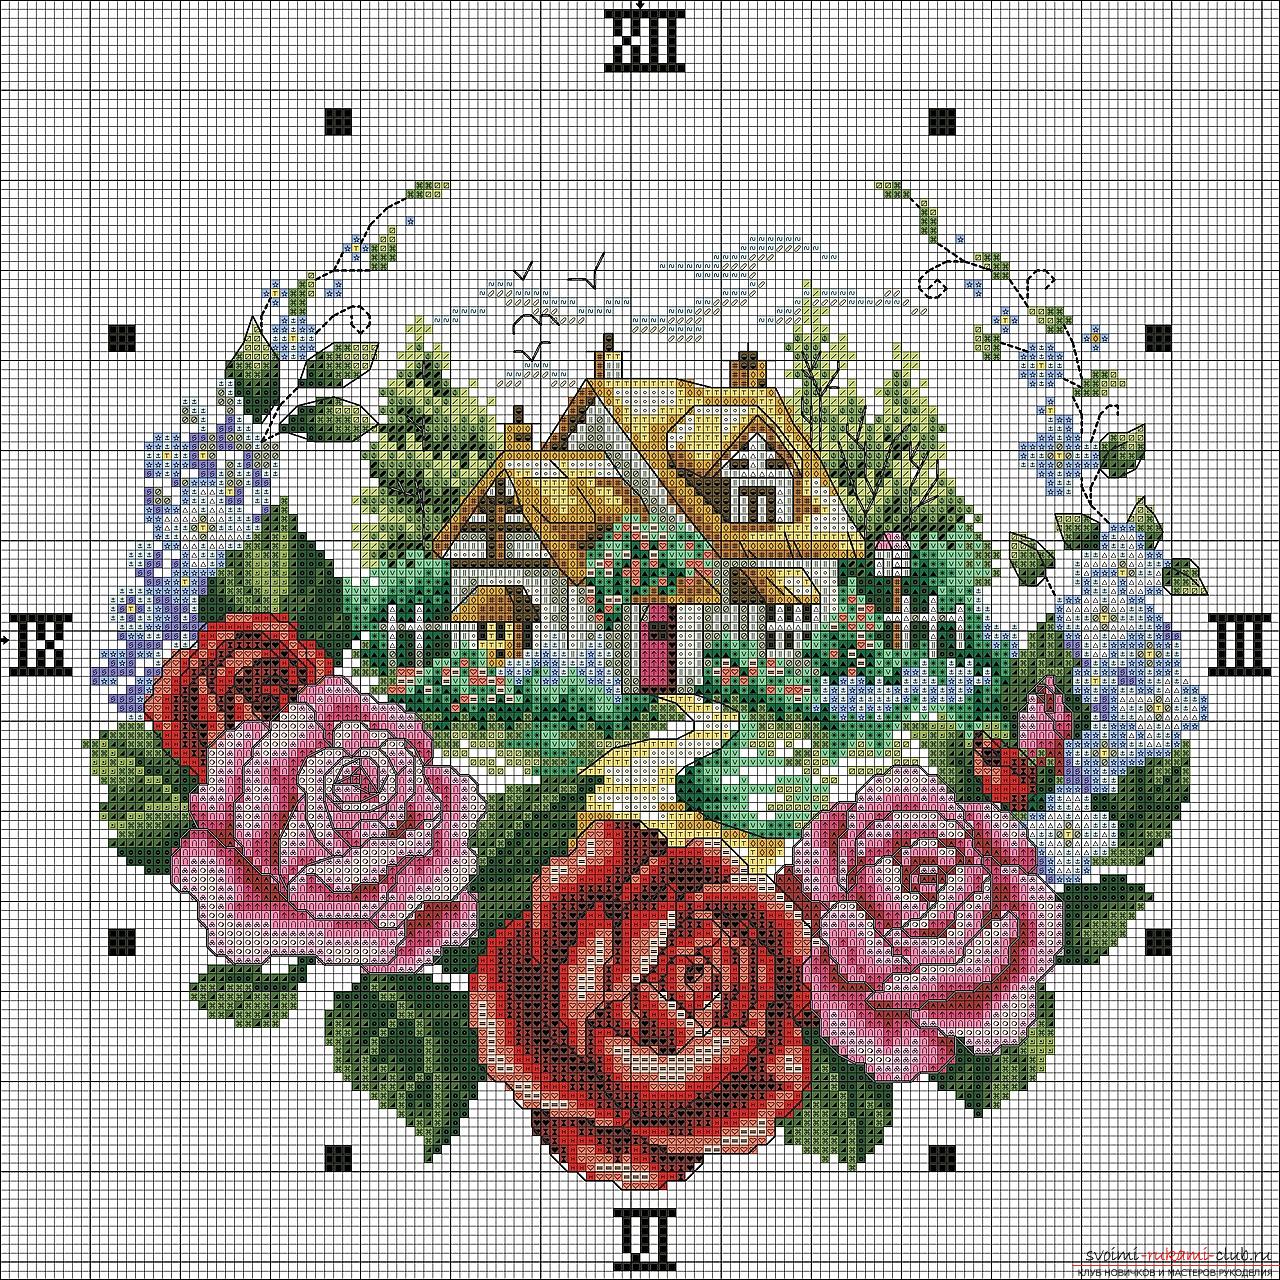 It is recommended that inexperienced embroiderers startwith small schemes. They are characterized by the image of one large bud or a few small ones. For this work, we advise you to take the canvas Aida 14 and the thread of the mulina.
 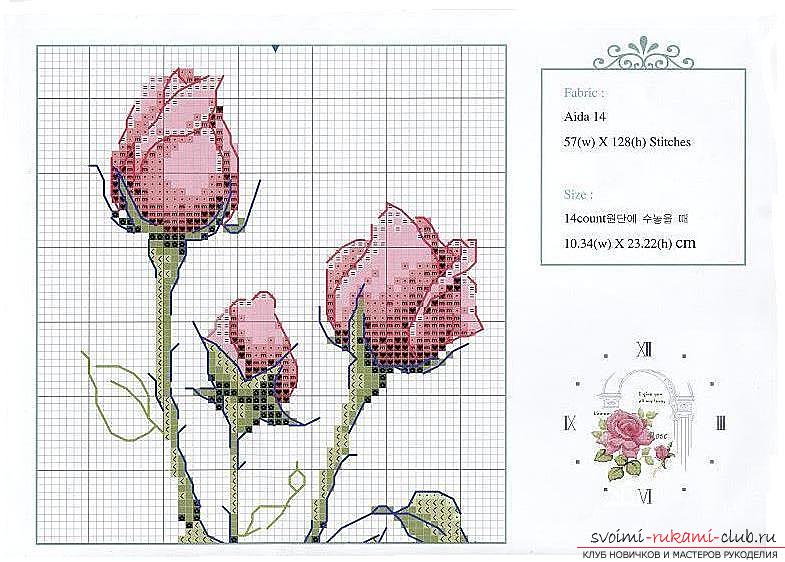 You will have to use the full cross technique. The image will be more successful if you are sewing with a thread folded in half.
  First we draw on the outline of the grid of necessarysizes, having departed from the edges three to four centimeters. After that, the material is cut off and stretched on the embroidery frame. Begin the embroidery from the upper left corner, moving consistently to the lower right corner. Gradually changing shades, you will do all the work.
 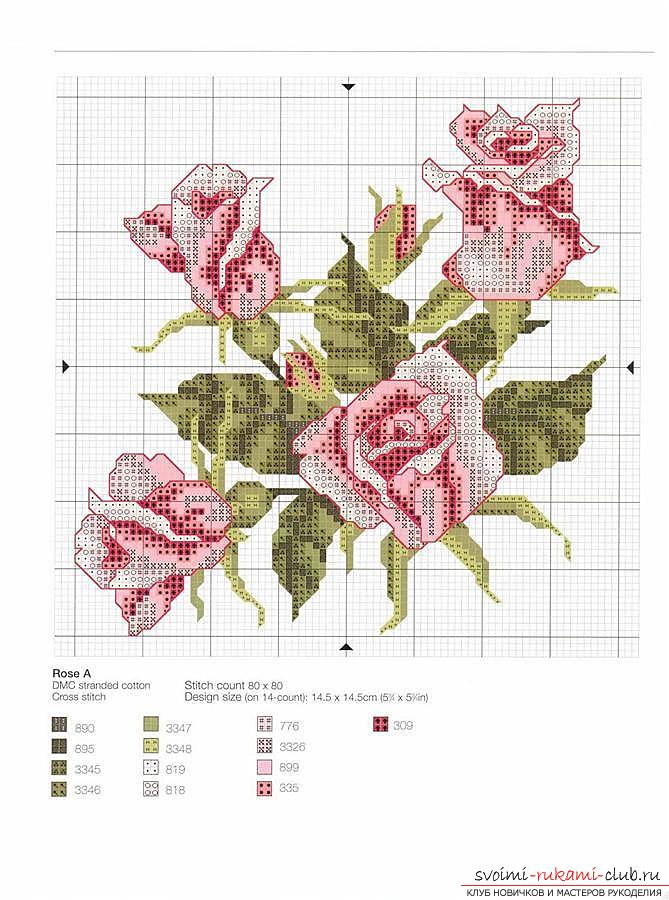 After completing the embroidery, it is desirable to wash the materialhands in a warm water. Dry using a towel to avoid deforming the fabric. Then it will need to be ironed a little with not too hot iron. In accordance with the size of the scheme, a piece of cardboard is cut out. We tighten the material with a strong thread, which also requires sewing the edges of the material from the underside of the product. Try to follow the smooth arrangement of the pattern and do not loosen the thread too much. The finished work is placed in a frame or left as it is, it all depends on your desire.
  For those who prefer small pictures witha bouquet of 3 roses, we offer one more option. It is recommended to perform such products on a light basis. This will give the brilliance and brightness to the flowers. If you do not want to use the canvas of white color, you can take as a basis a variety of pastel colors, which are different from the colors of the product.
 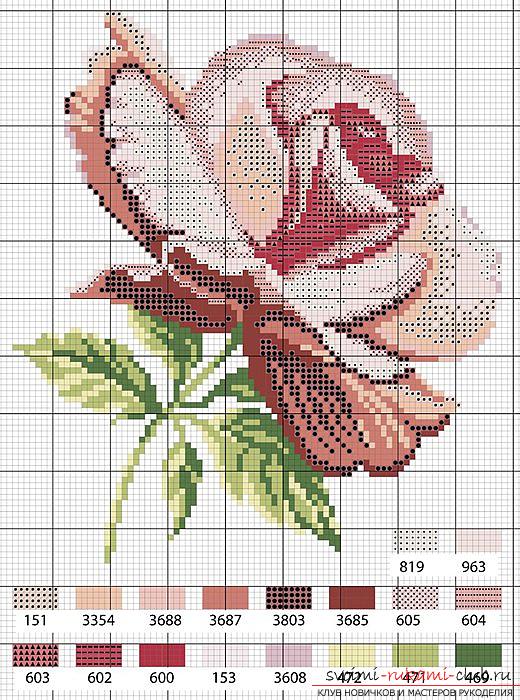 The first of the proposed schemes will require a dozenshades of thread when using a full cross and a "needle forward" seam. To embroider a full cross is followed by a double thread, and the contours are single. Of the thread recommended natural, for example, a mule.
 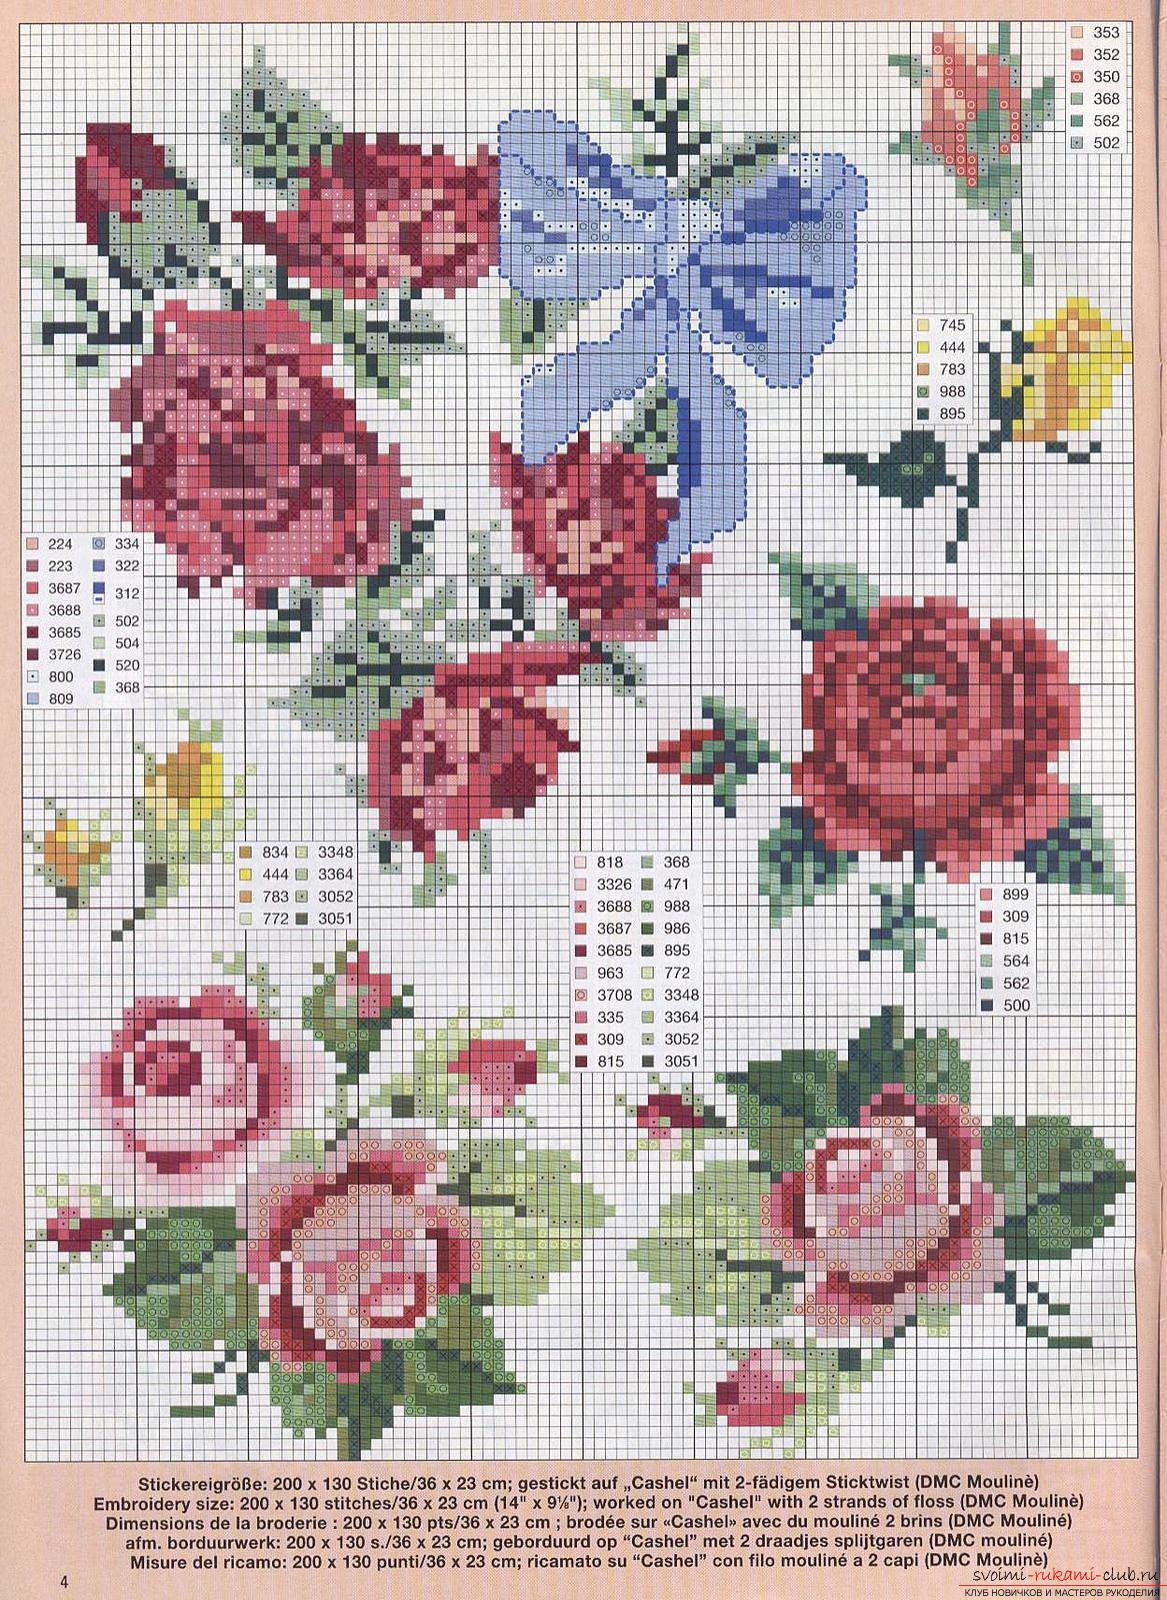 In the second scheme is used exclusivelyfull cross technique. This scheme is quite fair, it may seem to you more difficult than the first. The basis of the picture are 3 scarlet roses, each of which has its own special beauty. In addition, this scheme is characterized by the use of more shades. You are free to choose how to embroider this work: a single cloth or dividing into 3 sections, which corresponds to modern fashion in embroidery. We advise you to use the canvas Aida 14 white or blue. Working silk thread, you can achieve an additional volume of roses, and the matte thread will create an effect of modesty and non-glossiness.
  More ambitious and attractive schemes willembroider only experienced needlewomen. A lot of time and effort spent on a similar picture, justified by a lot of positive emotions to complete the work. As a rule, the finished product is stretched to a solid base and placed in a frame. No less interesting works are obtained by cross-stitching portraits with roses. Trying to get such beauty as soon as possible, you will be in a hurry to embroider it.
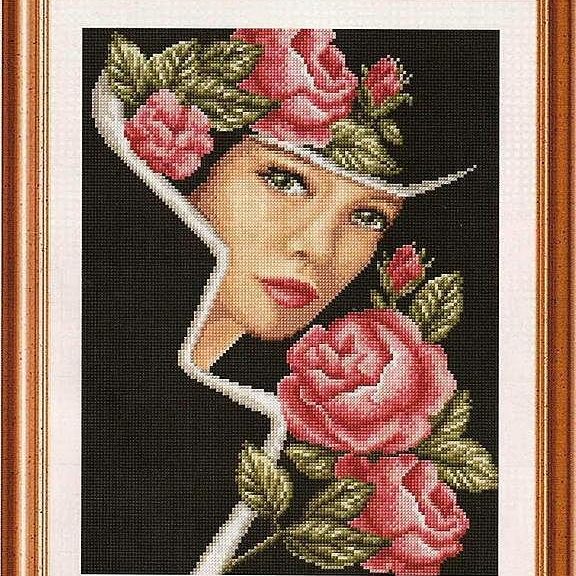
  For large-scale work, materials should be selectedHigh Quality. The basis should be selected considering the complexity of the pattern, for example, it can be canvas №16 and №14. The base number will determine the global perception of the finished product. To pick up threads better natural cotton, without reflux. Embroidery is performed in half-folded threads, the technique - a full cross. When using one thread to embroider the background, you can achieve a semi-transparency effect.
 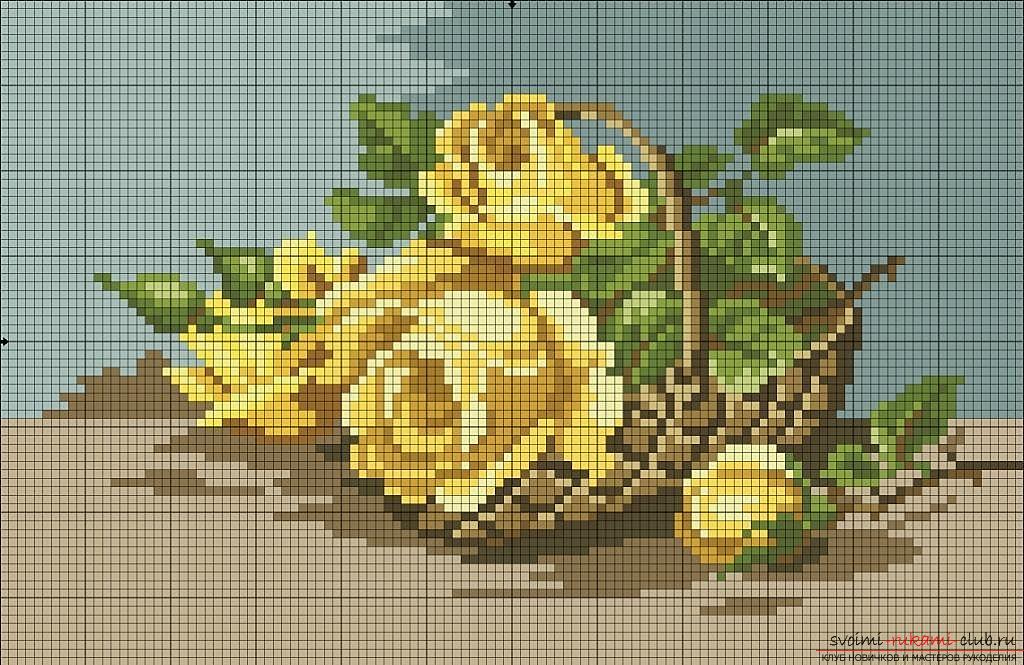 When working with portraits, there arefeatures, so, for example, you should first embroider a person and surrounding objects, and the background - at the very end. You need to start from the left side of the head, dropping down and continuing to embroider according to the scheme. The same is true for our picture - we start with the girl's head, then we pass to the shoulders and back, then to the bouquet and at the end to the colored skirt. Such step-by-step actions are performed by embroidery of similar portraits.
 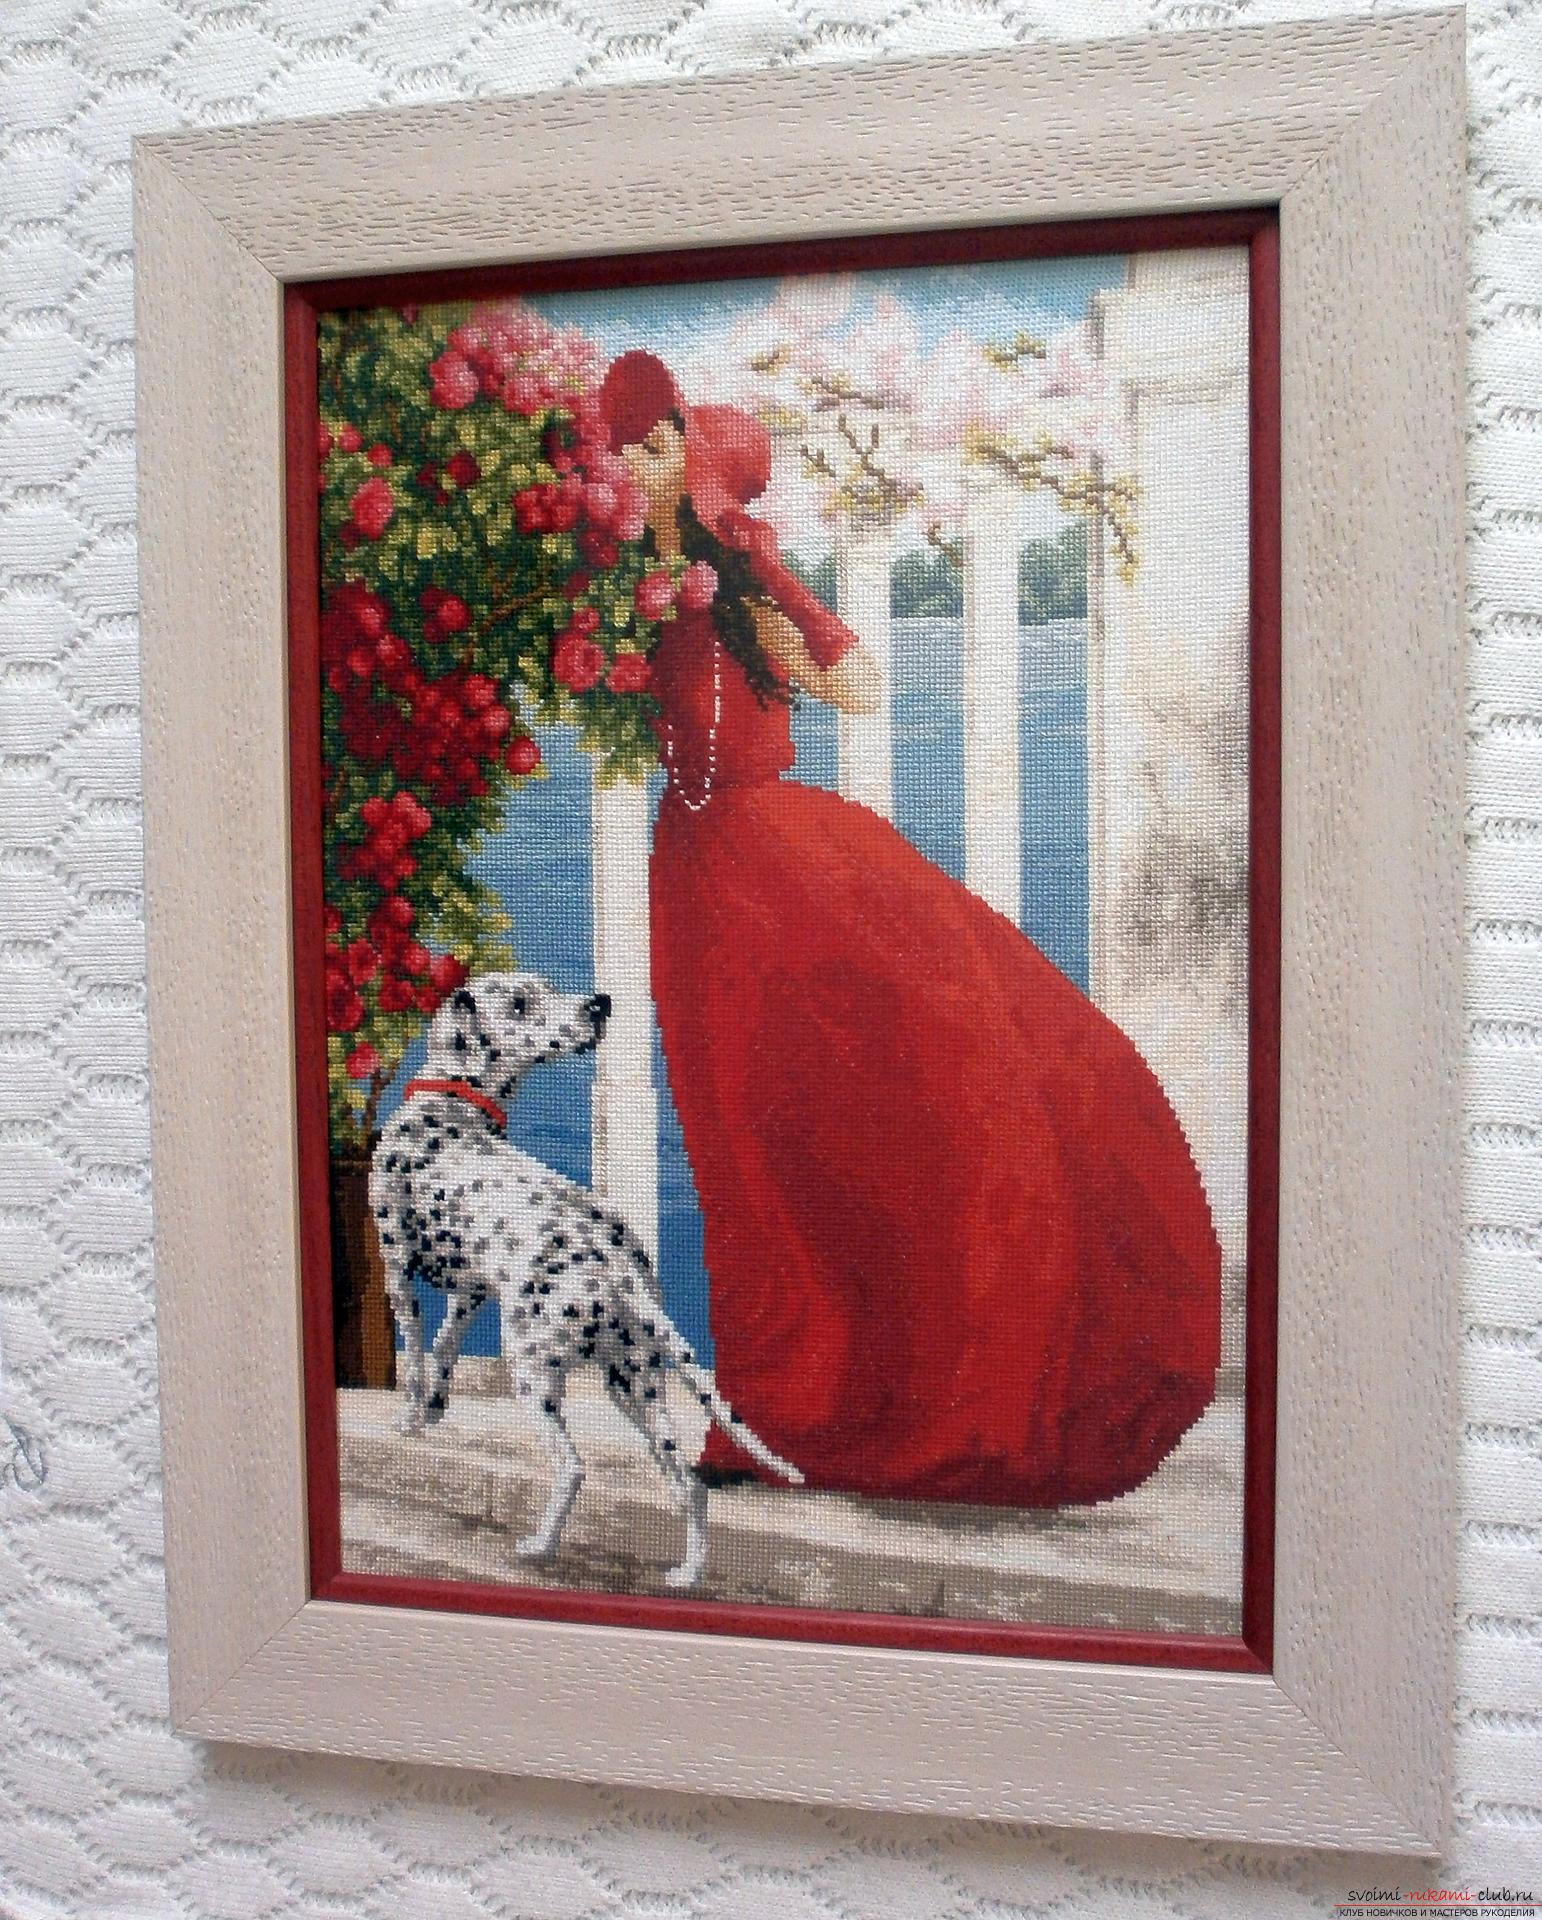 In case you decide to embroider a canvas withdifferent plans (similar to the one shown in the second illustration), then you need to start embroidering from the left corner from the top downward. You gradually embroider the individual parts of the picture and drop down to the very edge and again return to the edge at the top. With this mental separation of the picture into stripes, you will embroider the entire product.
  Another version of the portrait depicting a young girl and a bush of roses. Thanks to their amazing appearance, most needlewomen will want to acquire such a picture.
 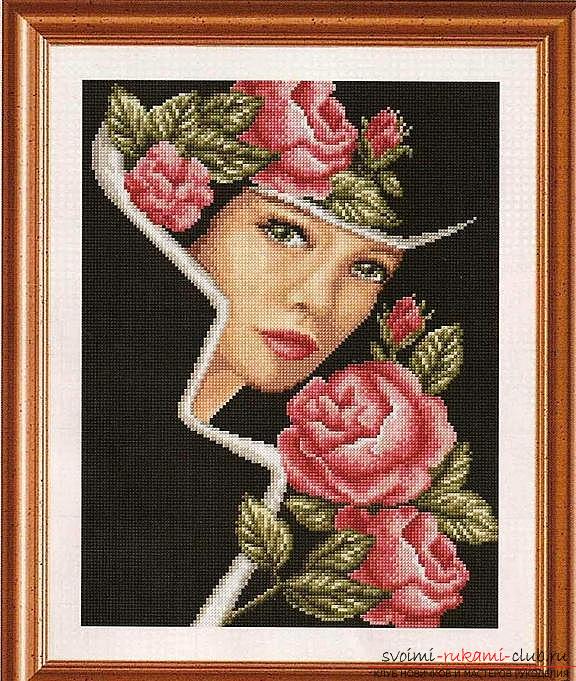 We hope that our master class aroused in you the desireembroider roses in various forms: from a postcard to a large-scale picture. Such a product, created by own hands, will not be a shame and present to someone from close friends or friends, because flowers are always a welcome gift.
Comments
Related posts:
 Master-class on cross-stitching the painting "The Middle Ages" with a free scheme and a photo for beginners.
 To embroider a pillow-needle with a cross with your own hands, a master class with a step-by-step description, a photo.
 Cross-stitch embroidery designs for cross-stitching, free cross-stitch patterns for embroideries, a master-class for embroidering pillows according to the scheme
 Cross-stitch embroidery designs for embroideries, cross-stitch embroidery on roses, free cross-stitch patterns for embroideries, a masterclass for embroidering pillows with roses according to the scheme
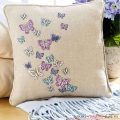 Cross-stitch embroidery designs for embroideries, butterfly embroidery, free cross-stitch patterns for embroideries, a master-class for embroidering pillows according to the scheme