
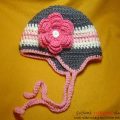
Master class on crochet of children's hats for girls Strawberry summer with descriptions of steps and photos
Knitting is one of the unique types of needlework. Knitting appeared many years ago, but this kind of needlework did not stop at certain canons, but constantly developed and improved. Today knitting is not just a kind of needlework, but a unique kind of human creativity. The 21st century - the age of innovative technologies has not prevented needlewomen from doing their favorite things and improving it. You can knit on different kinds of knitting needles and crochet. I propose to tie the child's cap for the girl with a crochet, for this we need the following materials: 1. Hook No. 3 2. White yarn (acrylic). 3. Red yarn (acrylic). First you need a hook and a red acrylic yarn. So, you need to make a chain of 6 air loops and connect them to a circle. We tie the ring in a circle with twelve air loops - the 2nd row is ready. 3rd row - from each eyelet we pull three loops, i.e. in the third row consists of 36 loops. 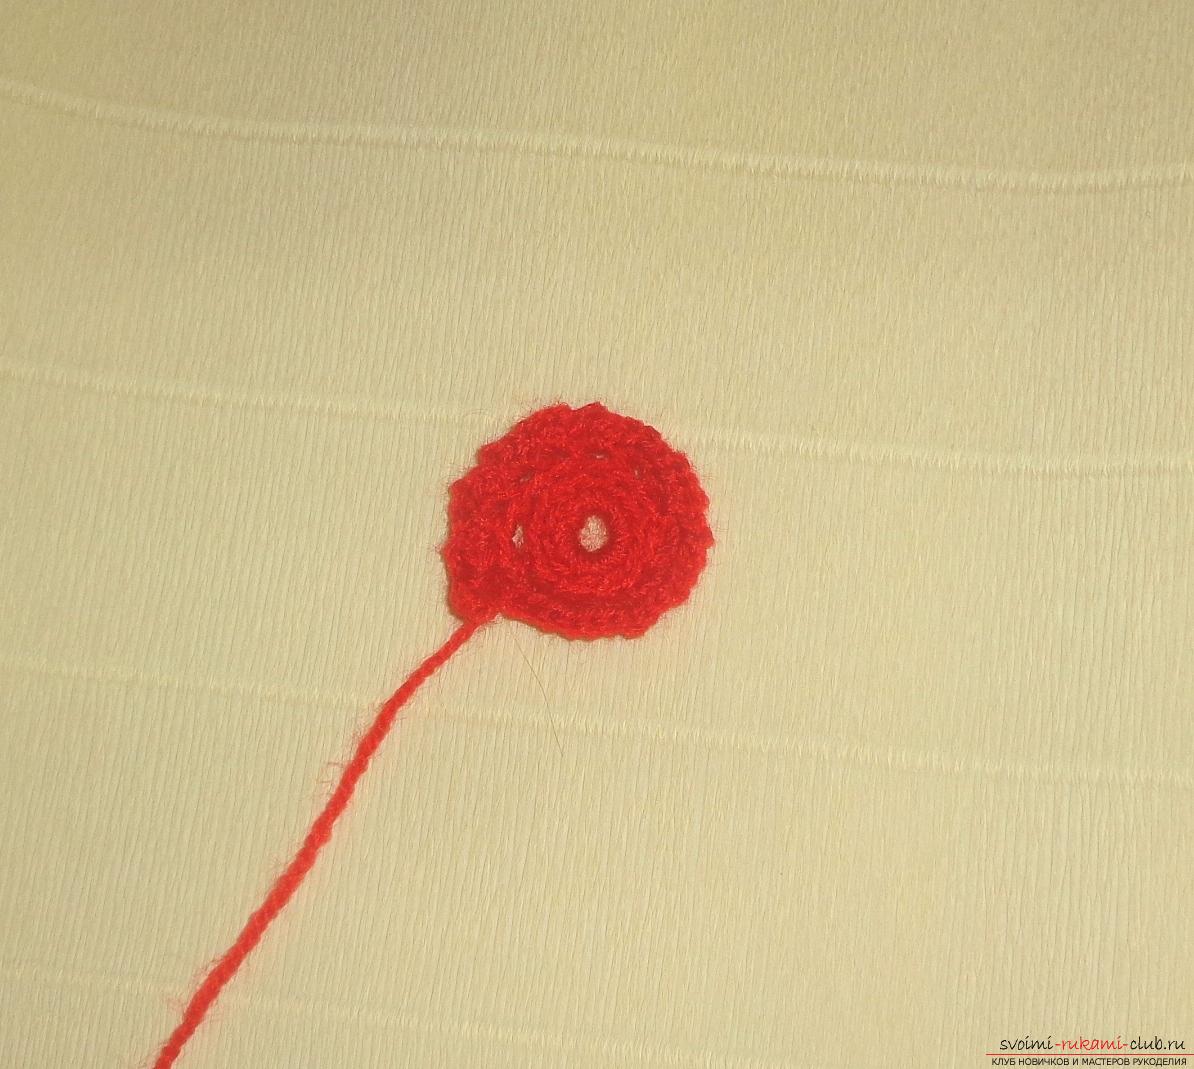 We pass to knitting of the 4th row, which is tied with 36 air loops. The 5th row is tied with bunches, in each 12 stitches we add one new column, in total 39 stakes.
  For the 6th row you need white acrylic yarn. We impose columns, in column 39 we add one new, it should total 40 columns.
  The 7th row is knitted with yarn of red color, with columns. 40 columns and add one column, only 41 bars in the seventh row.
  The 8th row - using white yarn, we bind them with bars, all of them are obtained 42.
 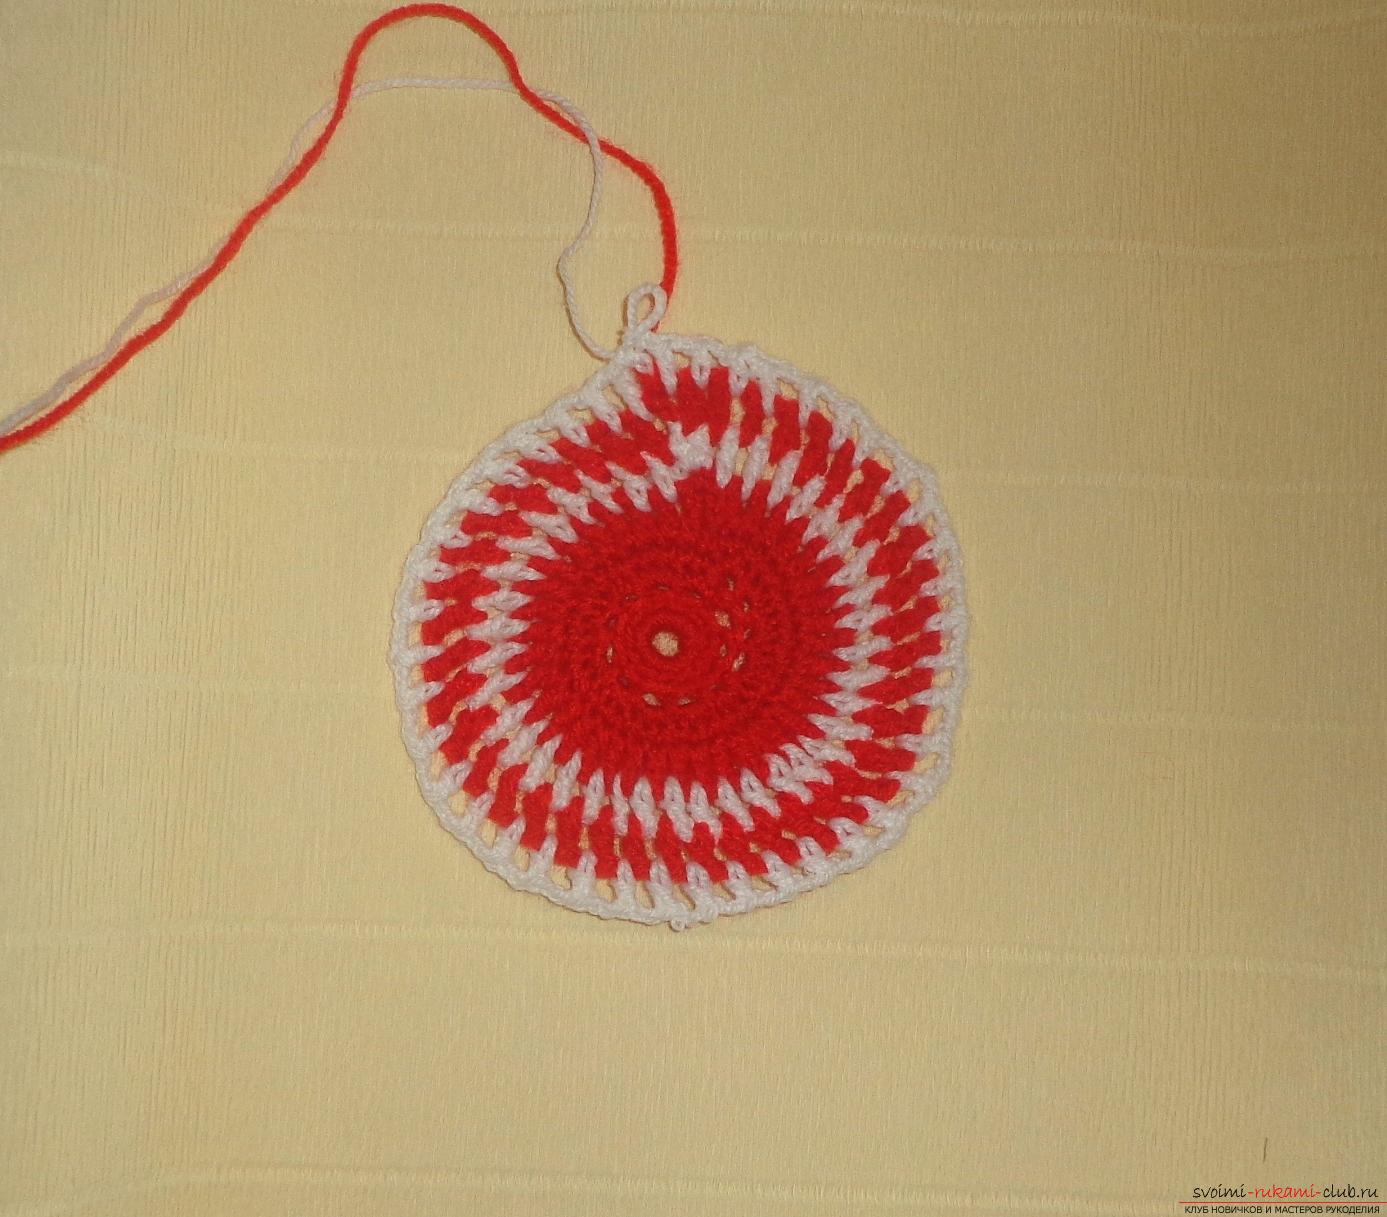 We also band the 9th row with white yarn, fromEach column pulls two air loops. In total in the tenth row there should be 84 loops. Next, we knit from 10 to 17 a row of yarns only red. The 10th row should be tied with bars and without additions. 11-th row - we begin knitting a pattern, tie one bar and one air loop, so do 4 times. Then dial three bars without air loops, then tie four air loops. Skip 1 bar and tie 3 posts in a row, then the air loop and the column - repeat 4 times. To knit three stiles without air loops and again we knit a pattern, i.e. tie one bar and one air loop, so do 4 times. We knit until the end of the series.
 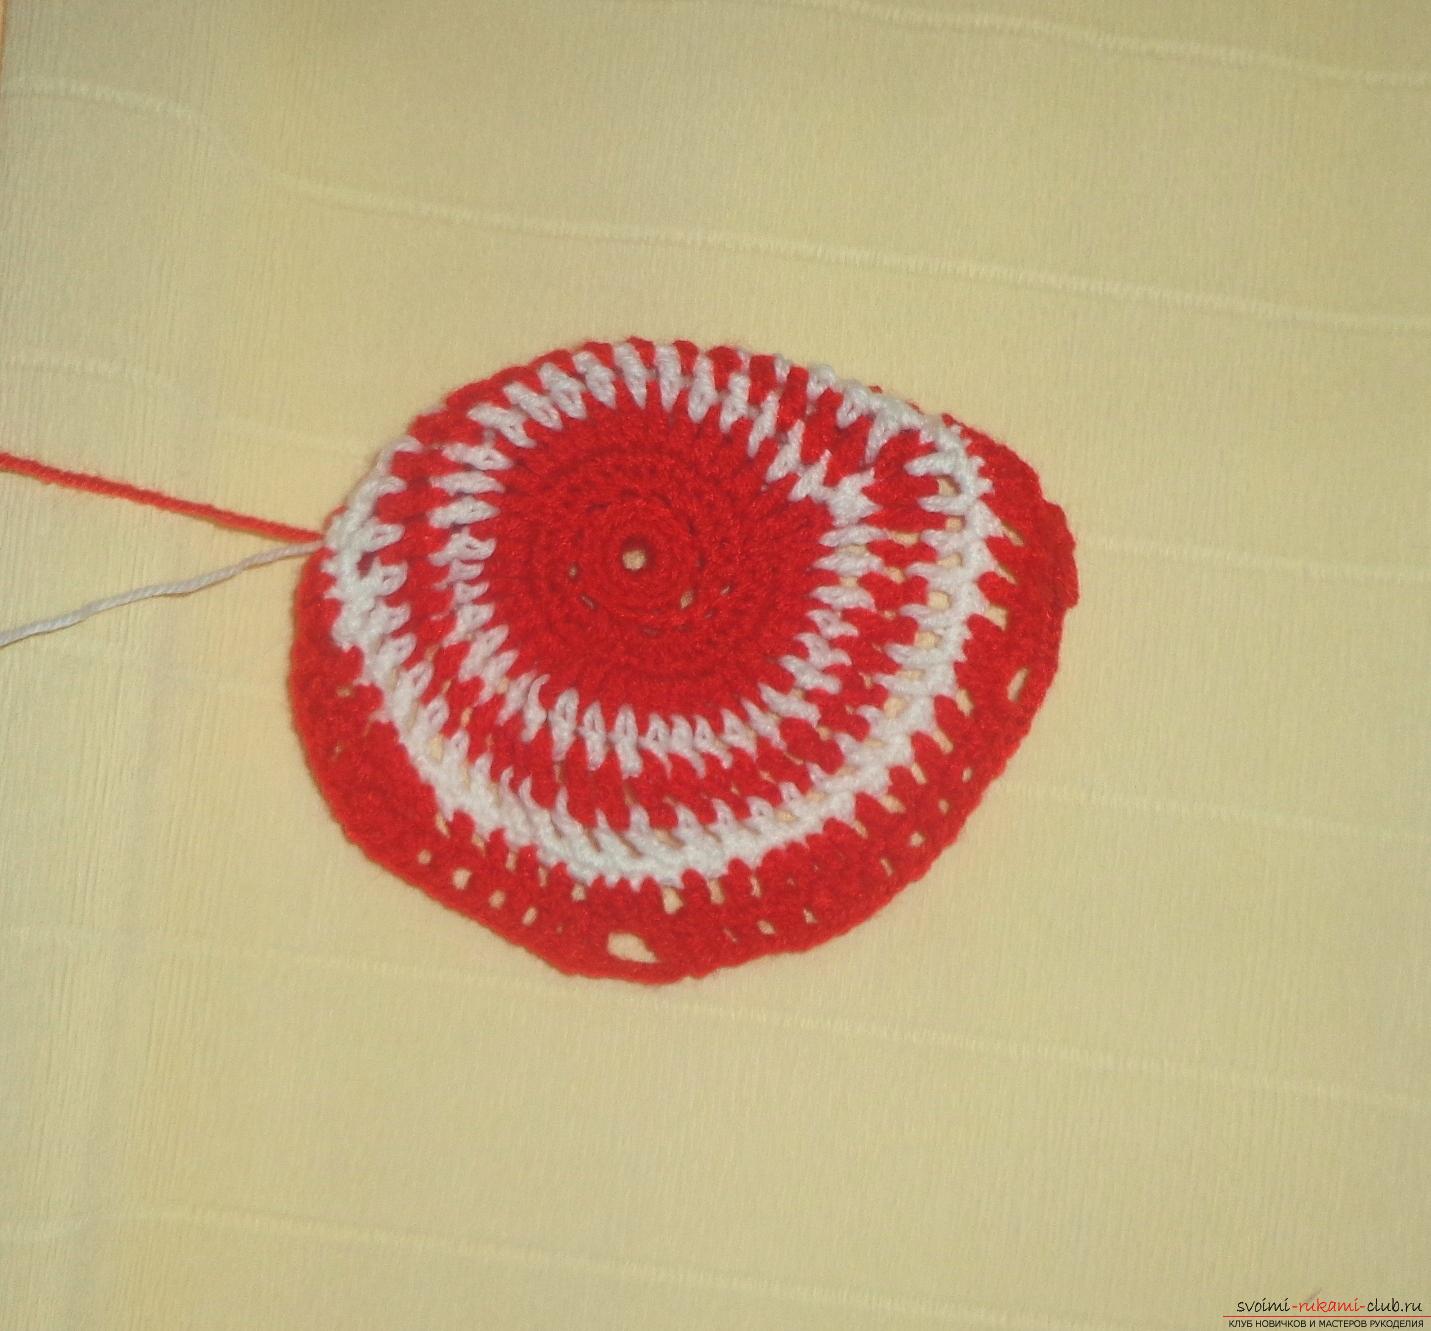 In the 12th row, one bar and onean air loop, so do 3 times, then tie three bars without air loops, make three air loops, connect the 4th loop with the pattern of the 11th row, tie three air loops, then pass one bar and tie three bars in a row. Then tie one bar and one air loop, so 3 times, then 3 posts without air loops. Spray the 12th row until completion. Let's start knitting the 13th row. To knead a column, then to make an air loop, again a column, an air loop and 3 columns without air loops. Now tie 3 air loops, then connect 3 air loops to the previous row, thereby forming a pattern in the form of an inverted pyramid. Next, tie 3 air loops and 3 bars without air loops. Next, tie the air loop and column, again the air loop and 3 posts without air loops. Until the end we are tying the 13th row. The 14th row is the main row in pattern formation. So, tie a bar, air loop and 3 bars without air loops, make a chain of 2 air loops, then connect the next 5 loops to the pattern, then again make 2 air loops and 3 bars without air loops, then the air loop, the column and air loop, 3 posts without air loops. Until the end of tying the 14th row. It is very important that each row in which the pattern is formed ends with three columns without tying the air loops. 15th row - we continue forming the pattern: to fasten a column, an air loop, a column, an air loop and three bars without air loops. Then tie 3 air loops and connect them to the last row, thereby forming a pattern in the form of an inverted pyramid. Next, tie three air loops, three bars without air loops, then tie an air loop, a column, an air loop, three posts without air loops. We finish the series until the end. 16th row - to tie one bar and one air loop, so do 3 times, then 3 posts without air loops. Next, dial 3 air loops, connect the 4th loop to the pattern of the 15th row, tie 3 air loops, skip one bar and tie 3 posts in a row. To knit one post and one air loop, so do 3 times, then 3 posts without air loops. In the 17th row, fasten the column and air loop, the column and so on until the end of the series. The final 18th row is simply knitted with white acrylic yarn.
 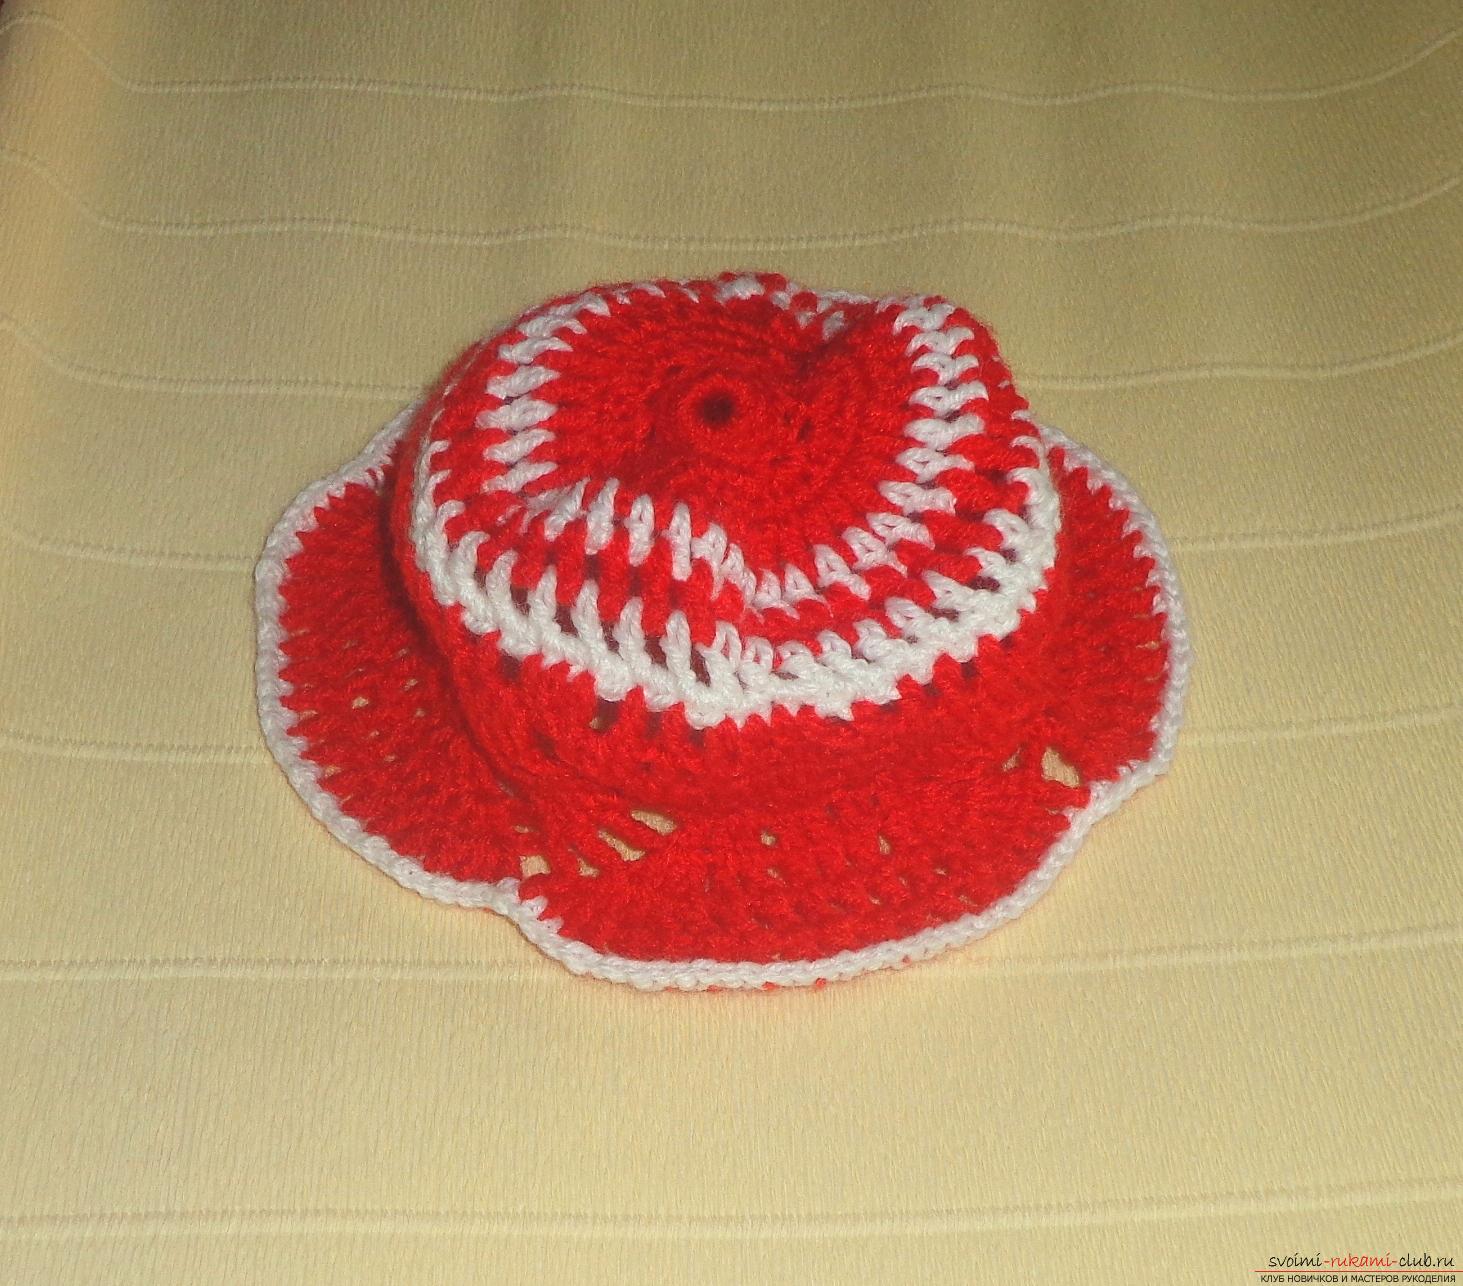 Pryazat 'one more row from the air loops and from each column it is necessary to pull two loops. Thus the edge of the cap turns out to be very bright and catchy.
  A cap for the girl "Strawberry summer" is veryeasy and pleasant for the baby's skin. It is suitable for spring and summer season. Such a hat will appeal to every little fashionista and will happily take a place in her wardrobe.
Comments
Related posts:
 Master-class with a diagram, photo and description will teach knitting crochet for a girl with a crochet
 A master class on knitting a baby cap for newcomers. Photo, description and diagram of knitting
 Master class on knitting hats with a bow for a girl, a detailed lesson with a photo and description
 Master-class on crocheting with photo and description will teach knitting of children's pinets
 Master-class on crochet of children's dresses, handbags and hats according to the schemes with description and photo for free