Master-class on making by own hands a New Year's fur-tree toy in the technique of reverse decoupage
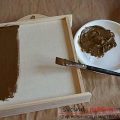
Plastic Christmas toys-containersare universal in purpose. They can put small presents, make a composition inside toys or decoupage both direct and reverse. Here on these toys in the form of a tree and asterisks, I decided to do a reverse decoupage. And, in order to make it quick and effective, I decided to do a decoupage parallel to both at once. For this, I prepared:
- Alcohol wipes
- PVA glue
- Brushes
- Colors acrylic (white and gold)
- Foam Sponge with Clip
- Paper napkins
- Pencil simple
- Acrylic lacquer
With reverse decoupage, as with direct, all thosesame operation, only the order of their execution is different. Toys are detachable, consist of two parts. To begin with, degreased the inside of the halves of both toys. 
 Fragments of napkins were selected according to the size of the toy and added a few millimeters to the height of the side walls. I penciled the right size, then cut it out.
  She put a light golden haze on the inside of the halves of the toys. Has dried up.
 While the halves dried up, prepared tissue fragments, removed the lower layers of the napkin.
  Put the napkins face down on the inside of the toys.
 Dryed for a long time, remembering that plastic does not absorb moisture. The hair dryer did not use to prevent the toys from deforming from the temperature. I covered all the halves of the toys with varnish.
  After the varnish has thoroughly dried, has covered with white paint all parts of toys. Has dried up.
 Assembled, added a braid.
  You can decorate such toys with a Christmas tree, you can give, after putting the notes with wishes inside.
Comments
Related posts:
 Decoupage of housekeeper with their own hands - master class and photos for decoupage
 Decoupage of a New Year's toy with their own hands - a master class for beginners and photo-shooting with their own hands
 Master-class with a photo will teach the making of a self-made toy - dolls with their own hands
 Master class on making a gift bottle with your own hands in the technique of decoupage, suitable for beginners
Master-class on making own hands the housekeeper in the technique of decoupage, which can become a practical New Year's gift.
Master class on making a gift bottle with your own hands in the technique of decoupage, suitable for beginners
Master-class on making own hands the housekeeper in the technique of decoupage, which can become a practical New Year's gift.