Master class Kanzashi butterfly, dragonfly and ladybug
Content
- Butterfly Kanzashi
- Video: We make butterfly Kanzashi
- Dragonfly
- Video: Hairpin in the form of a dragonfly
- ladybug
- Video: Ladybird Kanzashi with her own hands
Kansas technique is often used as aCreating original jewelry for the hair. Basically, all kinds of flowers are made from satin ribbons. Today we will talk about making by own hands wonderful butterflies, ladybirds and dragonflies. There are many techniques on the basis of which it is possible to make such accessories. In Kanzas, the principle of drawing products from pieces of ribbons is taken as a basis. Following the step-by-step MK, as well as photo and video examples, you can easily repeat such skilled craftsmen.

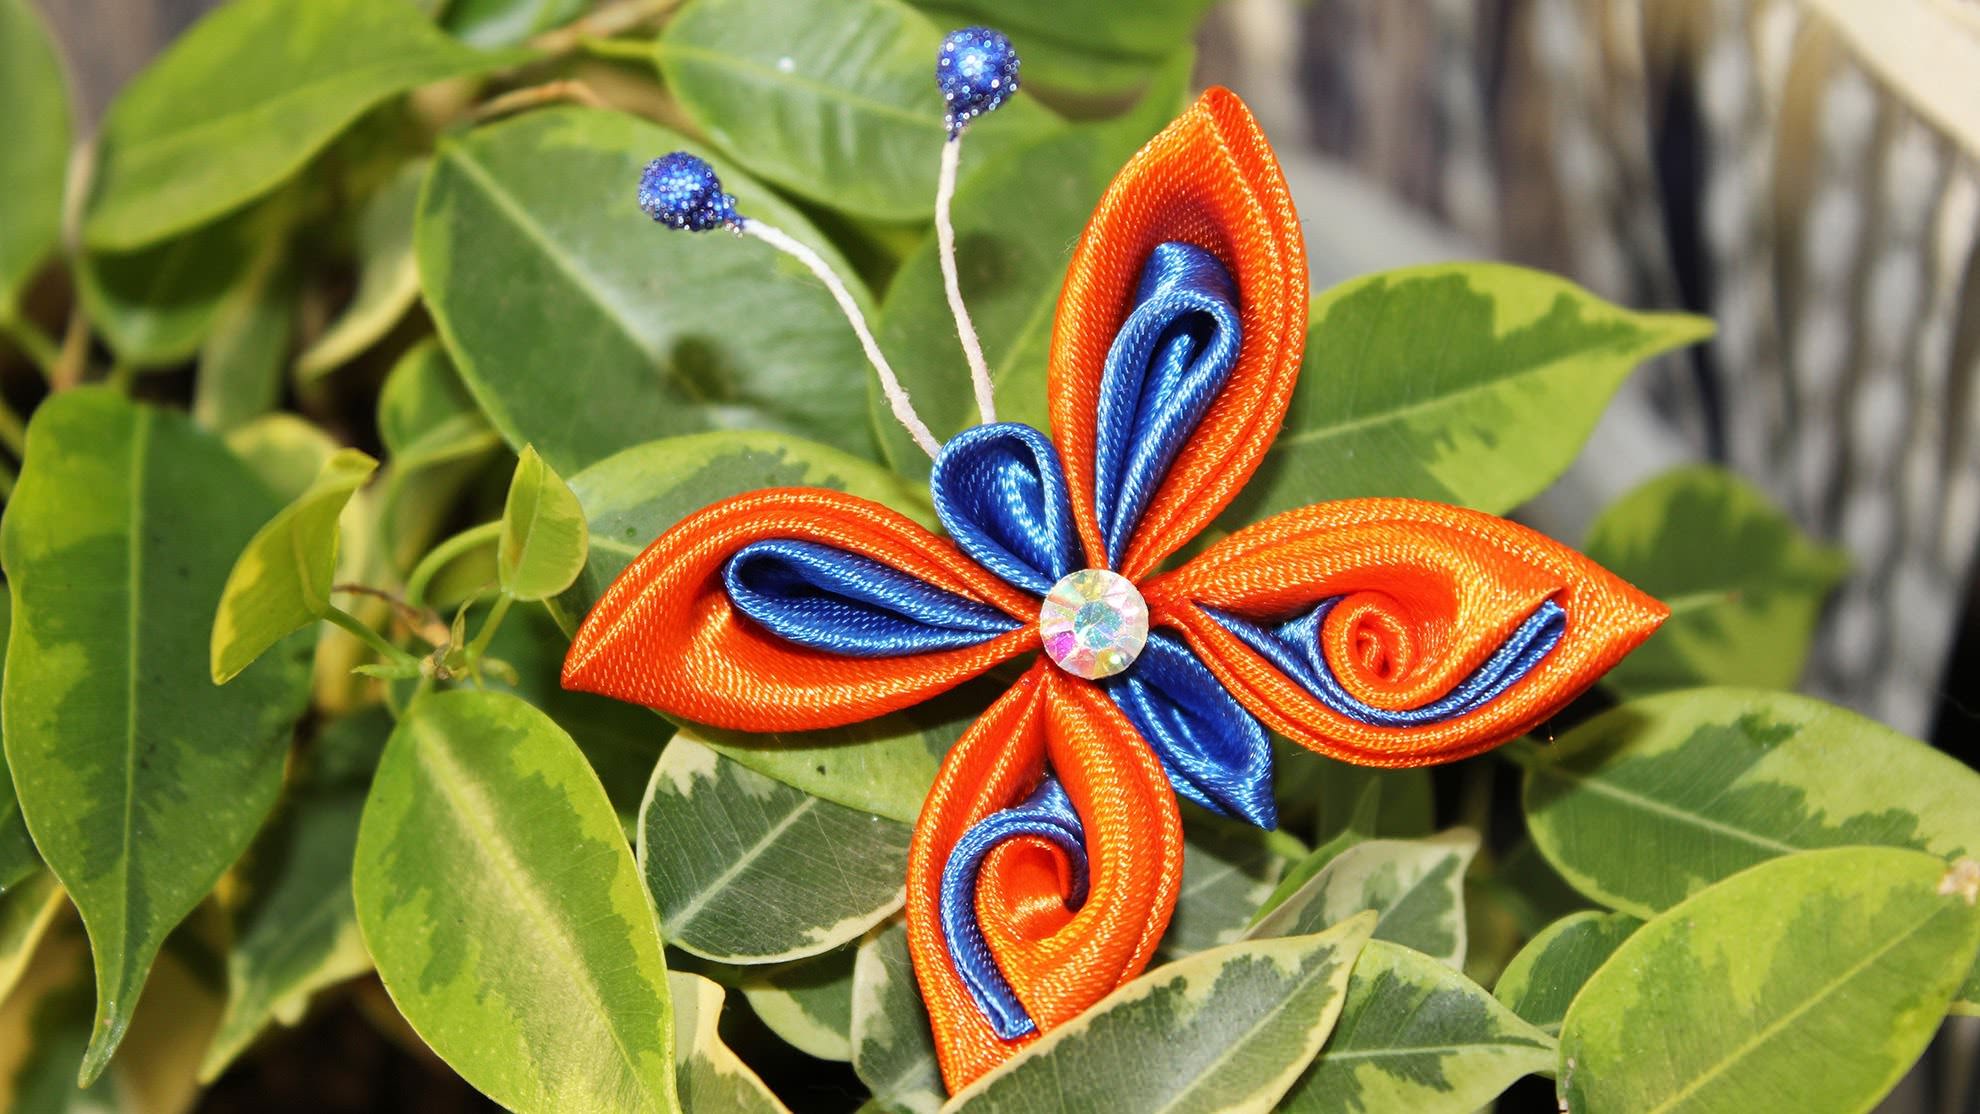
Butterfly Kanzashi
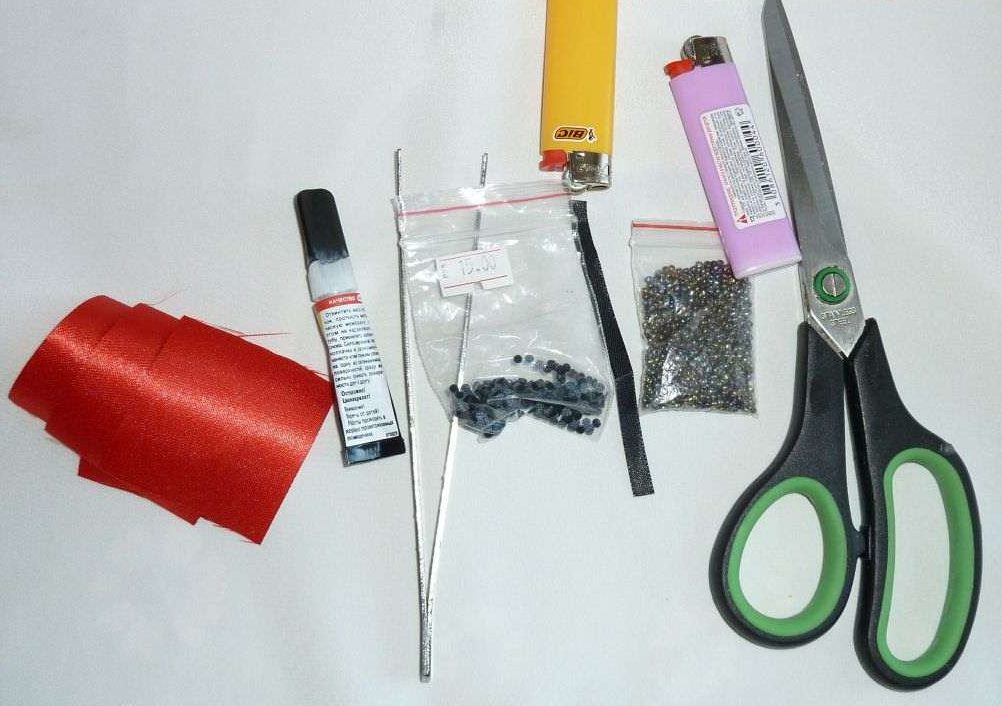
Before starting a master class (MK) on creating a butterfly kanzash, prepare the following materials and tools for work:

For the upper wings: satin ribbons 10 centimeters long (five centimeters wide) - 5X5 cm and 2.5X2.5 cm;- For the lower wings: 5x5 cm tapes - several shades and 2.5X2.5 cm;
- For the tail of a butterfly: tape 2,5X2, 5 cm;
- Needle;
- a thread;
- Rhinestones;
- beads;
- beads;
- Pins;
- Rondeli;
- A lighter;
- tweezers;
- lace;
- glue.
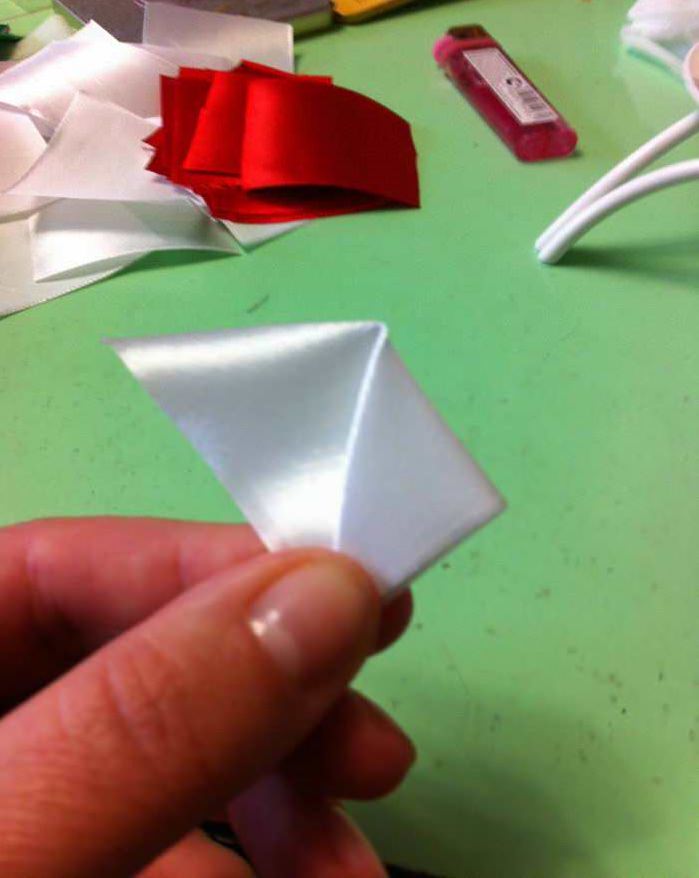
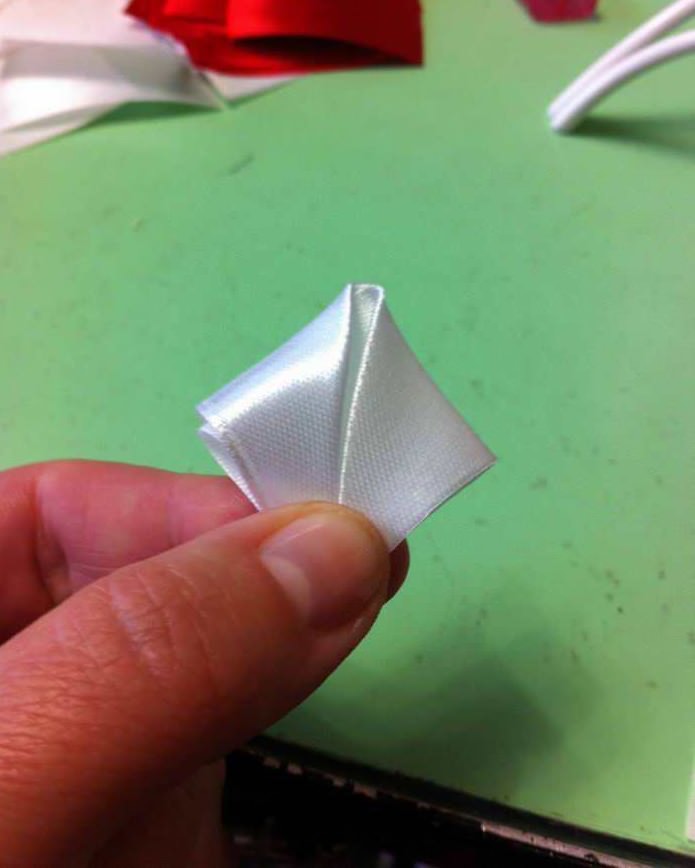
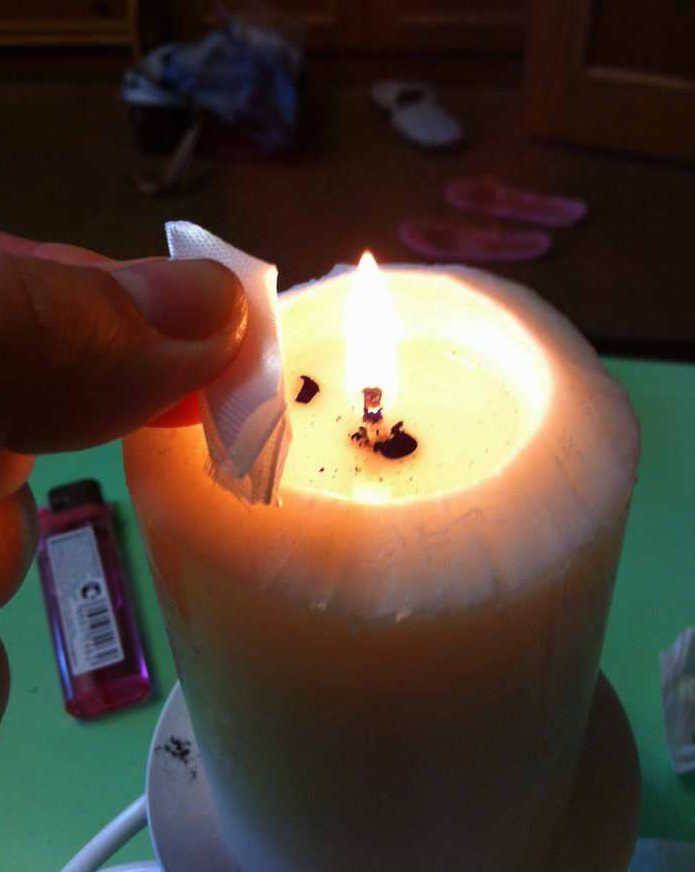
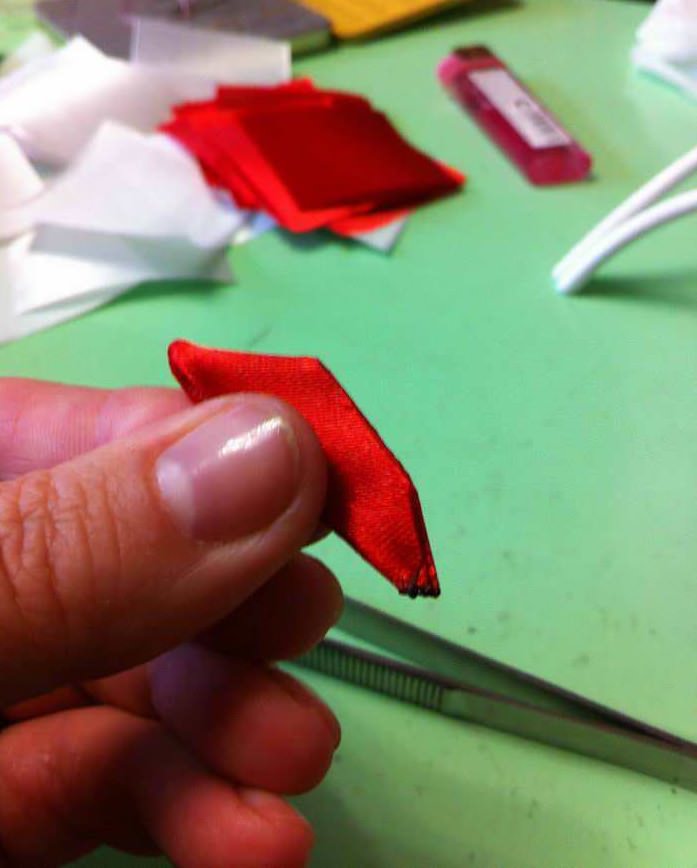
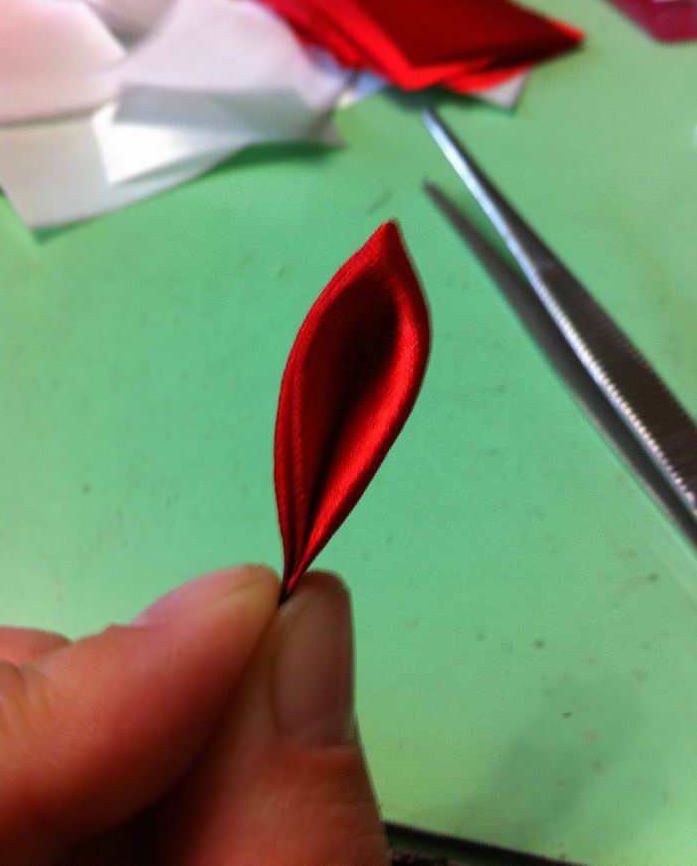
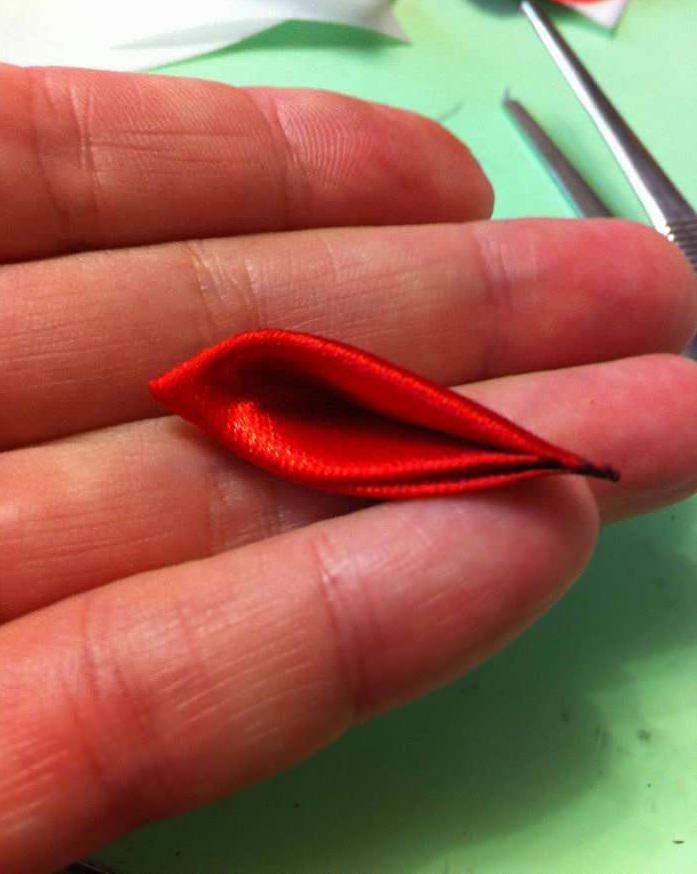
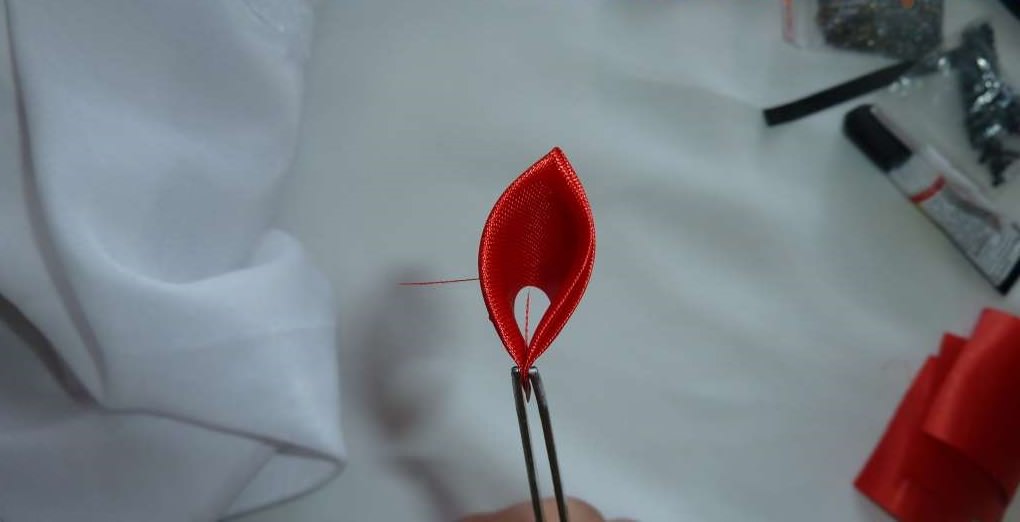
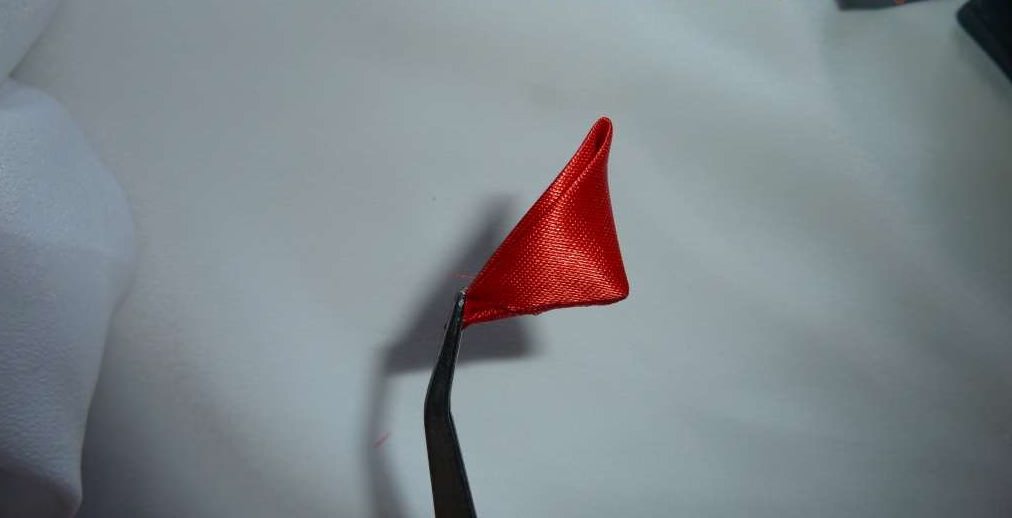
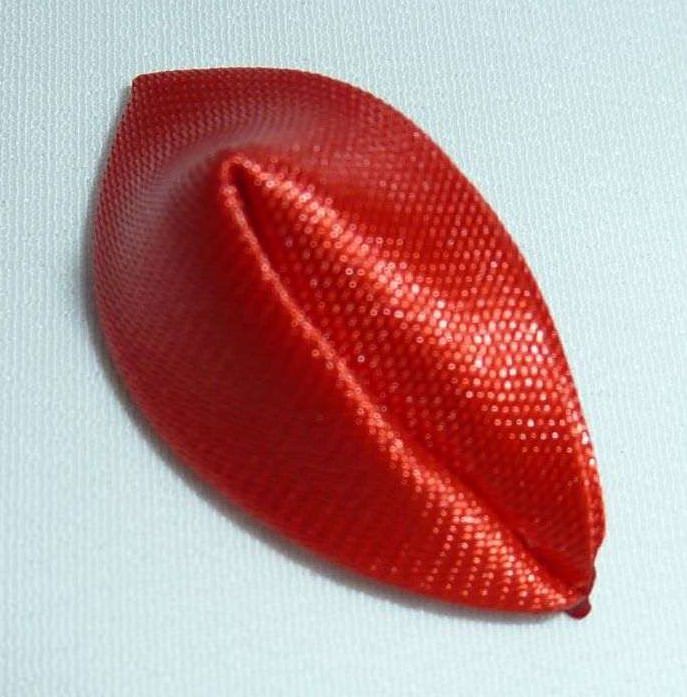
Butterfly Kanzash will be created from smallPieces of tape. At the beginning. We take a small piece and chop it together with the second one. These details need to bend the shape of the airplane, as in the photo and grab the bottom of the needle. We do this to avoid divergence of the seam. Next, in the place of the cut, it is necessary to paste a rhinestone to keep the borders. If you do not have a rhinestone in place, you can skip this step and when adding elements, simply hold the stitches with your fingers. We scorch the bottom part and squeeze our own seam. In the end, we get the next element, as in the photo. Now, it is necessary to fold flat, squeeze with tweezers and trim. To determine the amount of tape to be trimmed, fold it as follows, as shown in the photo or video:

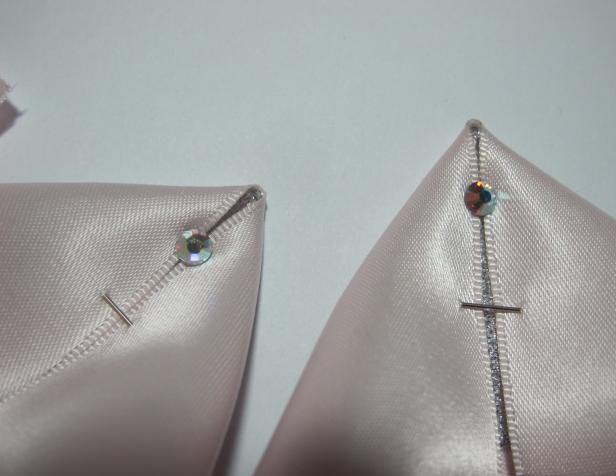
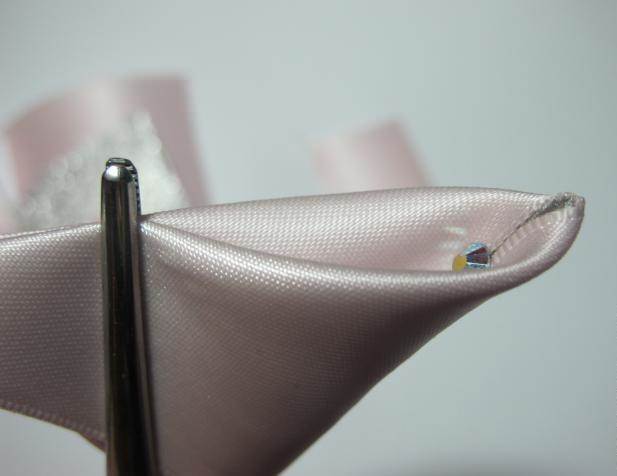
The lower part is cut, singed. If you did not use the rhinestone, just squeeze the seam on your bottom so that it does not break. Further, the first of the wings must be applied in such a way as to determine the amount of the second material to be cut.
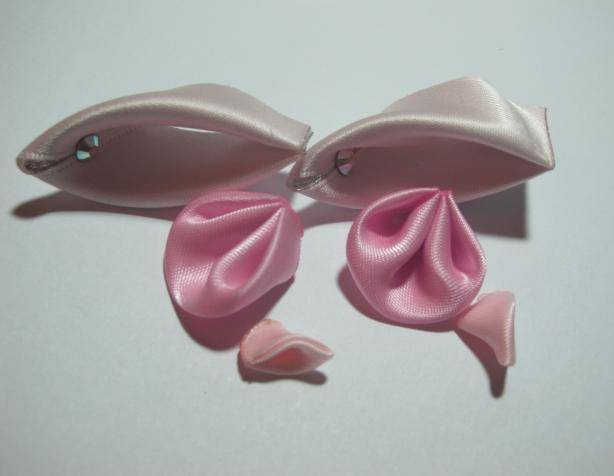
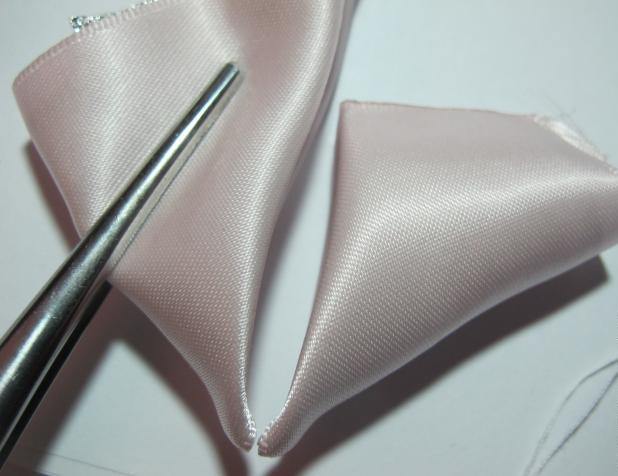
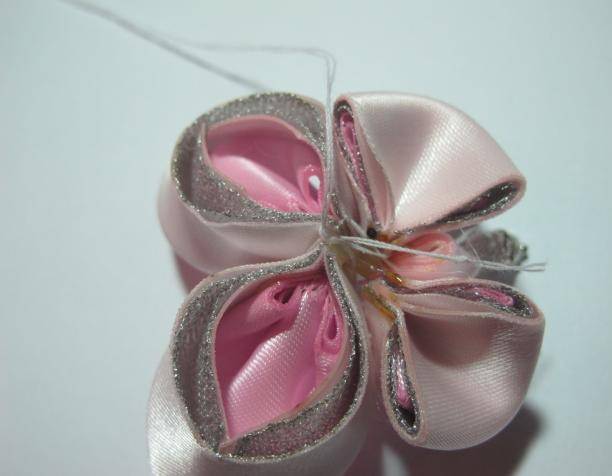
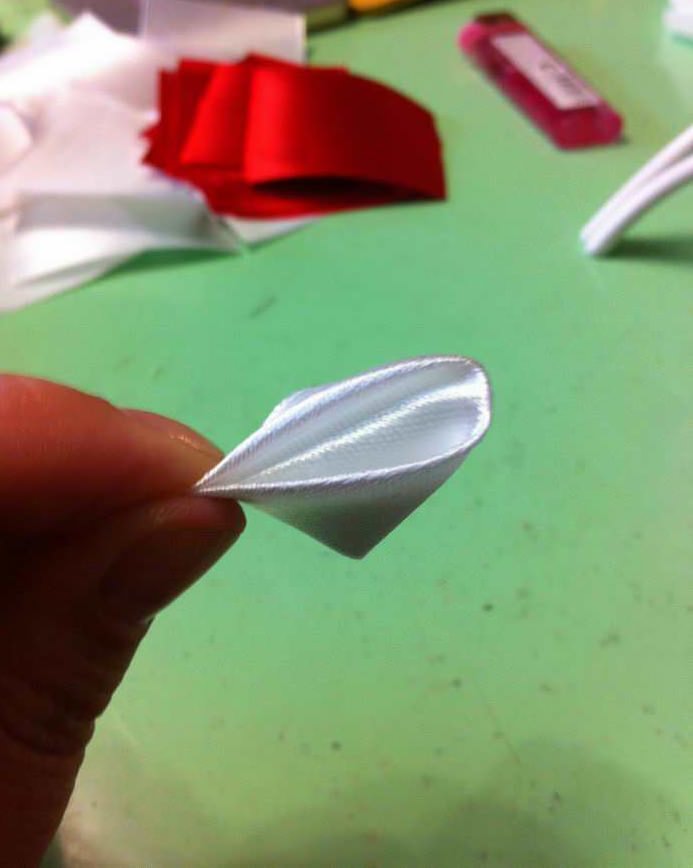
We continue the master class and form a petal with a fold. There should be 3 similar folds for the subsequent embedding of the petal.
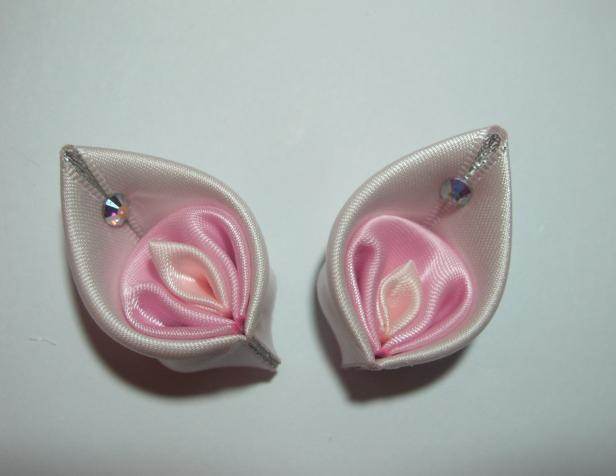
Please note that you need to paste a smallPetal in the middle of the petal with a fold. The glue is applied to the bottom of the part, after which the fold expands and the petal is carefully inserted inside. The next step, a folded petal is pasted into a large element. The adhesive is then applied to the seam, so that it is on the underside of the seam and slightly on the side parts. Do it carefully so that you do not get excess glue. In the place where the petals begin, it is necessary to fix the rhinestone.
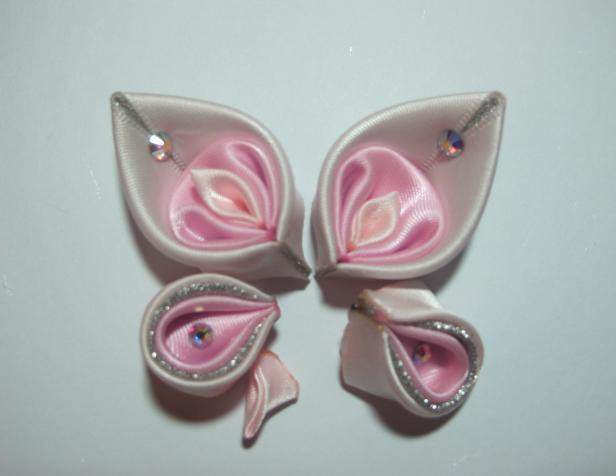
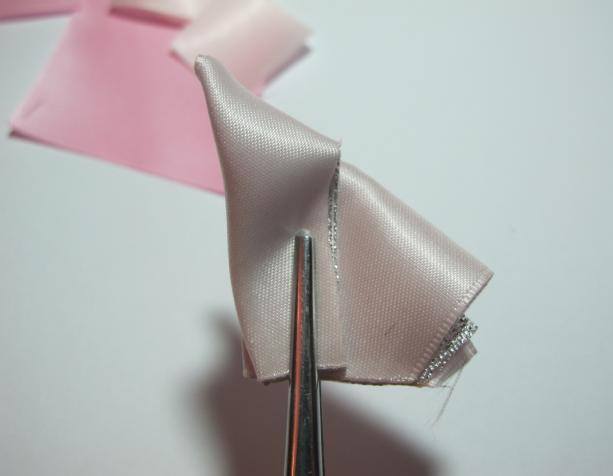
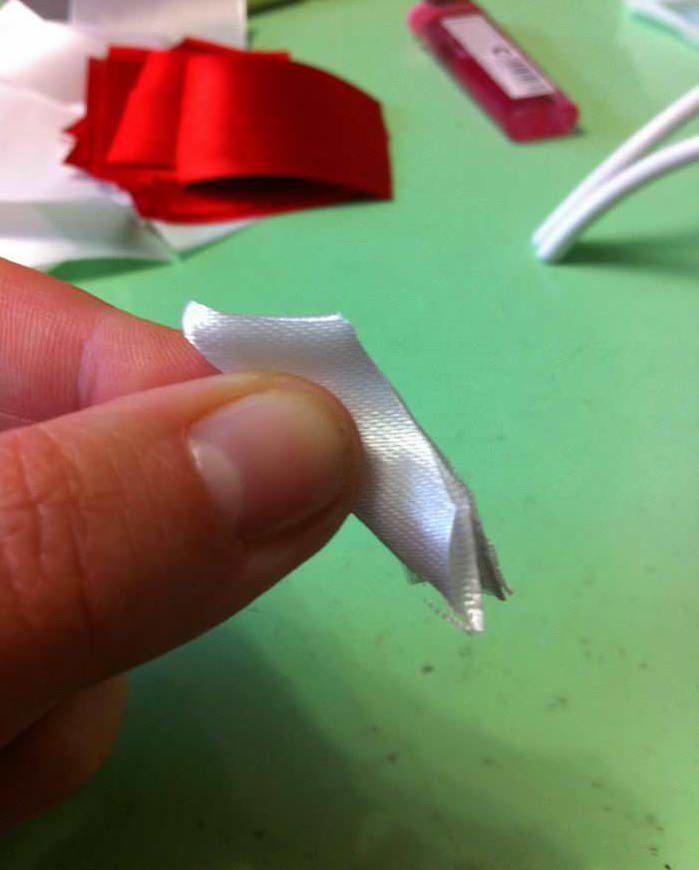
In the lower part, we make the petals roundForms. If you are not familiar with the technique of creating them, the video MC will tell you how it's done. You can make them triple and fix the rhinestones on the finished element. At the next stage, the master class proceeds to create the tail.

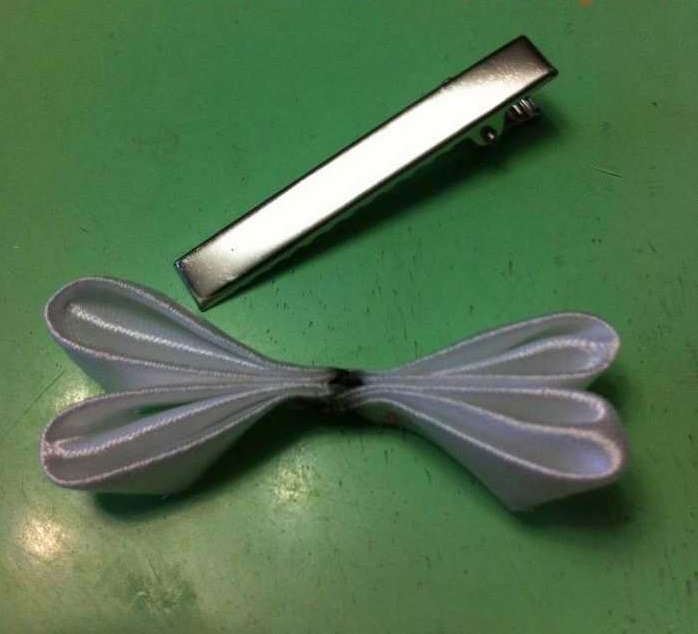
Need to take a needle and thread and flash itBlanks on equal intervals. Note that the butterfly wings that are in the upper part must be pierced and capture all three parts. The needle is stretched in the center of the tail, a bead is put on and goes in the opposite direction. Then the process must be tightened and make three knots. At the bottom of the collection area of the butterfly wings, apply a drop of glue to capture all the wings and level them.

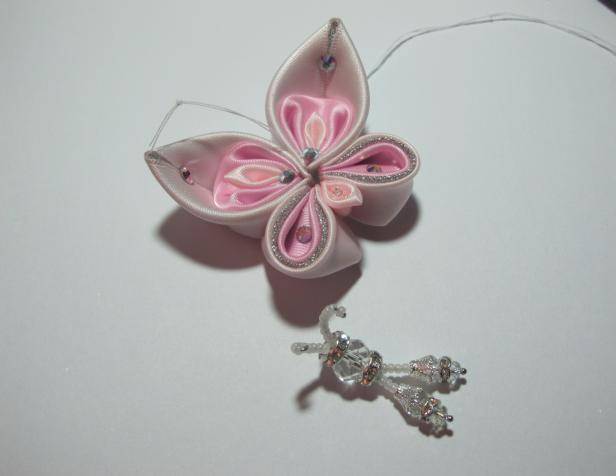
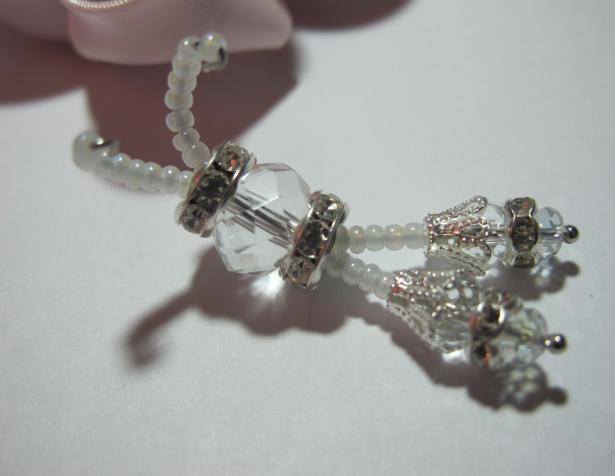
Now, our butterfly must acquire a hull. Take the pin and thread on it one small bead, rondel another large bead, a hat, five beads. With the next pin we do the same actions. Next, the first and second pins need to be inserted into the rondel, strung a large bead, rondel, and beads along the rest of the pin's din. The ends need to be rounded, using for this purpose round-bends. In the end, you should form a butterfly body, as in the photo.
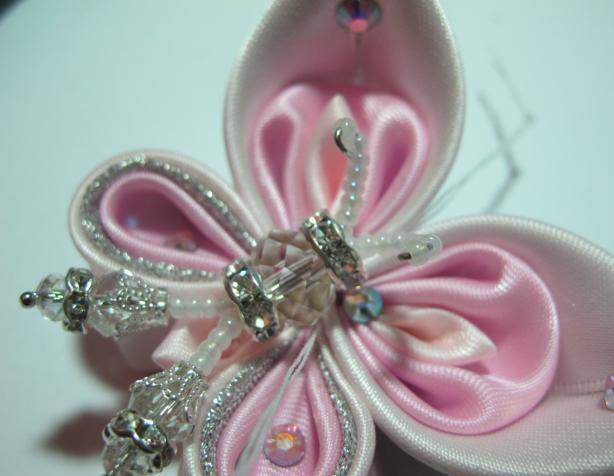
At the center of the wings, carefully glue the created body.
The thread is removed from the bottom of that rondel,Which is at the top. Near it we make a circle and draw a thread on the bottom of the other side. Thus, you need to hide the thread among the rondel and bead. Similarly we deduce a thread and on the second roundel.
The remaining ends of the threads are tied with three knots.
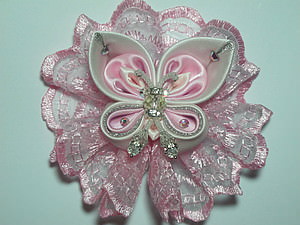
We take the lace, in the center of which there should not beHoles. The folds are straightened, and the Kanzash butterfly is glued to this material. After that, each of the wings is fixed on the lace. In the lower part, an elastic band or other special fastening is sewn, depending on what your butterfly will serve: a barrette, a decorative element on a bandage or a hoop, etc.


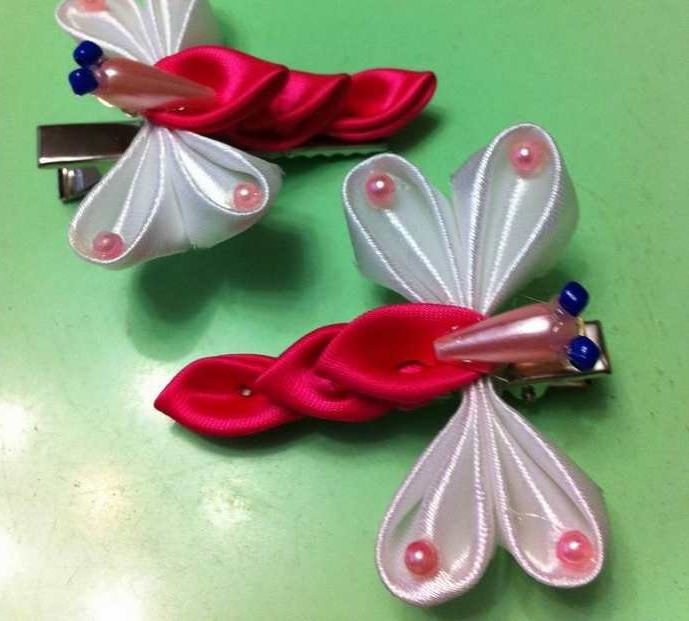
This completes the master class. Such a delightful butterfly can also be made from satin ribbons of contrasting hues. Experiment, make your butterflies in an original and inimitable style. Video tutorials at the end of the article will show you more options how to make butterflies from satin ribbons.
Video: We make butterfly Kanzashi
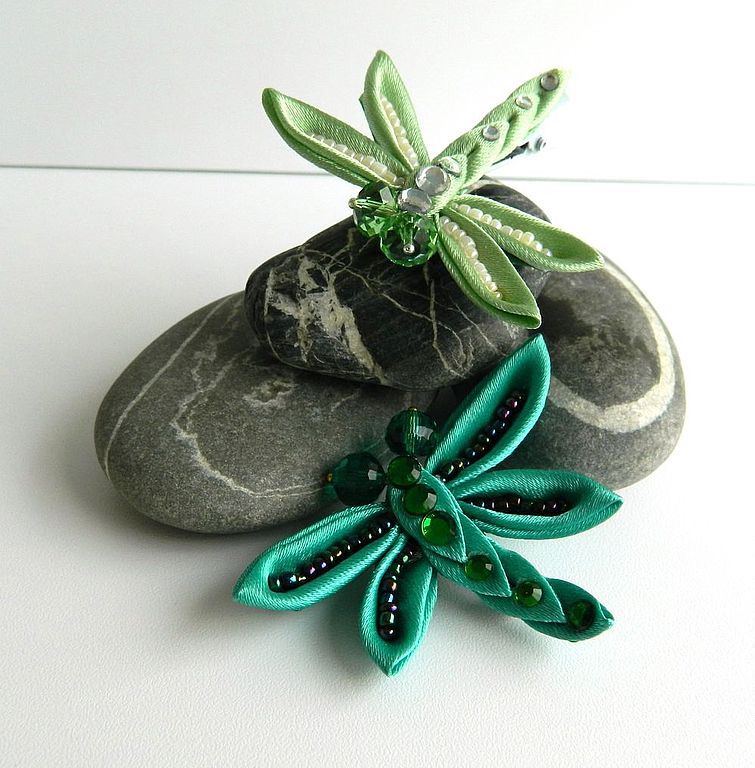
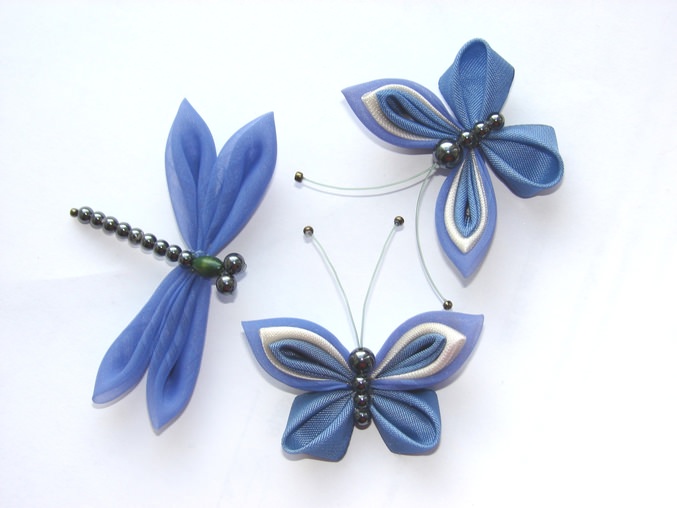
Dragonfly
Another option for a hairpin is the dragonfly kanzashi.
We will need:
- Ribbons of a suitable shade;
- A lighter or a candle;
- The base for the barrette;
- beads;
- glue.
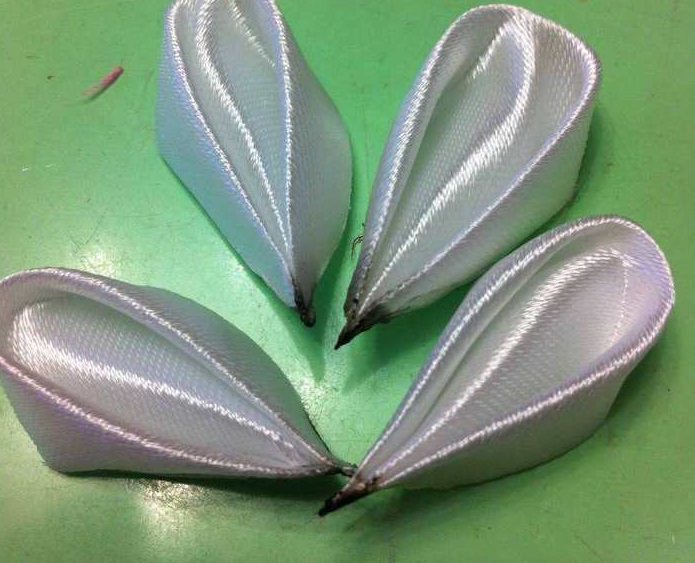
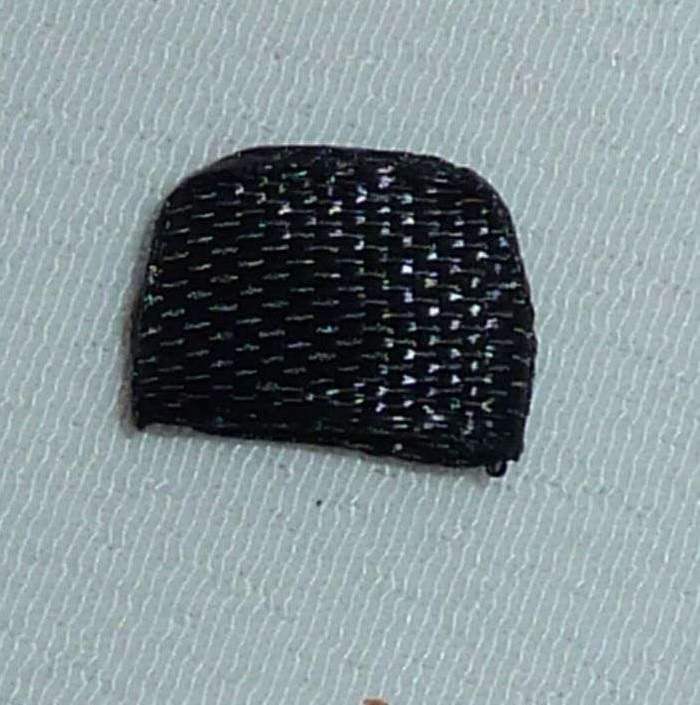
The master class begins, as usual with slicingSatin ribbons on squares. From belts of white color it is necessary to make the petals of the round form. Next, the square workpiece bends obliquely. The next step, you need to wrap the sharp corners of the formed triangular figure in the middle of the right angle. We take the resulting element and connect it along the center line. Unnecessary delete. Places of slices must be scorched with a candle or lighters. As a result, you should get a round petal, from which the wings of the dragonfly Kanzash will be formed. In total for the wings you need to make four petals.


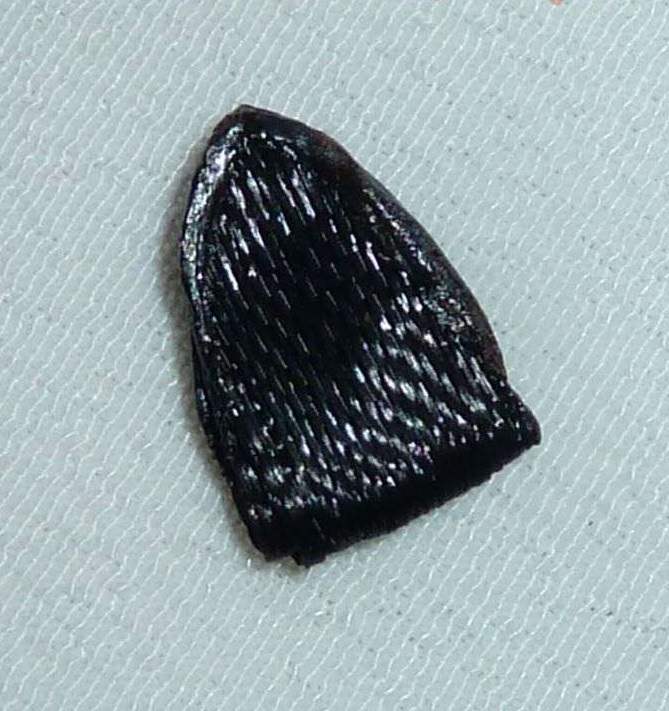
Next, the dragonfly must acquire a trunk. To create a body, create a petal of a sharp shape. The square segment is doubled several times. The angle is cut off and burned by a cigarette lighter. So we get a detail for the shell of a dragonfly. Total create three blanks. The circular shapes are joined together on the basis of glue. In the photo, you can view this process. Then, using the glue, attach the dragonfly wings to the base of the hair clip. On top of the elements are placed in an acute shape, thus creating a body of a dragonfly and covering the area where the rounded petals join. It remains to decorate the dragonfly with beads.


Here is such a wonderful dragonfly you should get.
Video: Hairpin in the form of a dragonfly
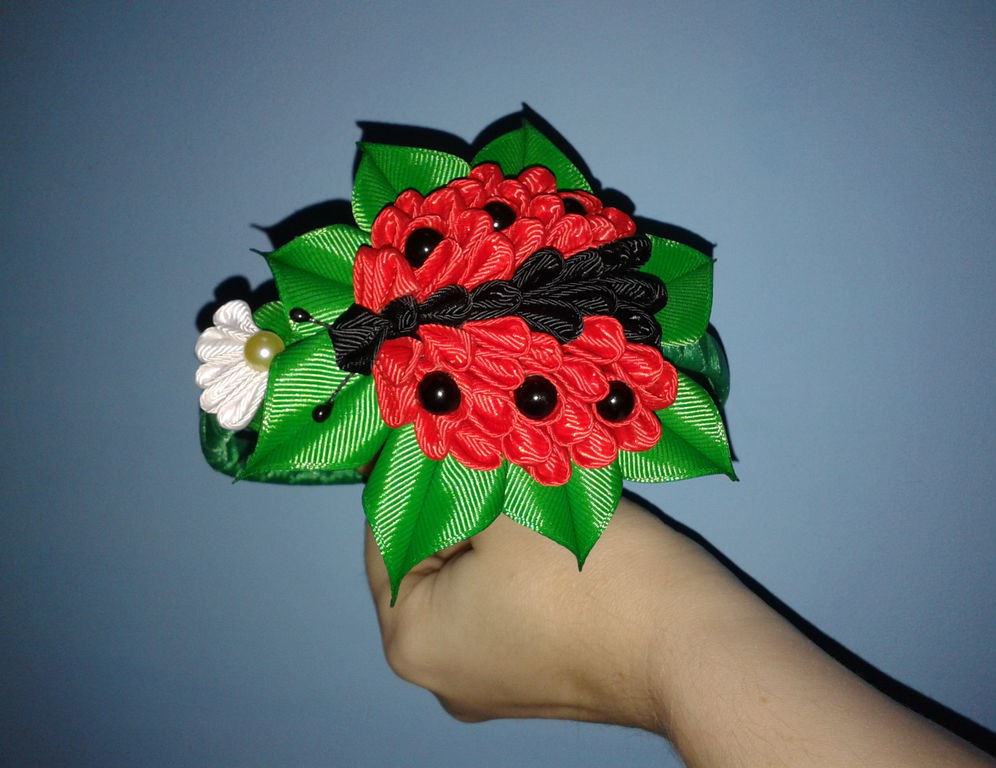
ladybug
The final master class (MK) is dedicated to creating a ladybug made of ribbons.
Such a ladybug is made quickly and simply. One of the longest processes is fixing strasses on ribbons. So, for its manufacture, prepare:
- Satin ribbon (from four to six centimeters in width);
- Small rhinestones of black color;
- A narrow satin ribbon (six millimeters);
- Beads;
- Super glue;
- Glue gun;
- Thick thread.
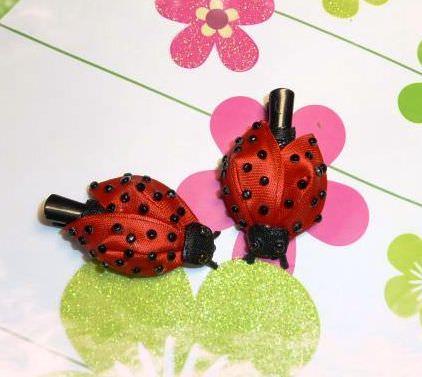
Ladybird from ribbons begins with creationA petal of the acute form of Kanzash, which must then be scorched and unscrewed. It turns out one wing. In total, we make two such inverted elements. Next, prepare a narrow ribbon, fold one piece, scorch and make your own head for the ladybug with your own hands. The tail is made from the second segment. With the help of hot glue we fix the petals-wings with each other. After that, we glue the head and antennae. Antennae are made from two pieces of thread, the length of which is equal to one centimeter. It remains to attach the tail and paste the rhinestones on the wings.

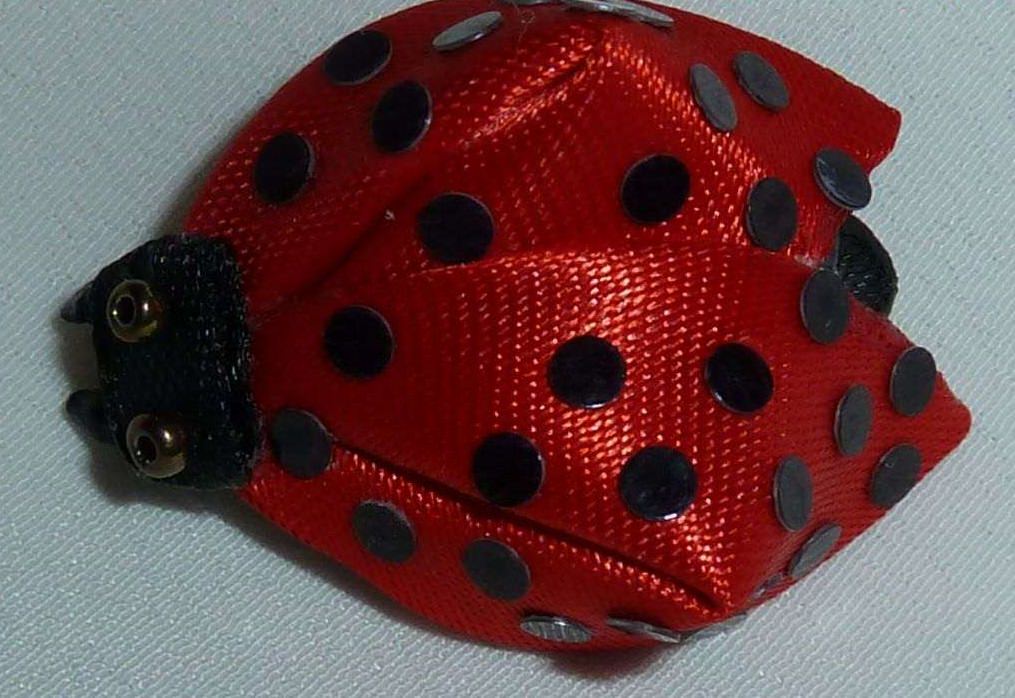
Such a ladybug will look great, like a hairpin or a brooch. Just pick up a special mount to it.
A few more video lessons will show you the creation of such crafts in Kansas technique in an interesting style.