
Master class to create crafts by March 8 from plastic bottles with detailed descriptions and photos.
In this lesson we will talk about how ourhands to make a vase of plastic bottles. Such work will be able even for children of lower grades. This article can be of particular interest to teachers, parents and all those who are keen on needlework. 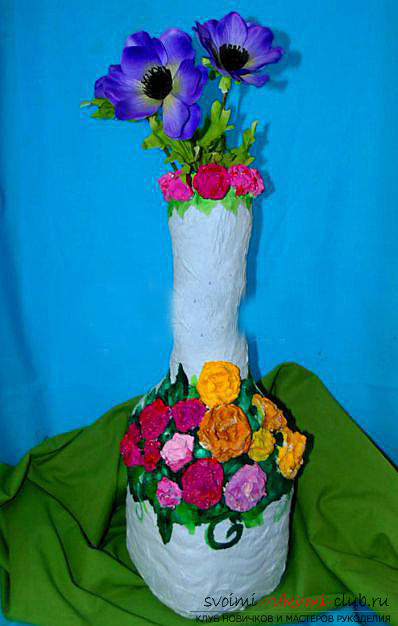 Thanks to this lesson, children will get acquainted withan interesting technology for creating vases from plastic bottles and paper; learn painting on a relief paper product; cultivate one's patience, tenacity, perseverance, accuracy and diligence. Even in ancient times, the vase was an indispensable attribute in the decoration of interiors. Archaeologists find vases during excavations of the oldest civilizations, but their use was completely different from the modern one. For ancient Greeks vases made of clay with artistic painting were not only decoration, but also intended to store various liquids and granular substances in them. In the Middle Ages, outdoor vases were given the role of decor in the homes of aristocracy and tycoons. Until now, vases have retained this role in the interiors of homes, hotels, shopping complexes and office spaces, their presence symbolizes well-being and prosperity. Our vase will be unique in its own way, because it will be made from not quite ordinary materials. Here they are:
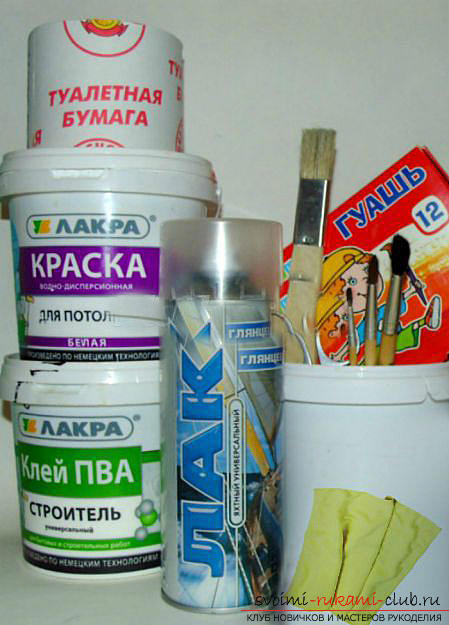
- bottles of plastic (1.5l and 5l);
- paint (water-emulsion type);
- lacquer;
- bank;
- Scotch;
- glue;
- gouache;
- toilet paper (2-3 rolls);
- Brush elastic wide;
- manicure scissors;
- brushes for drawing.
Course of work.
The first thing that we have to do is create a vase shape. To do this, we cut the bottles with the neck. Here you will need a manicure scissors, they are most convenient to use. 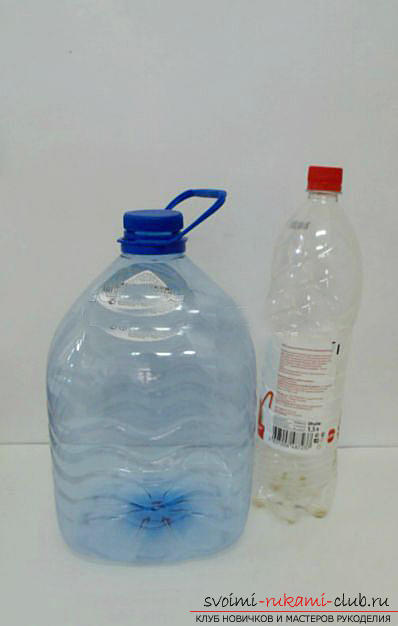
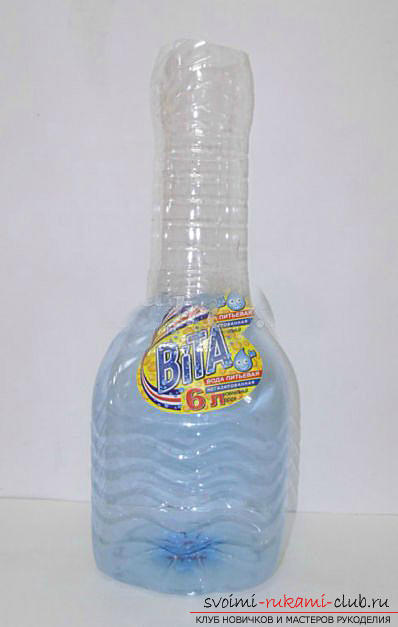 Attention! This stage is undesirable to entrust to children, they can injure themselves with a sharp object. If you decide to entrust this part of the work to the child, familiarize it with the following list of safety rules: 1) before using the scissors, it is necessary to check their serviceability; 2) to work with scissors with weak fastening is forbidden; 3) the scissors must be properly adjusted and sharpened; 4) watch closely the movements of the blades; 5) the scissors are put in rings on themselves, but they are fed in rings; 6) do not leave the scissors open; 7) the scissors are stored with the blade down, in the holster; 8) scissors must be used strictly for the purpose, do not play with them and do not bring to face. Using adhesive tape we fasten the details of the vase.
 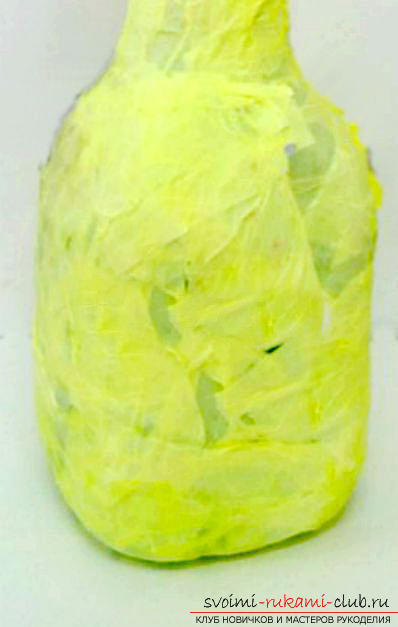 Further we take glue PVA and we plant in warm water (onthe consistency of the finished mixture should be similar to cream). With a wide brush, glue is applied to the vase, after which toilet paper is applied to this area, along which adhesive is glued. Formed small folds will create a relief of the surface of the vase. It was time to fashion a relief ornament from flowers. This step should be carried out only after the vase has dried. For reliable drying, it takes one or two days, it all depends on the temperature in the room. The glue is diluted somewhere 1/3, i.е. one part of the water has three parts of the glue. In addition, toilet paper is prepared. Tear off a small piece of paper and fold it threefold or even fourfold. Paper crumples as if inside, forming a flower. It will be his purse. Approximately so the flower will look outside:
  After this, the flower blank is dipped inglue and slightly wring out. At the same time, try not to damage the form. Then the flower is fixed on the intended place. The following illustration shows how the neck of the vase is decorated. The flowers are multilayered, one part needs to be pasted into the next, moving along the circle of the neck. The complexity of this process will require more patience from you, in view of the fact that due to the severity of the glue the parts can crumble, but the end result will please you. Here's what should happen at the output:
  Further in the same sequence,decoration of the main part of the vase. After making each flower, let the vase dry. This time drying can be delayed for 2-5 days. The vase is preferable to place on a small hill, which will be slightly smaller than the base of the vase. This is due to the fact that the glue remains down.
  The back side of the vase is not decorated. It was now time to prime the vase. Use at this stage will be water-based paint. For this process, too, will require special patience, since every hole and crease are painted over, and the paint does not lie too obediently on the material. However, this work will make the painting of the vase easier. Water emulsion paint should also be allowed to dry.
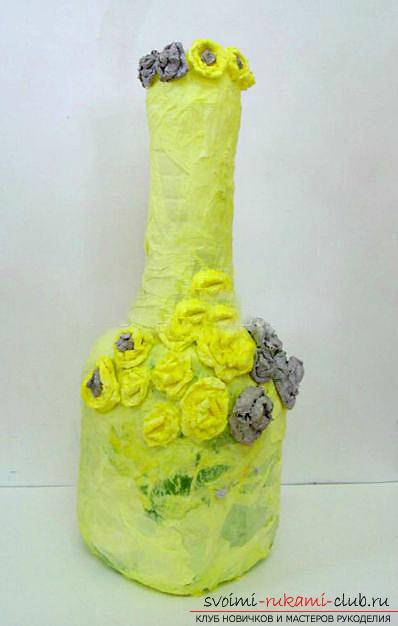
 Finally it was time to paint a vase. At first the tone is selected - in our case it will be a pastel blue shade. It turns out by mixing gouache and water-based paint. As soon as the paint has dried, a soft blue color will appear.
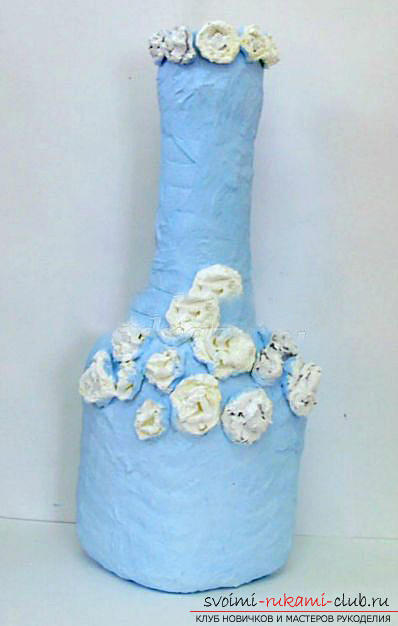 After that, the flowers are decorated with selected shades. This tone is the first in the relief decoration of the vase.
 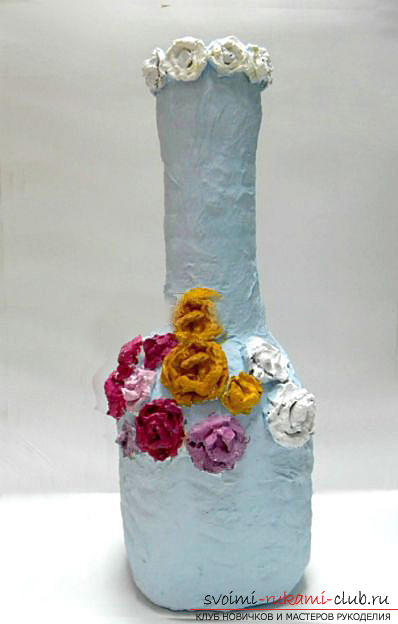 At the top of the flowers are decorated with pinkshade. Painting should also be done carefully, without lumens. Next, a crimson hue is added to the petals and leaves from underneath under the flowers are drawn.
 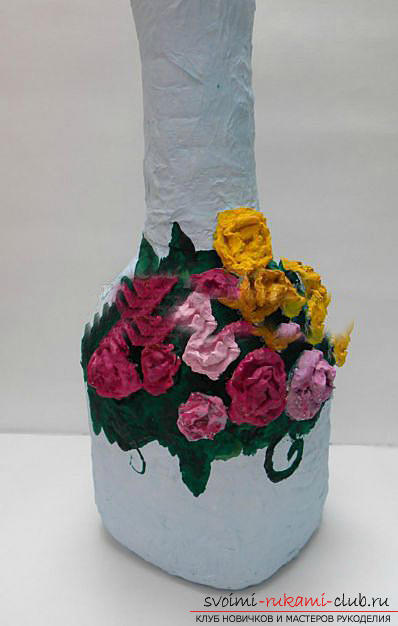 In the circle of the main flower composition alsogreen leaves are drawn. White paint adds specks to the colored leaves. After that, specks are blurred by a brush dipped in clean water. So we create all kinds of shades of greenery, and the foliage gets a brighter look. In the flowers themselves are also introduced a variety of shades to give a more realistic and voluminous appearance. What should you end up with in the picture:
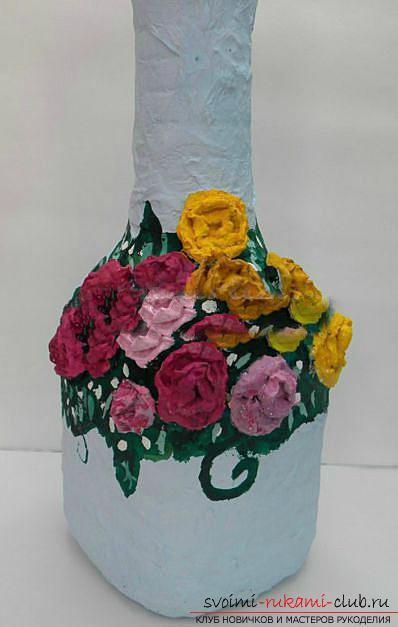
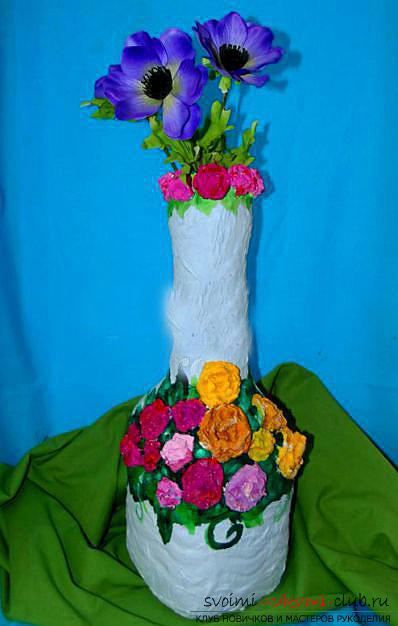 Once the paint has dried, cover the vase withusing lacquer to make it more practical in the process of using in everyday life. Such a vase will perfectly complement any bouquet not only from fresh flowers, but also from dried flowers.
  Created by hand, a vase of plastic bottles, can be an excellent present for people close to you. We hope that our master class will be able to push you to create a vase of your own design!
Comments
Related posts:
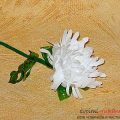 Crafts from plastic bottles with their own hands, how to make flowers from plastic bottles, cornflowers from plastic bottles, roses from bottles with their own hands.
 Handmade crafts from plastic bottles
 Necklace of plastic bottles. Master Class.
 A beautiful panel for a salted dough kitchen. Master class with detailed descriptions and photos for beginners.
 A master class with a detailed description and photo will show how to crochet a toy-symbol of the year - a monkey on a Christmas tree