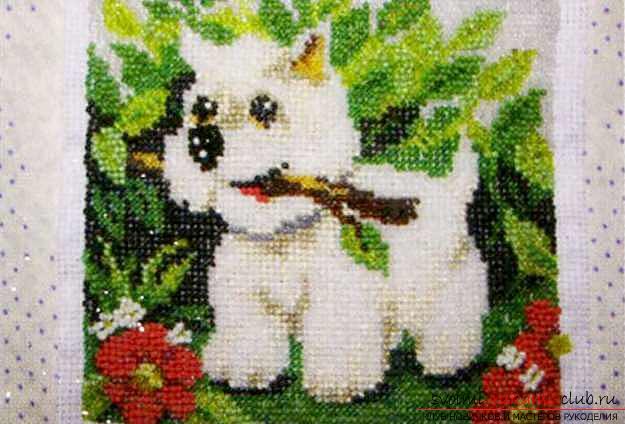
Master-class on embroidery of a small picture with beads will help to master this technique of needlework
Master-class on embroidery of a small picture with beadswill enable every needlewoman and with experience, and beginner, to make a beautiful piece of furniture on its own. Despite the painstakingness inherent in the technique of embroidery with beads, there are also simple options. One of them we offer to your attention in this article. Embroidery with beads appeared long ago. Many needlewomen decorate things, accessories, create beautiful icons, pictures and other canvases, using this material and this technique. Despite some complexity, laboriousness and painstakingness, it was beadwork that became incredibly popular. In today's master class, we will not talk about large paintings, or embroidery of any accessories. We will try to embroider independently not a complicated, not big picture, which will decorate, for example, a children's room, and its fulfillment will be under the power of absolutely everyone, even those who only learn to work with a universal material - beads. Using this material, you will later easily create pictures of any complexity, attracting attention with its brightness, richness and beauty.  First you need to stock up on materials, as well as the necessary tools.
 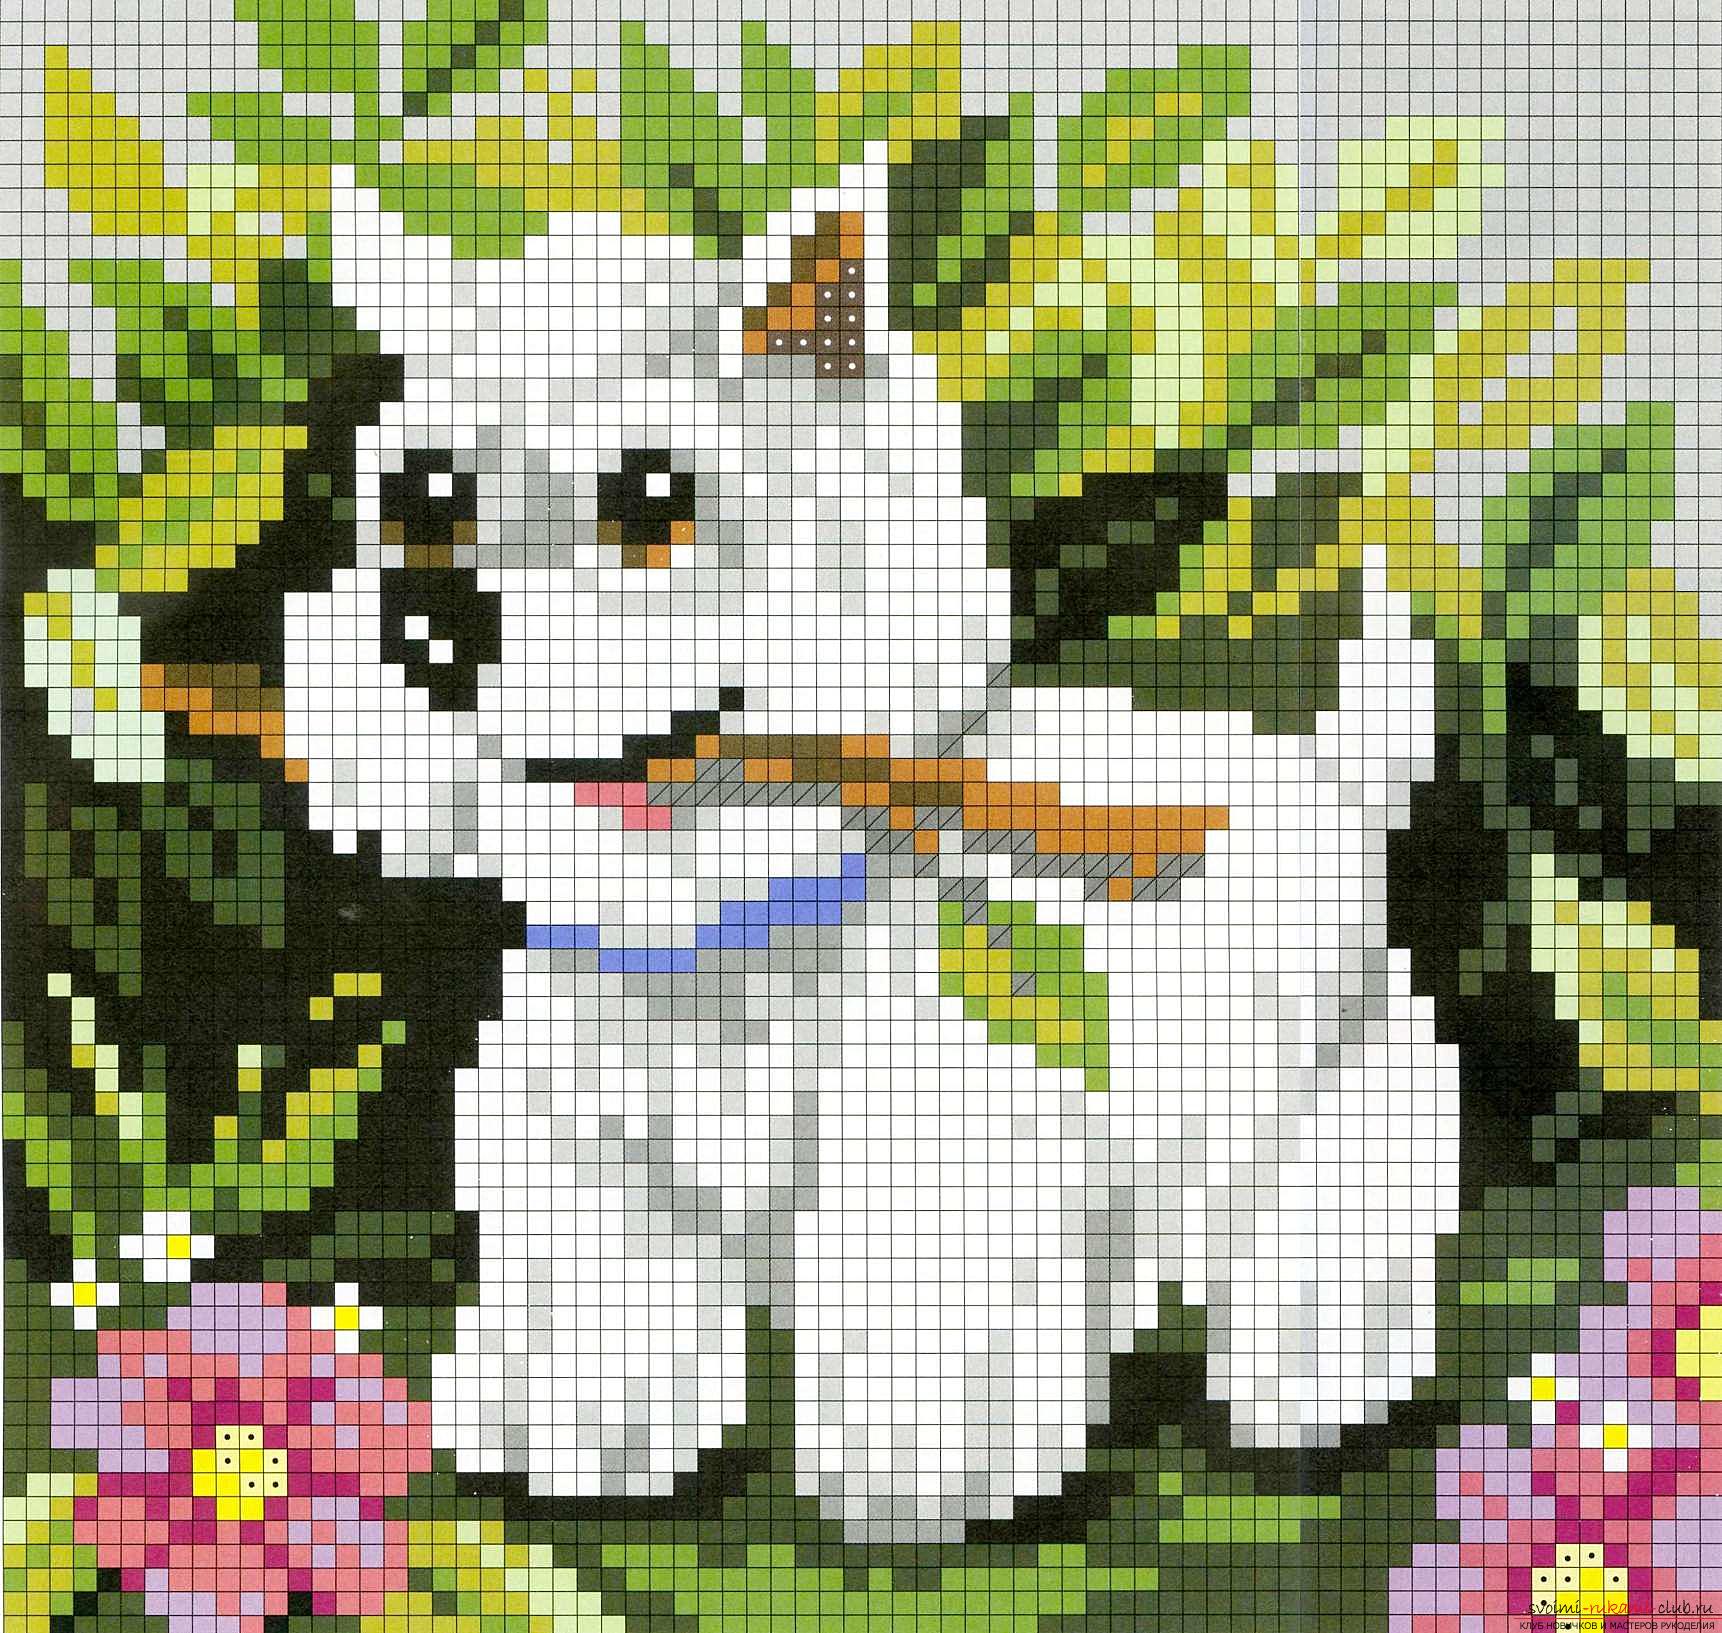 First of all, we need:
- canvas for embroidery;
- beads needed for embroidery colors and shades;
- a scheme for embroidering an image;
- a special needle for embroidering with beads with a thin eyelet at number 11;
- thread reinforced No. 45, it is better if it will be the same tone with a canvas;
- scissors.
During the selection of beads you must firstDetermine which areas we will have voluminous, which of them we will allocate with the help of a larger bead. In this case, it is necessary to distinguish stamens, the so-called needle technique, as well as the nose of our main character and small white-colored flowers, a nodular technique. For embroidery of leaves and sticks, we need to take one of the shades of green and brown. The size should be slightly larger than the main one. 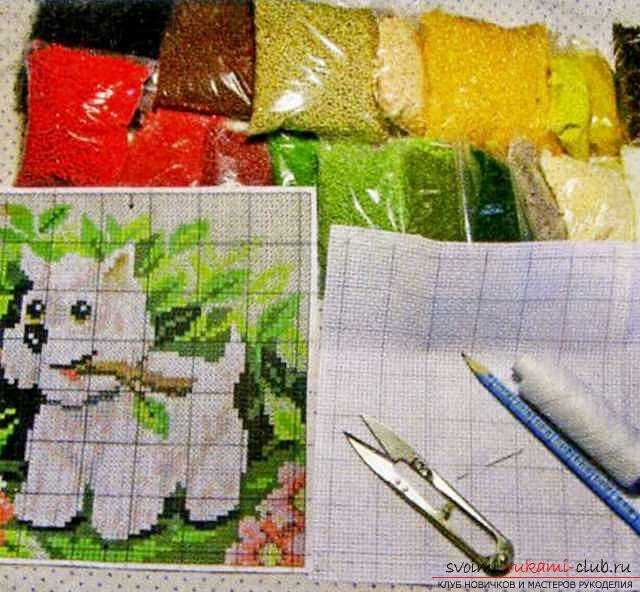 Let's start the embroidery from the lower left corner. Fix the thread from the underside of the canvas, bring it to the front side and sew beads. We embroider in the direction from the left to the right side and so until we finish the first row.
 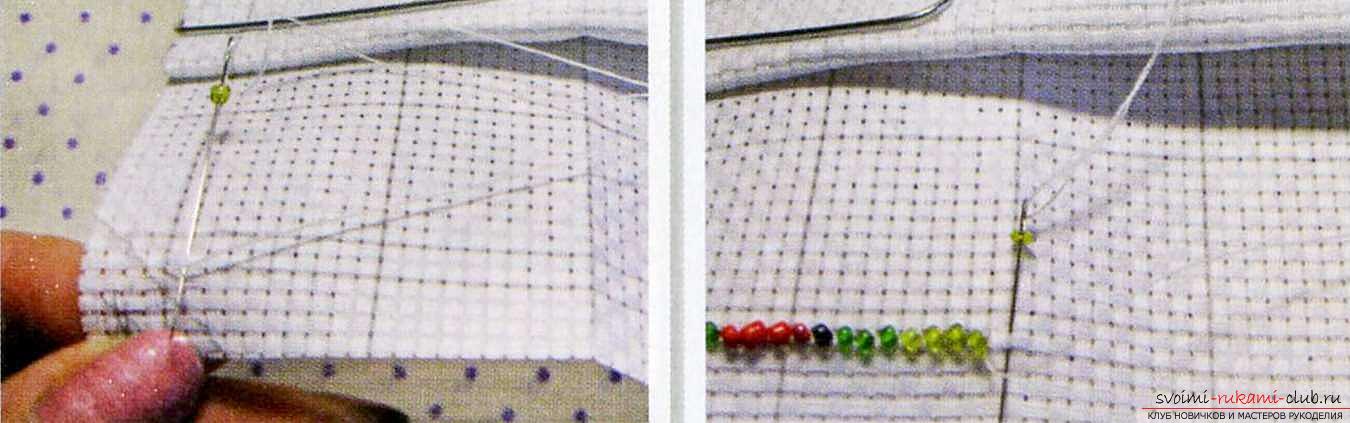 According to the scheme, we will embroider the pattern until,until we reach a place that needs to be made voluminous. In this figure, this is the middle of the flower. For the selection, we take two different shades of yellow. Here we need a needle technique. We need to sew the beads so that they are perpendicular to the fabric.
  The height of one column directly depends on whetherhow many beads simultaneously we will type on a needle. In this variant we will type three beads. To make the core become more voluminous, for its central part we take five beads in one column.
  Next, we will again embroider according to the scheme, beforeuntil we need to embroider flowers of small size. Here we need to apply, as already mentioned above, the nodal technique. Simultaneously, on the needle, we collect three beads and sew them in such a way as if it were a single bead.
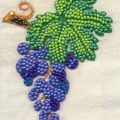
 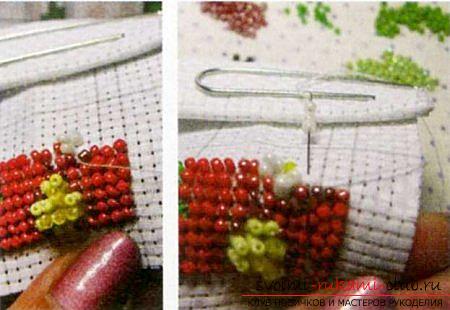 Continue to embroider in rows according to the schemewe change the technique of embroidery to the appropriate one only when we embroider stamens and small flowers. When we get to the point where we need to embroider our puppy's nose, we'll switch to nodding technique, as in the case of white flowers of a small size. The background of the picture, including the upper part of the scheme, we will embroider beads of soft blue color. Such a decision will make the picture more expressive, easy, lively. In principle, the embroidery is finished. It remains to put it in a beautiful frame and ready. If you have a desire, then the picture can be sewn on a handbag, sew a pillowcase on a sofa cushion and so on. It all depends on your imagination. A few practical tips for embroiderers. To avoid an unpleasant moment with the embossing of the edges of the canvas, before starting work, they must be smeared with PVA glue and left to dry completely. By and large, it does not matter how you will embroider - on the left side on the right or in the reverse order. It is important that all beads have the same direction. Then the embroidery will turn out to be perfect - even and beautiful. Any three-dimensional technique of embroidery with beads requires the artist to be patient. In some cases, the bead column must be pulled to the fabric with the second hand. For this, the embroidery must be placed on the table. But, as practice shows, the result justifies all efforts. If you liked the image on the diagram, but the whole picture is completely embroidered there is no possibility or desire, break it into fragments. Select the item you like and embroider it. It can become an excellent decor of any accessory or thing.
Comments
Related posts:
 Uncomplicated step-by-step drawing of the sea depths and their inhabitants with the help of gouache will help to master this technique of painting
 Beadwork embroidery, detailed master-class with diagrams, photo, for beginners
 A lesson on embroidery beads with their own hands, advice for beginners with embroidery beads with photos and descriptions.
 This master class with photo and description will show the technique of decoupage of country furniture - stools.
 Free schemes and a small master class for weaving various figures of beads.