The master class will show you how to make a craft from a bottle, decorated in the style of decoupage with your own hands.
Today we will make not only a pleasant eyean interior thing, but also a fully functional thing - a decorated bottle in a marine style. Without unnecessary complications (sketches and other artistic tricks), easily and quickly decorate the interior, and lift the mood. A decorated bottle can be used: as a vase for a small bouquet with thin stems or one flower; as a container for oil or vinegar, replacing the cork plug with a special nozzle; As a bottle for storing wine or strong drinks. Such a thing is nice to put on the table, to consider, to take in hands. For decoration you will need:
- the actual glass bottle with a flat surface;
- varnish, glue and paints on a water basis;
- primer for glass or universal aerosol white paint;
- filler universal or structural paste;
- plastic stencils;
- napkins, printouts;
- sisal twine;
- hot glue gun;
- a hard brush and a piece of sponge or toplovka;
- for decoration - half-beads, shells, pendants and so on.
The glass bottle is carefully and thoroughly washed outside and inside, dried and covered with a dense layer of white paint or a ground for glass.  On opposite parts we glue a napkin withthe right motive. Given the dimensions (an elongated narrow surface), it is more convenient to glue using a fan brush and water. To do this, put the tissue motif on the surface, in the middle of the motive, drip with water and raise the left and right edges, distribute moisture evenly over the motif, then fan the air bubbles and creases with a drop of acrylic lacquer or adhesive for decoupage.
  On the other sides of the glue the torn motif fromtext on the sea theme. Cover with acrylic lacquer. You can glue on acrylic lacquer or glue for decoupage. In this work, we do not need to weaken the motive, since the boundary of the transition will then be closed by a volumetric decor.
 Next, we apply the stencilled pattern with putty,We push into the putty decorations - half-beads, chip-boards, etc. You can make some twists with a hard brush or wax on the putty to get waves, an imitation of algae or fish.


 We produce acrylic paint with water to liquidstate. You can add a little acrylic lacquer. Thoroughly and accurately with a rigid brush paint all the volume elements, trying not to touch the picture on a napkin and printout. When the first layer dries, you can make the so-called variability of colors, smooth transitions from lighter to darker and vice versa. We will add colors darker shade - cobalt blue, blue fts, ultramarine, you can even add a drop of black. When everything is well dried, we apply literally a milligram of whitewash on a dry brush and with very gentle movements, lightly touching the prominent elements, manifesting the volume.
 You can add a little pearl and alsowalk through the pearlescent paint on a volumetric pattern. At the same stage, you can add some patterned elements to the outlines or make a couple of bright accents. The more shades, the more interesting the result will be.
 We decorate the bottom with sisal twine on gluepistol. If you use another glue, there is a risk that the sisal will not keep the shape and while the glue dries, the whole structure will fall apart. In the middle, with a drop of glue, we glue the tip, wait for drying and make a "bite". Further, twisting the string of sisal, glue the bottom in a spiral. You can experiment with the shape of the bottom, but practice shows that the spiral shape is the most durable and convenient to use.
  We clean the neck of the paint. Since we used non-toxic water-based materials - the bottle can also be used for food purposes. We insert the cork stopper and admire the interior new thing.


Comments
Related posts:
 Master class with a description and photo will teach how to make decoupage of a bottle of champagne with your own hands
 Decoration of bottles and decoupage with tights with their own hands - master class
 This master class will teach you how to make your own tea house and how to decorate it in the style of decoupage.
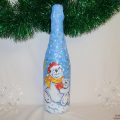 Master class with photo and description will teach how to make a decoupage of bottles of champagne for the New Year
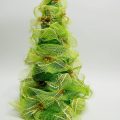 How to make a Christmas tree for the New Year with your own hands? A detailed master class with a photo on creating a Christmas tree from the grid will help you learn how to make a new article