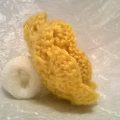
The master class will teach you how to create your own crocheted crocheted bunny
Toys, associated with their own hands, will always occupy a special place in the soul of the person to whom you present such a gift. 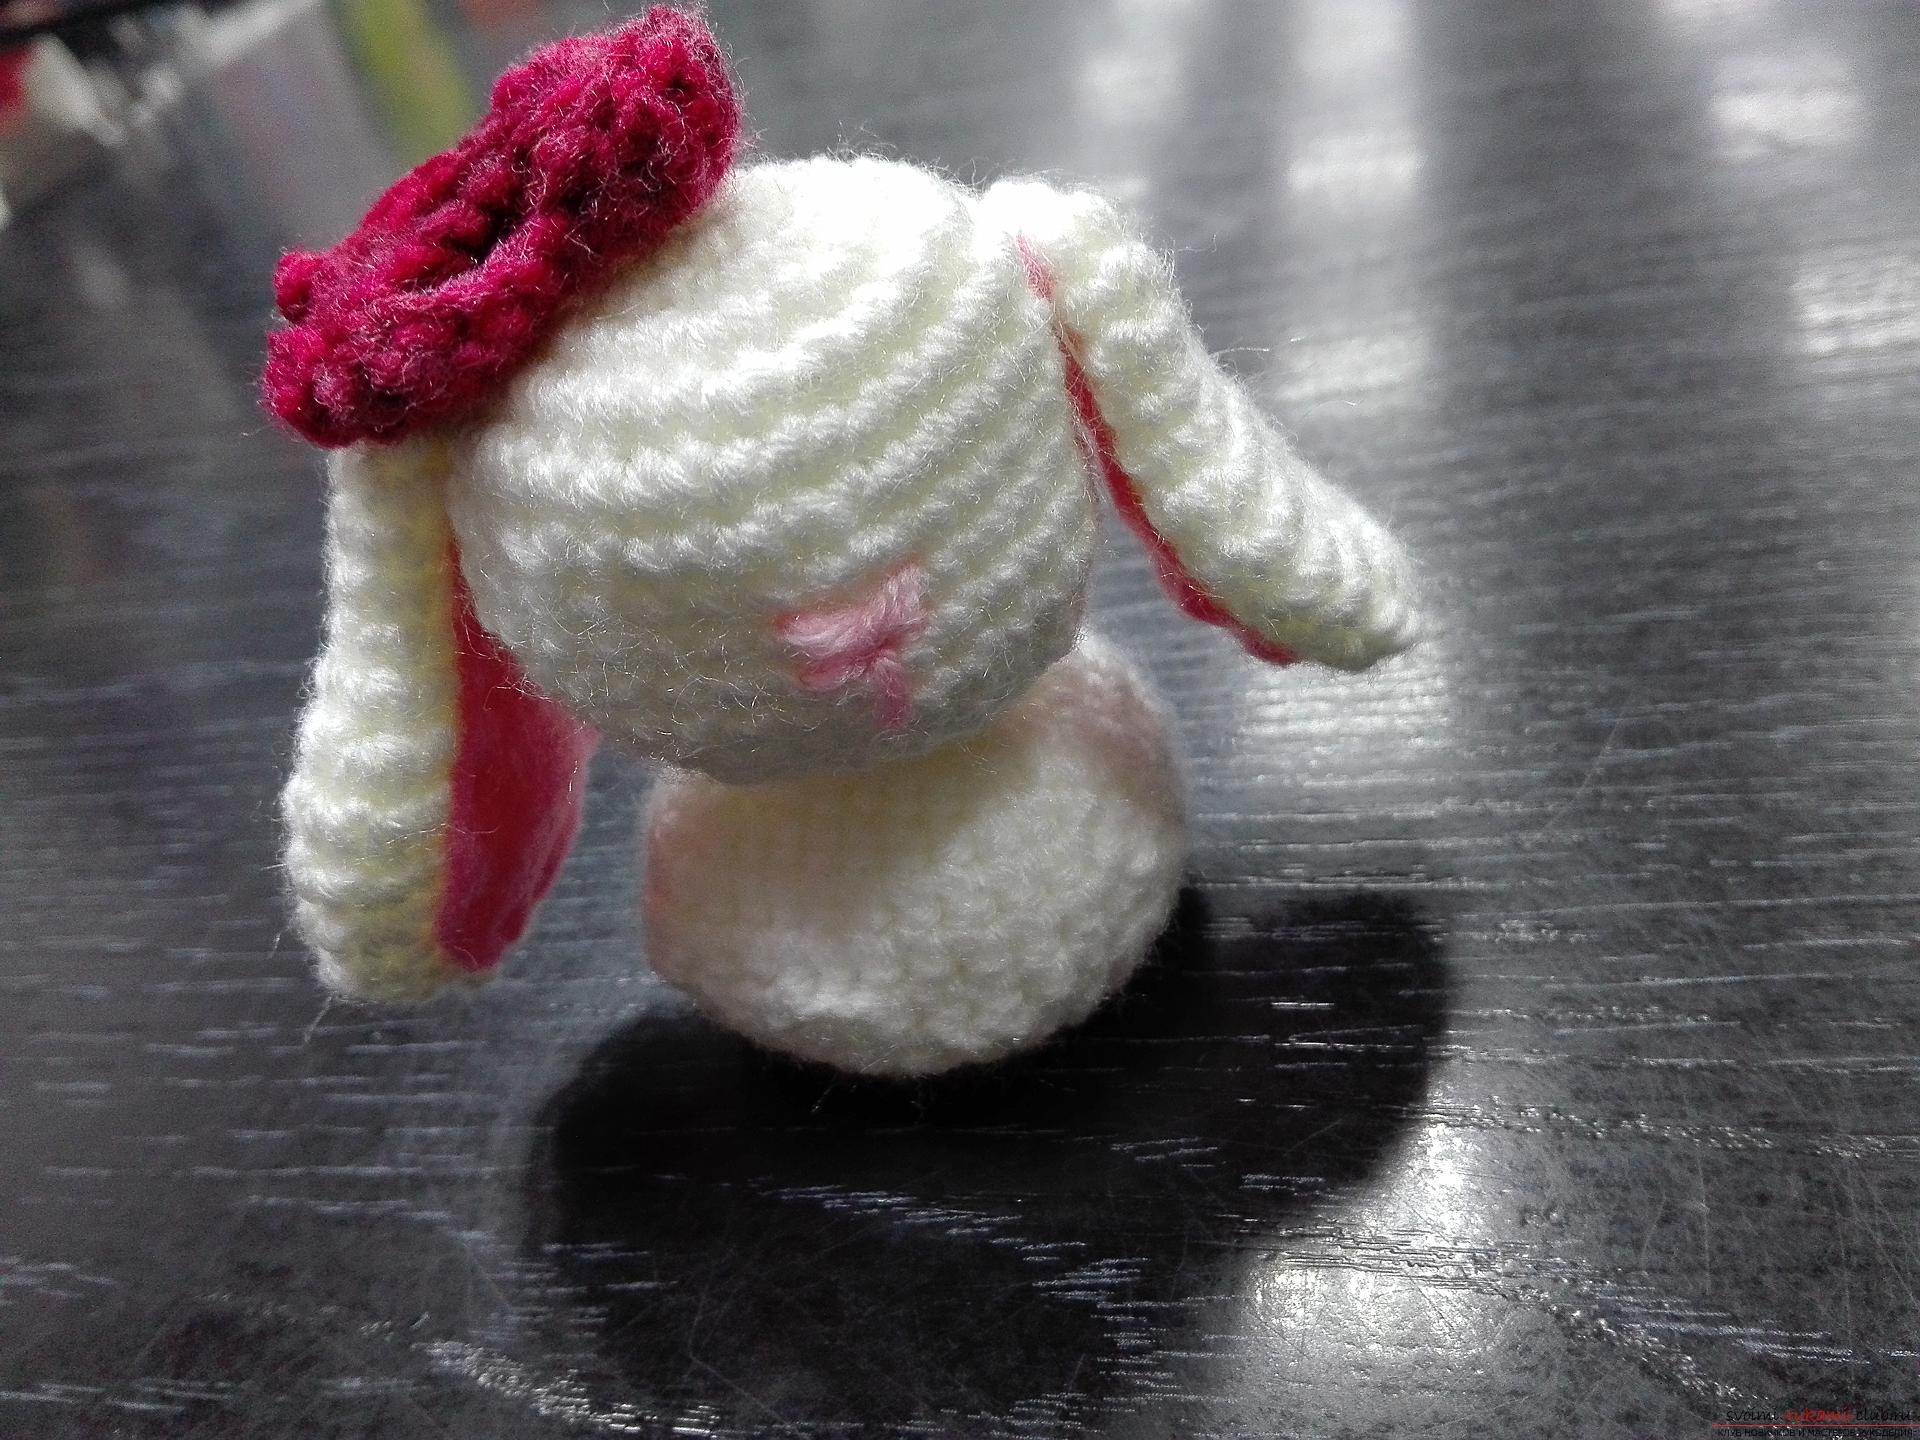 To make a bunny, we need:
- yarn of white color;
- hook;
- felt pink;
- filler.
We'll start the work with knitting the head. We type 4 air. loop and close in the ring. Inside the ring we sew 6 posts without a crochet. 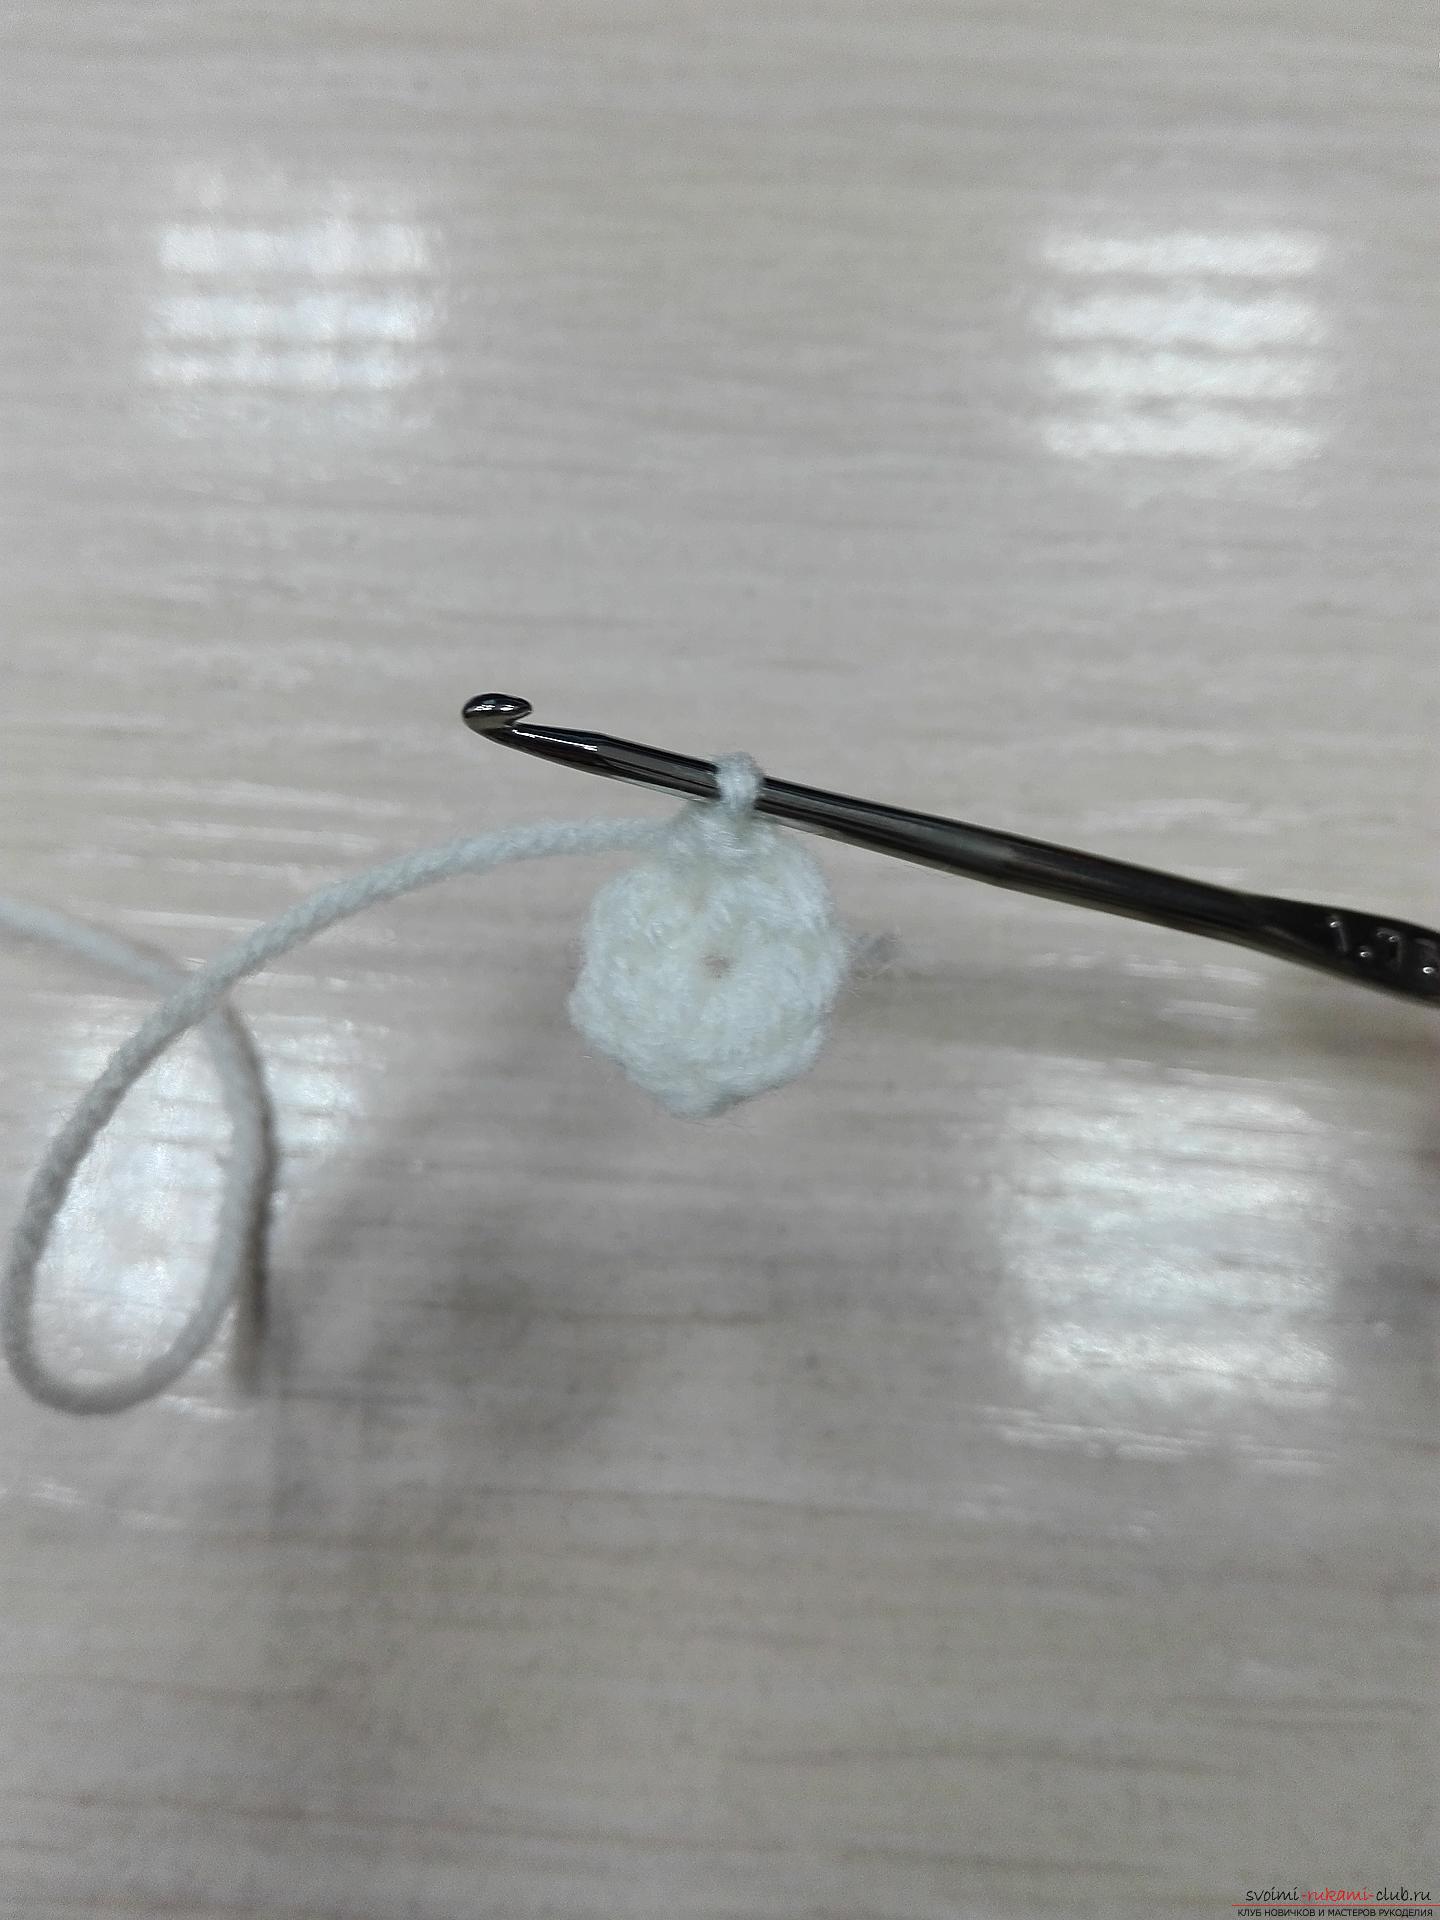 Next, we knit 2 sticks without a crochet in each column of the previous row.
 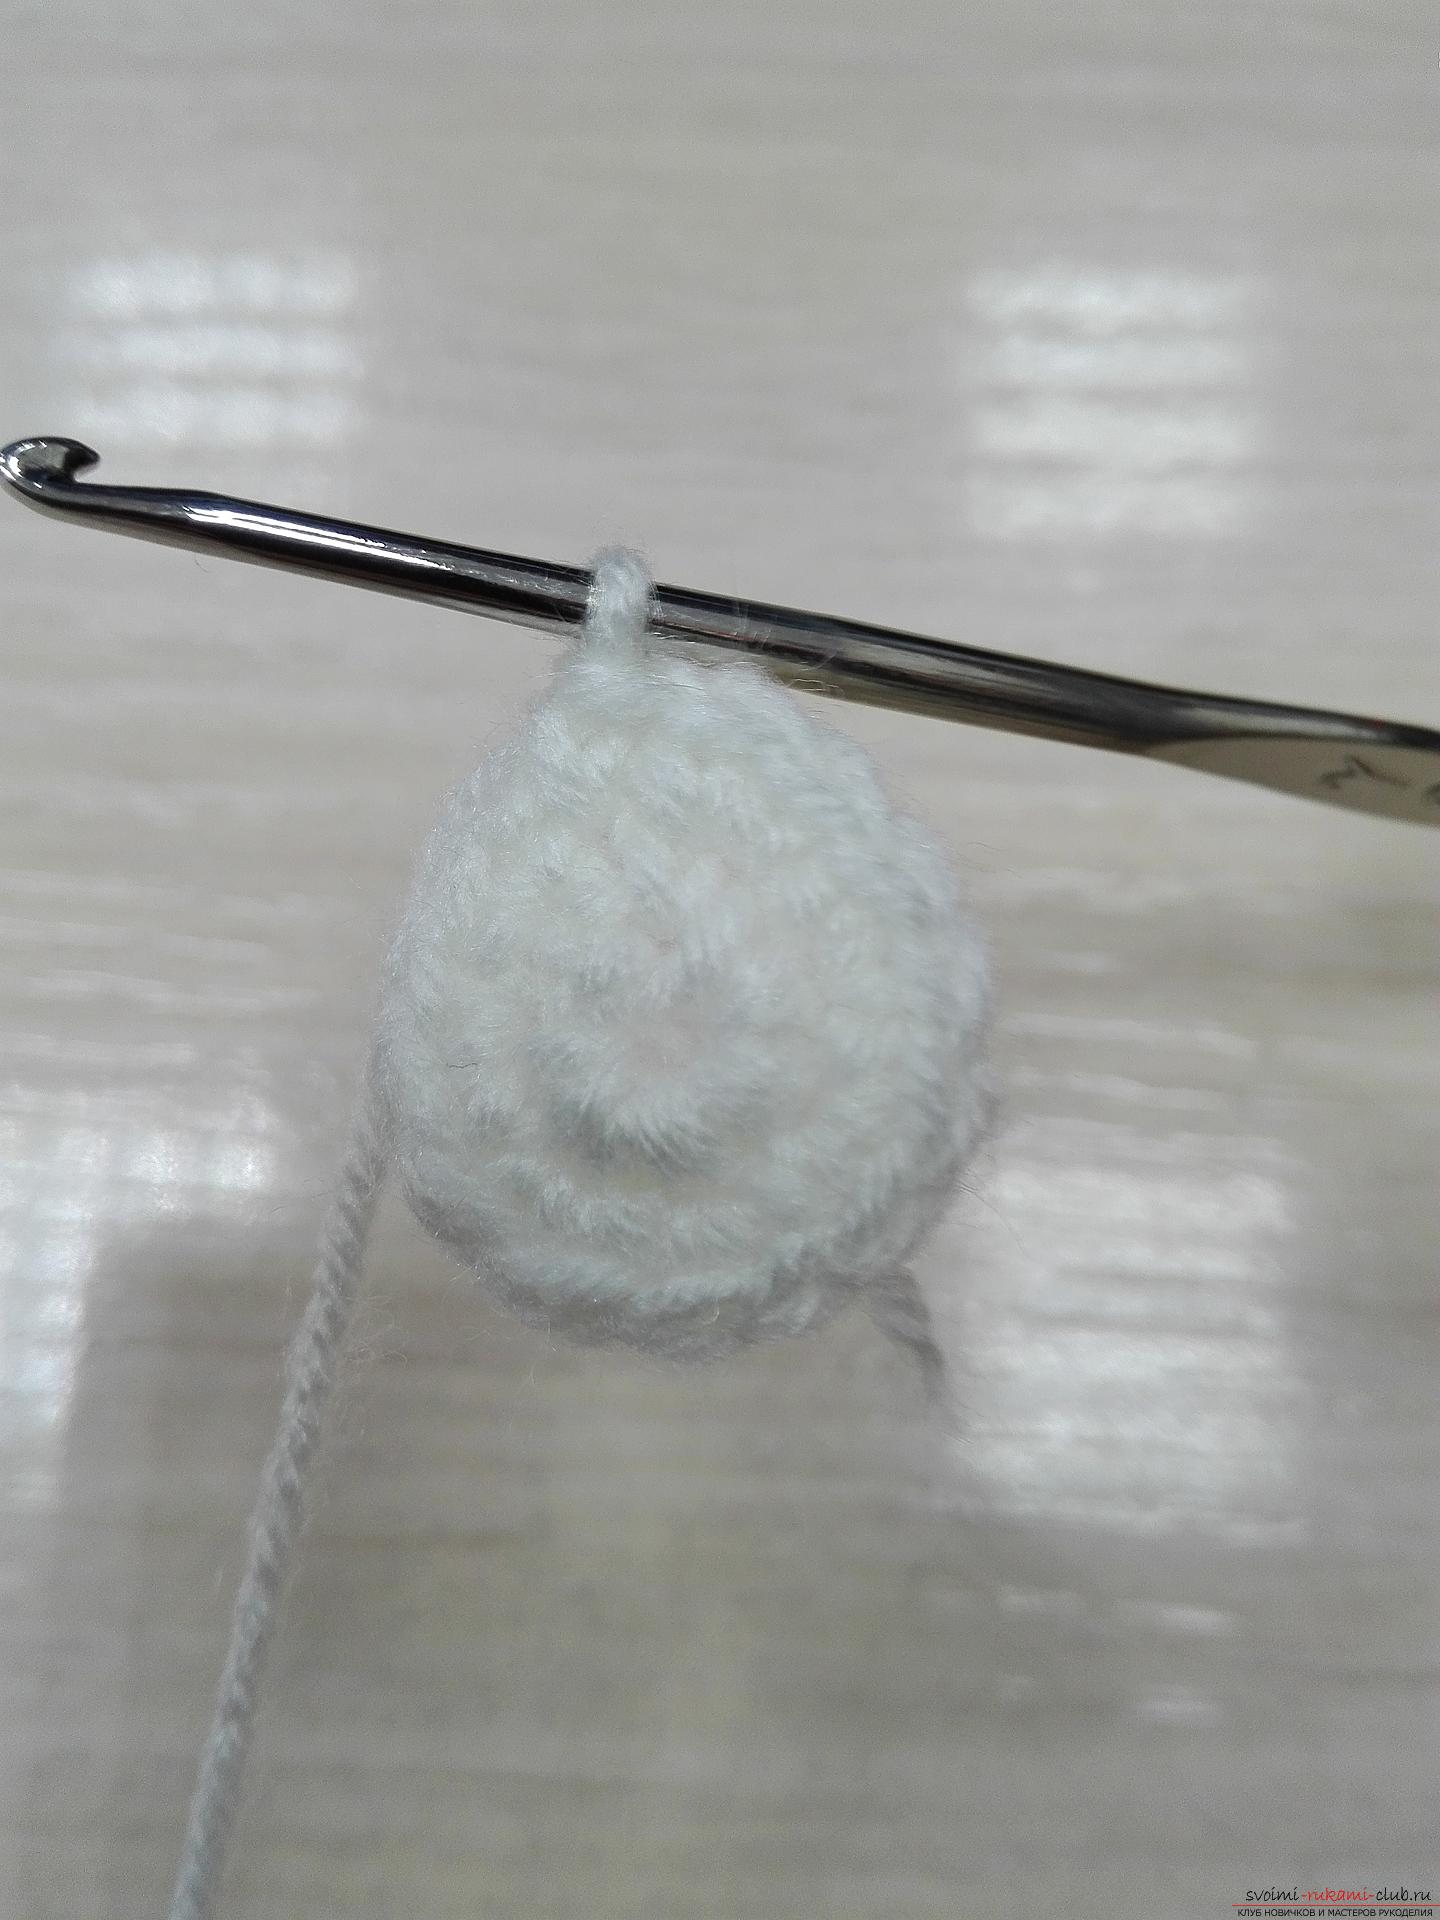 Then we sew 1 st. without a crochet, and in the other 2 tbsp. without a crochet, so we alternate. And then vice versa, two st. without a crochet, then one, 2 tbsp. without a crocheting, 1 tbsp. without a crochet.
 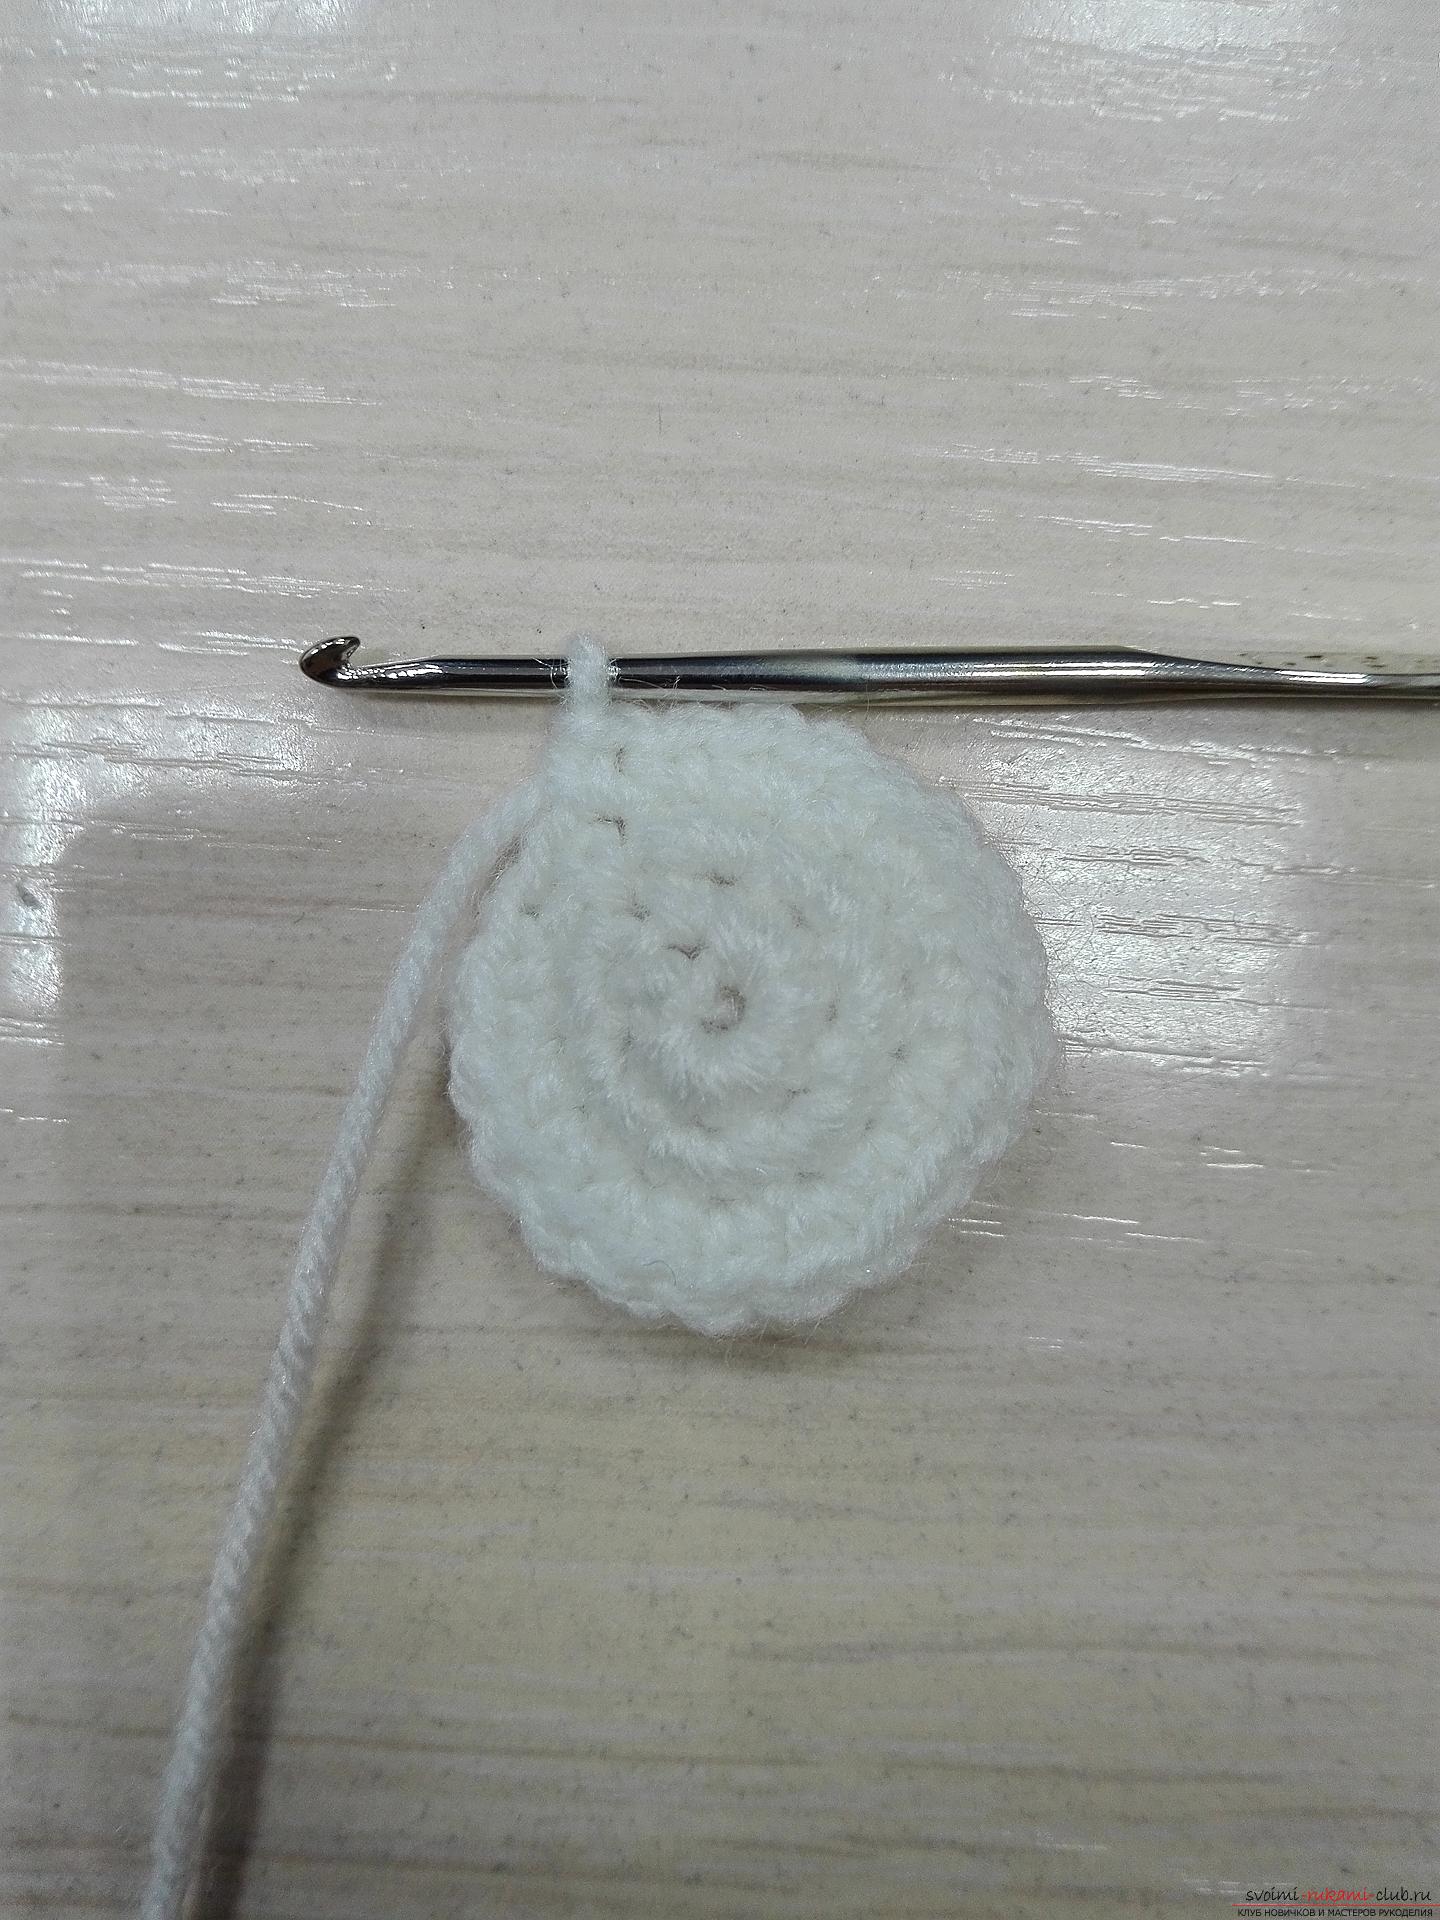 The next approximately 4-5 rows we knit on the 1stA column without a crochet in each loop. Then we start to reduce. The first time we make four adjustments. In the next row, we make 2 adjustments. Once again, 2 decreases. So we will alternate the penalties in each row. In one row we make 2 adjustments, in the other row 4, in one 2, in the other 4. And when we get a narrow hole, we will not forget to fill the head with a sintepon.
 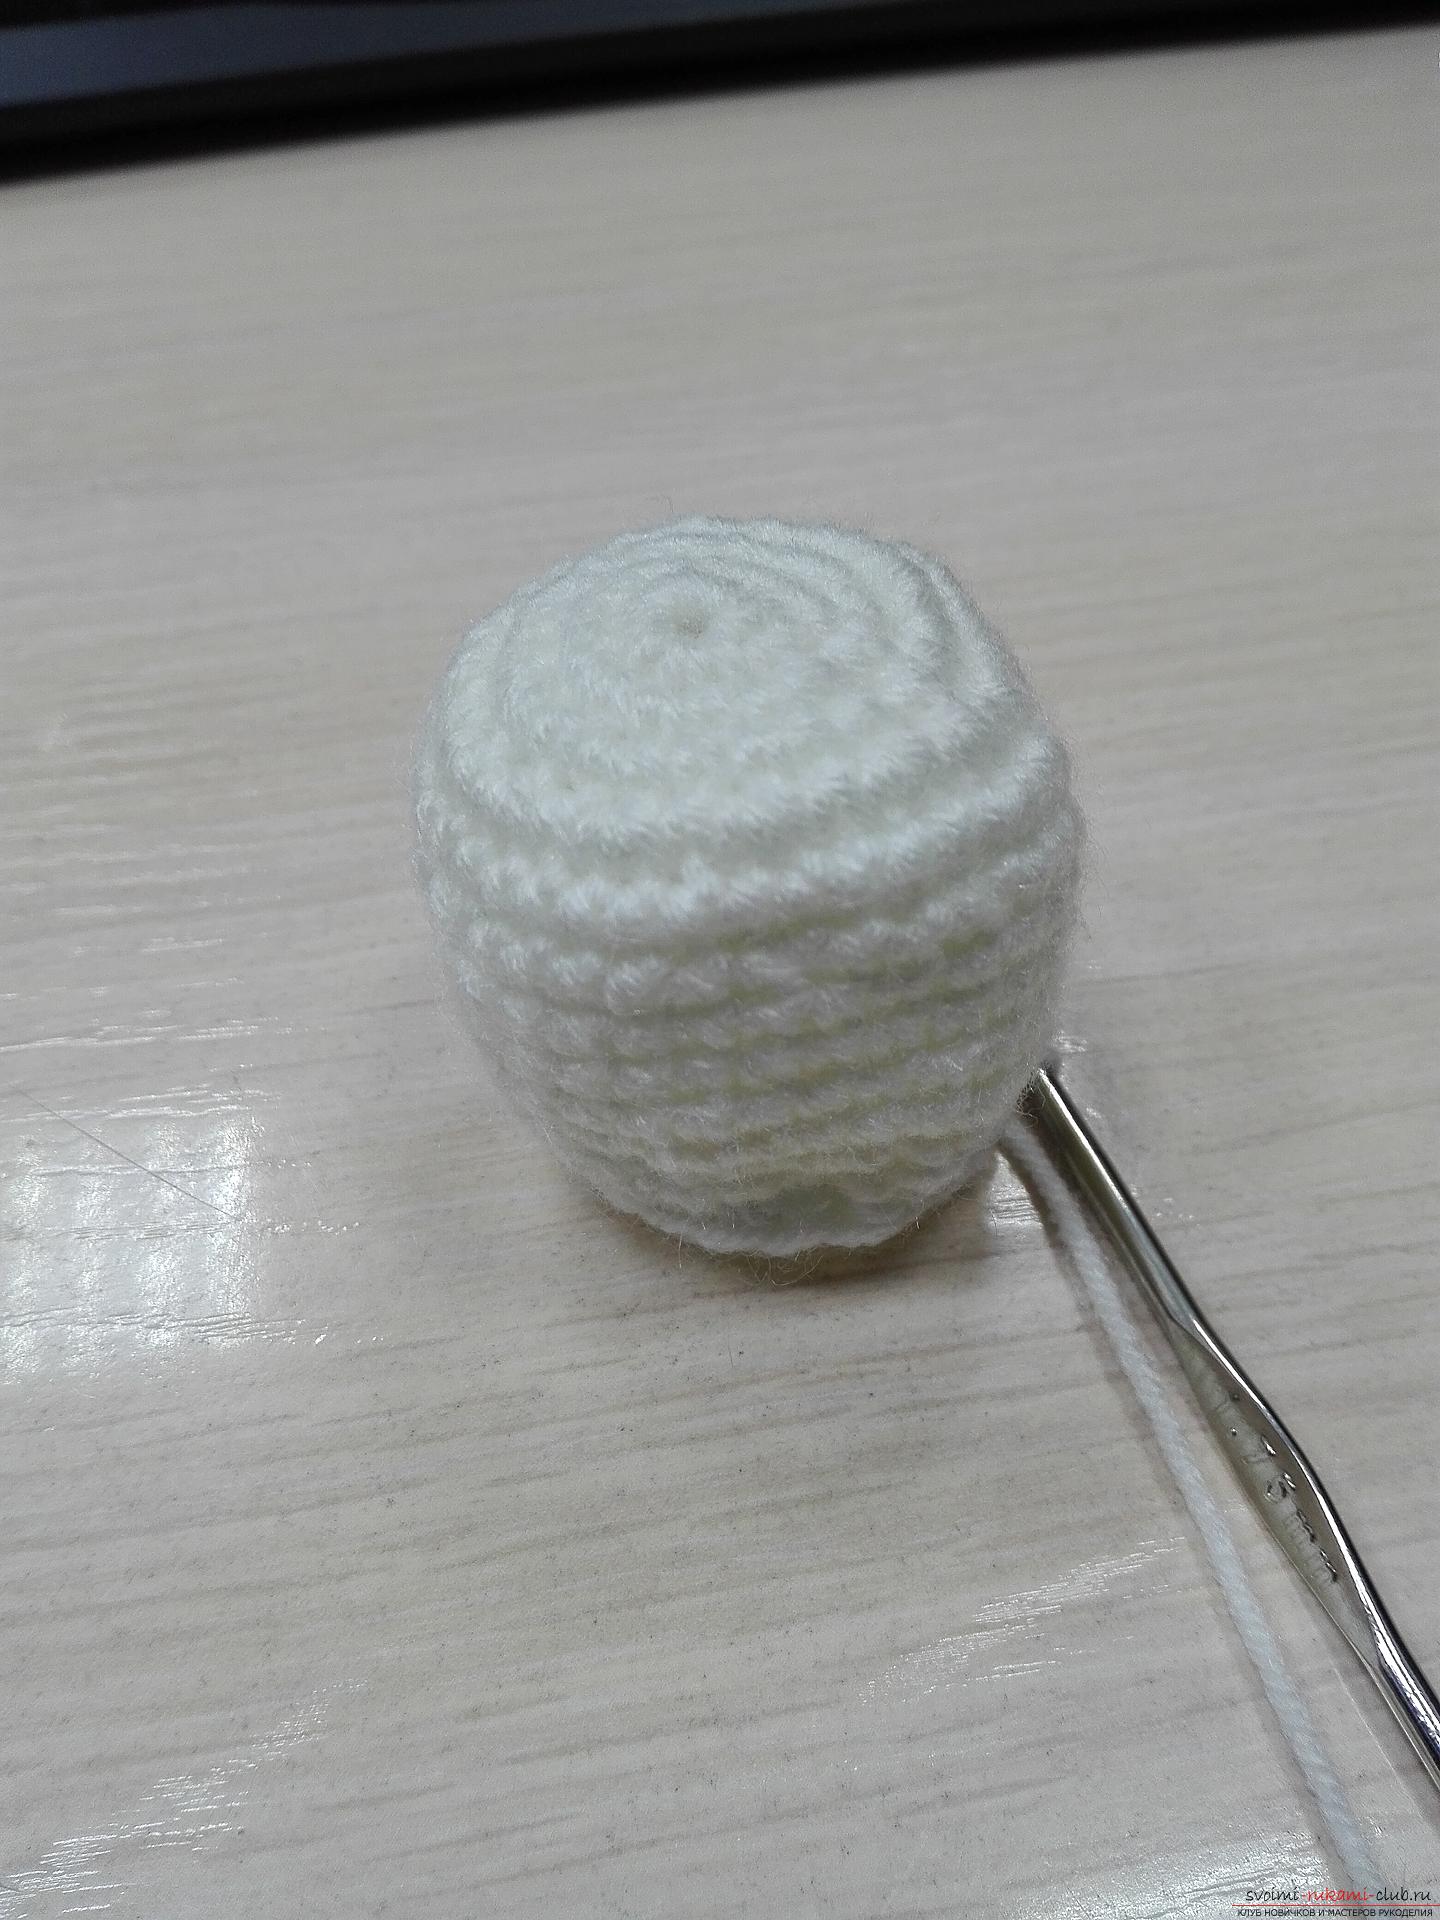 Then we tie two rows on one column without a crochet in each loop. Get a short neck.
  And we start knitting the torso. Then we knit 2 tbsp. without a crochet in each loop. And another row of 2 tbsp. without a crochet in a loop. Next on the 1st column without a crochet in each loop. I make the following rows of the trunk, we do 4 drops in each row. So until the moment when we finish. And do not forget to fill it with sintepon.
 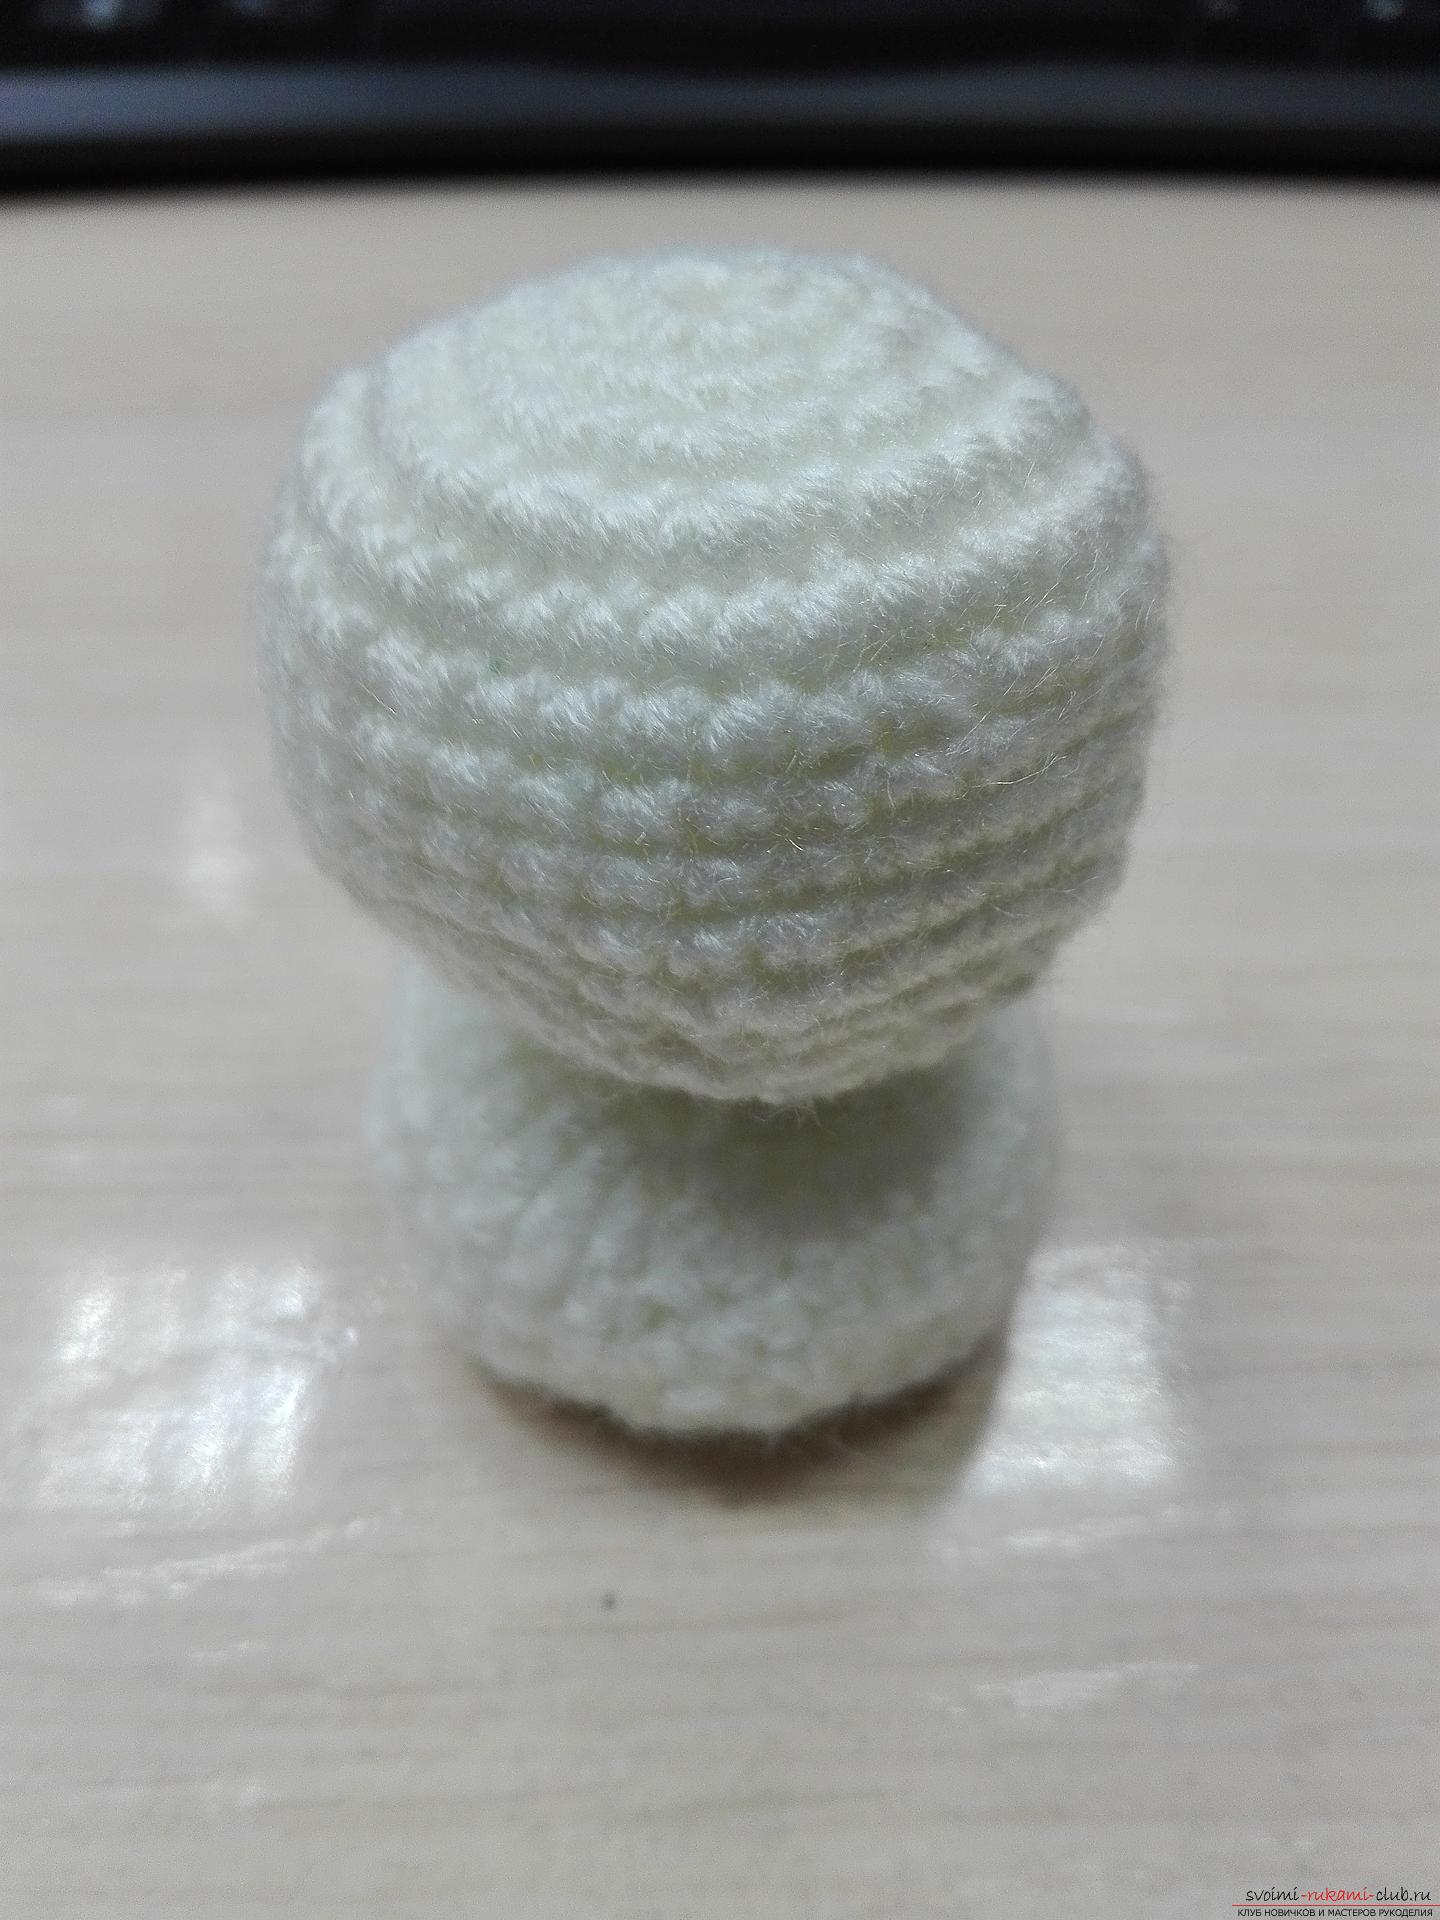 Let's start knitting ears.
 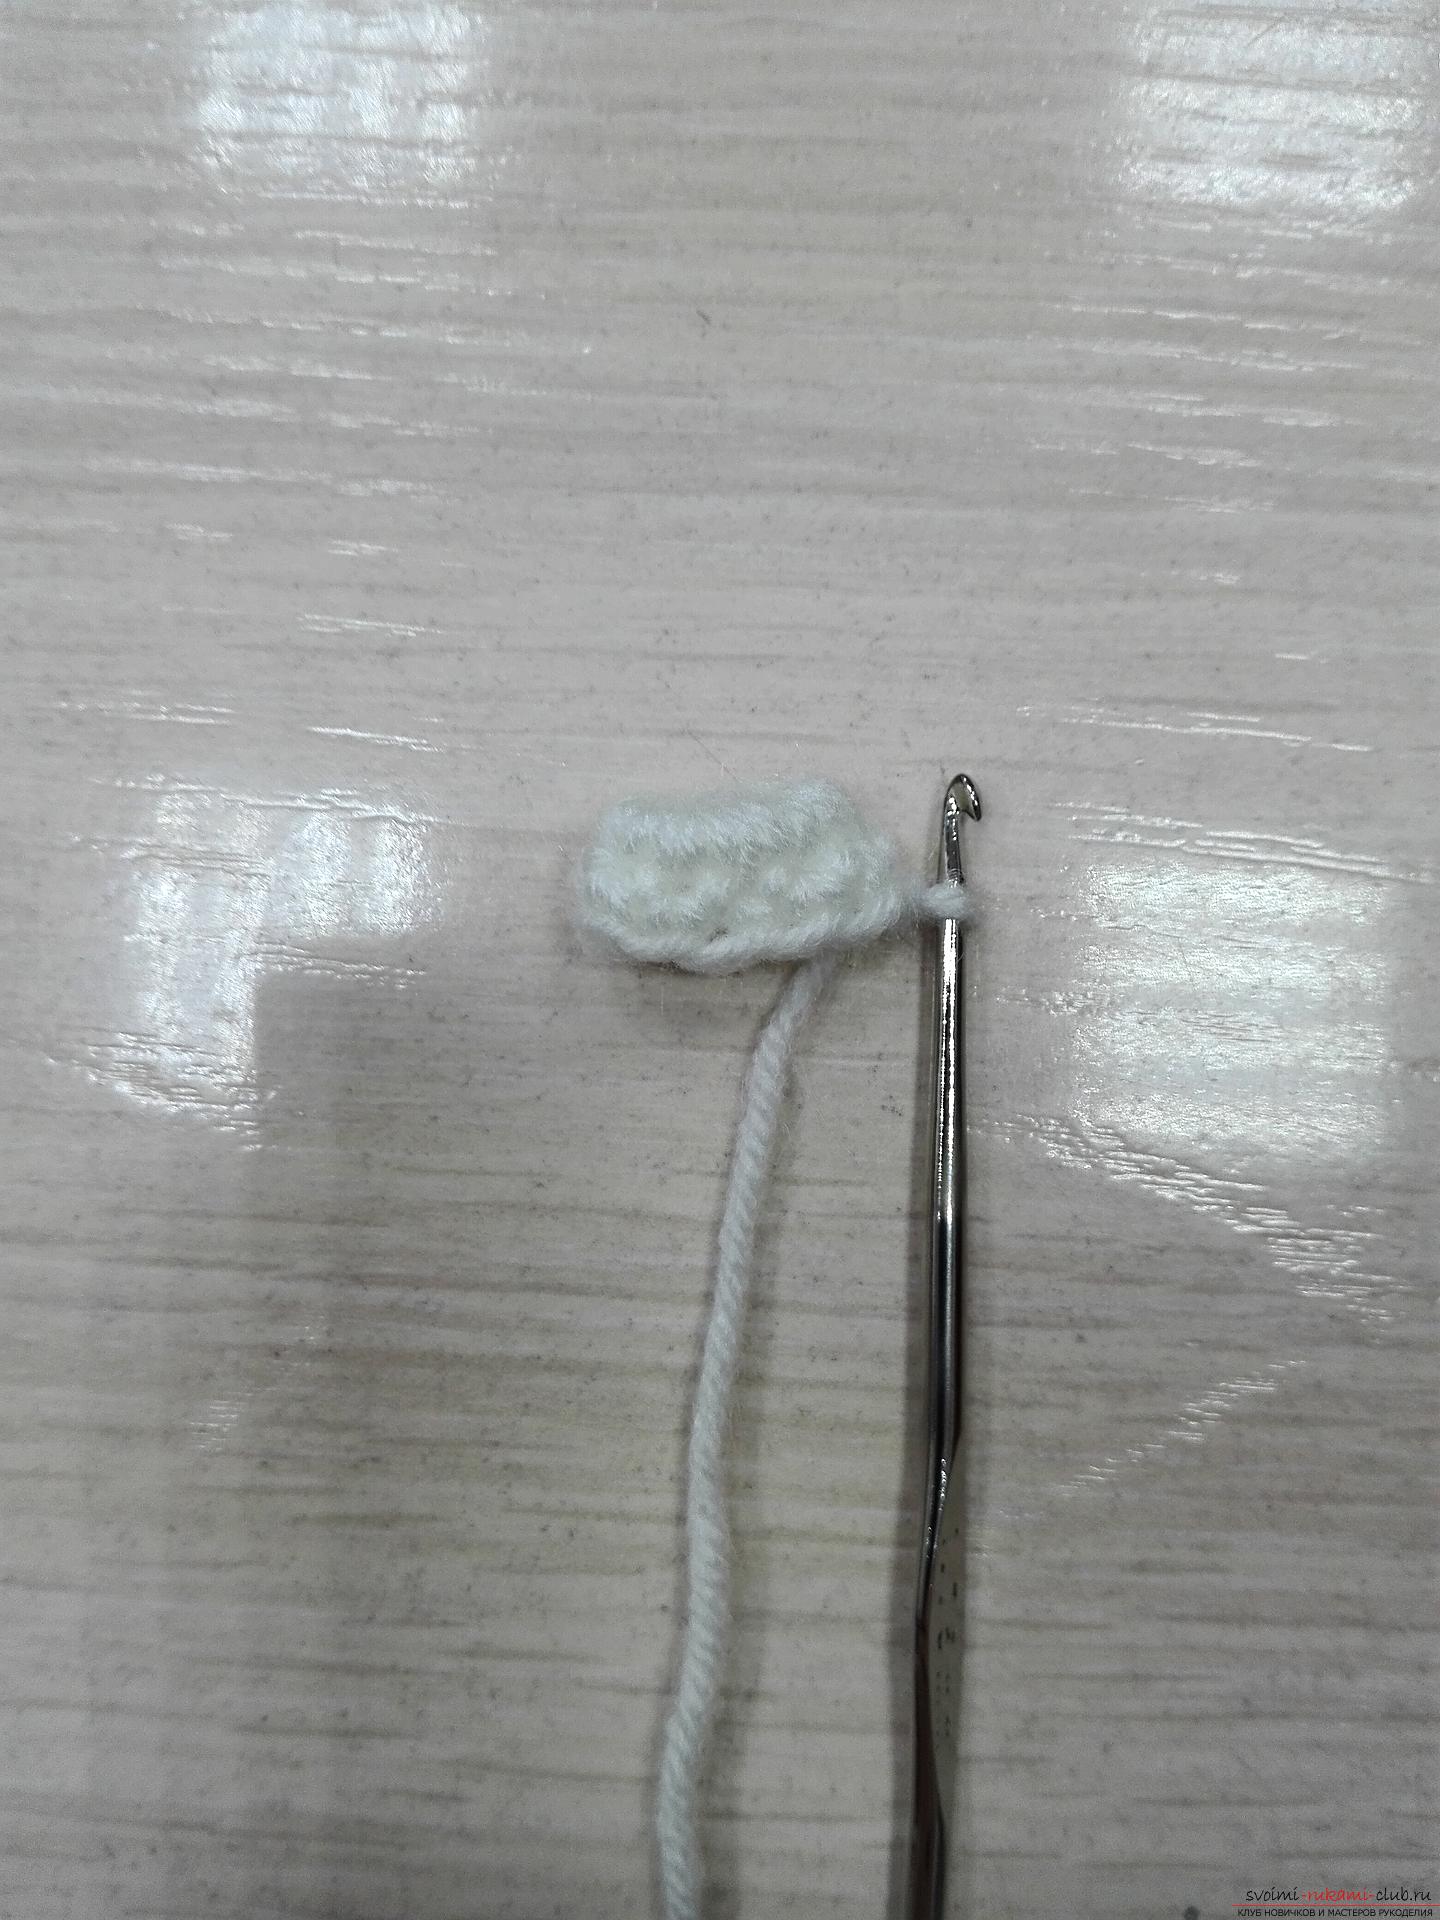 We select 4 bp, close them to the circle. Inside the circle we sew 8 tbsp. without a crochet. And the next 4-th row we knit on 1 column without a crochet in each loop.
  We begin to make increases. In one loop we knit 2 tbsp. without a crochet, and in the other 1 tbsp. without a crochet, so alternate, 2 tbsp. without a crocheting, 1 tbsp. without a crochet. And the next row we knit on the contrary, 1 tbsp. without a crochet, 2 tbsp. without a crochet in one loop, 1 tbsp. without a crochet, 2 tbsp. without a crochet in one loop. Next, we sew on the 1st st. without a crochet in each loop.
 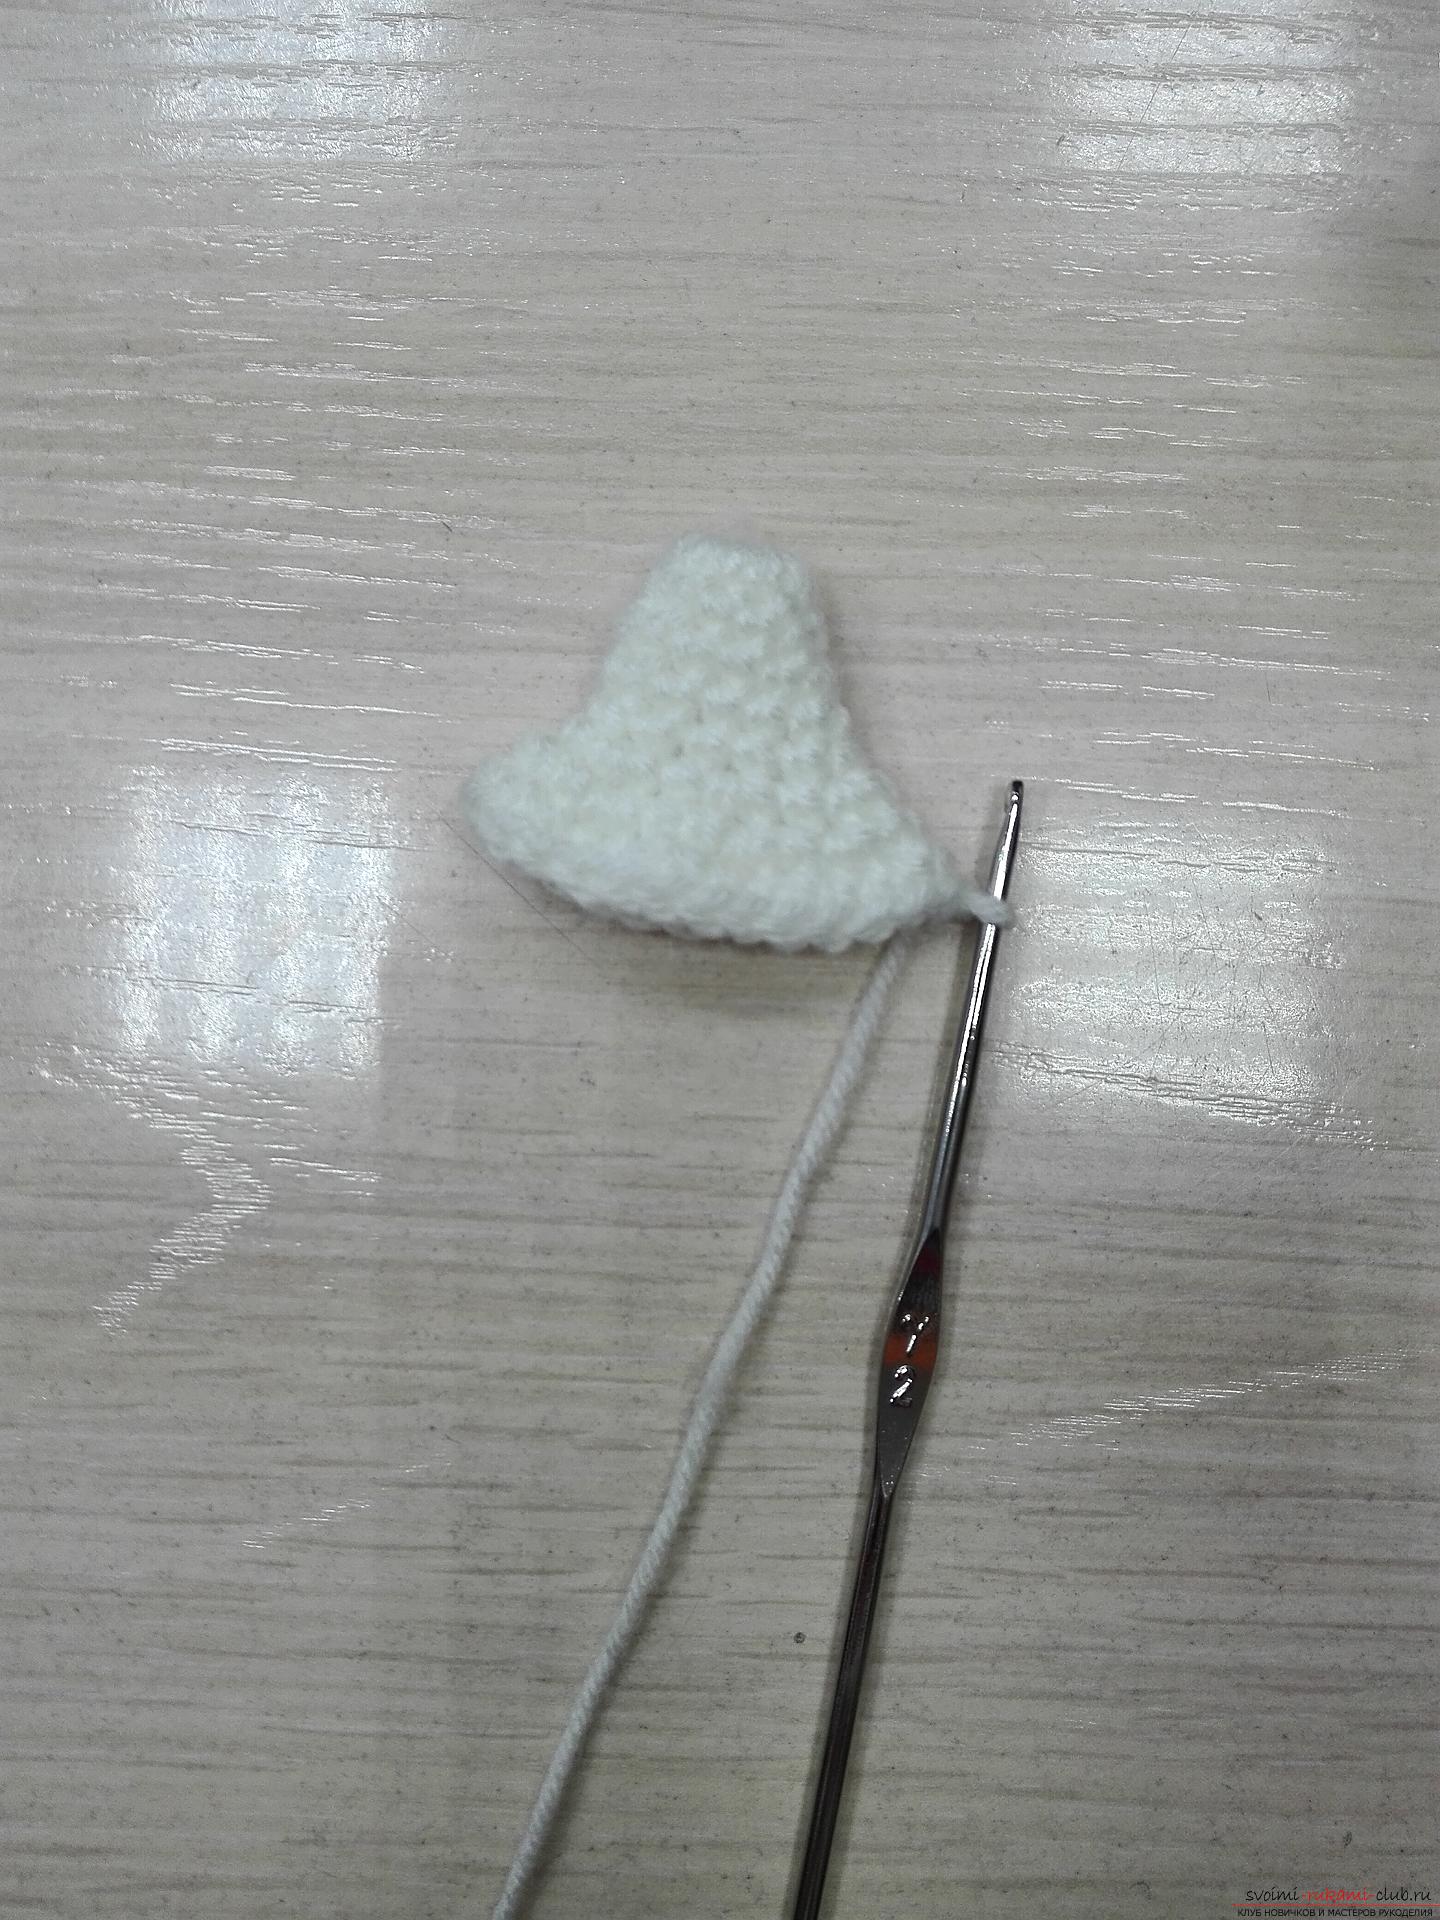 Also we start to reduce. In the next 2 rows we make three adjustments, in each row. In the next 2 rows of 2 decreases in each of the series. So we ended up knitting one bunny's ear.
 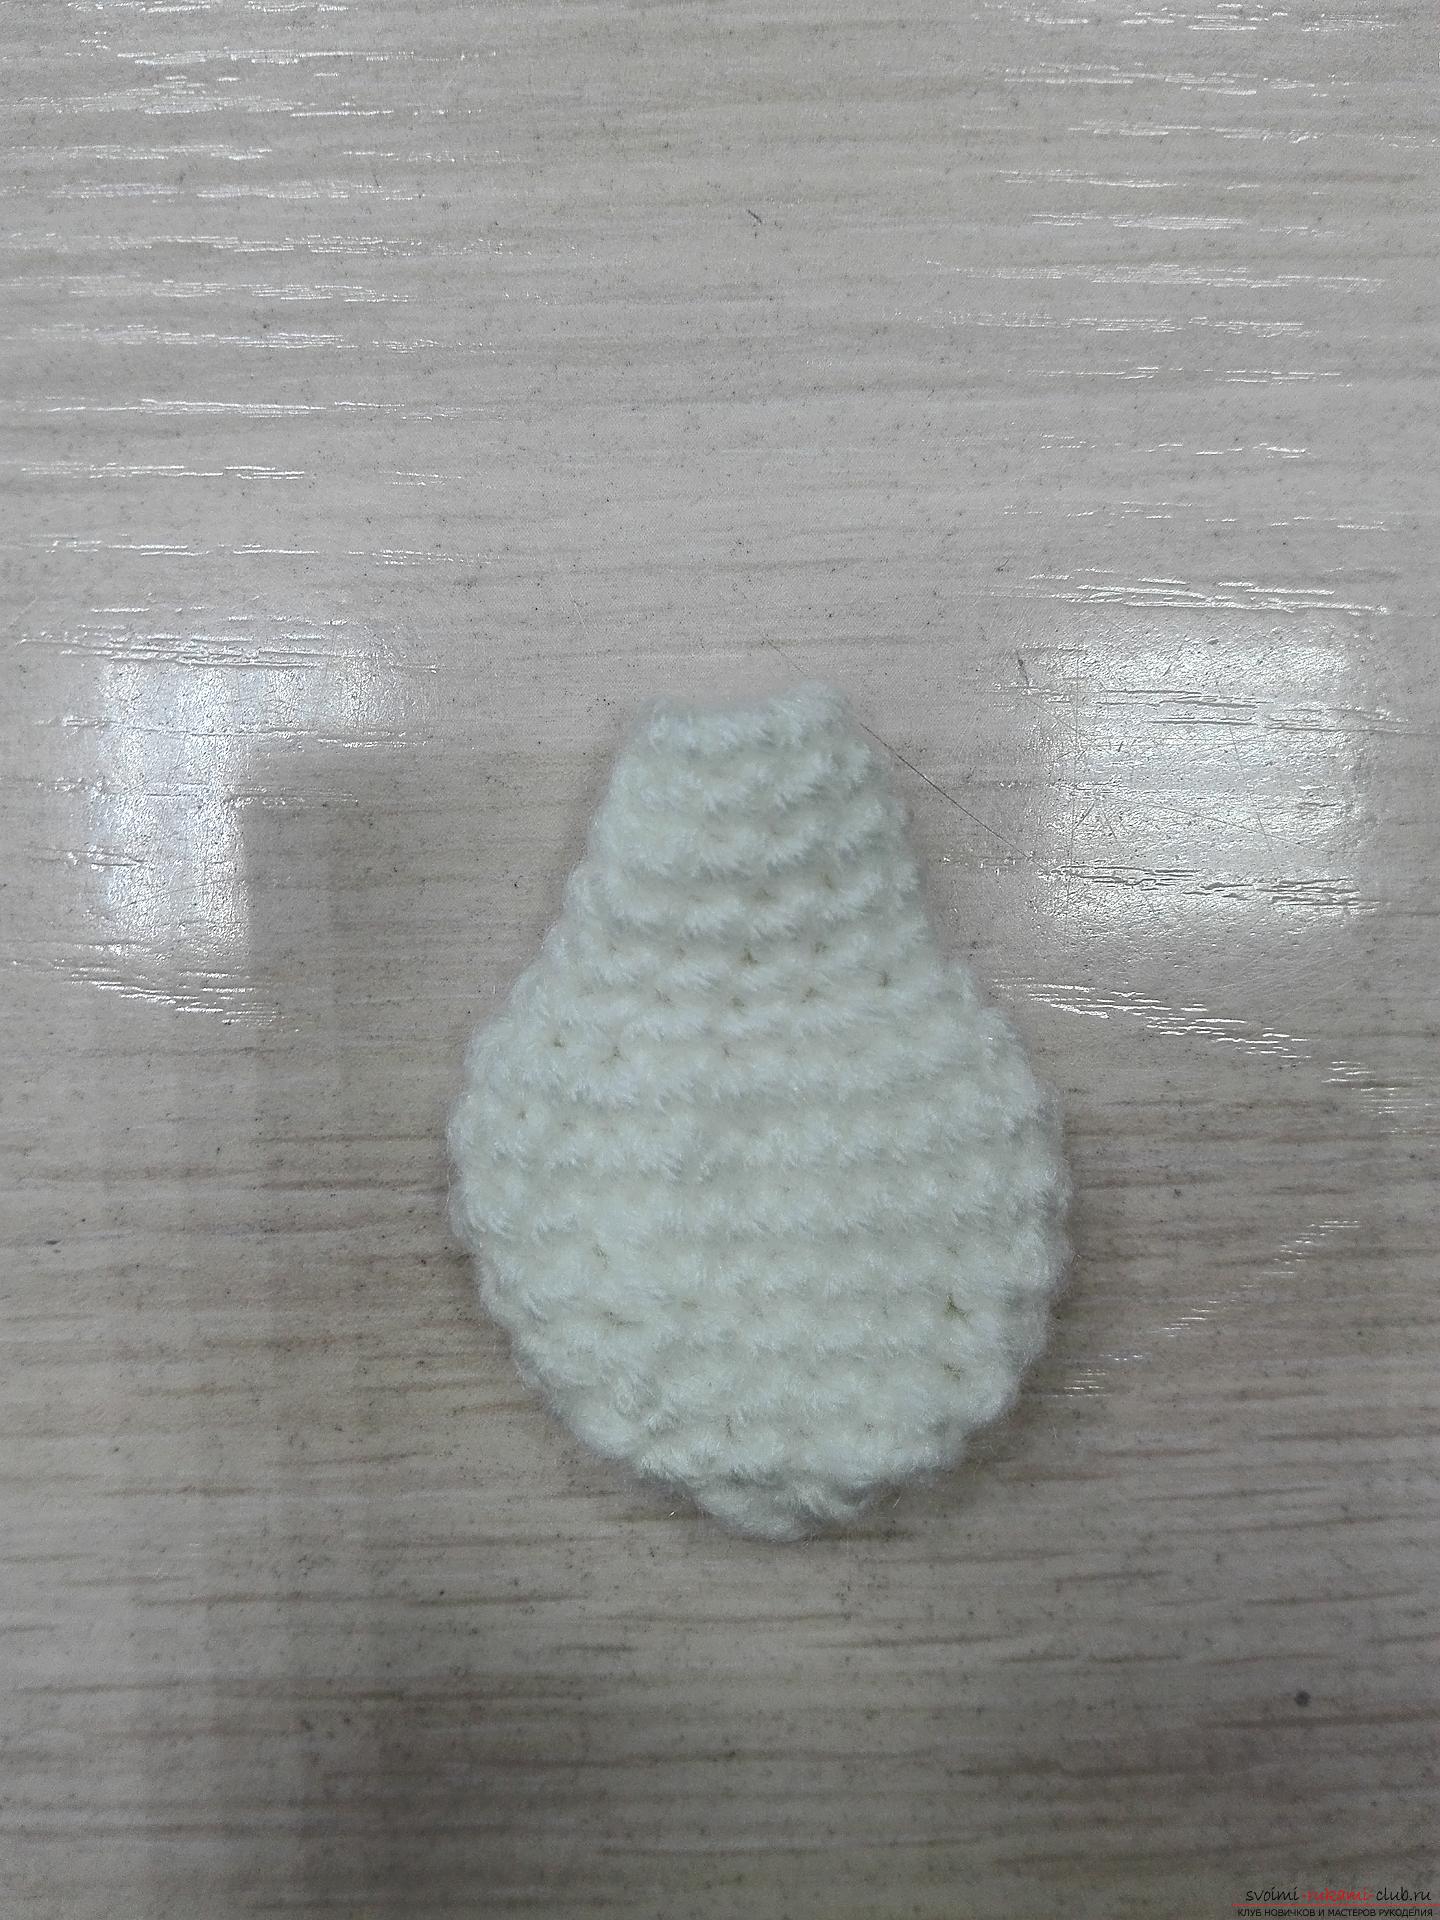 By the same scheme we knit and the second hare's ear. For further work we will need pink felt. From it we have to cut the inside of the bunny eye. And using sewing threads with ordinary stitches sewn to the ears.
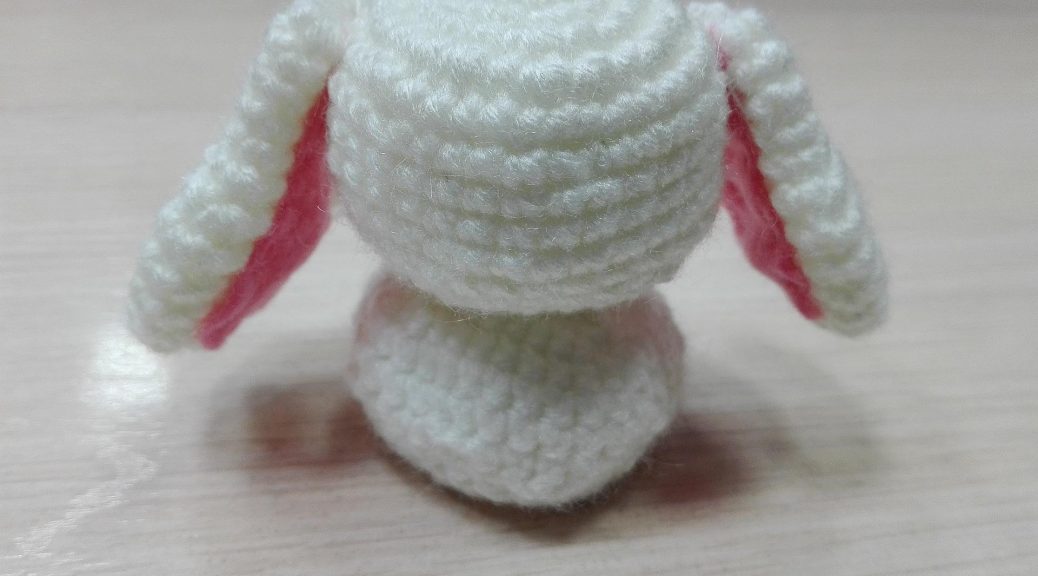
 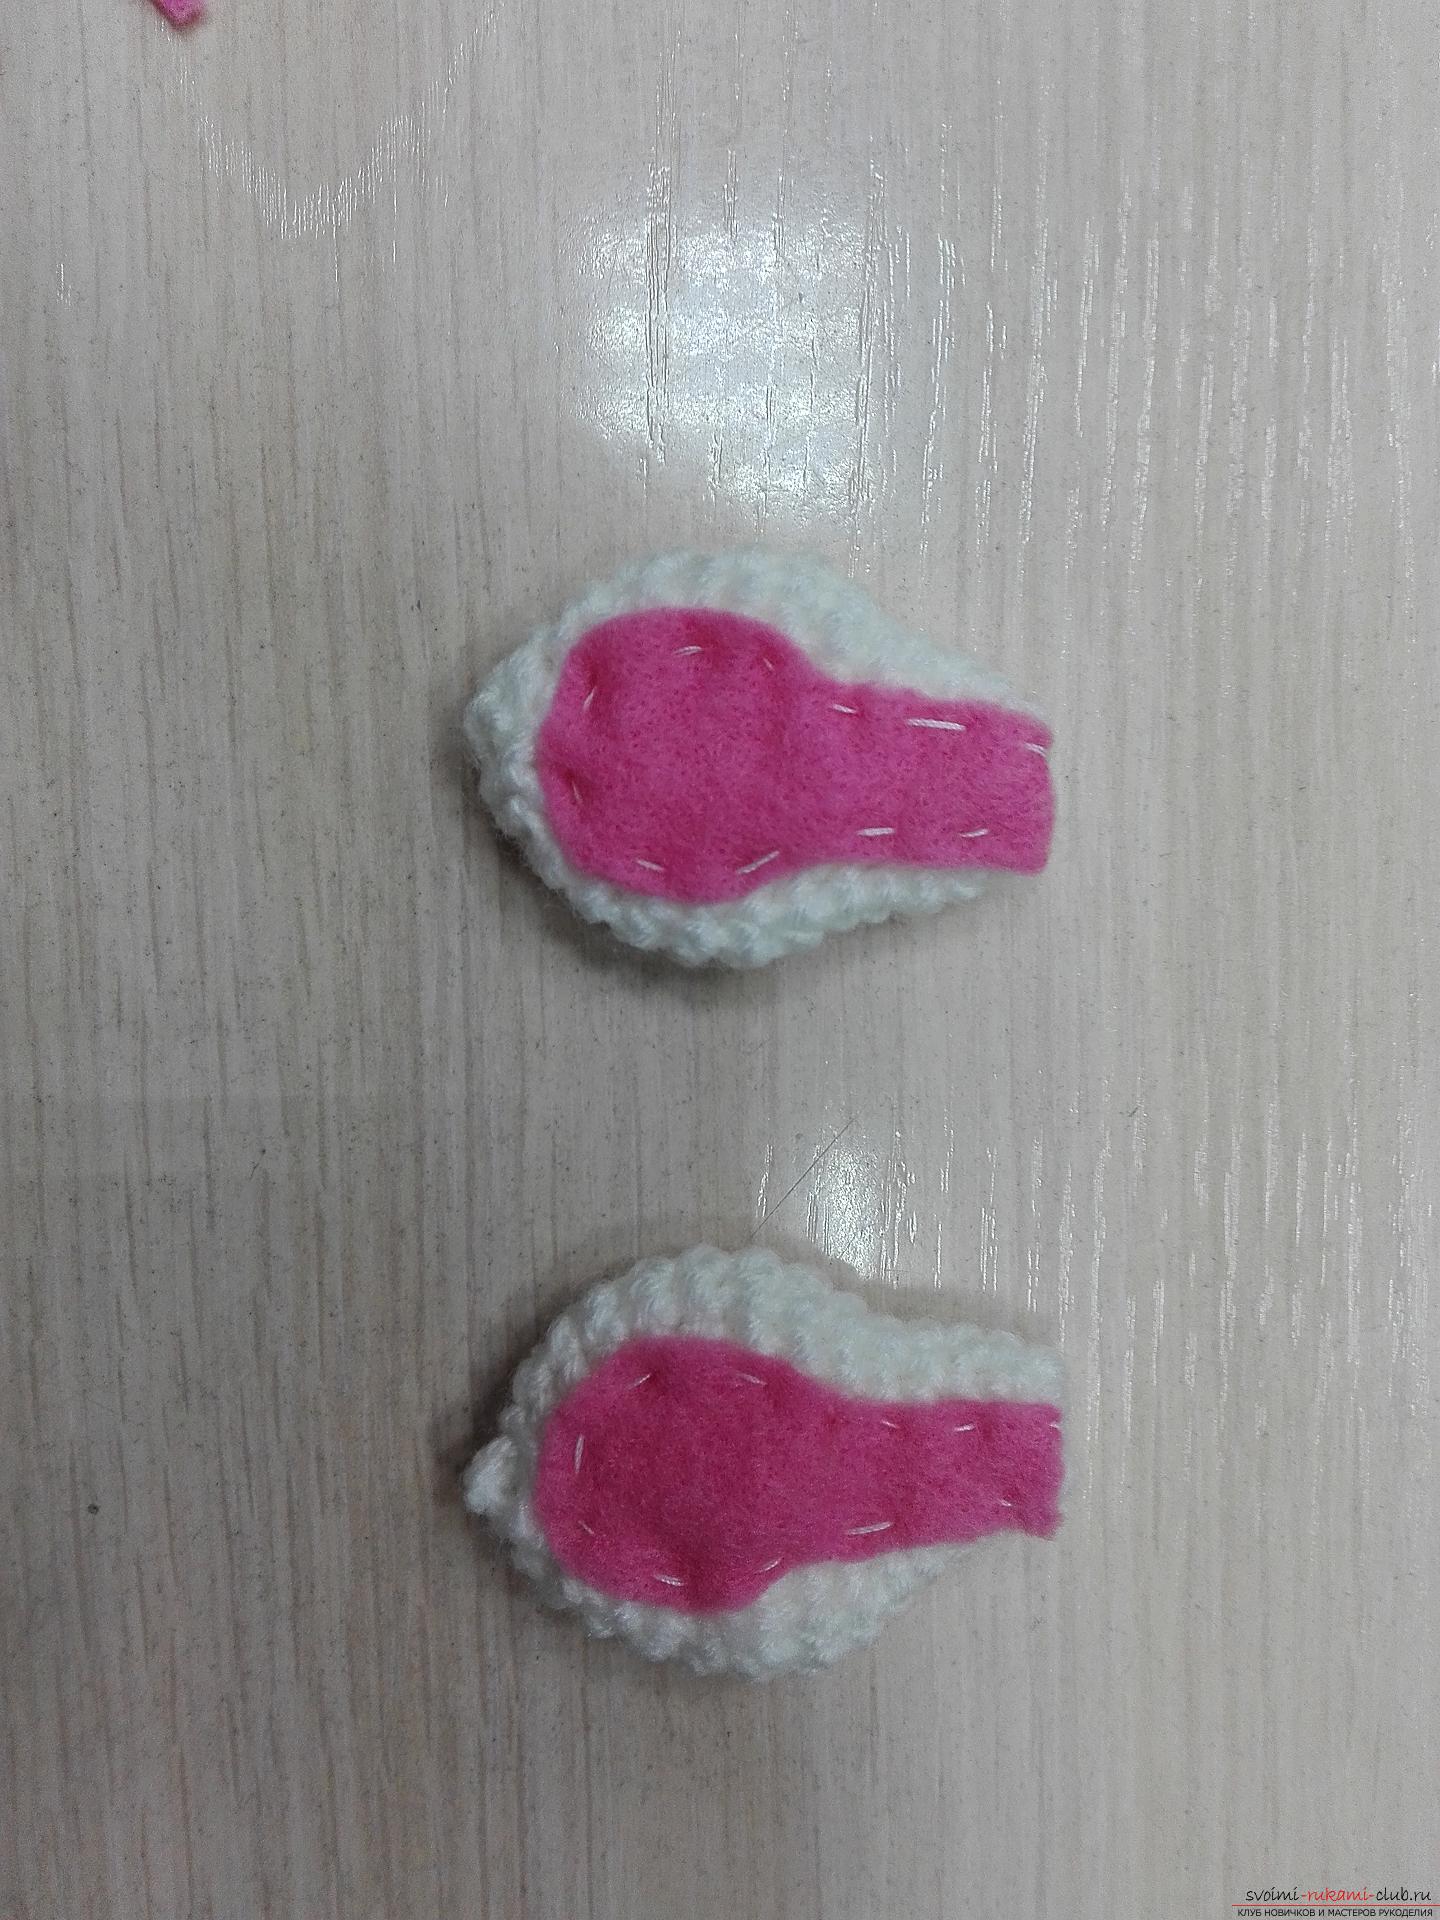 The ears are ready. Now sew the ears to the head.
  Threads for knitting and a needle, we embroider a little nose with a bunny. We knit a bunny female, so to make it more obvious, I tied a little flower on my head. You can also use a satin ribbon, you canto weave from beads any object of costume jewelry for decorating a toy. Eyes hare can be embroidered, as well as a spout, thread, but I decided to leave so. And now our little bunny is ready!
Comments
Related posts:
 This master class on crochet will teach you how to make a heart charm with your own hands.
 The master class will teach you how to make your own hair elastic band with a crocheted flower
 This master class on crochet will teach you how to create a beautiful frame for your photos.
 Master class of making a children's clothing set - a crocheted suit
 The master class will tell you how to create a New Year's hand-made crochet-crocheted snowman Stepu