The master class will teach you how to tie a toy Krosh with your hands using a hook.
We all saw the cartoon "Smeshariki" about the funnyanimals in the form of balls. These original and sweet, but at the same time very unpretentious characters do not leave indifferent not only young children, but even adults. The most popular of the merry comers is Krosh, a blue hare. In this master class, you can see how you can link Crochet to a crochet. Materials and tools:
- yarn (blue, pink, white);
- hook;
- sintepon;
- needle;
- two small beads;
- thread.
First you need to tie a ball, because Krosh hasshape of the ball. We make the first loop and then the second one. In the first we will bind the columns without a crochet. In total, we will make them 6. And add in each of the 4 rows of 6 columns. We will send another 4 rows of columns without a crochet.  Now let's make 4 adjustments in each of the twonext ryadochkov. Then we'll make 6 adjustments, and then we'll reduce the knitting to the end. We get a ball. At a time when we will start decreasing, Krosha will have to be filled with synthepone. It is necessary to fill it more tightly so that it does not lose the shape of the ball in due course.
  This is the head and body of Krosh. Next we will knit his paws. They knit quite quickly and simply. In the initial loop, we need to associate only 6 columns. And add 6 more in the second ryadochke. Now we'll tie another ruffian and make two in the last row. This will have Krosh legs, or hind legs. That's how they should look.
  The pens knit differently. In the initial loop also we will fasten 6 columns, but we will add in the second row not 6, but only 3 columns. And we'll fasten 3 ryadochka. After that we need to make 3 discounts in the last row. This is necessary so that the handles in the shoulders (in the place where we will sew them) were already. Then they will not fray.
  We knit the ears of Krosh. His ears are quite large. We will knit them round, and therefore the ears will not hang, but will stand and keep in shape. We will not fill them with sintepon. The form can be attached simply with your fingers, for example, if you want to still have one ear hanging. Again, make the initial loop, and one more. In the initial connection 6 simple columns. We will make six additions in the second and third rows. We knit two rows. We make two decrements and associate two more rows. After that we will make 4 discounts and we will bind 3 ryadochka. And in the last row there will be two deductions.
  We decorate the face of our Krosh. For this we need white and pink yarn. From white we will knit our eyes. They are different sizes of Krosh. One eye is slightly larger than the other. One eye: We knit 6 columns without a napkin in a sliding loop. Glazik is ready. Second eye: We also link 6 columns to the sliding loop. We knit the second row. But we will not bind it to the end, but we will only fasten the first 4 loops. The second eye is also ready. We knit the nose with the pink color of the yarn. Again, make a sliding loop. And we will link 6 columns without a crochet. And in the second ryadochke we will have 6 increases. Now we will tear the thread and stretch it through all the posts that we had in the last row. After that, we tighten all our knitting. The nose is also ready. All the details have to be left threaded to them to sew details.
  Sew the details to the ball. Eyes and nose, too, sew. The nose must be sewn so that it touches the lower edges of the eye. We will embroider the smile with the same pink threads that we used when we knitted our nose for Krosh.
  Instead of pupils, you can paste beads. Or you can embroider the pupils with threads of a mulina, for example. That's such a funny Crouch turned out!
Comments
Related posts:
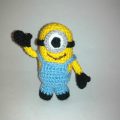 Master-class with detailed photos and step-by-step description will teach how to crochet a toy minion
 This master class toys will teach you how to tie a zebra crochet
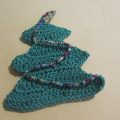 This master class New Year crafts with their own hands with a photo and description will teach how to tie a Christmas tree crochet
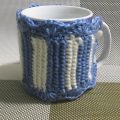 The master class will teach you how to connect your own hands with a useful hand-crafted article for your home - a glass bottle for a glass
 The master class will teach you how to make your own hands a developing toy from improvised materials