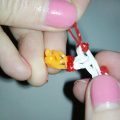
Master class braiding bracelets with their own hands will teach how to weave bracelets of rubber bands on the machine.
Weave bracelets from latex rubber bands have come toto us from America. This is a very interesting and diverse kind of needlework, which everyone should try. After all, he proposes the creation of his original and unique decoration. This kind of needlework not only carries away, but also allows you to save on buying bracelets. And the materials themselves, from which the ornaments are weaving, will not hit your pocket. Thanks to latex elastic bands, we can create our own stylish and unique bracelets for every day. Materials and tools:
- machine tools for weaving;
- hook;
- elastic.
Our bracelet will contain the inscription I love you,but in the usual reduction. We embroider the word "I", instead of the word "love" we make a heart, and we shorten the word "you" to 1 letter "u". Such a bracelet can be a good gift for a loved one. We remove the middle row from the machine and unfold it with the open side of the columns to the right. It is desirable that at the bottom of the machine there is no base in the place where we weave, since the bracelet will come out from below. We will weave according to the scheme. We will use 12 bars, that is, 6 on each row. The points on the diagram mean that we have to put on the rubber band of the primary color, we will have them red. And crosses are letters that we will weave. They are woven with white elastic bands. You can take any other colors. By this scheme, you can weave any word or picture.  1 rubber (cut-ku) we need to wear at all6 columns (st-kov) of the bottom row. You can always wear on the top row, it does not matter. Next, you need to pull 6 rez-ok. One for the first sts of both rows, the second for the second and so on. At the same time, we turn the cutting machine. Cutting should cross in the middle.
  If you want the bracelet to be thicker and denser, thenyou need to pull each time 2 cuts, except for the one that we put on all the sts at the bottom. Next, we take an elastic band, put on all the sts of the lower row, and transfer it to the center. That is, we just take it off the sticks and let it go in the middle between the rows. It was the 1st row. In total we will weave 23 rows. It is better to bend the circuit after each row, so that you can see exactly how to position the cut. This will help us not to get confused and not to spoil the drawing. In the 2 nd row, again put on 1 cut-on all the sts at the bottom. And now let's arrange the cuts in the same way as in the previous row. Again, we remove the elastic band, which is stretched to all the sts. Now we remove the bottom layer, that is, we take one lower cut from each stalk and release it inside. If you throw 2 cuts, then we will shoot by 2. We bend the circuit. The third row of plait is the same, but it is already possible not to cut it.
  Again, we drop the layer from the bottom.
  The remaining ranks of the plait are exactly the same, according to the scheme. Where there is a point, you need to throw red cut, and where there is a cross - white.
  In the end we get such an inscription.
  Please note that the first 5 rows and the last5 rows consist only of rubber bands of the primary color. To remove the bracelet from the machine, we need to transfer cuts from each row of the bottom row to the opposite st-to the upper row or vice versa.
  If we used 2 cuts when weaving,on the side of the row, then after the cuts have been transferred, you need to fold the 2 lower ones. If you took 1 cut-ke, then you do not need to throw anything. Now we just put turns from each stitch to the hook. We catch 1 red cut and stretch it through all the cuts on the hook.
  We put on the clip. When the bracelet is locked, then you need to catch the second side of the clip at the other end of the bracelet. The bracelet is ready! You can wear it on your hand, and you can give it to a loved one!
Comments
Related posts:
 Master-class weaving from the rubber bands will teach how to weave figurines of an angel on a machine.
A detailed master-class with a photo will teach how to weave from a rubber band a handbag for a doll with your own hands.
Master-class weaving from the rubber bands will teach how to weave figurines of an angel on a machine.
A detailed master-class with a photo will teach how to weave from a rubber band a handbag for a doll with your own hands.
 Bracelets made of rubber bands with their own hands, how to weave a bracelet made of rubber bands, weaving bracelets on the fingers, using a slingshot when making bracelets with your own hands.
Master-class weaving from rubber bands will teach how to make your own hands of rubber bands shoes for dolls - slippers.
Bracelets made of rubber bands with their own hands, how to weave a bracelet made of rubber bands, weaving bracelets on the fingers, using a slingshot when making bracelets with your own hands.
Master-class weaving from rubber bands will teach how to make your own hands of rubber bands shoes for dolls - slippers.
 This master class of weaving from rubber bands will teach how to weave a Ronald McDonald figure