
The master class will teach you how to make your own hands a Christmas tree decoration - a knitted snowman
The most magical and long-awaited holiday is comingyear, this is the New Year. All people decorate houses and, of course, put Christmas trees, so I propose to perform a toy, to decorate a green beauty. Namely, a snowman! 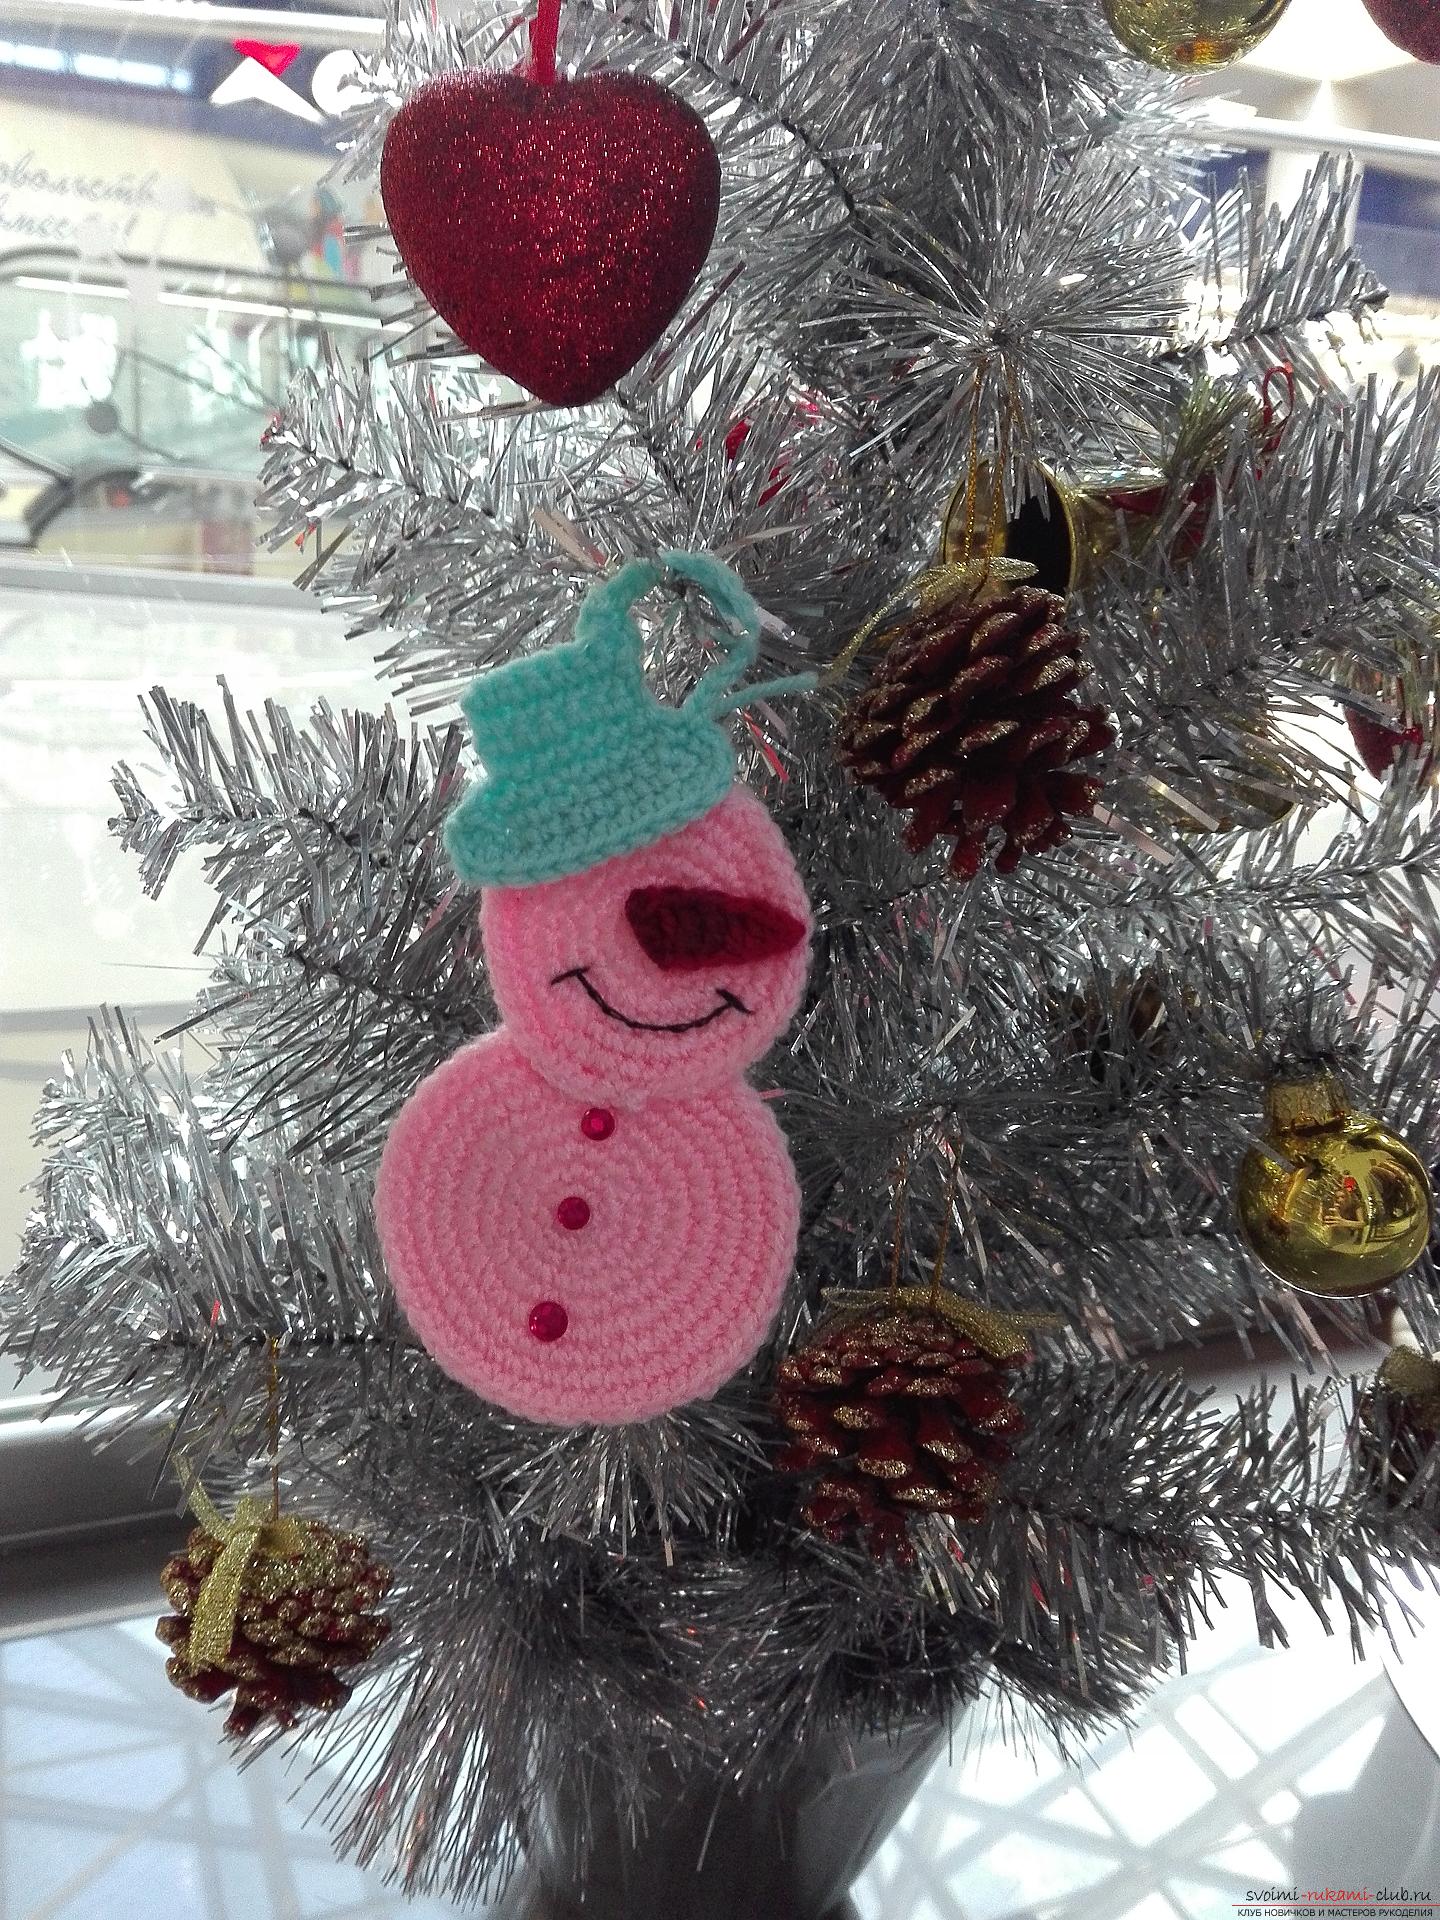 For the manufacture of toys we will need:
- yarn of pink, red and blue;
- hook;
- Rhinestones;
- sewing thread;
- needle.
Let's do 3 air. loop and close them in a circle. We do one air. loop for lifting and we will be tying 6 columns into the ring without a crochet. 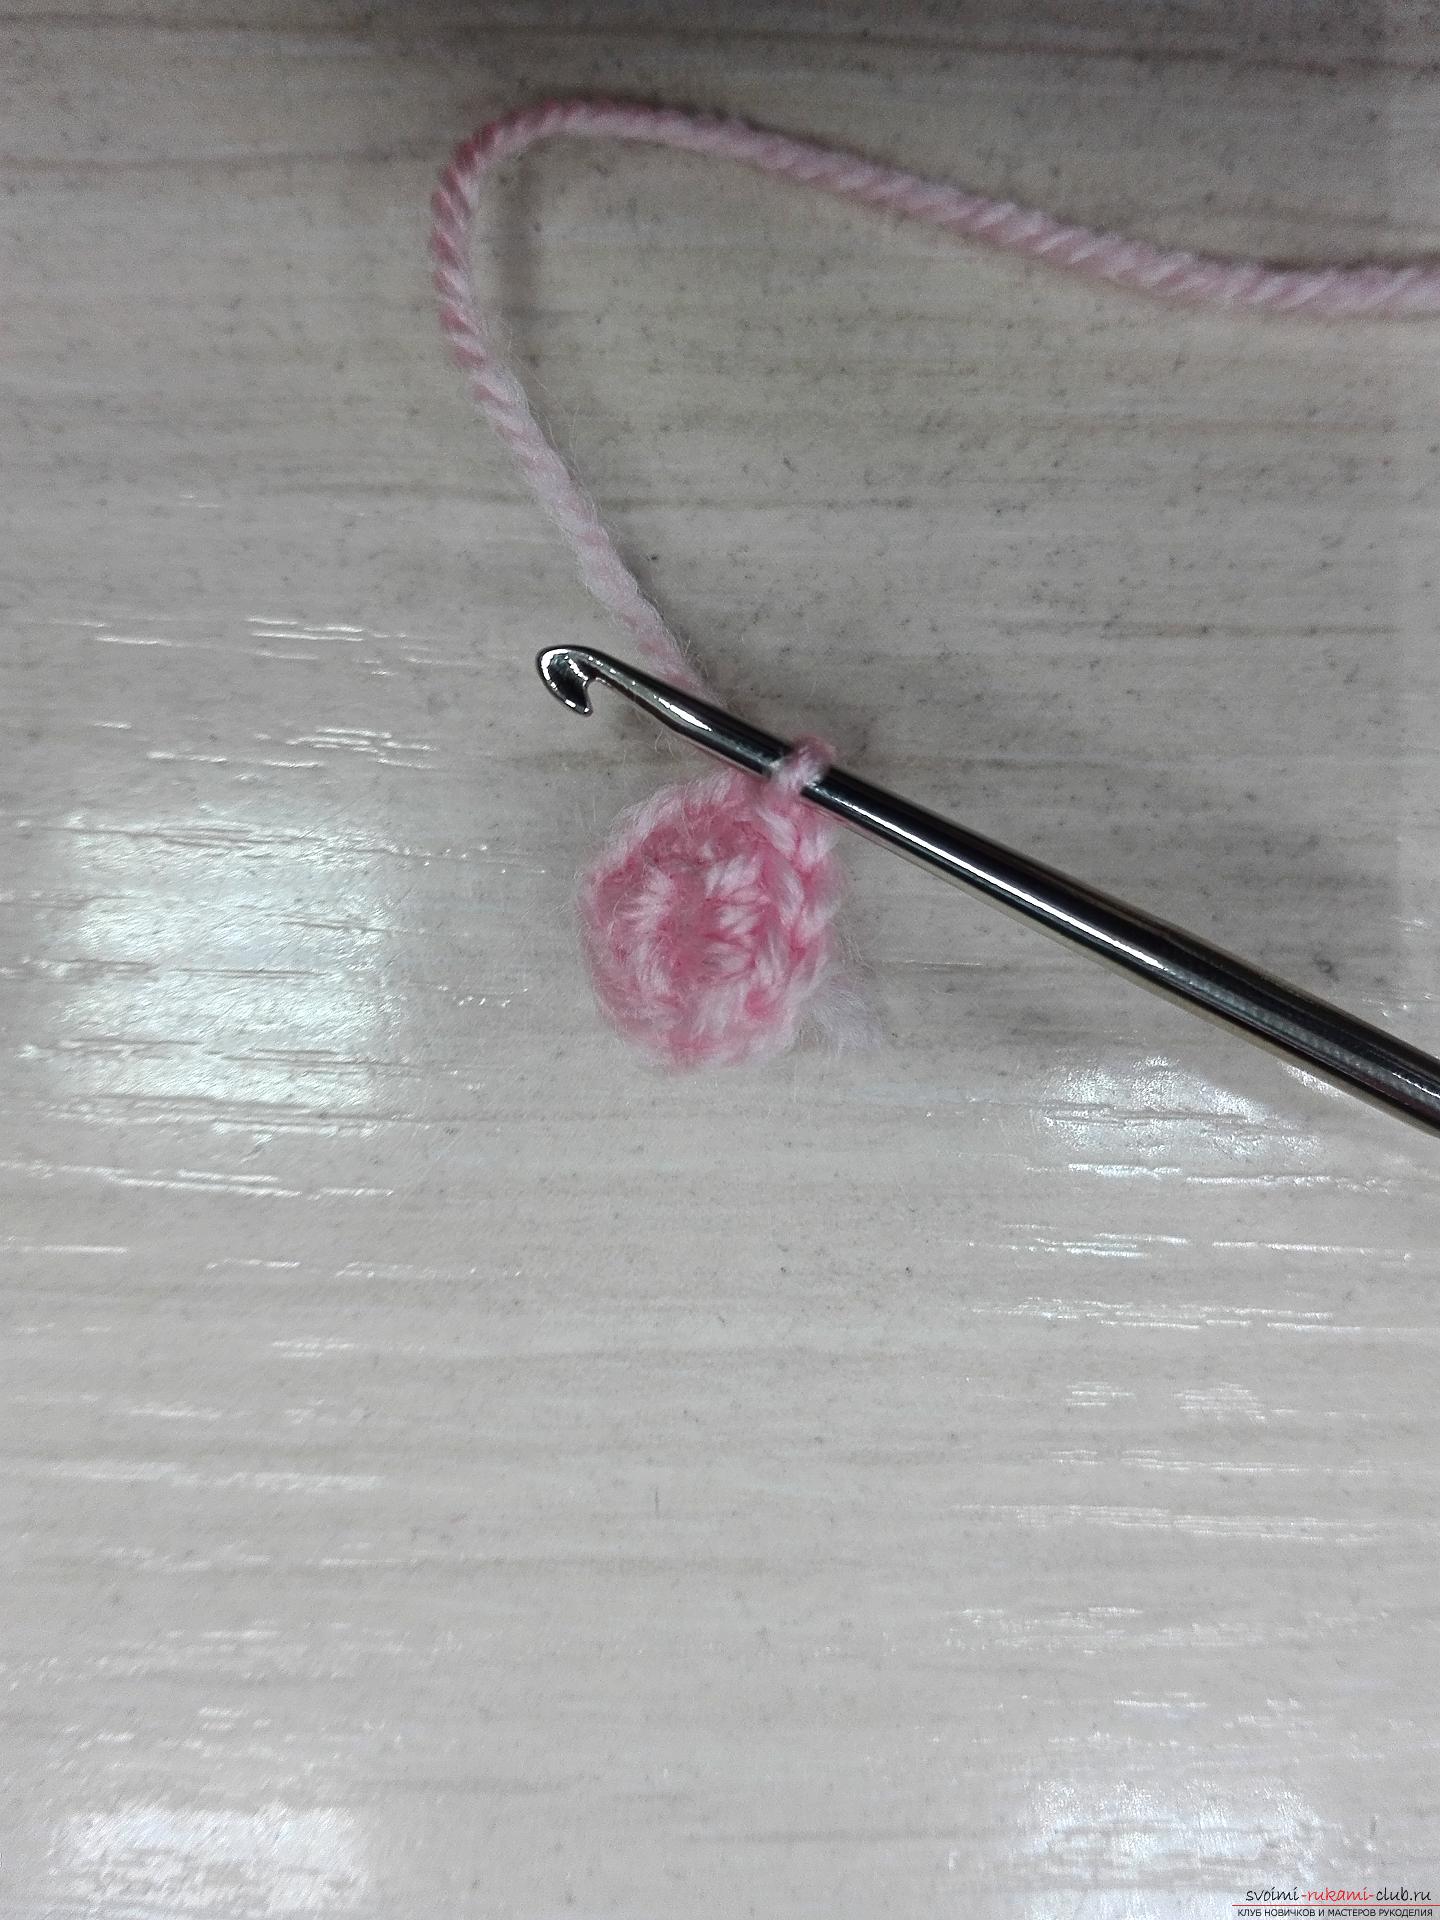 1 air. eyelet for lifting. In the first column we knit 2 columns without a crochet, in the next loop, we knit one column without a crochet, then we knit in each loop along the 1st column without a crochet. And only in the last loop will we again relate 2 columns without a crochet into one loop, end the row.
 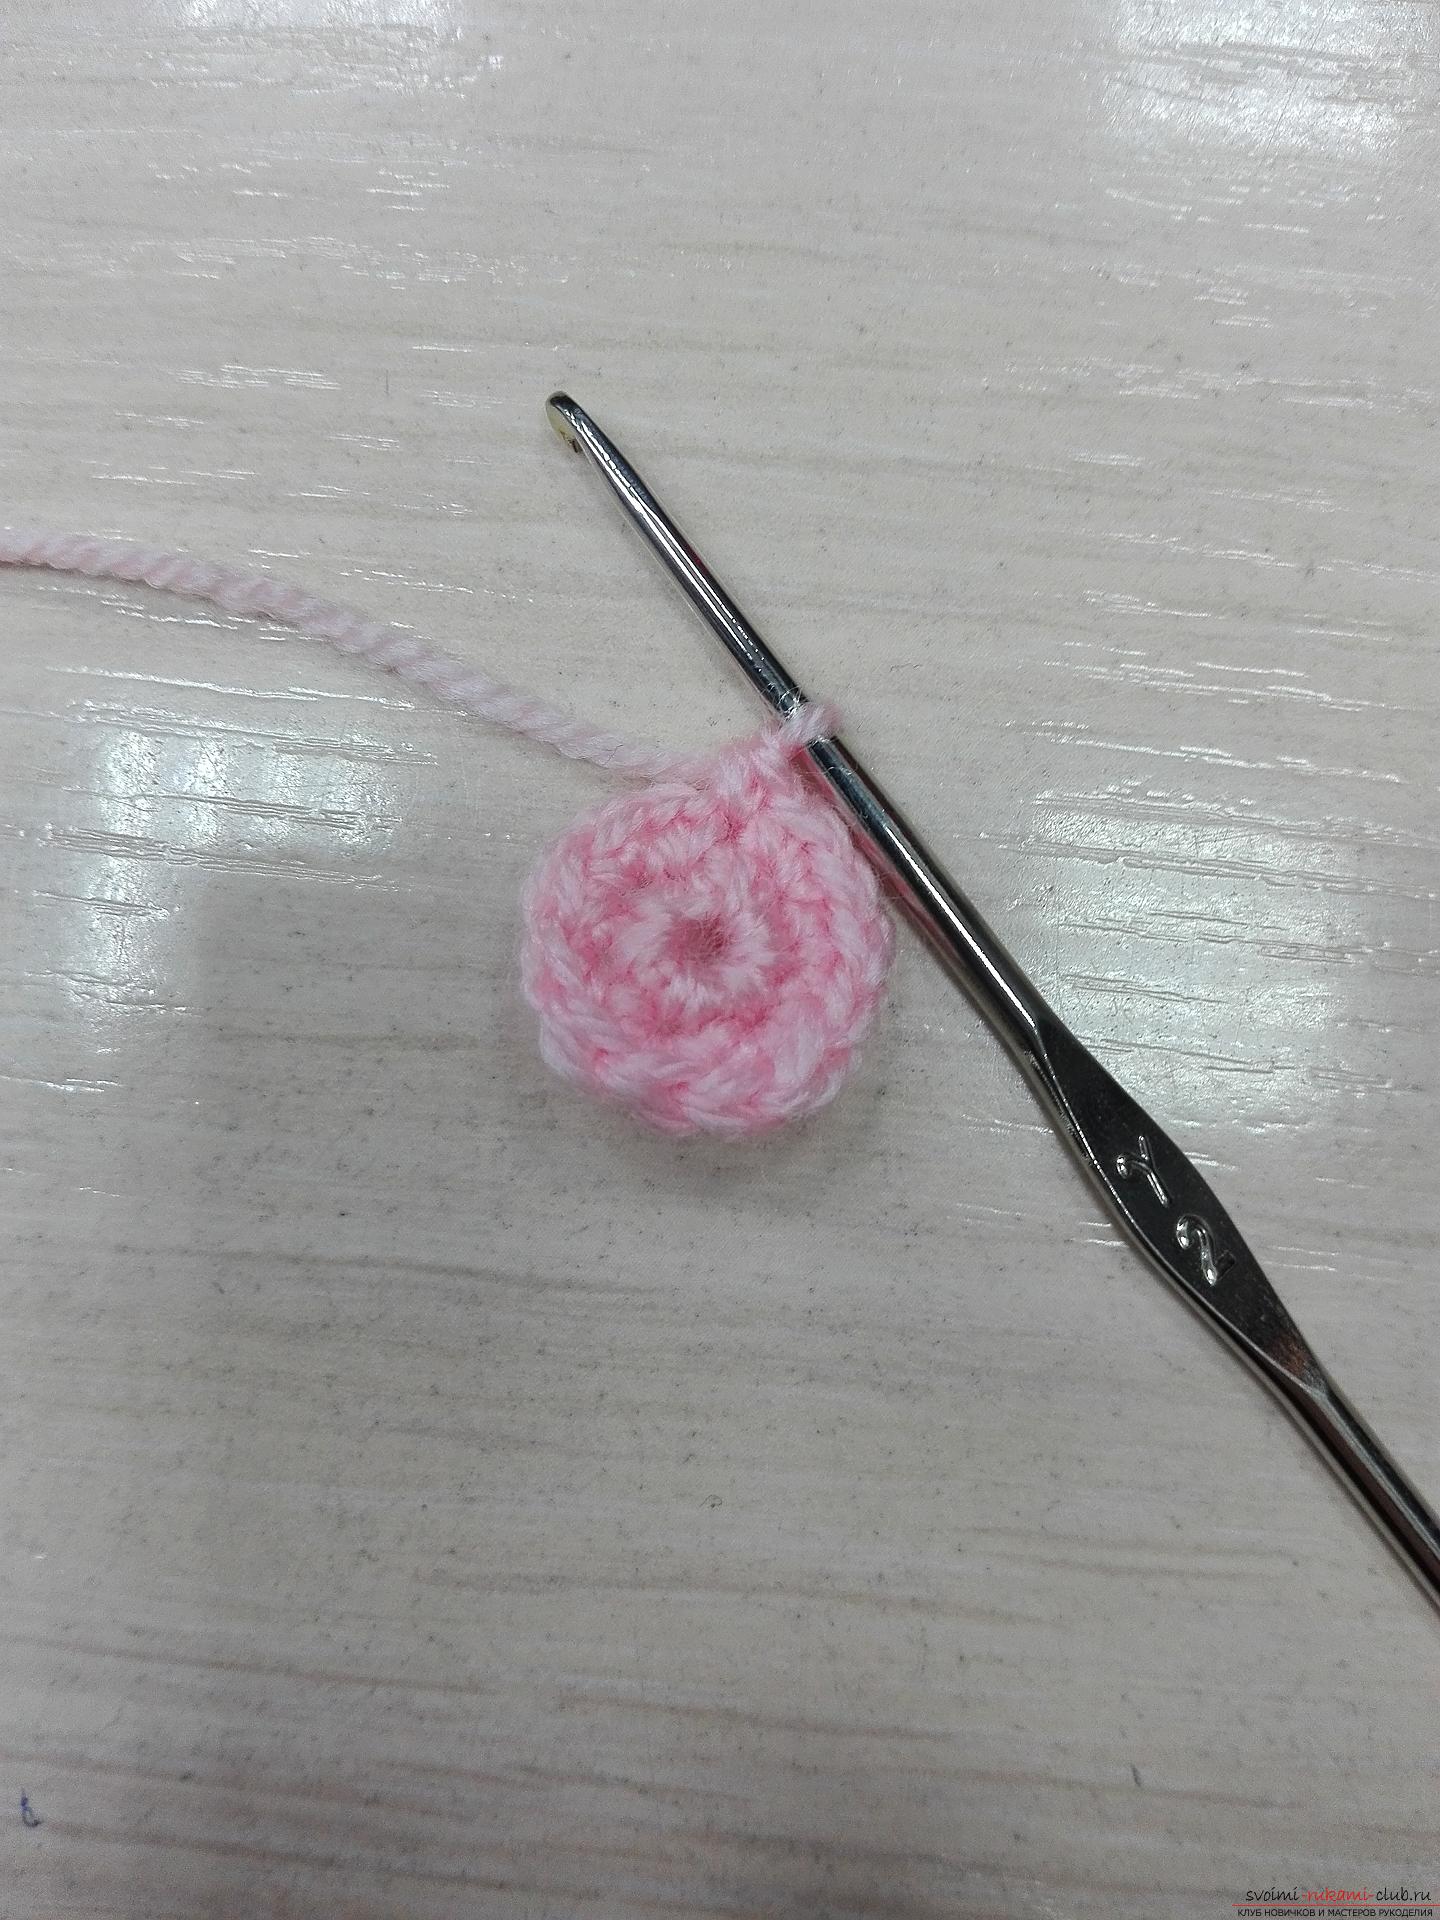 We do one air. loop for lifting. We will tie a column without a crochet, then in one loop we knit two columns without a crochet, in the next loop we knit again 2 columns without a crochet. Next, we knit on the 1st column without a crochet. And at the end of the series, we repeat what we did at the beginning, in the last 2 loops we will fasten 2 columns without a crochet, in each.
 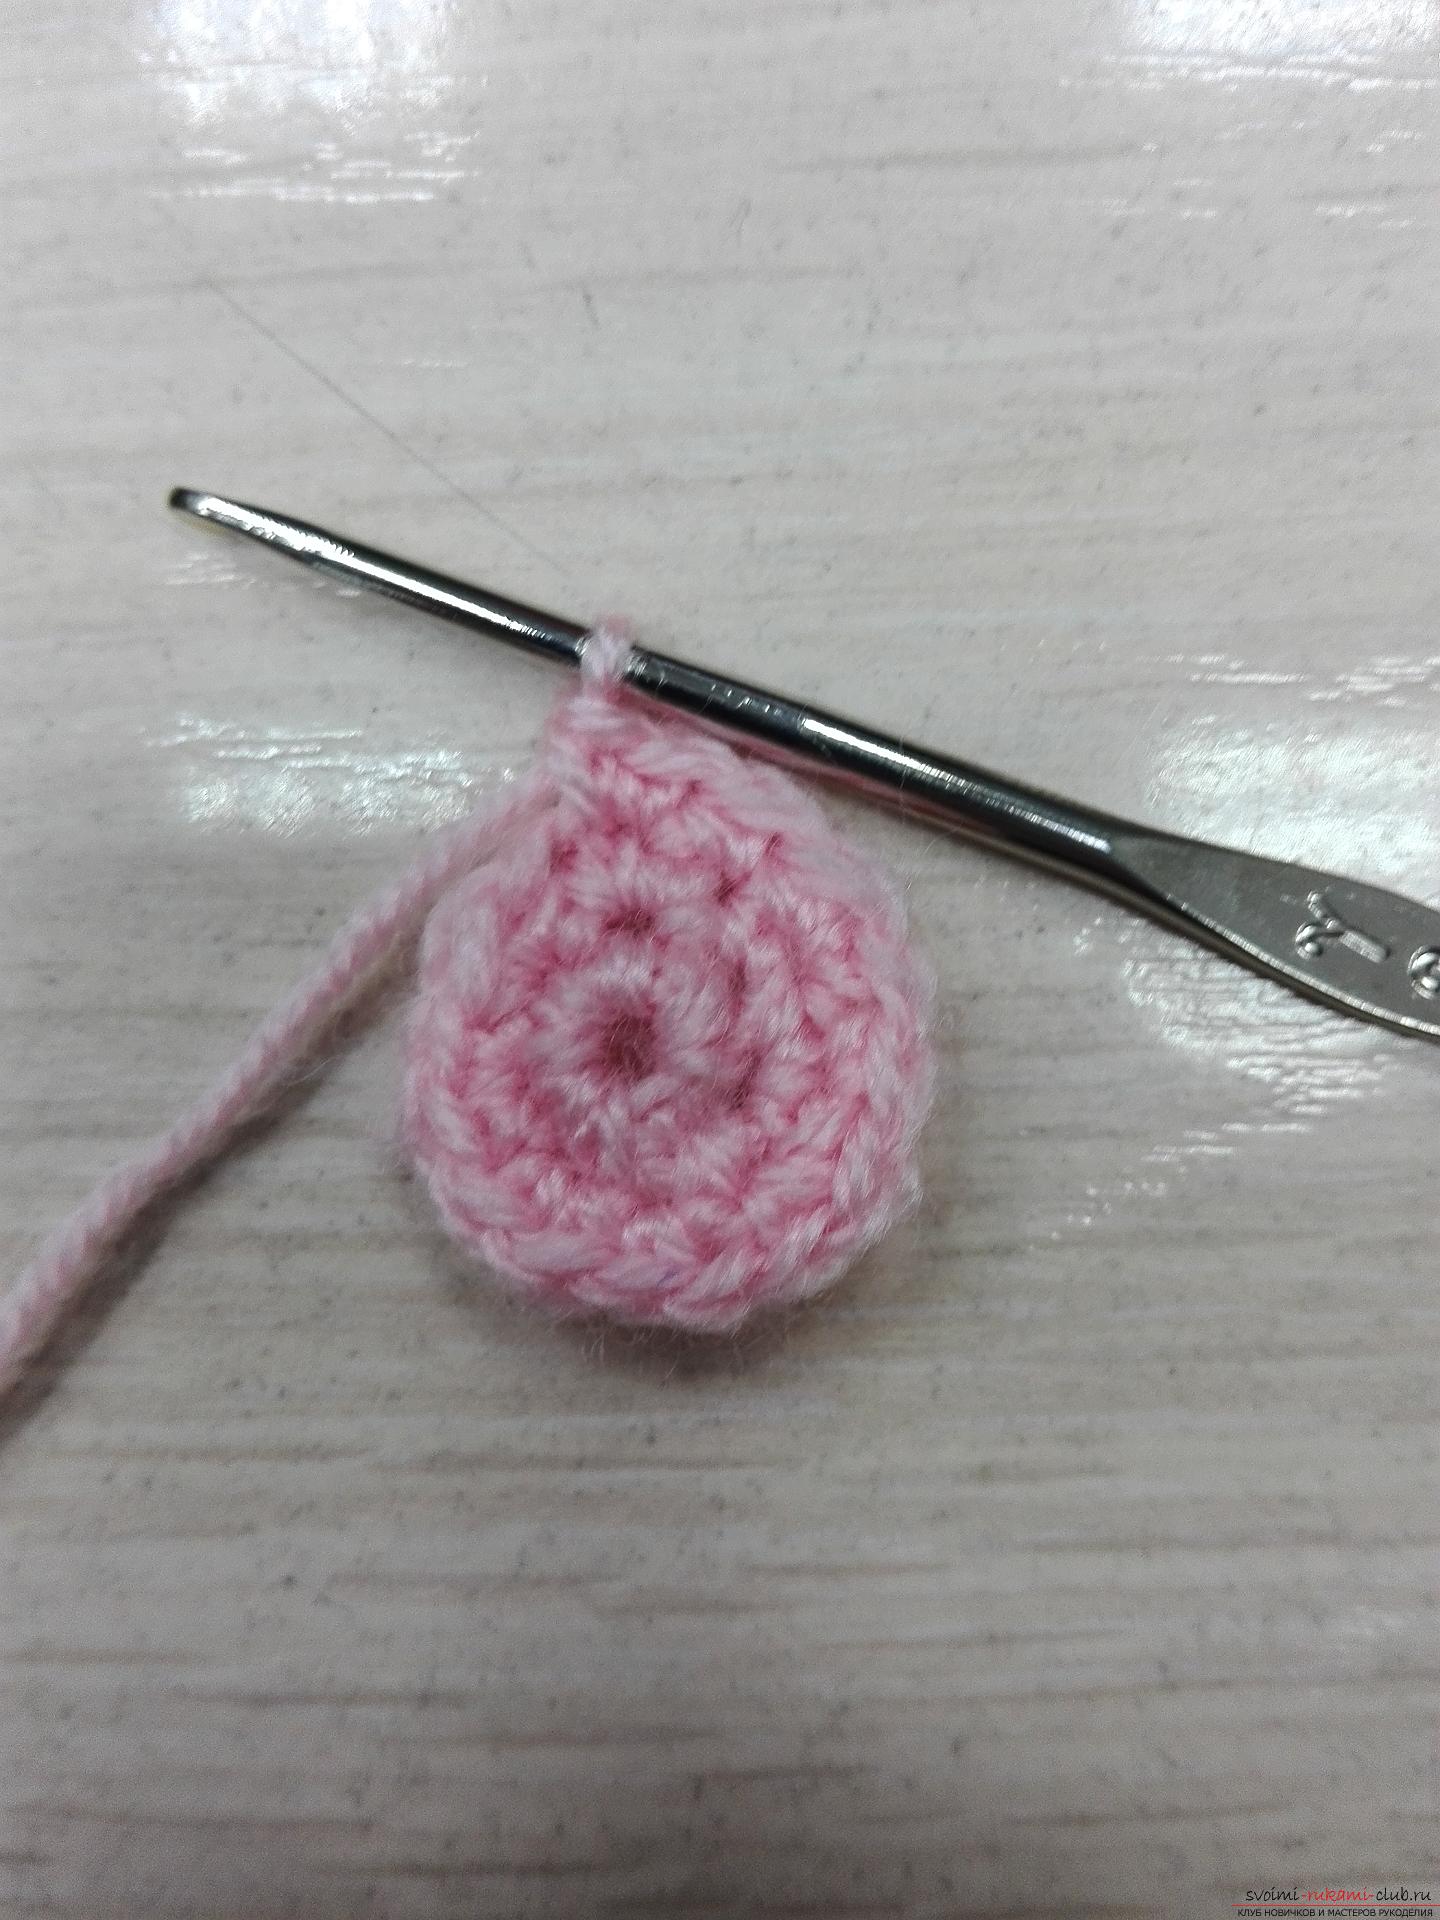 We knit 4-5 rows similarly to the third. That is, we do one air. a loop for lifting, then in the first 2 loops we will fasten 2 columns without a crochet, then we knit on the first column without a crochet, and in the last 2 loops, we again knit 2 columns without a crochet in each.
 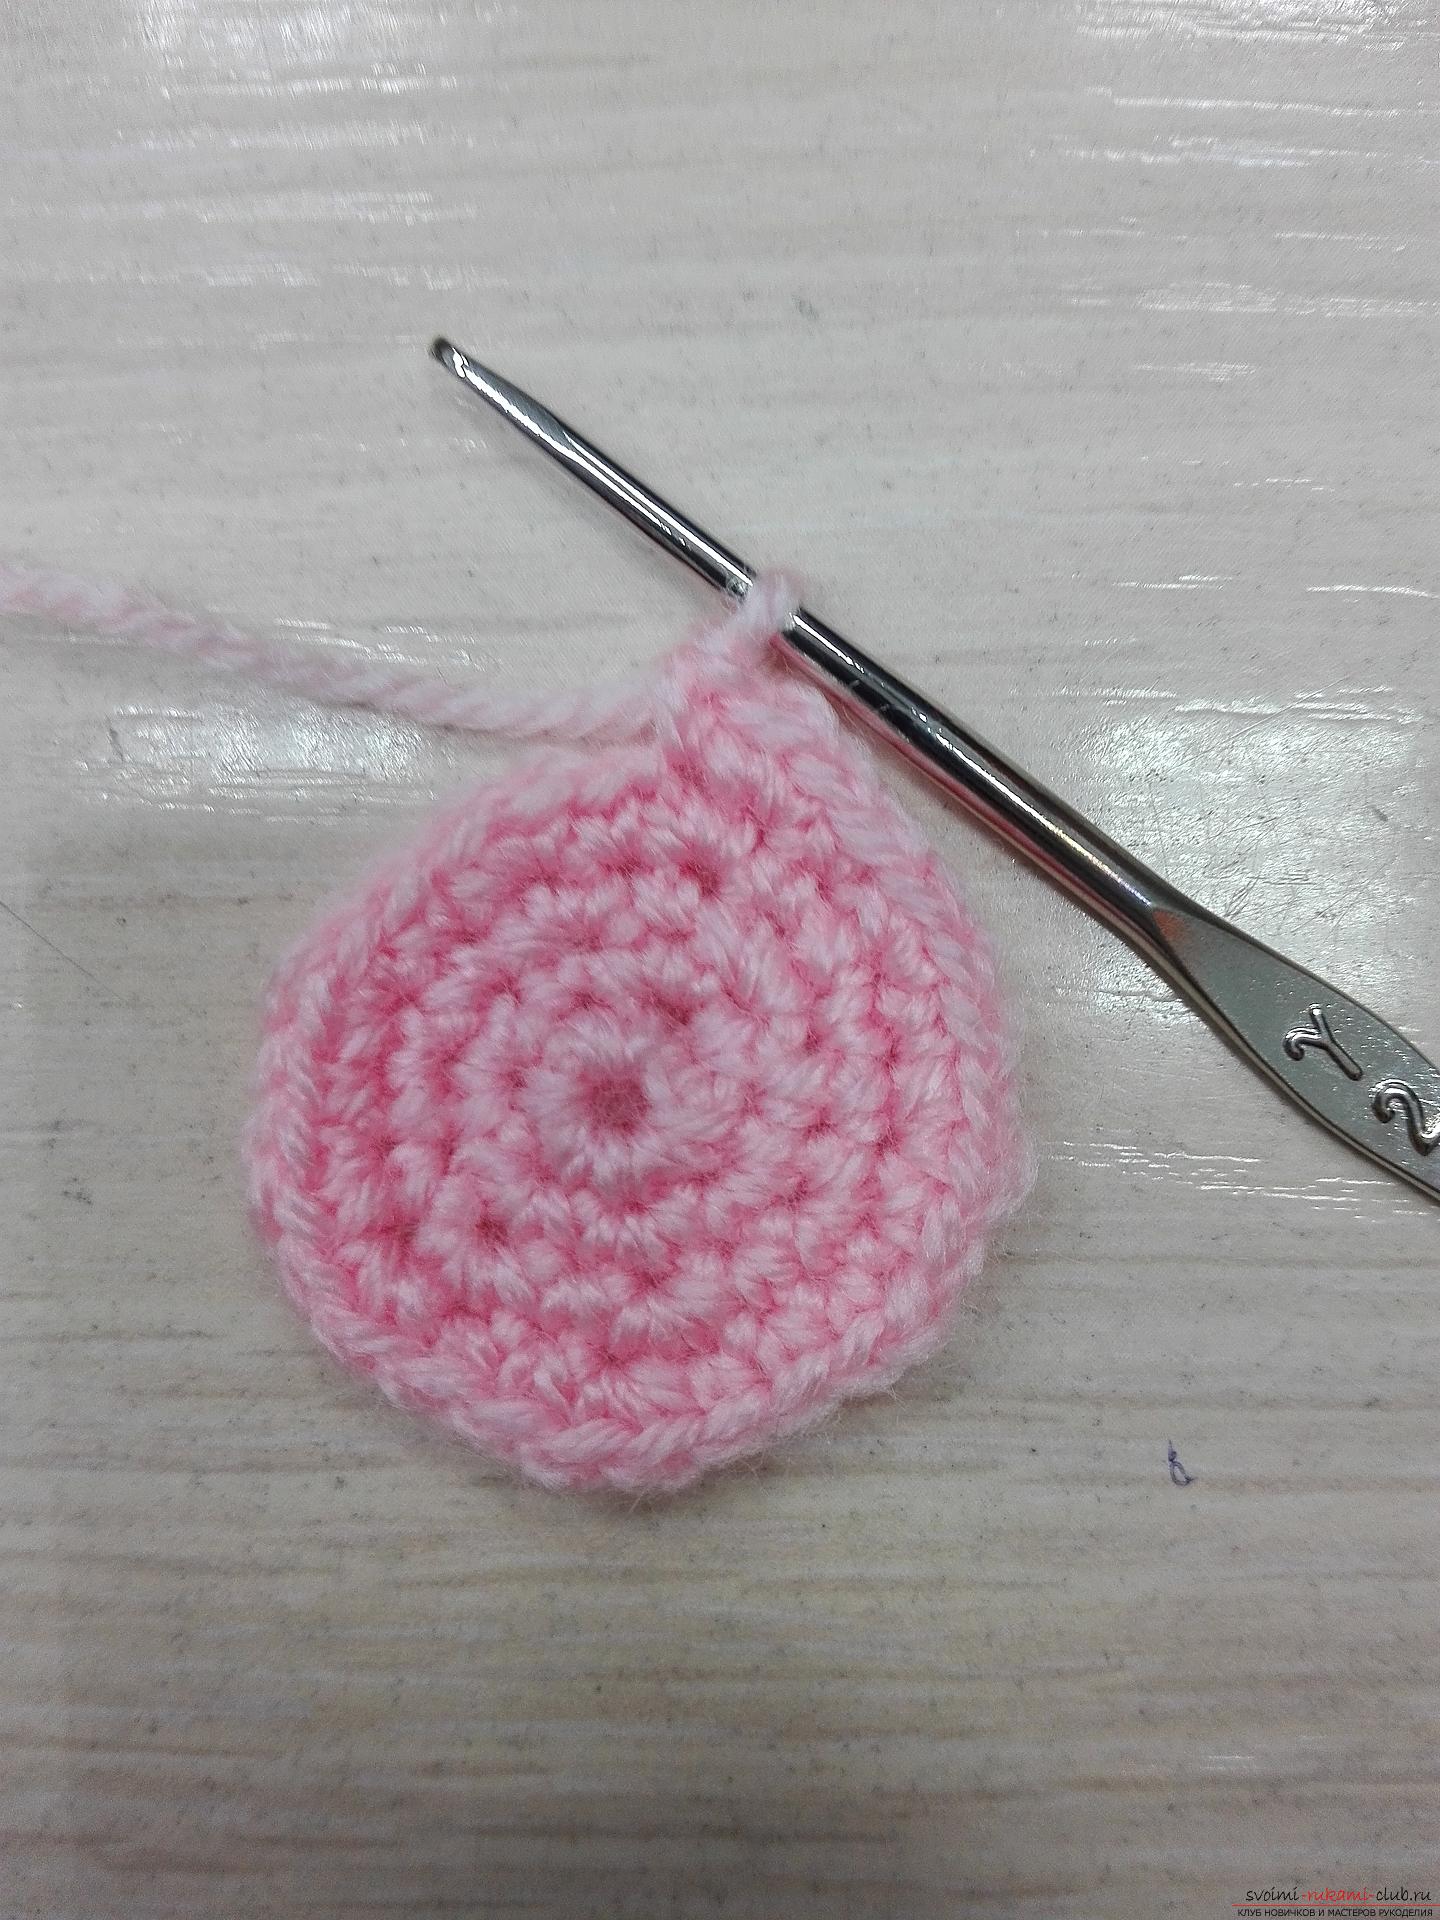 We will tie one air. loop for lifting. And in each loop we knit on the 1st column without a crochet.
 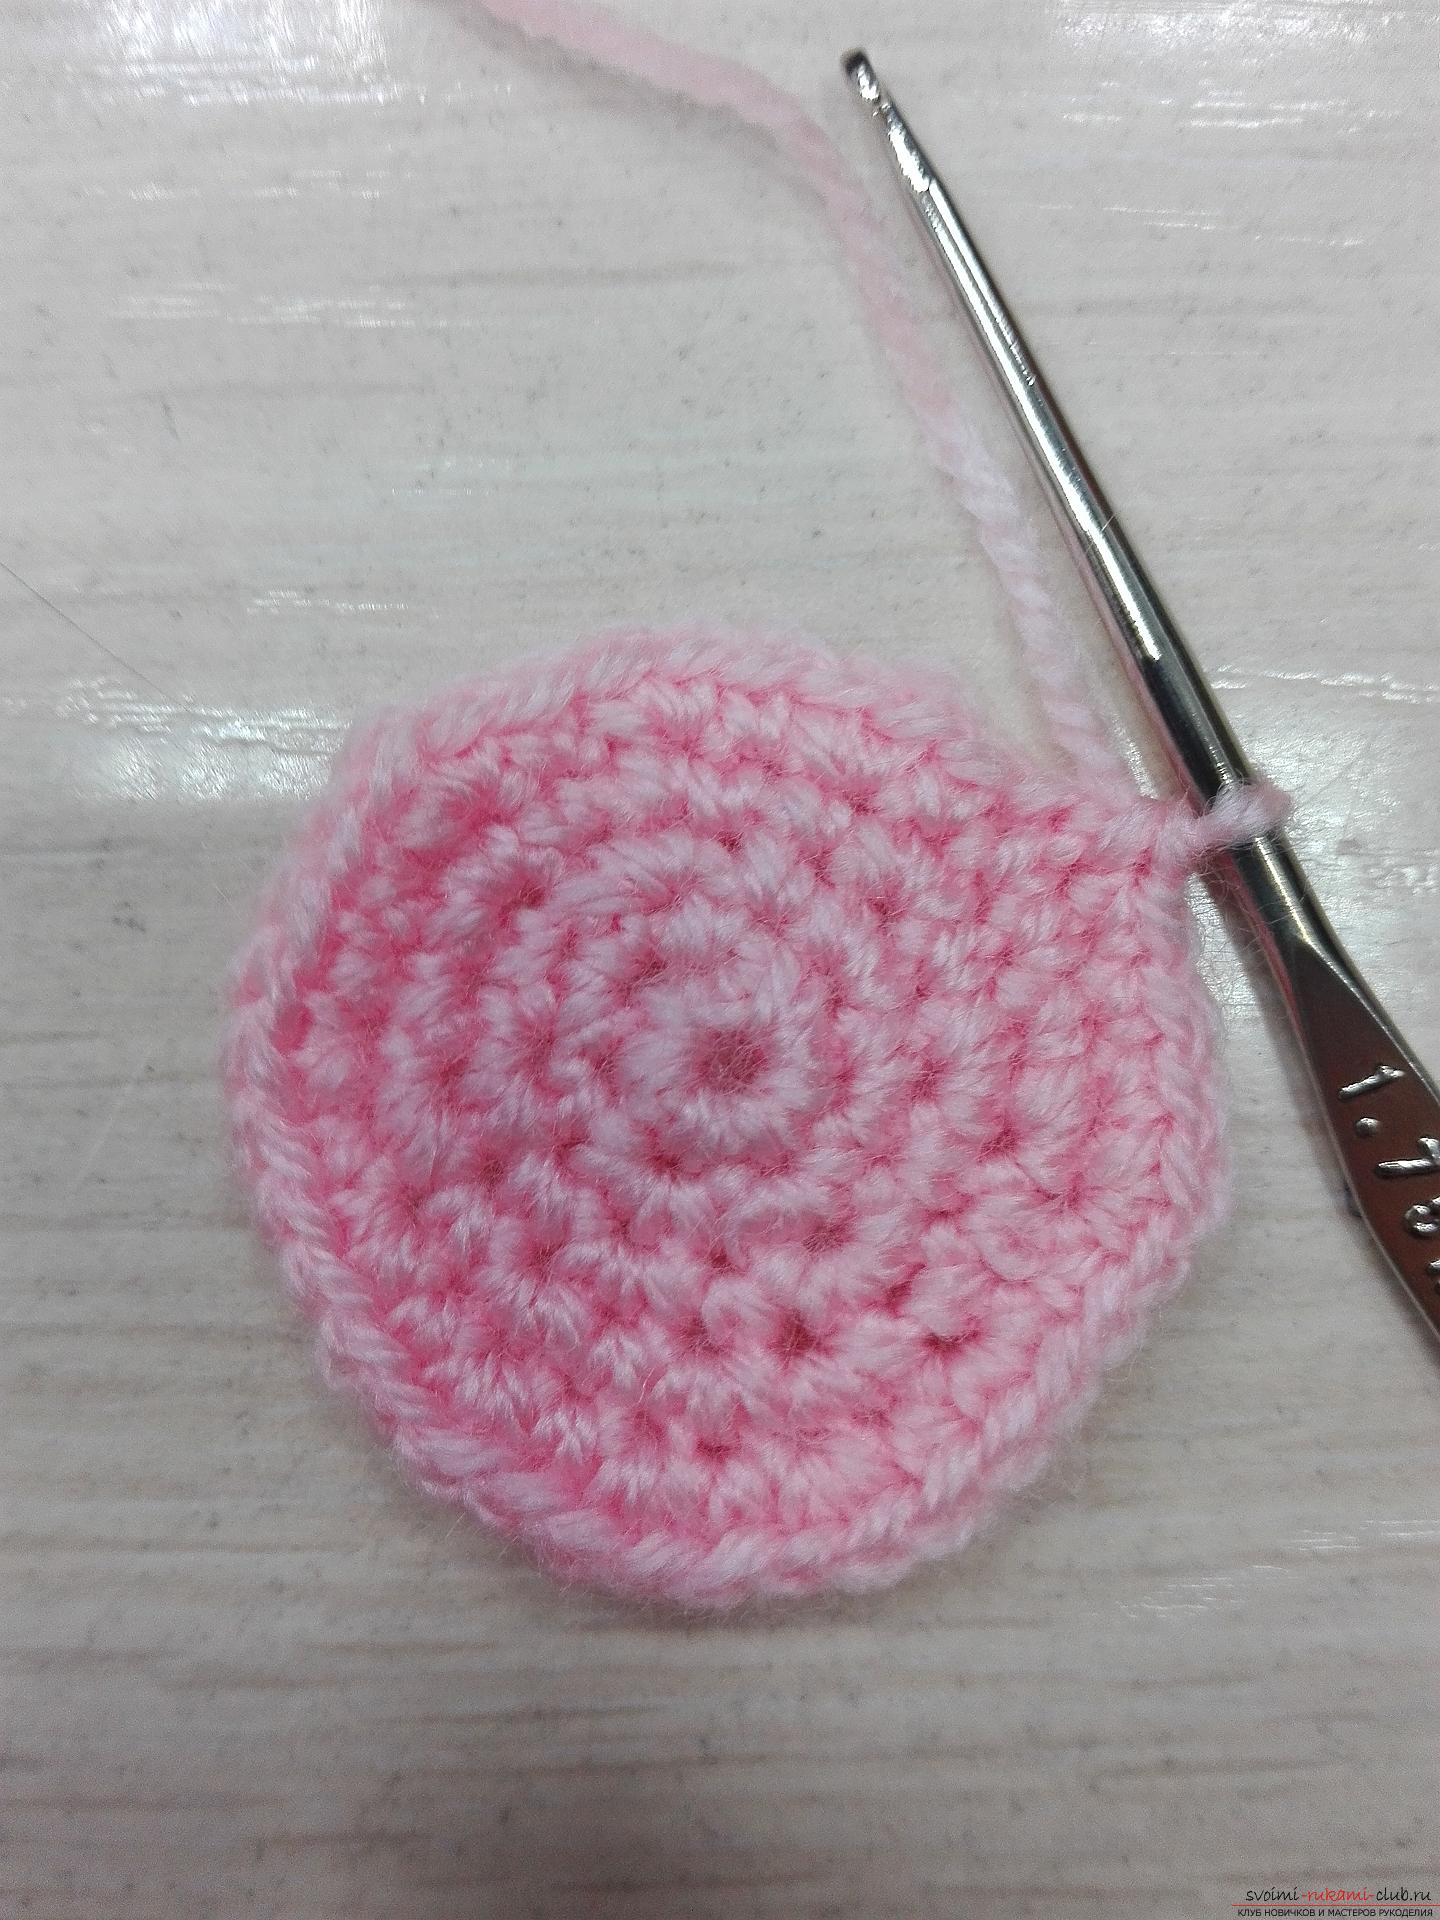 The next row, we knit, like the previous one,that is, we do one air. loop for lifting, and in each loop we will be tied to the 1st column without a crochet. And so we knit 2 more rows. 1 air. loop for lifting, and then we will tie the first column without the crochet. So, we got one of the elements of our snowman!
 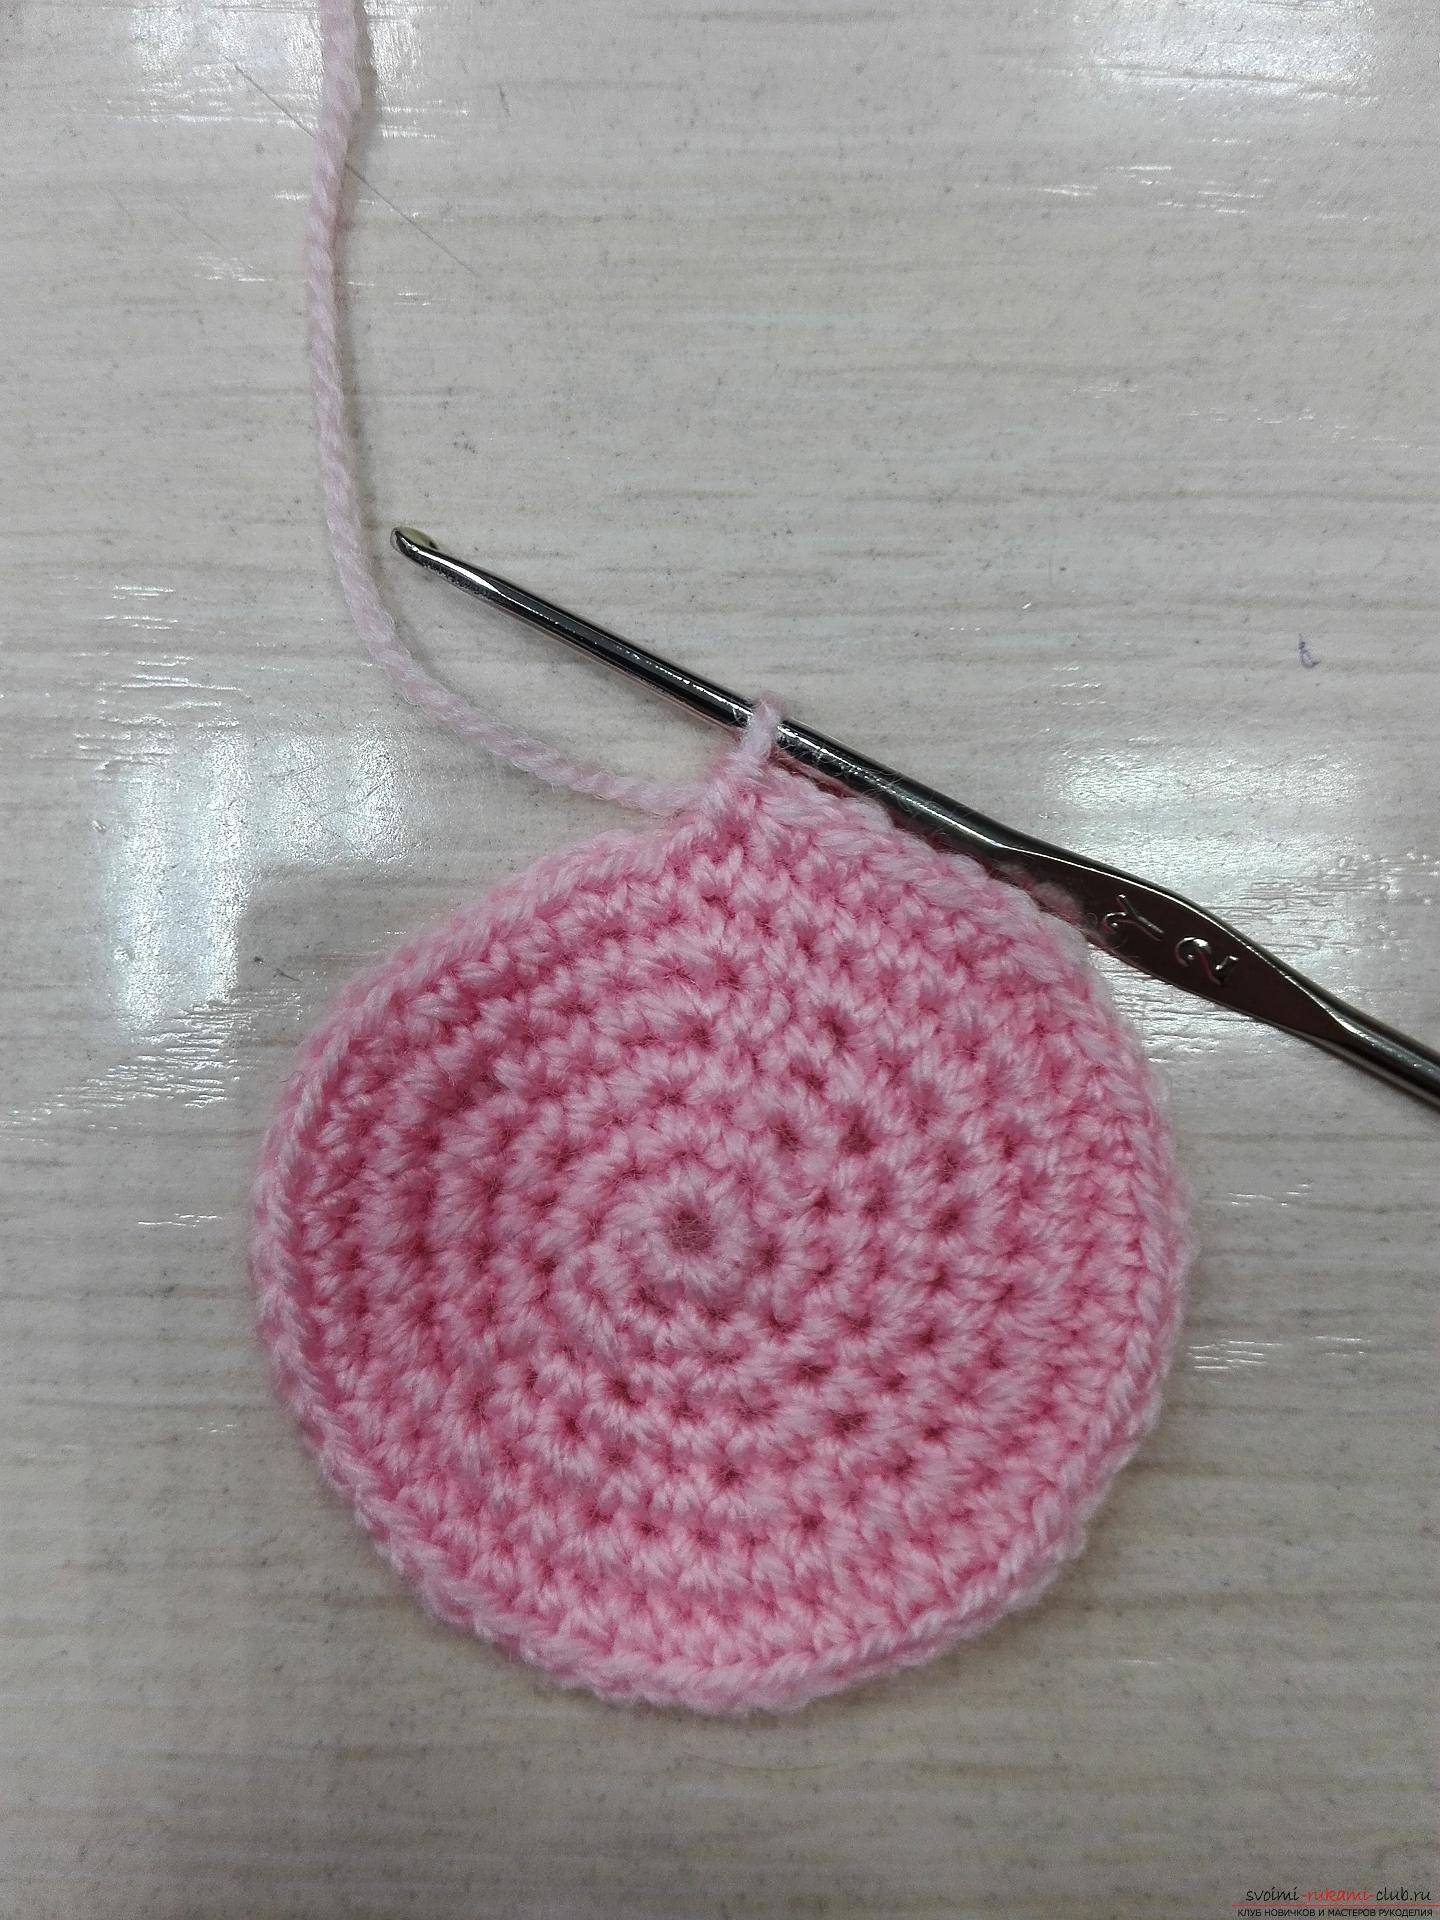 Further, on the same principle, we knit a second circlefor the snowman. Only the second circle for a snowman, we will link not from 10 rows, but from 6. We do the work according to the scheme of the first circle. So, we have reached the point where the biggest details of the snowman are ready for us. Now we need to impose a circle of a smaller size, on a circle of a larger diameter, to denote the trunk and head.
 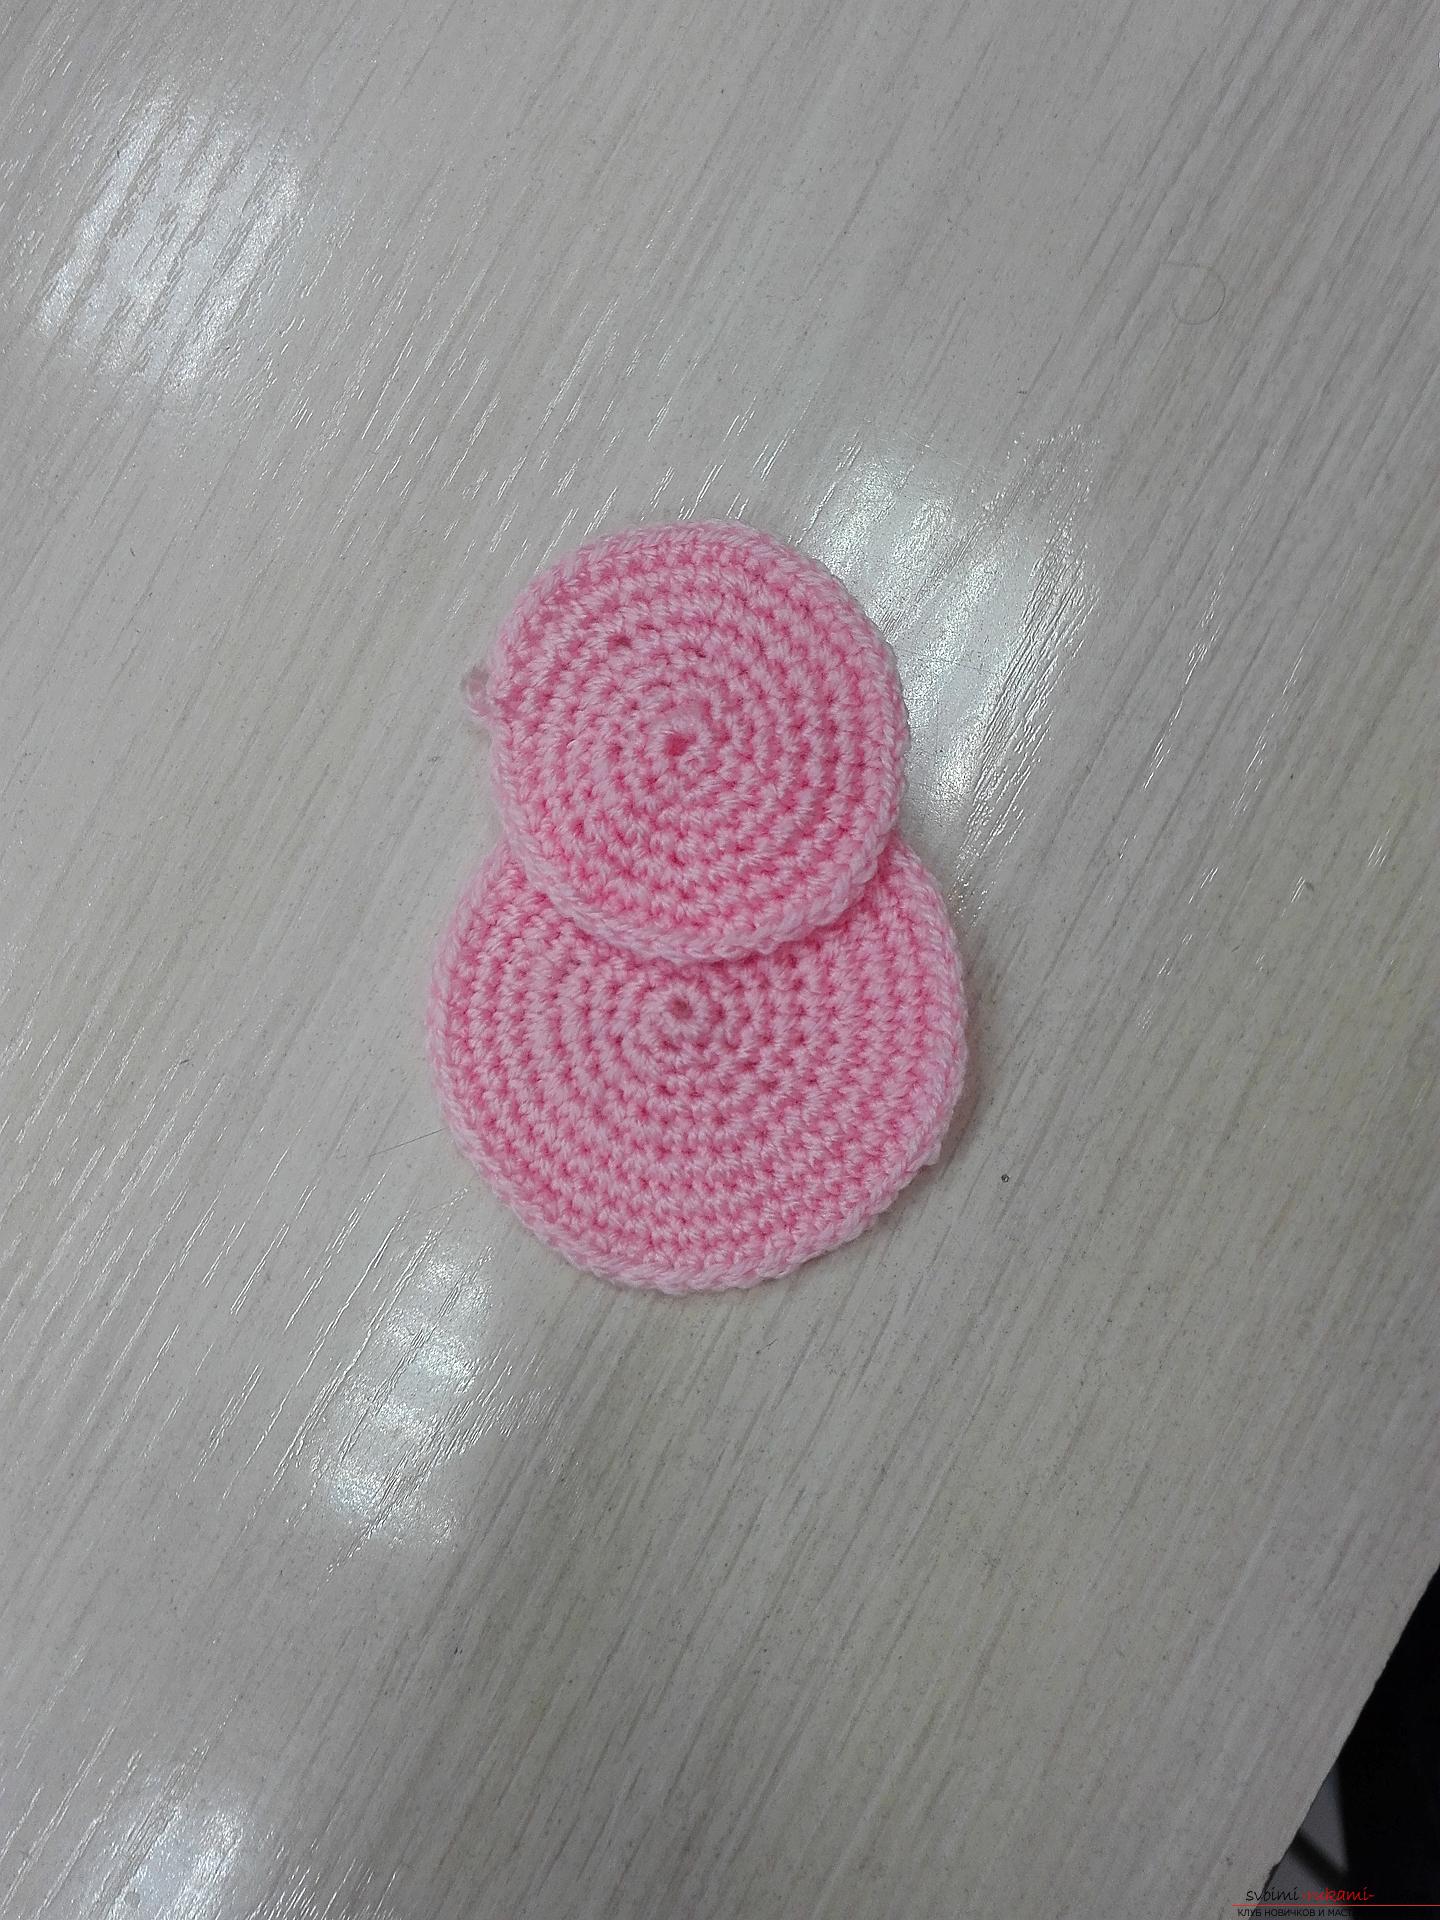 Then with threads from the wrong side, we fix the details. Now proceed to the remaining parts. And we start with the snowman's nose. Let's make a chain of 6 air loops.
 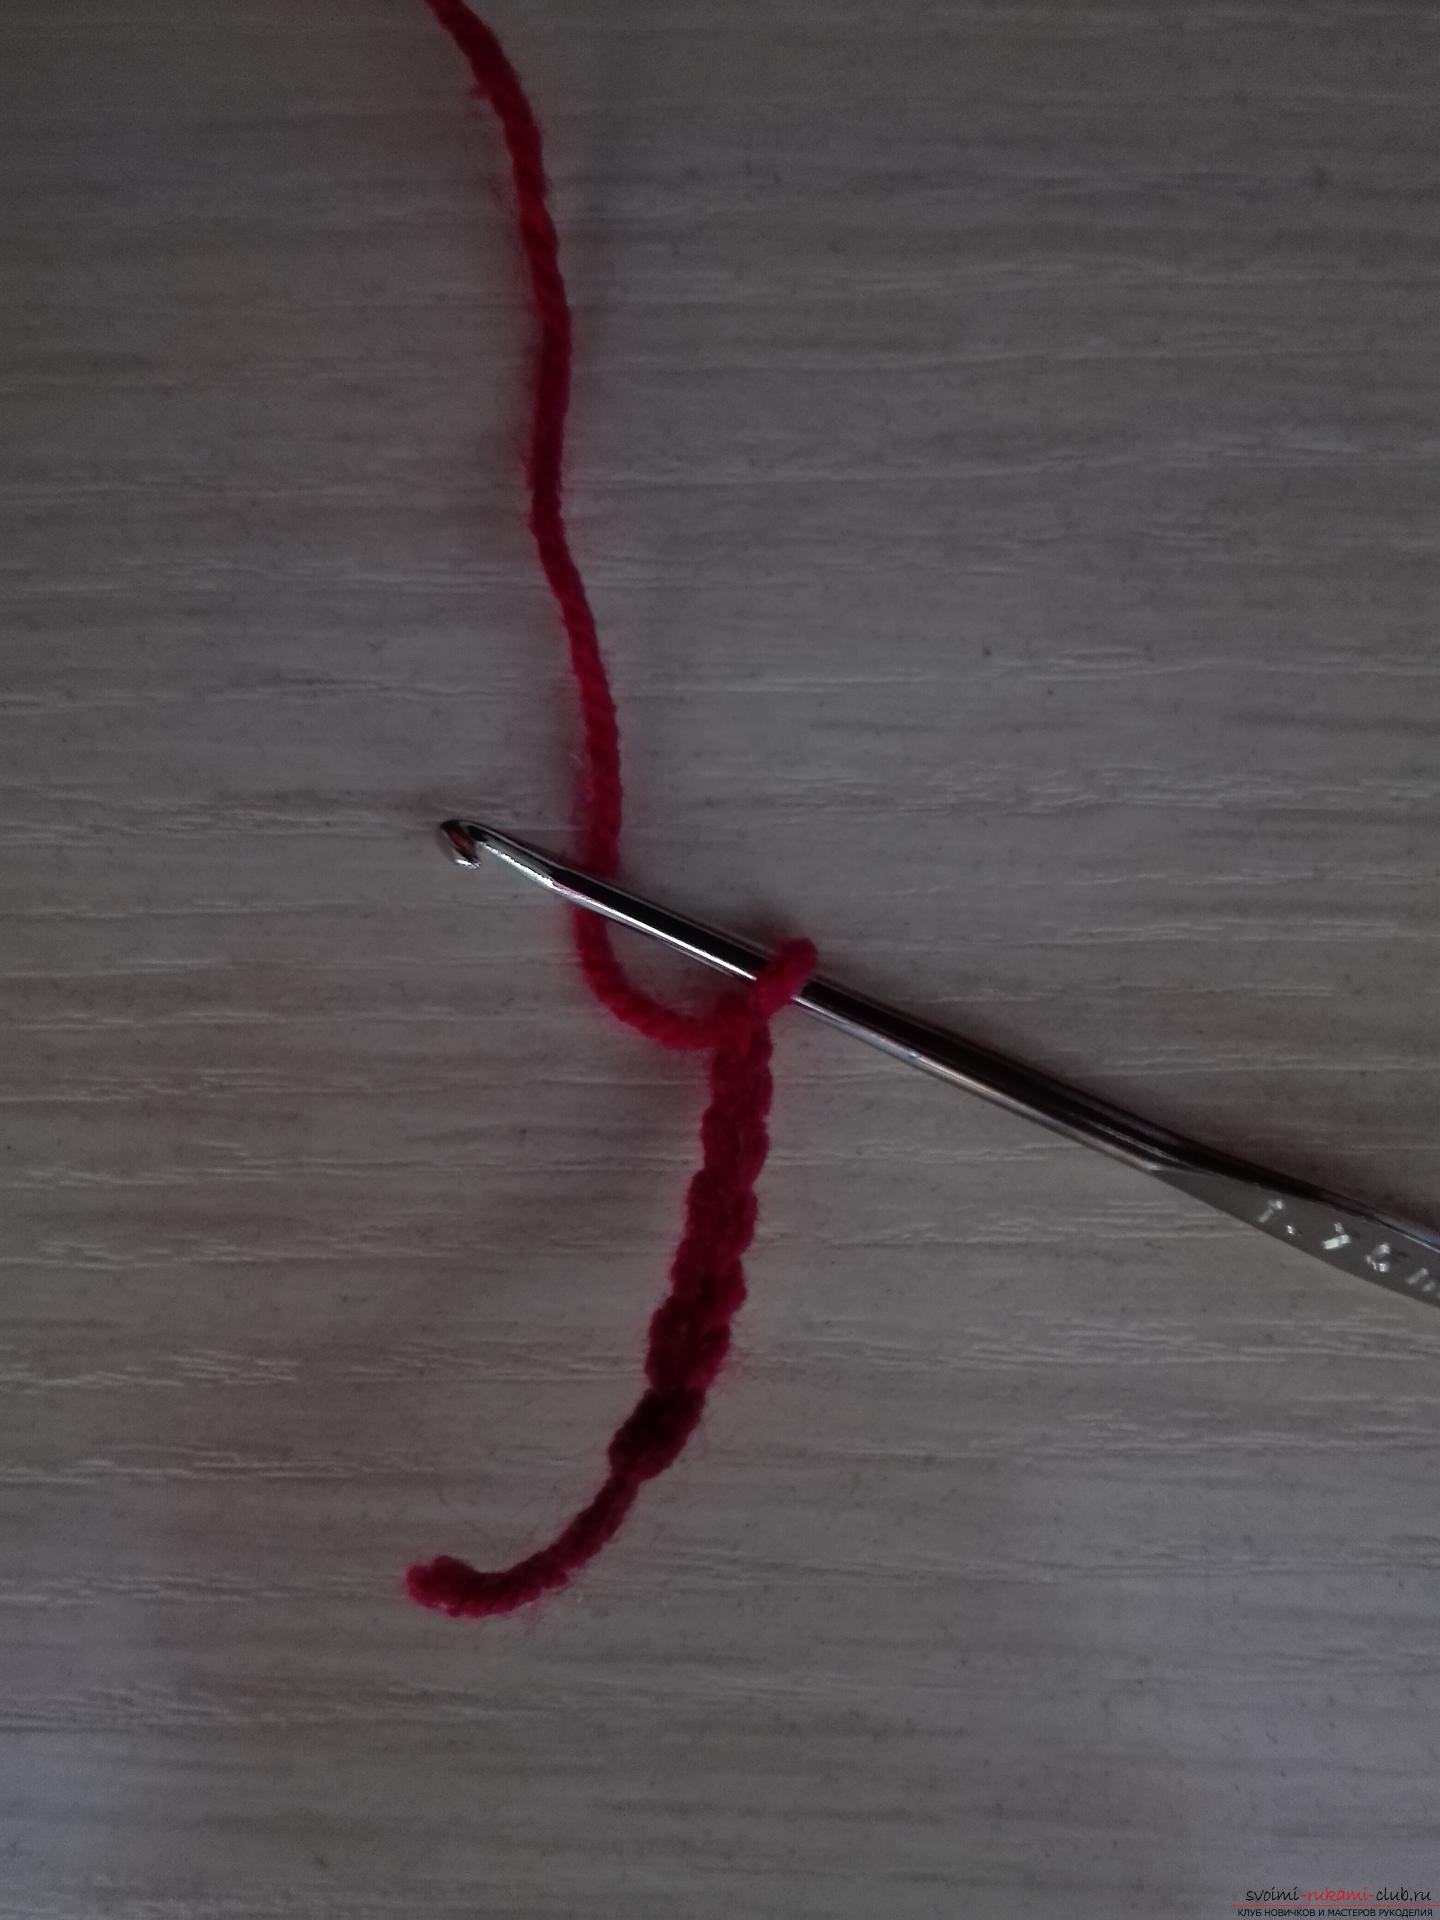 Then we do one air. loop for lifting, then we will be fastened to the next 2 loops along the 1st column without the crochet. In the next 2 loops we will tie the first column with one cake to each, and in the last 2 loops we knit on the 1st column with 2 nakidami in each.
 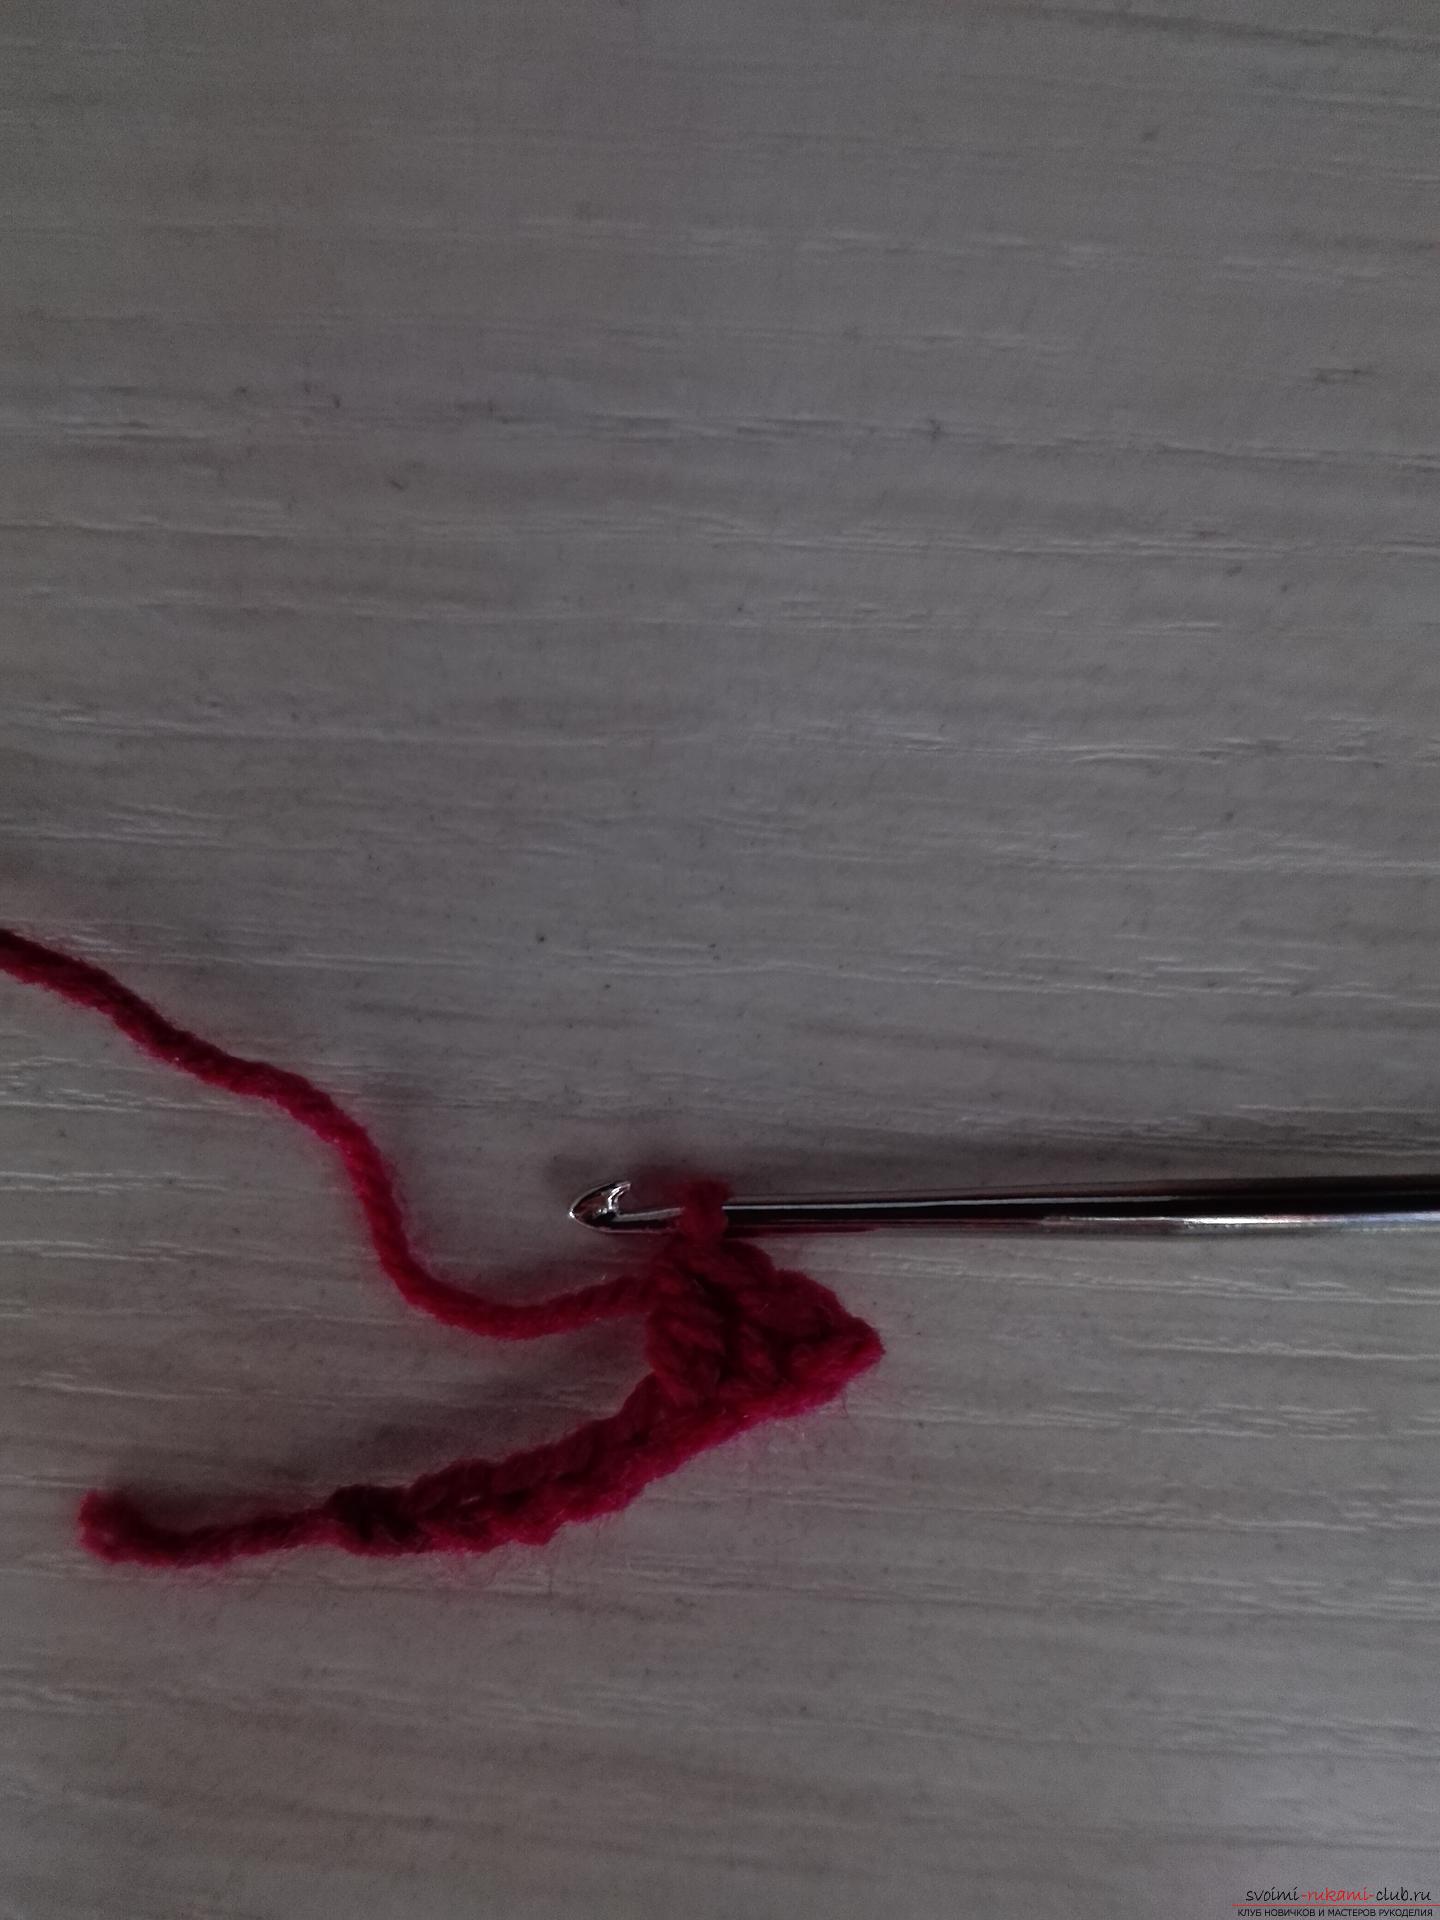 And thus, the nose for the snowman is ready.
 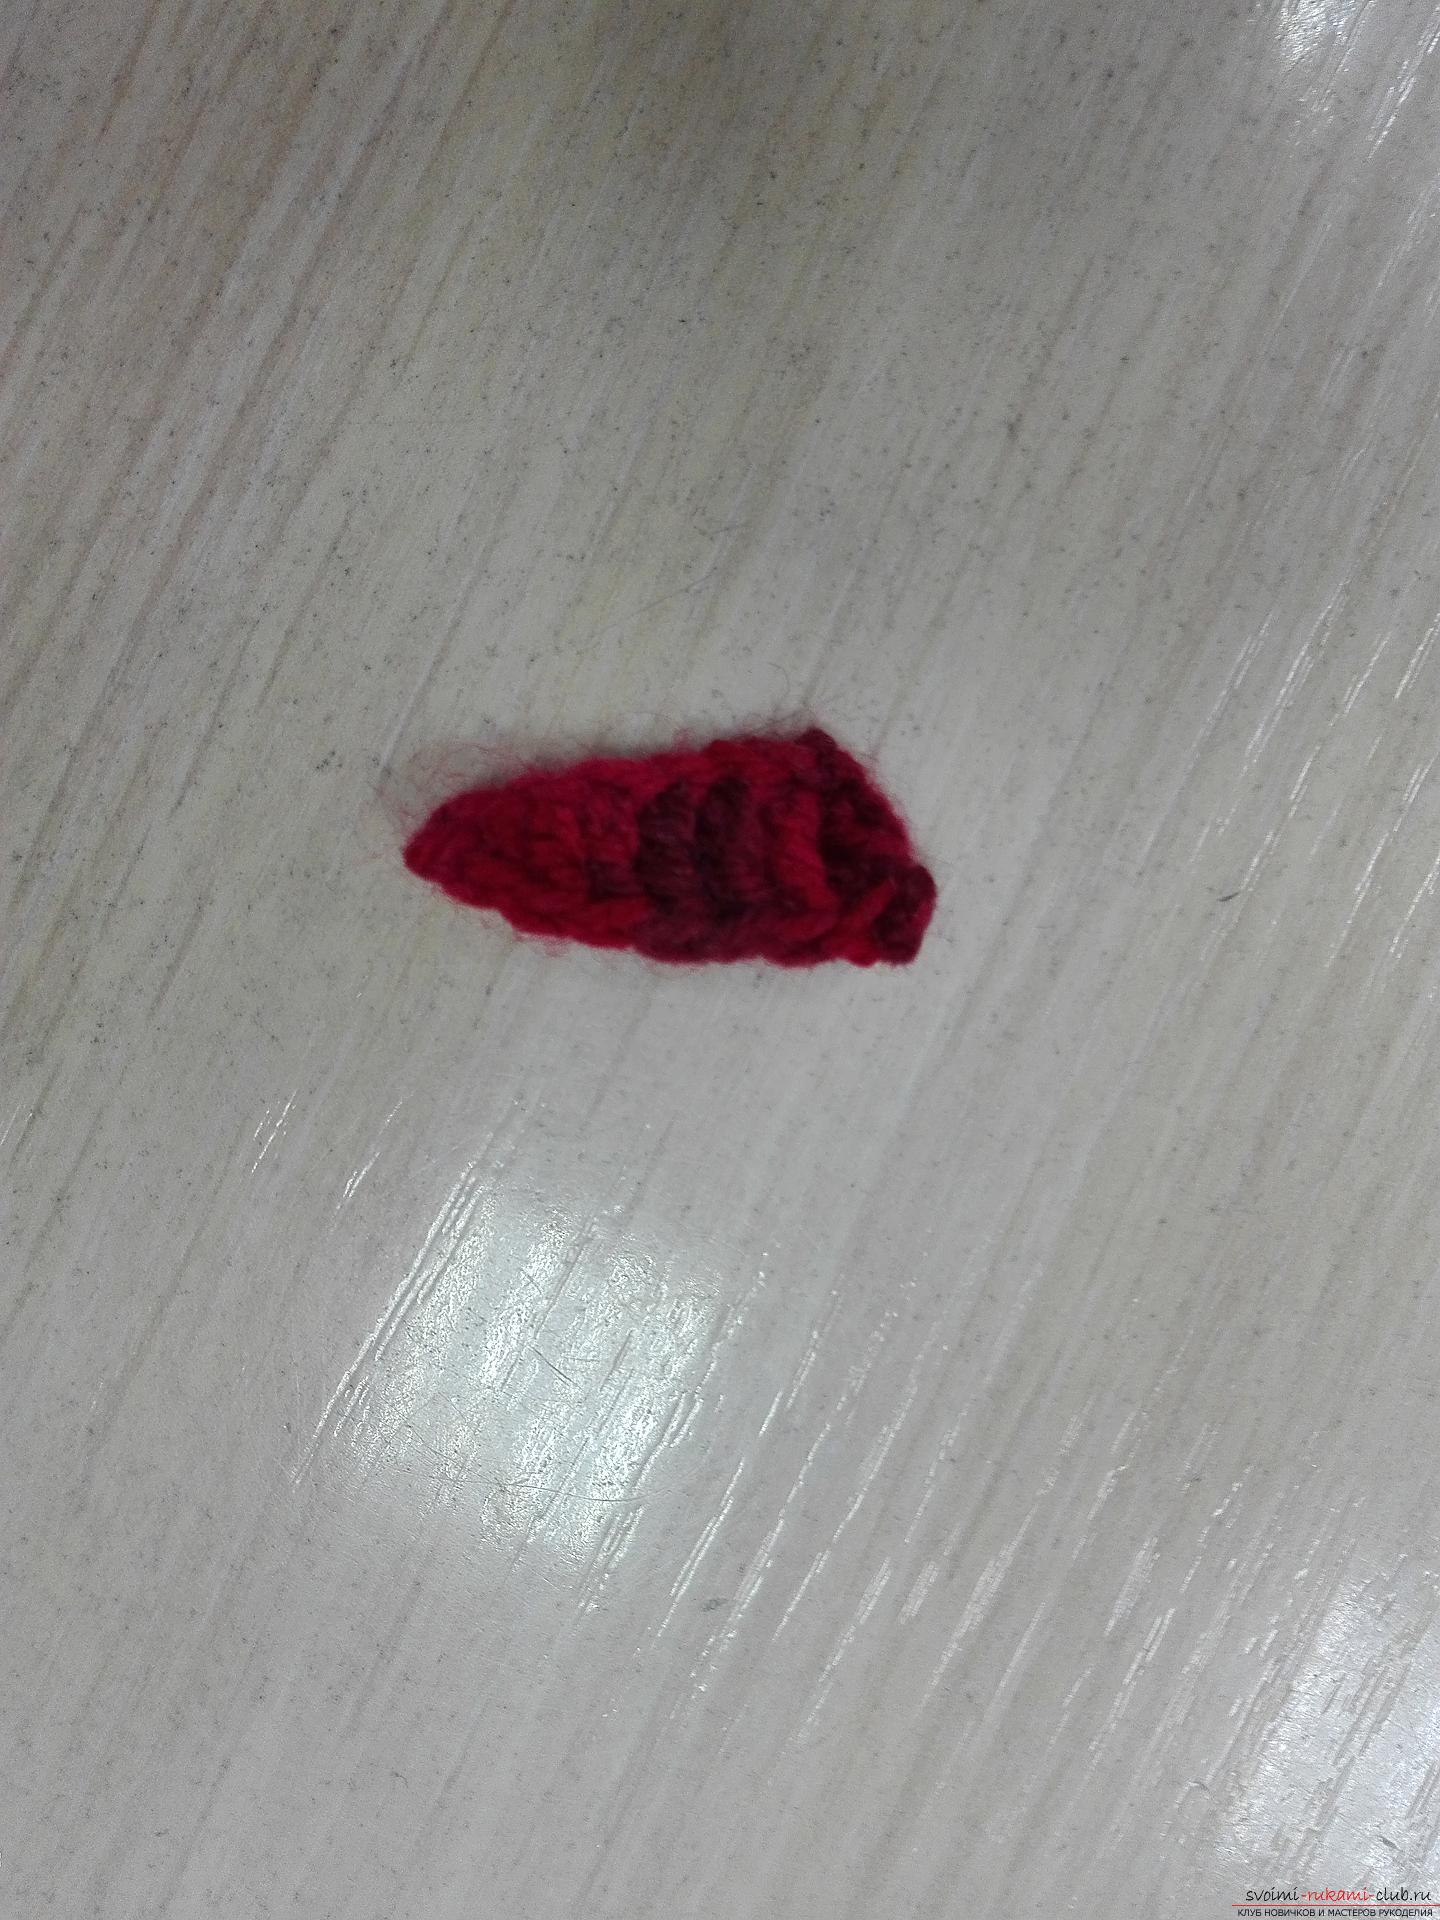 Apply the nose to the middle of the upper circle and withon the wrong side sew it to the product With the help of the usual sewing thread, we make a smile for our snowman! But if someone wants, you can picture a sad face.
 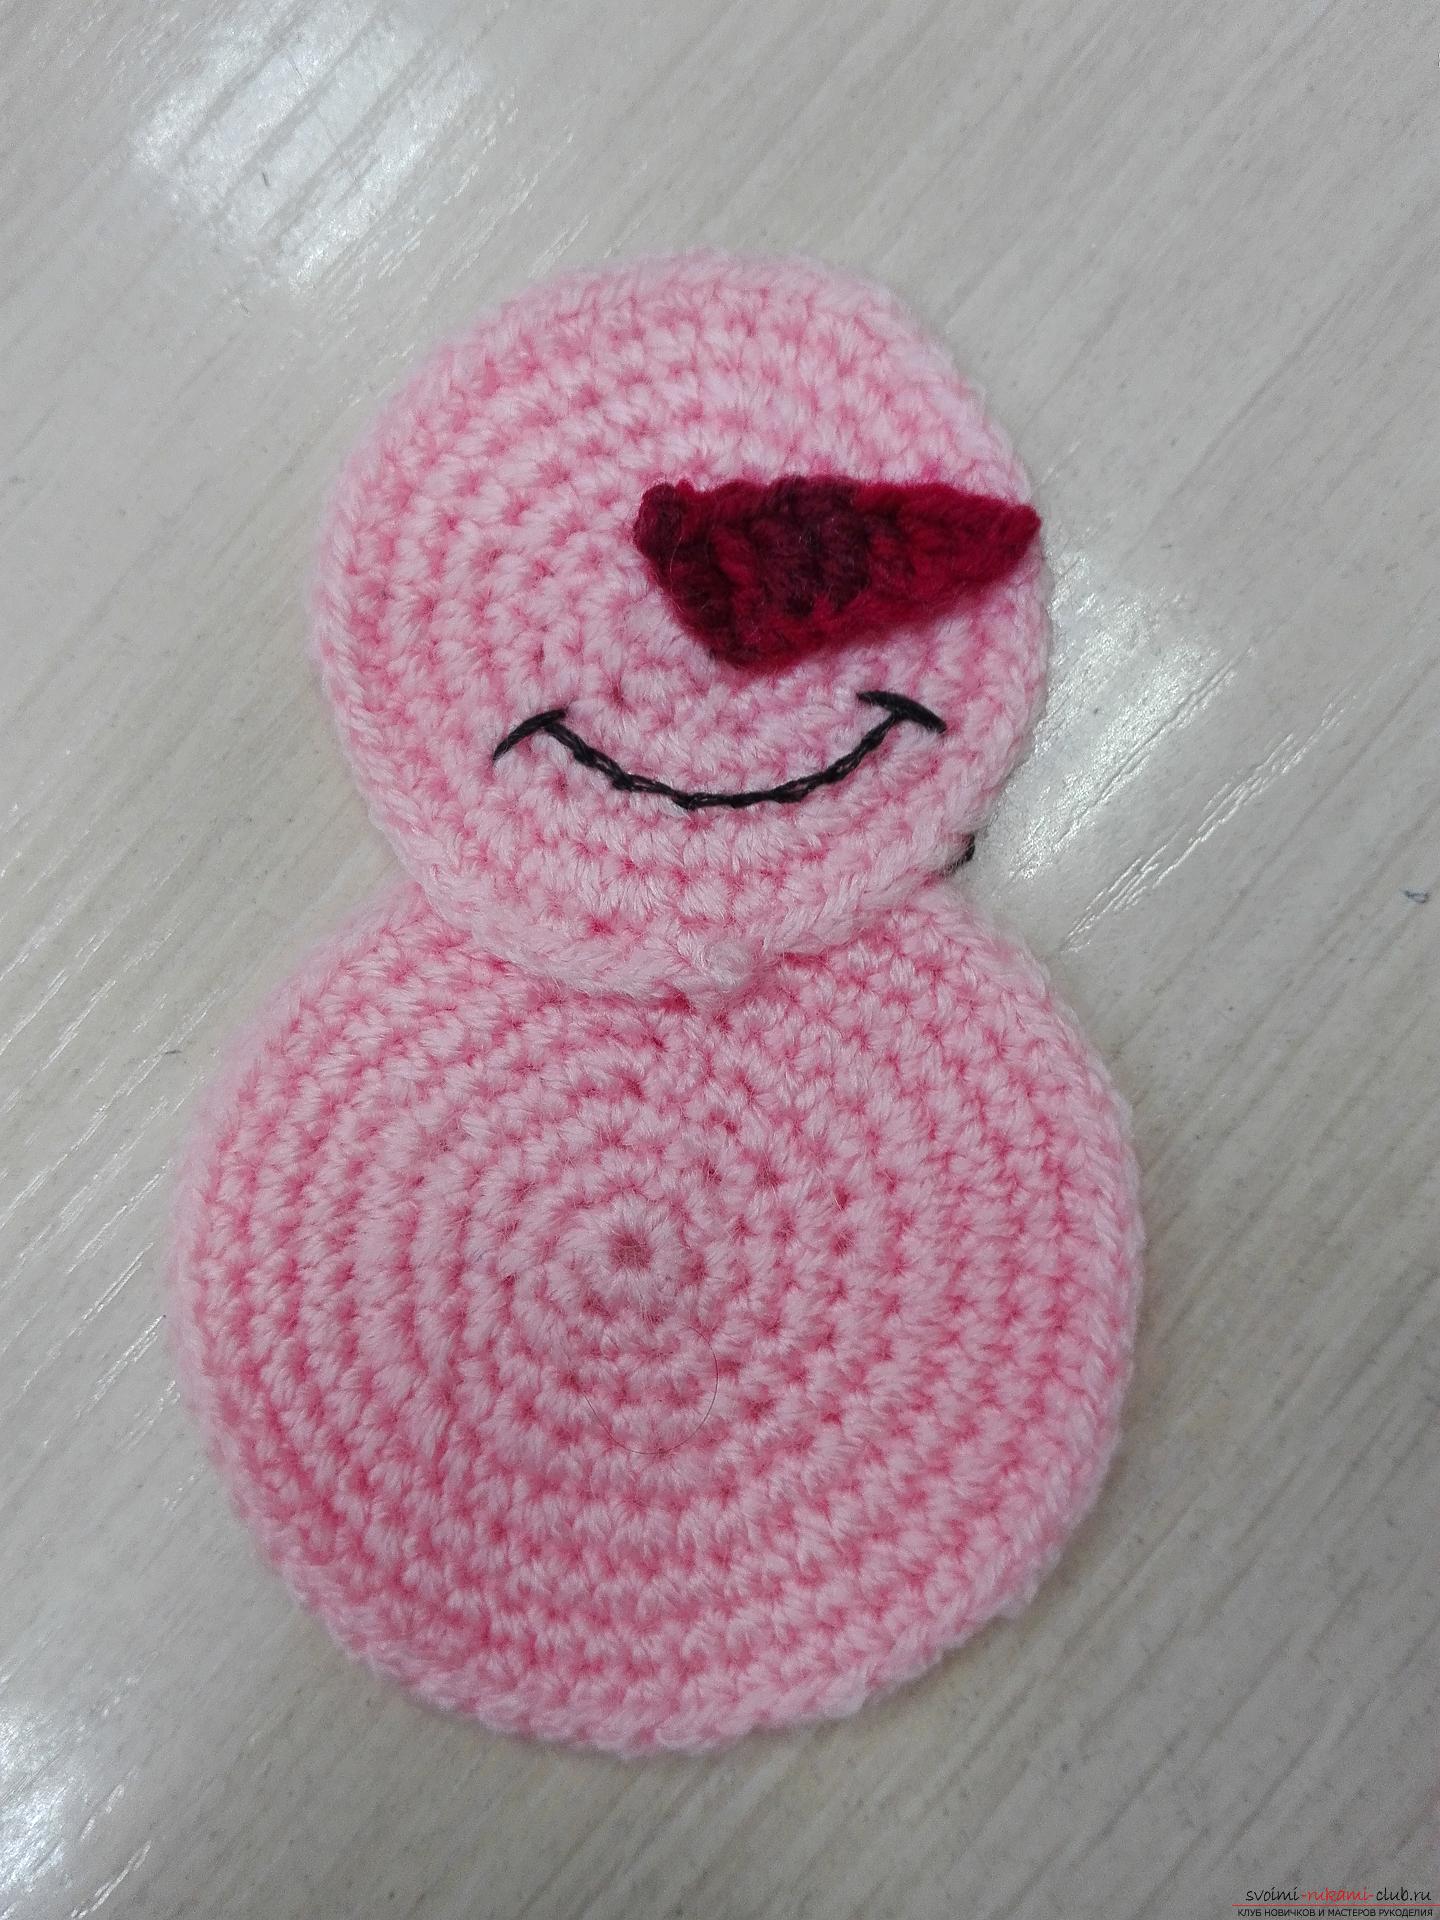 Next, we paste the rhinestones, on the bottomsnowman, it will be buttons. The next element, to which we will proceed, will be a hat. Let's make six air loops. 1 air. eyelet for lifting. Next, we knit the columns without the crochet, along the first column in each loop.
 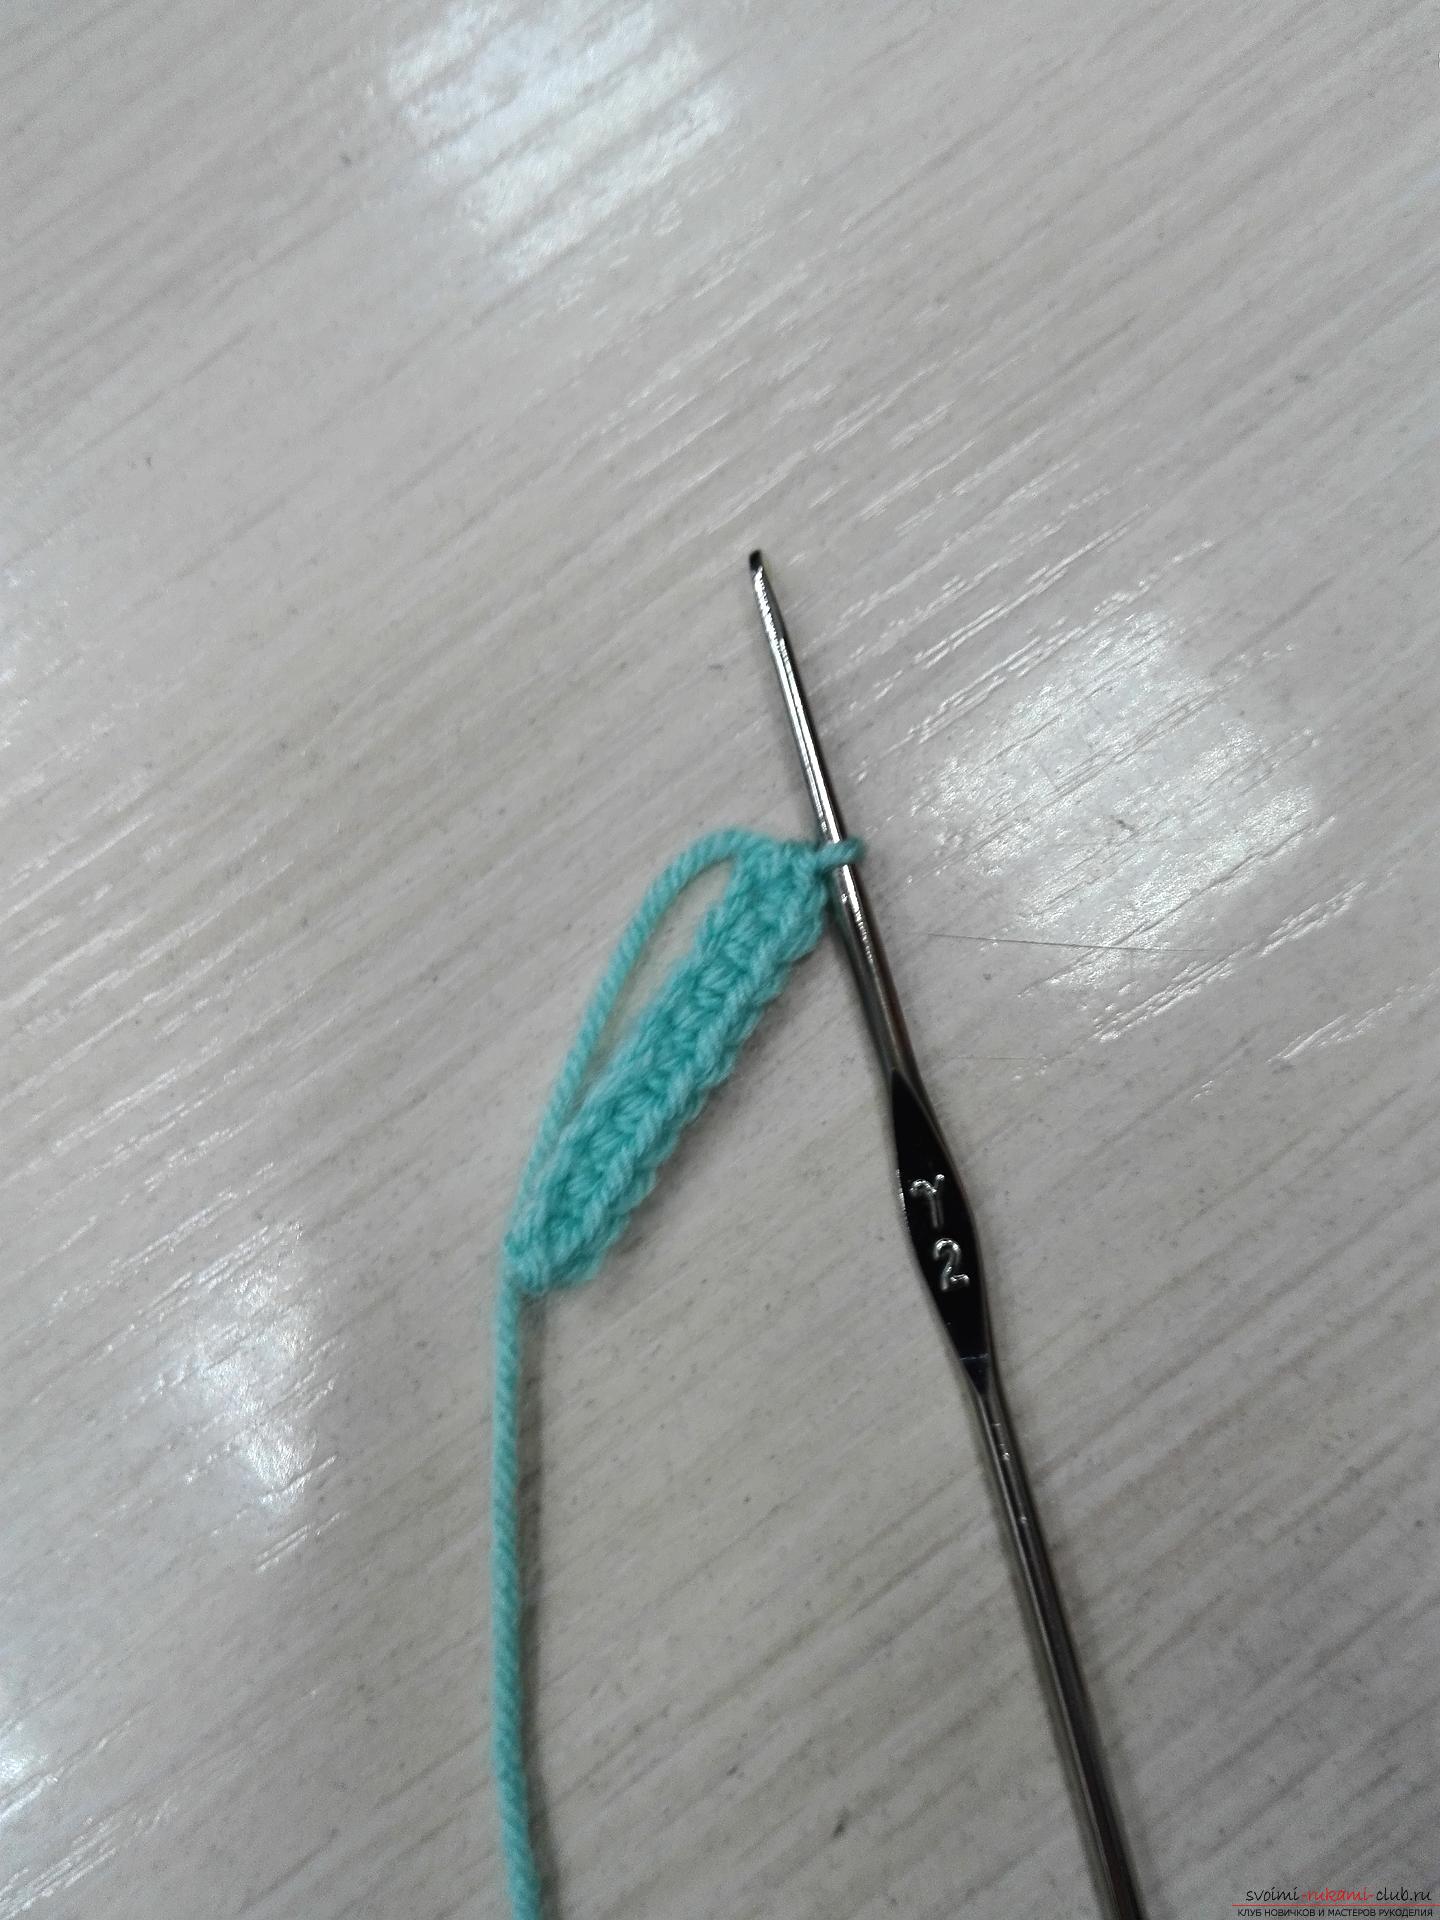 Then we tie the second side of our chain with columns without a crochet.
 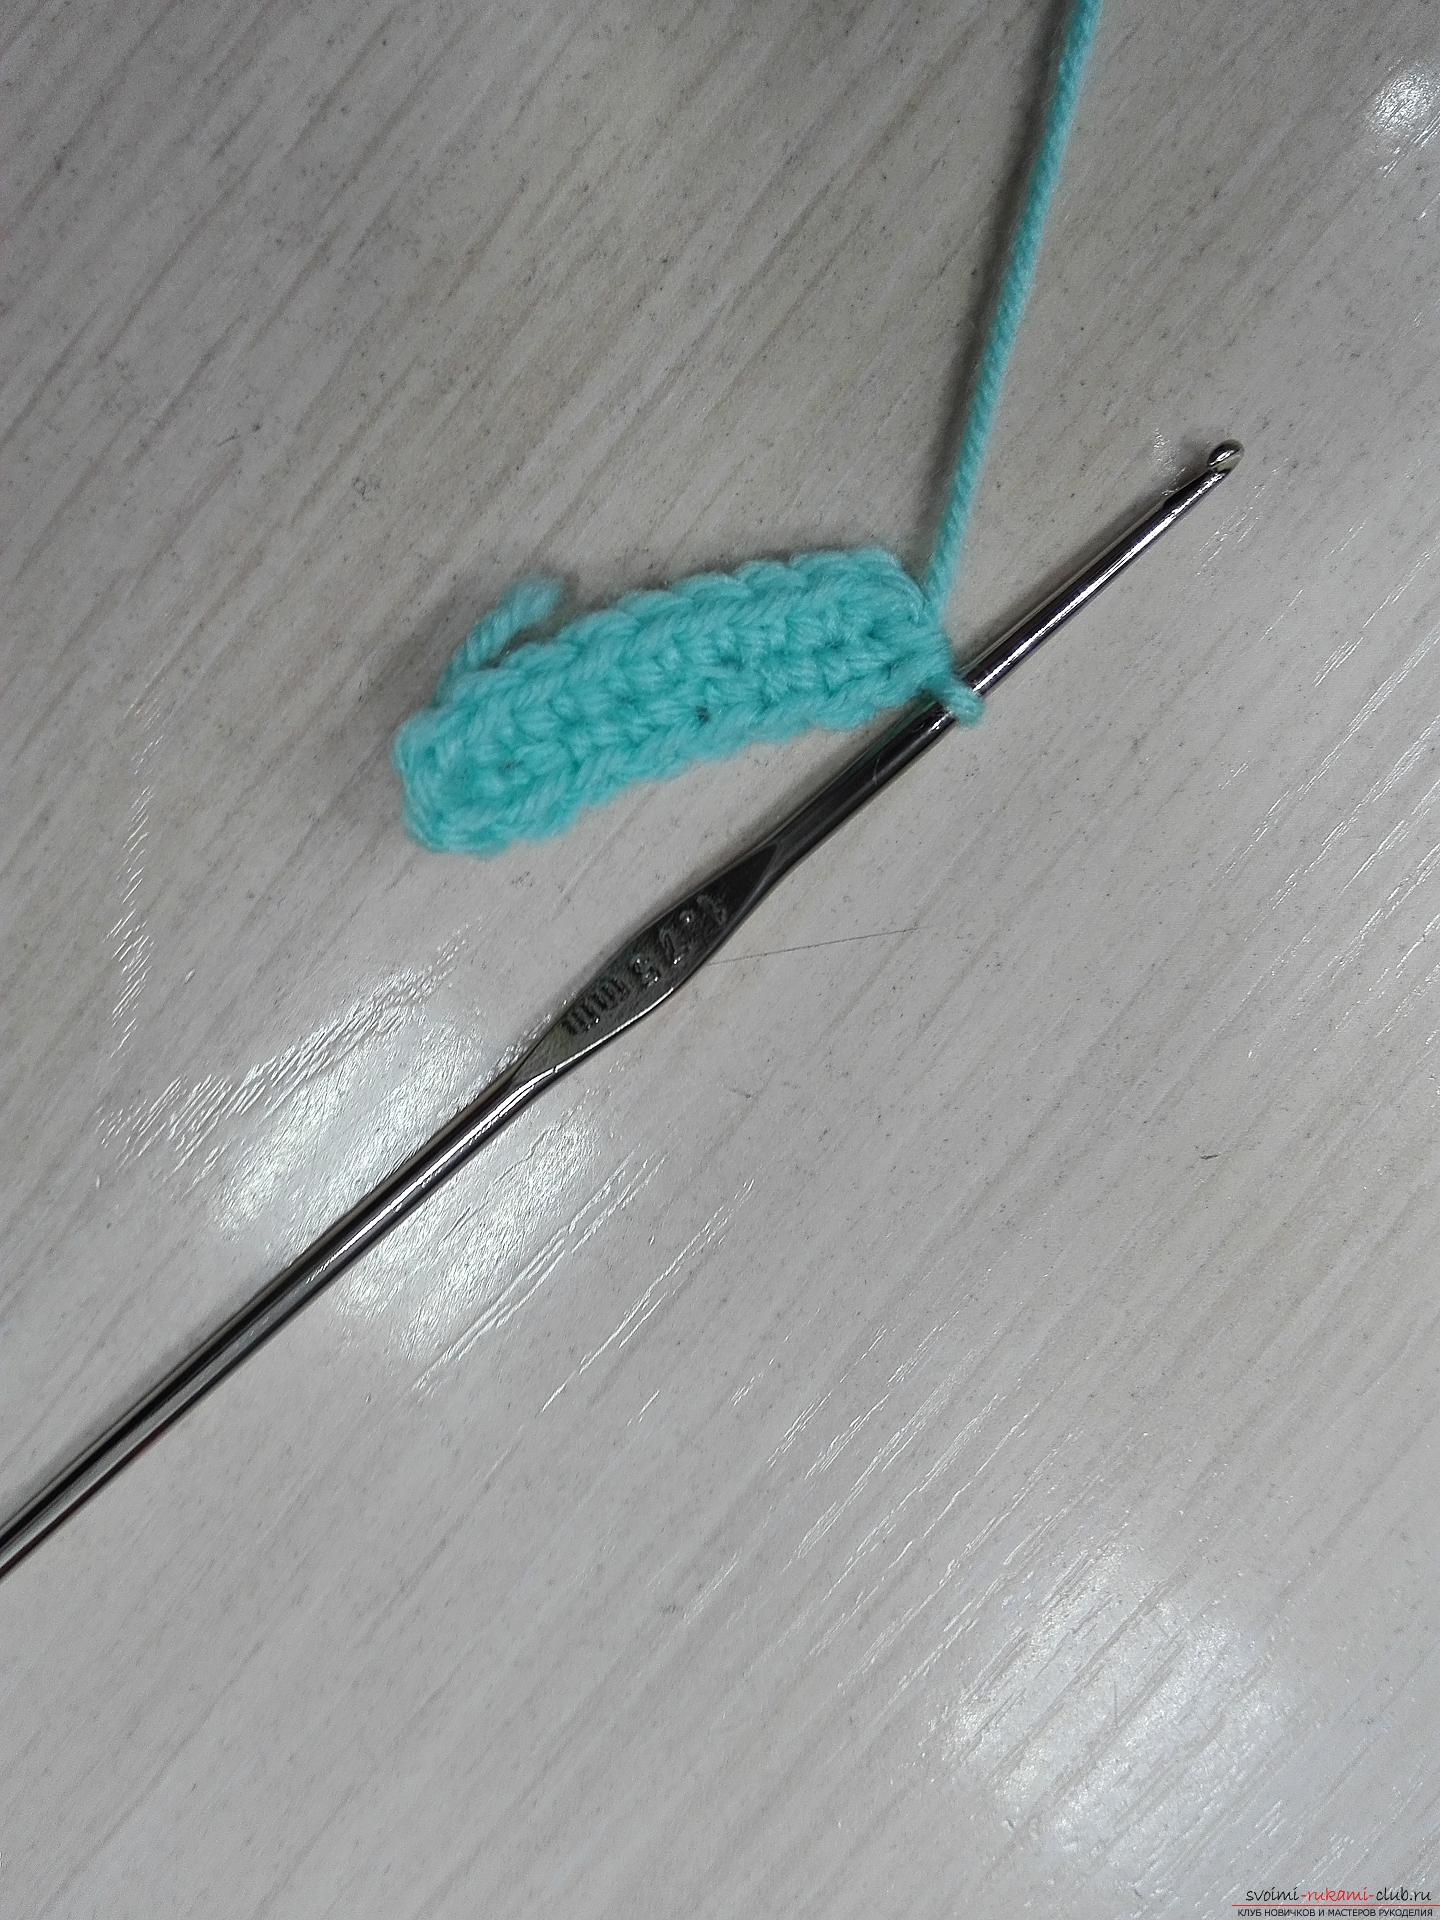 We untangle another row, but on both tops we make three loops in one upper.
 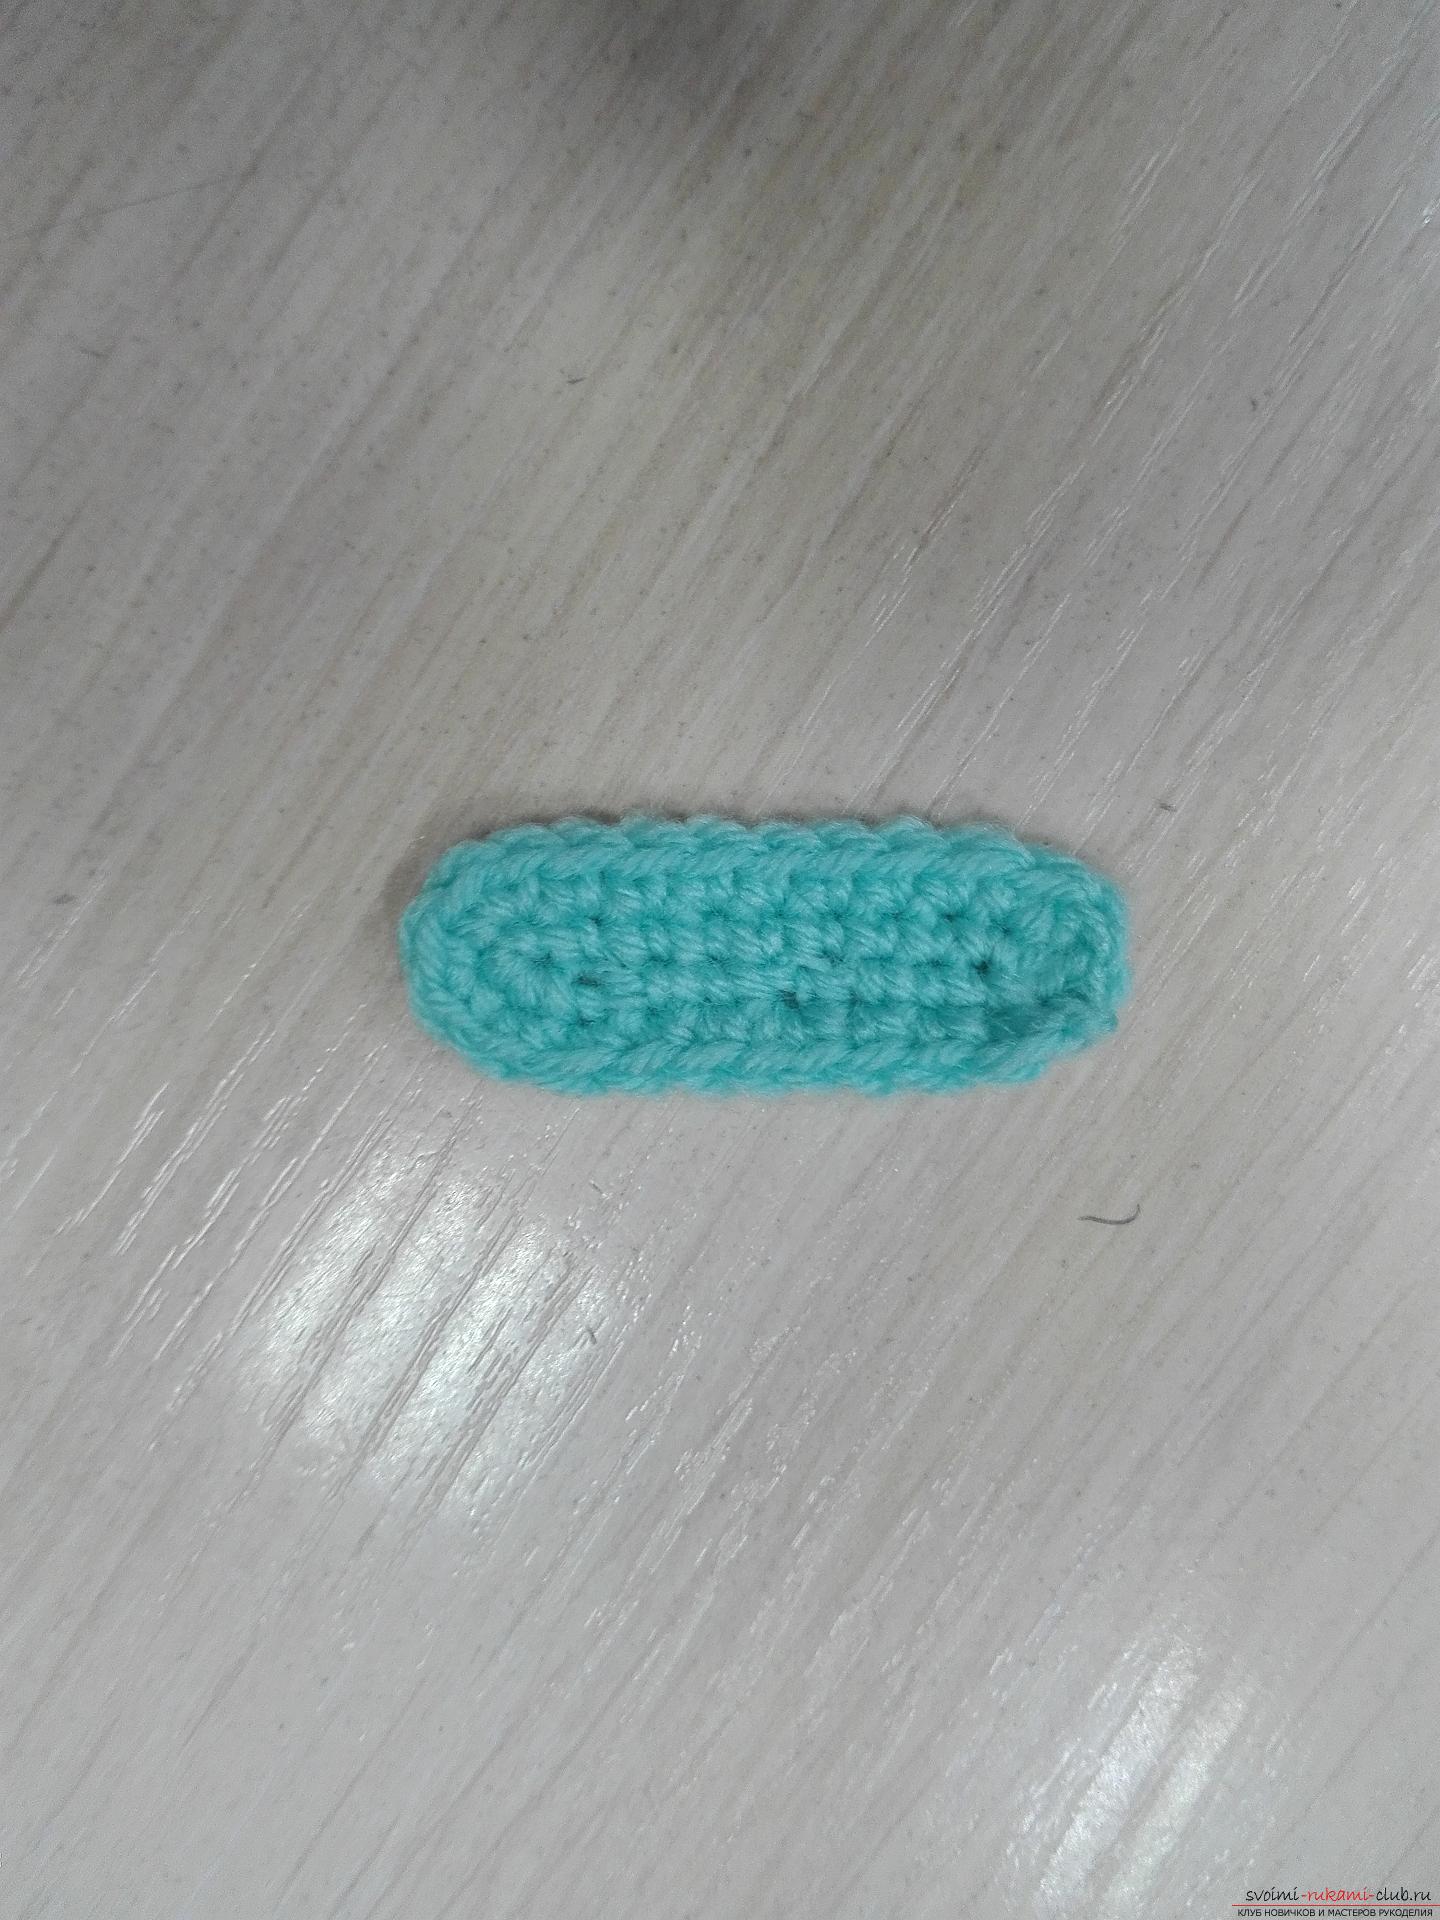 Then we step back from the edge of strip 2 of the loop and knit 7 columns without a crochet in each.
 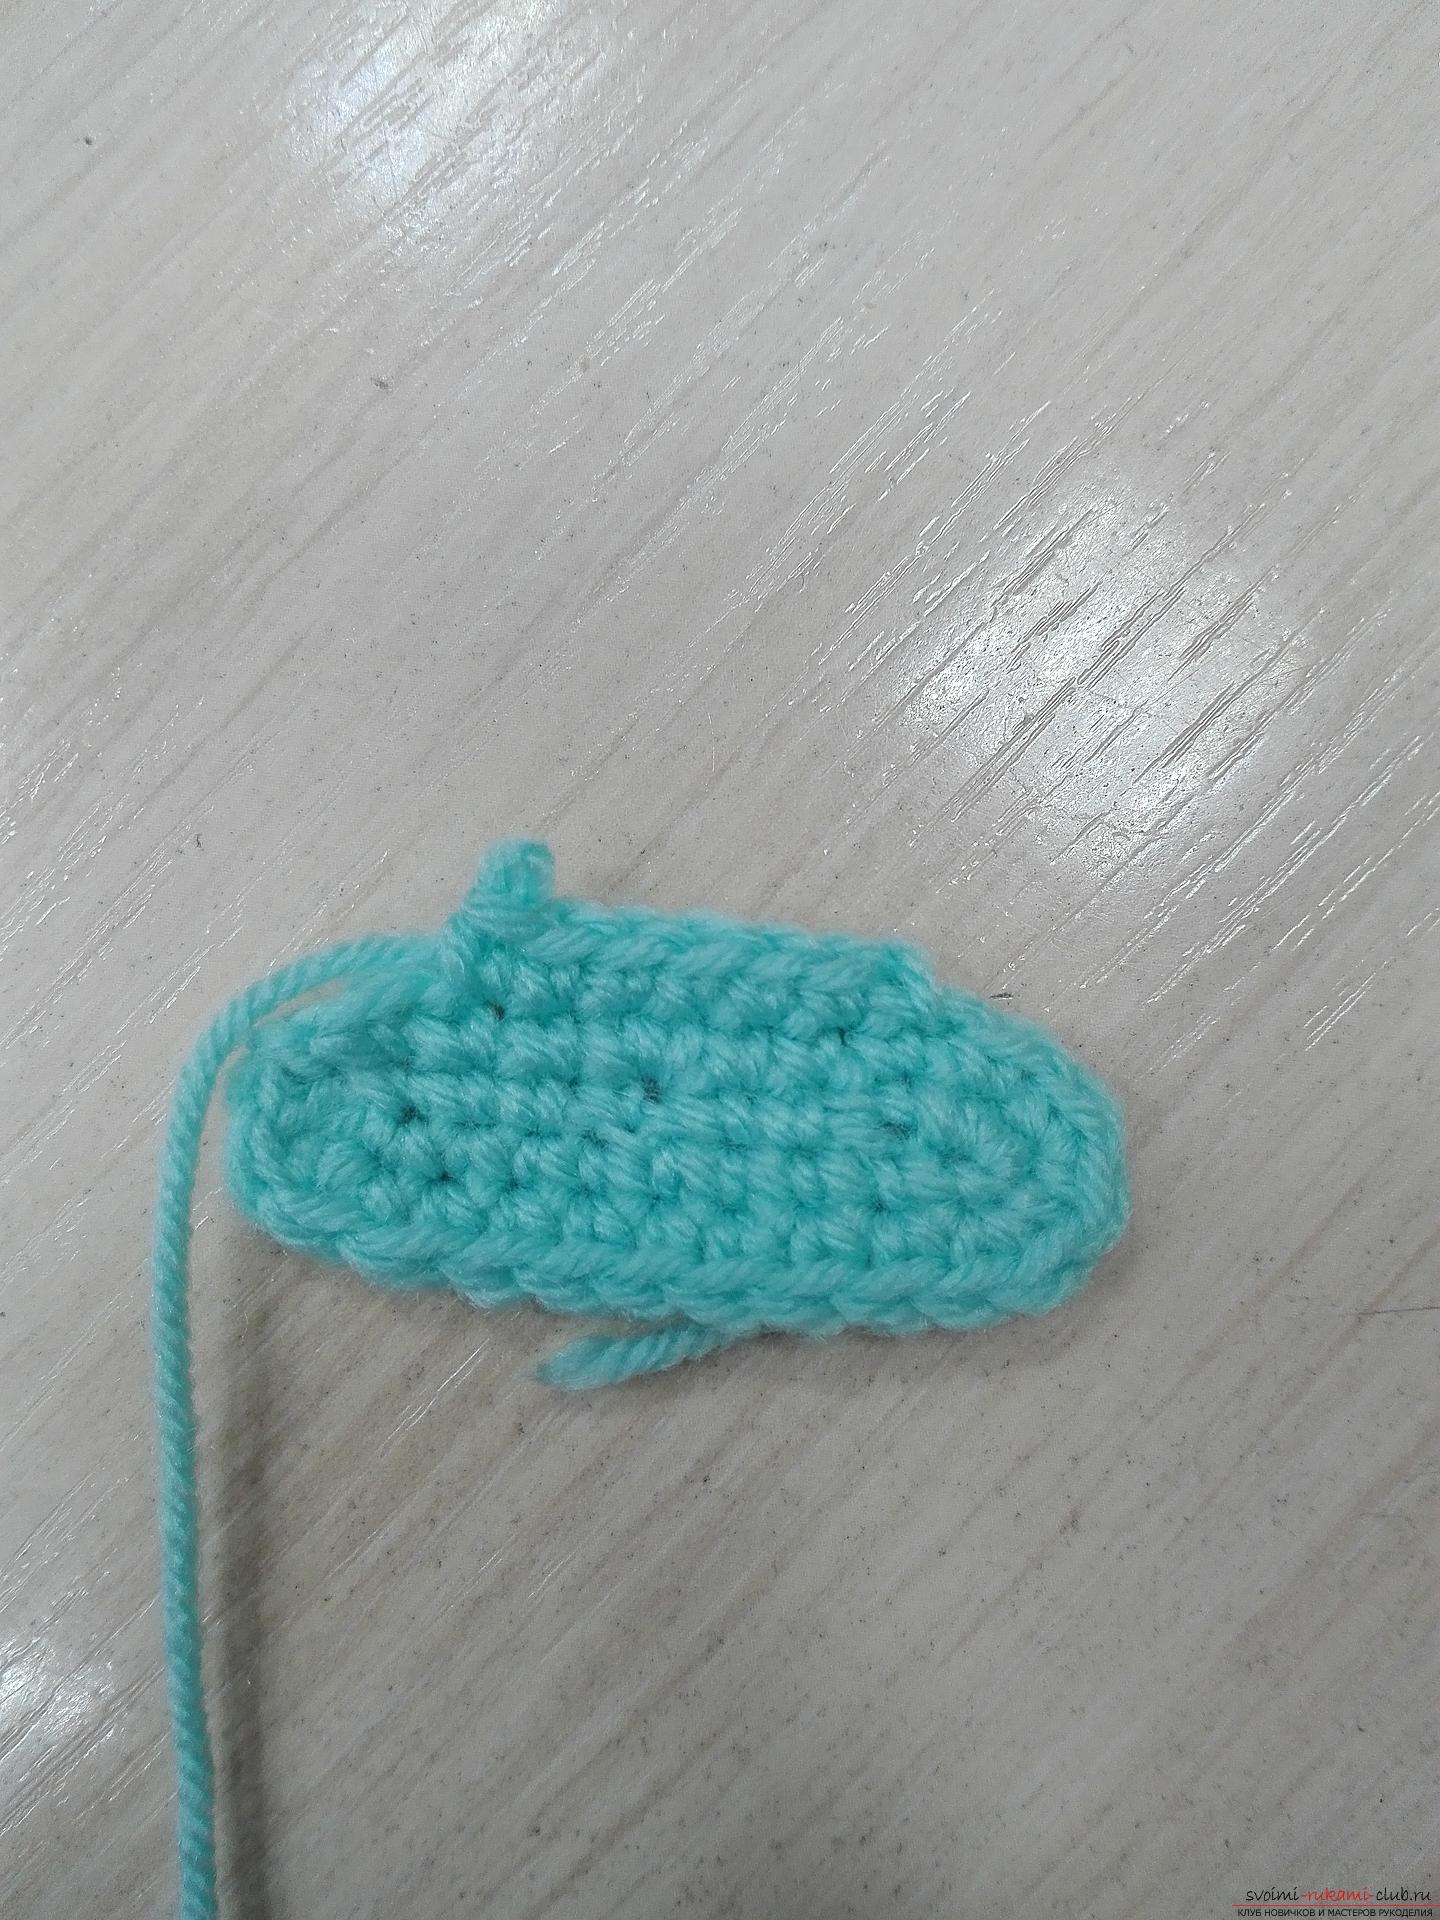 We turn the hat, and in the same way we will tie the next row, 7 columns without a crochet in each loop. And we will tie the third row in the same way as the previous two. The hat is ready!
 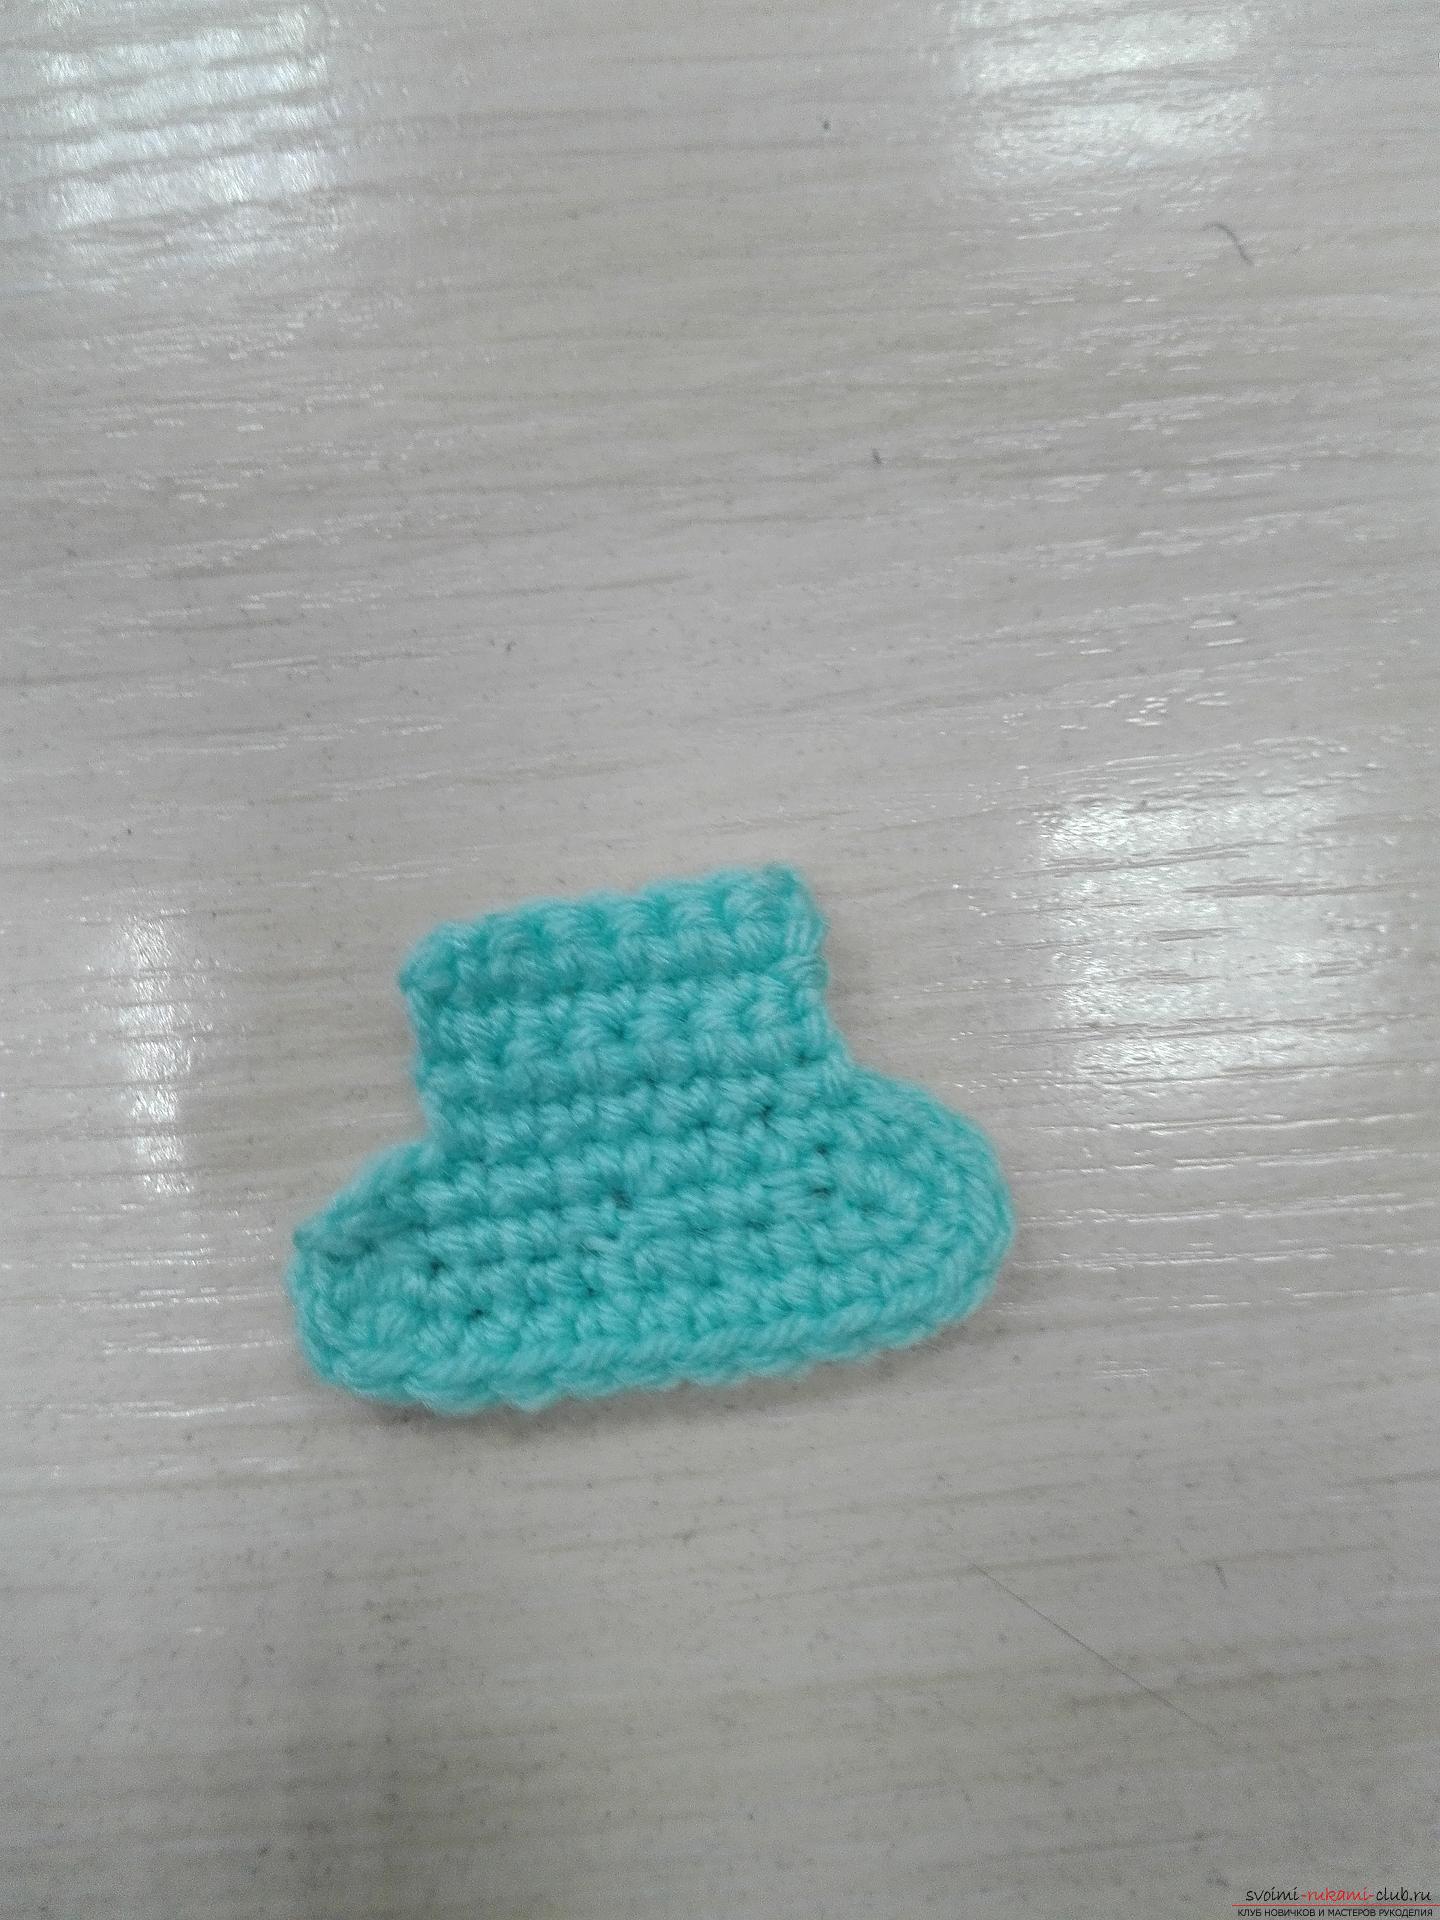 And now we sew a hat to the snowman's head. Well, and that, we could hang our toy on the tree, to the top of the hat we'll make a chain of air loops and fix it so that the suspension turns out. Here is our wonderful toy is ready to please our New Year beauty!
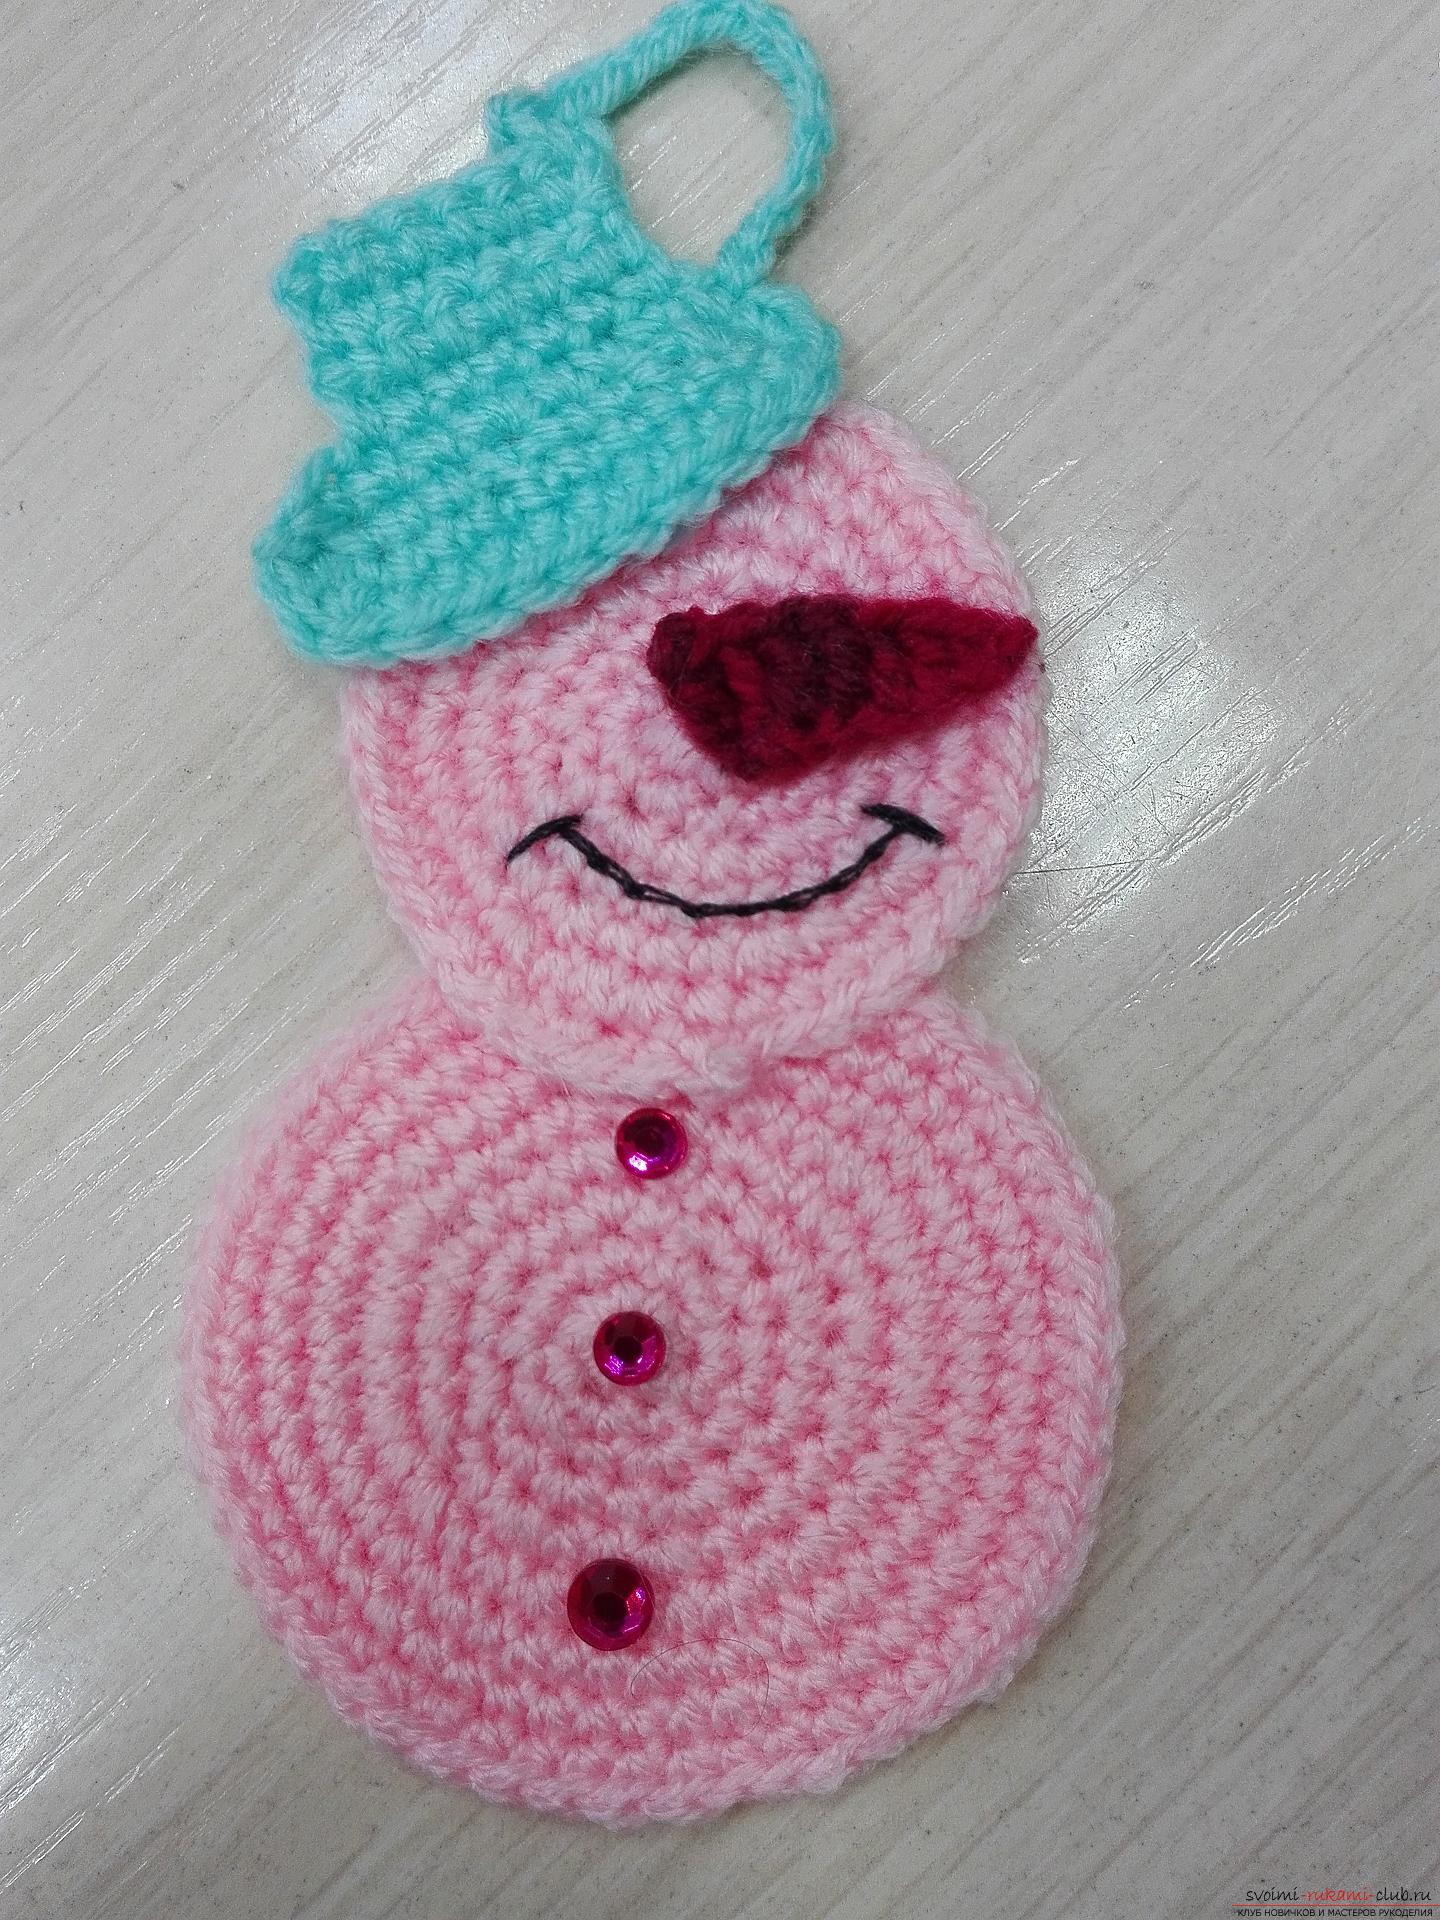
Comments
Related posts:
 The master class will teach you how to create your own crocheted crocheted bunny
 Master class with photo and description will teach you how to make your own New Year's hand craft - a snowman
 The master class will teach you how to make your own hands a New Year's craft - a snowman from glasses
 The master class will step by step teach you how to tie a New Year's craft with your own hands - a snowman.
The master class will teach you how to make your own hands a Christmas decoration - a suspension.
The master class will step by step teach you how to tie a New Year's craft with your own hands - a snowman.
The master class will teach you how to make your own hands a Christmas decoration - a suspension.