A master class with photo on knitting with needles will help to create a children's sweater that will warm in any weather. The use of bright yarn will make the thing unique and beautiful.
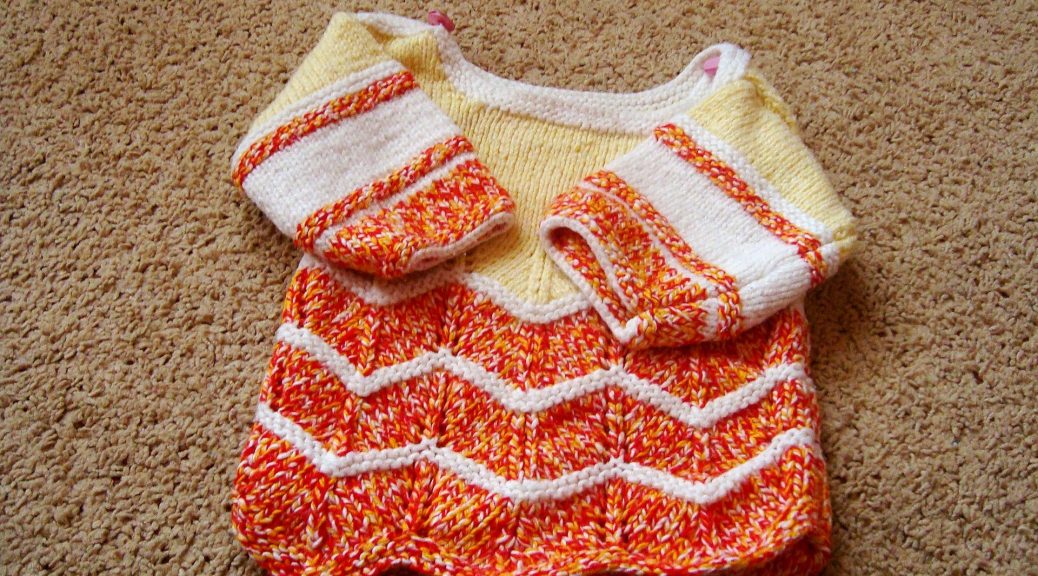
A knitted sweater not onlywill warm the child, but will always look beautiful, unusual. Knits on the baby will always say that his mother is a caring master. A sweater from a combination of different colors of yarn looks fashionable, beautiful and original. The yarn used in this product is sixty percent wool, so a fashionable knitted thing will always warm the baby in bad weather. 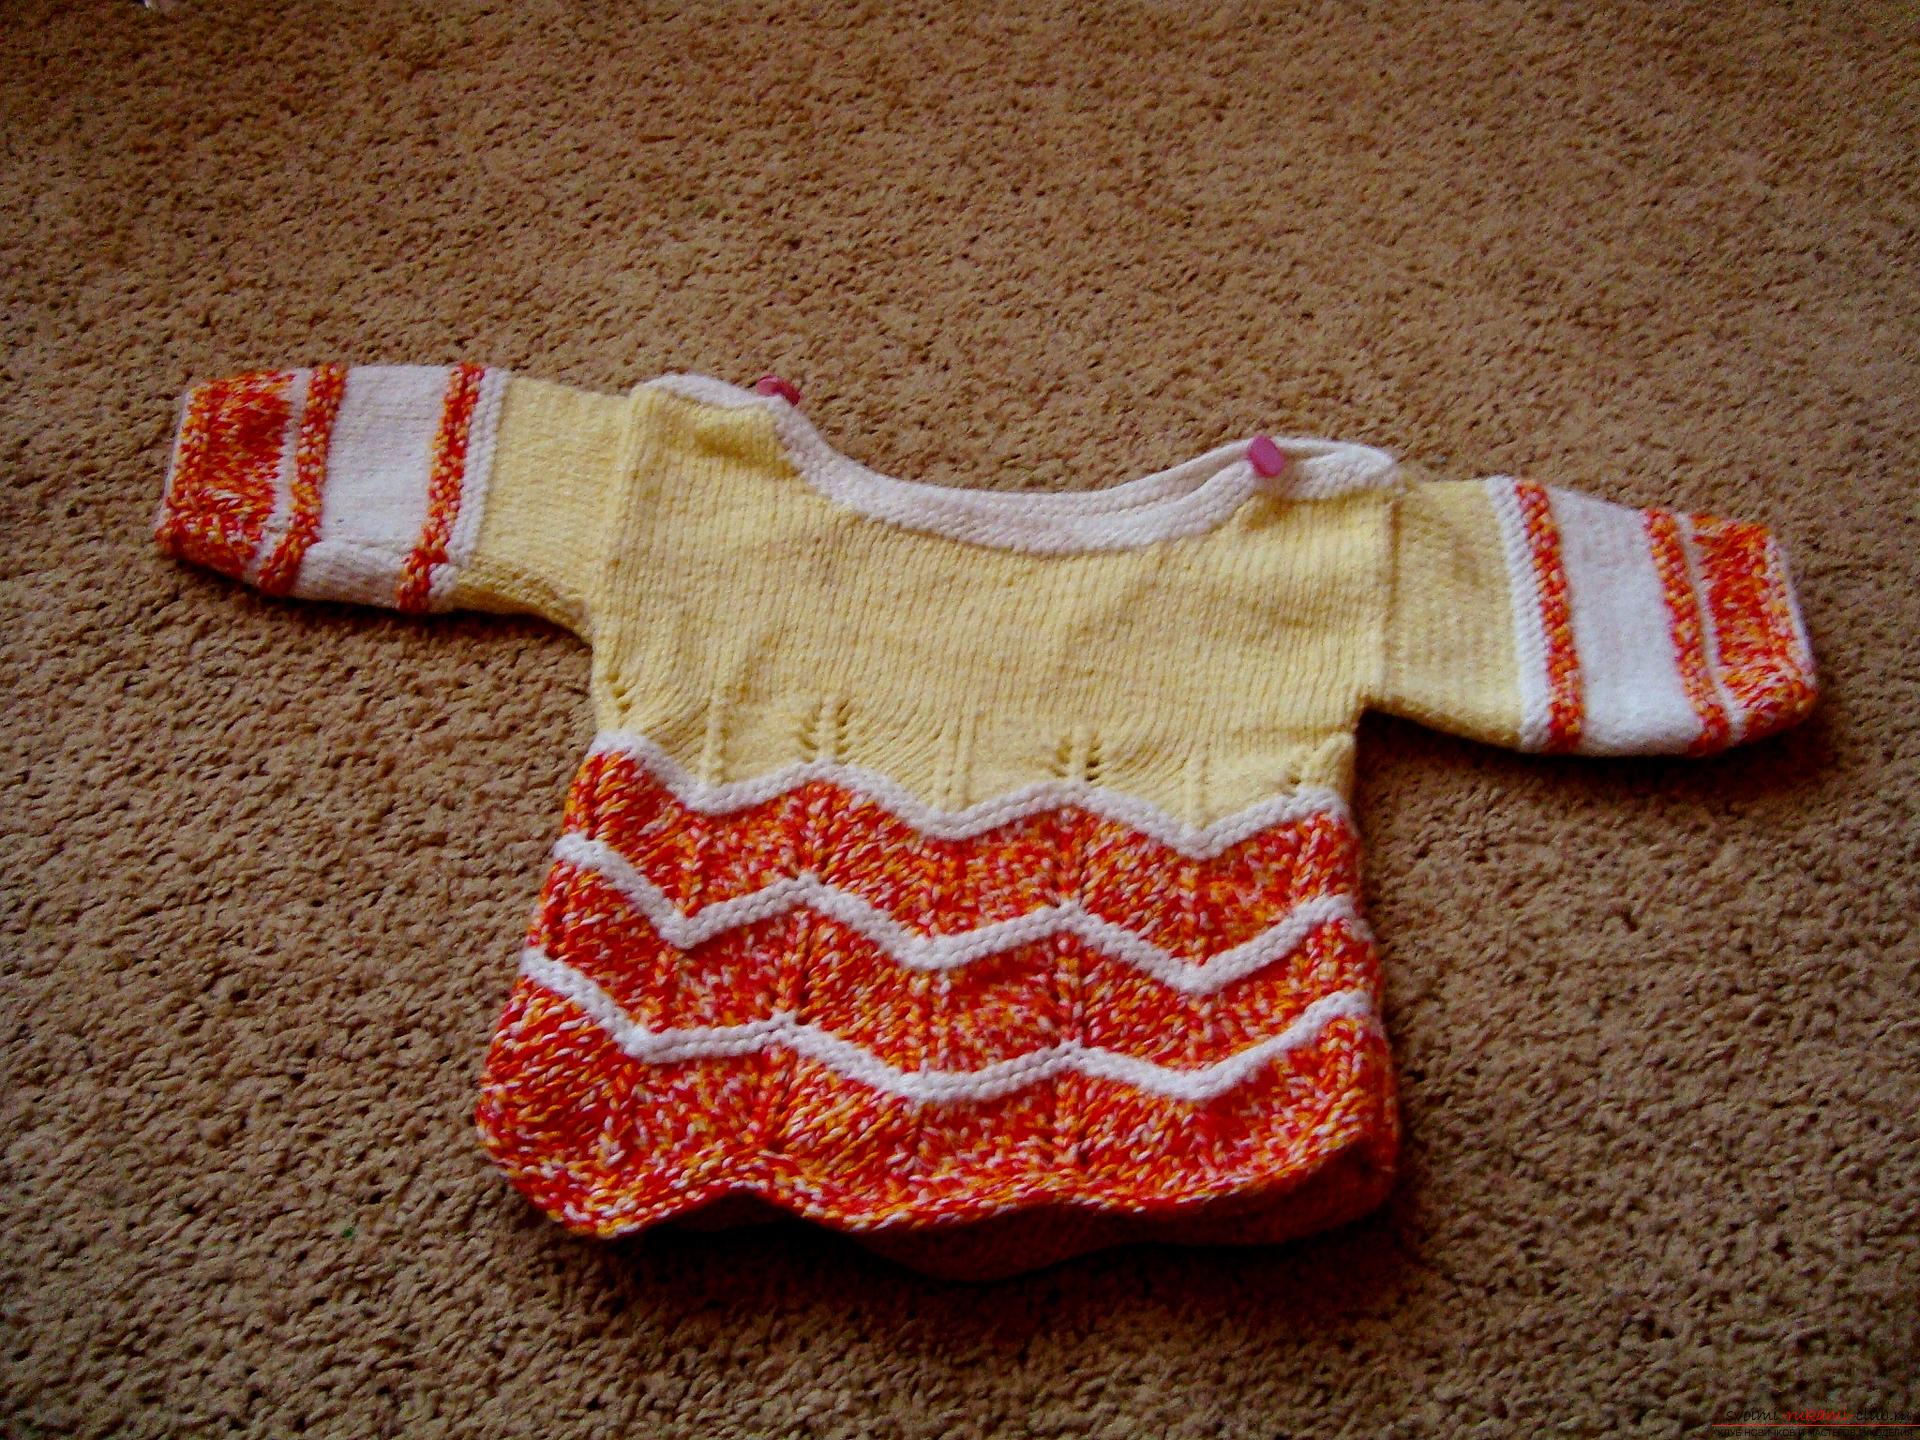 This sweater is designed for a child of 0.5-1.5 years, heslightly elongated, so it can be worn even at a time when the baby learns to crawl and do not bend his back. A detailed master-class with photos will help you to understand all the intricacies of creating a sweater, master the step-by-step steps of the work.
 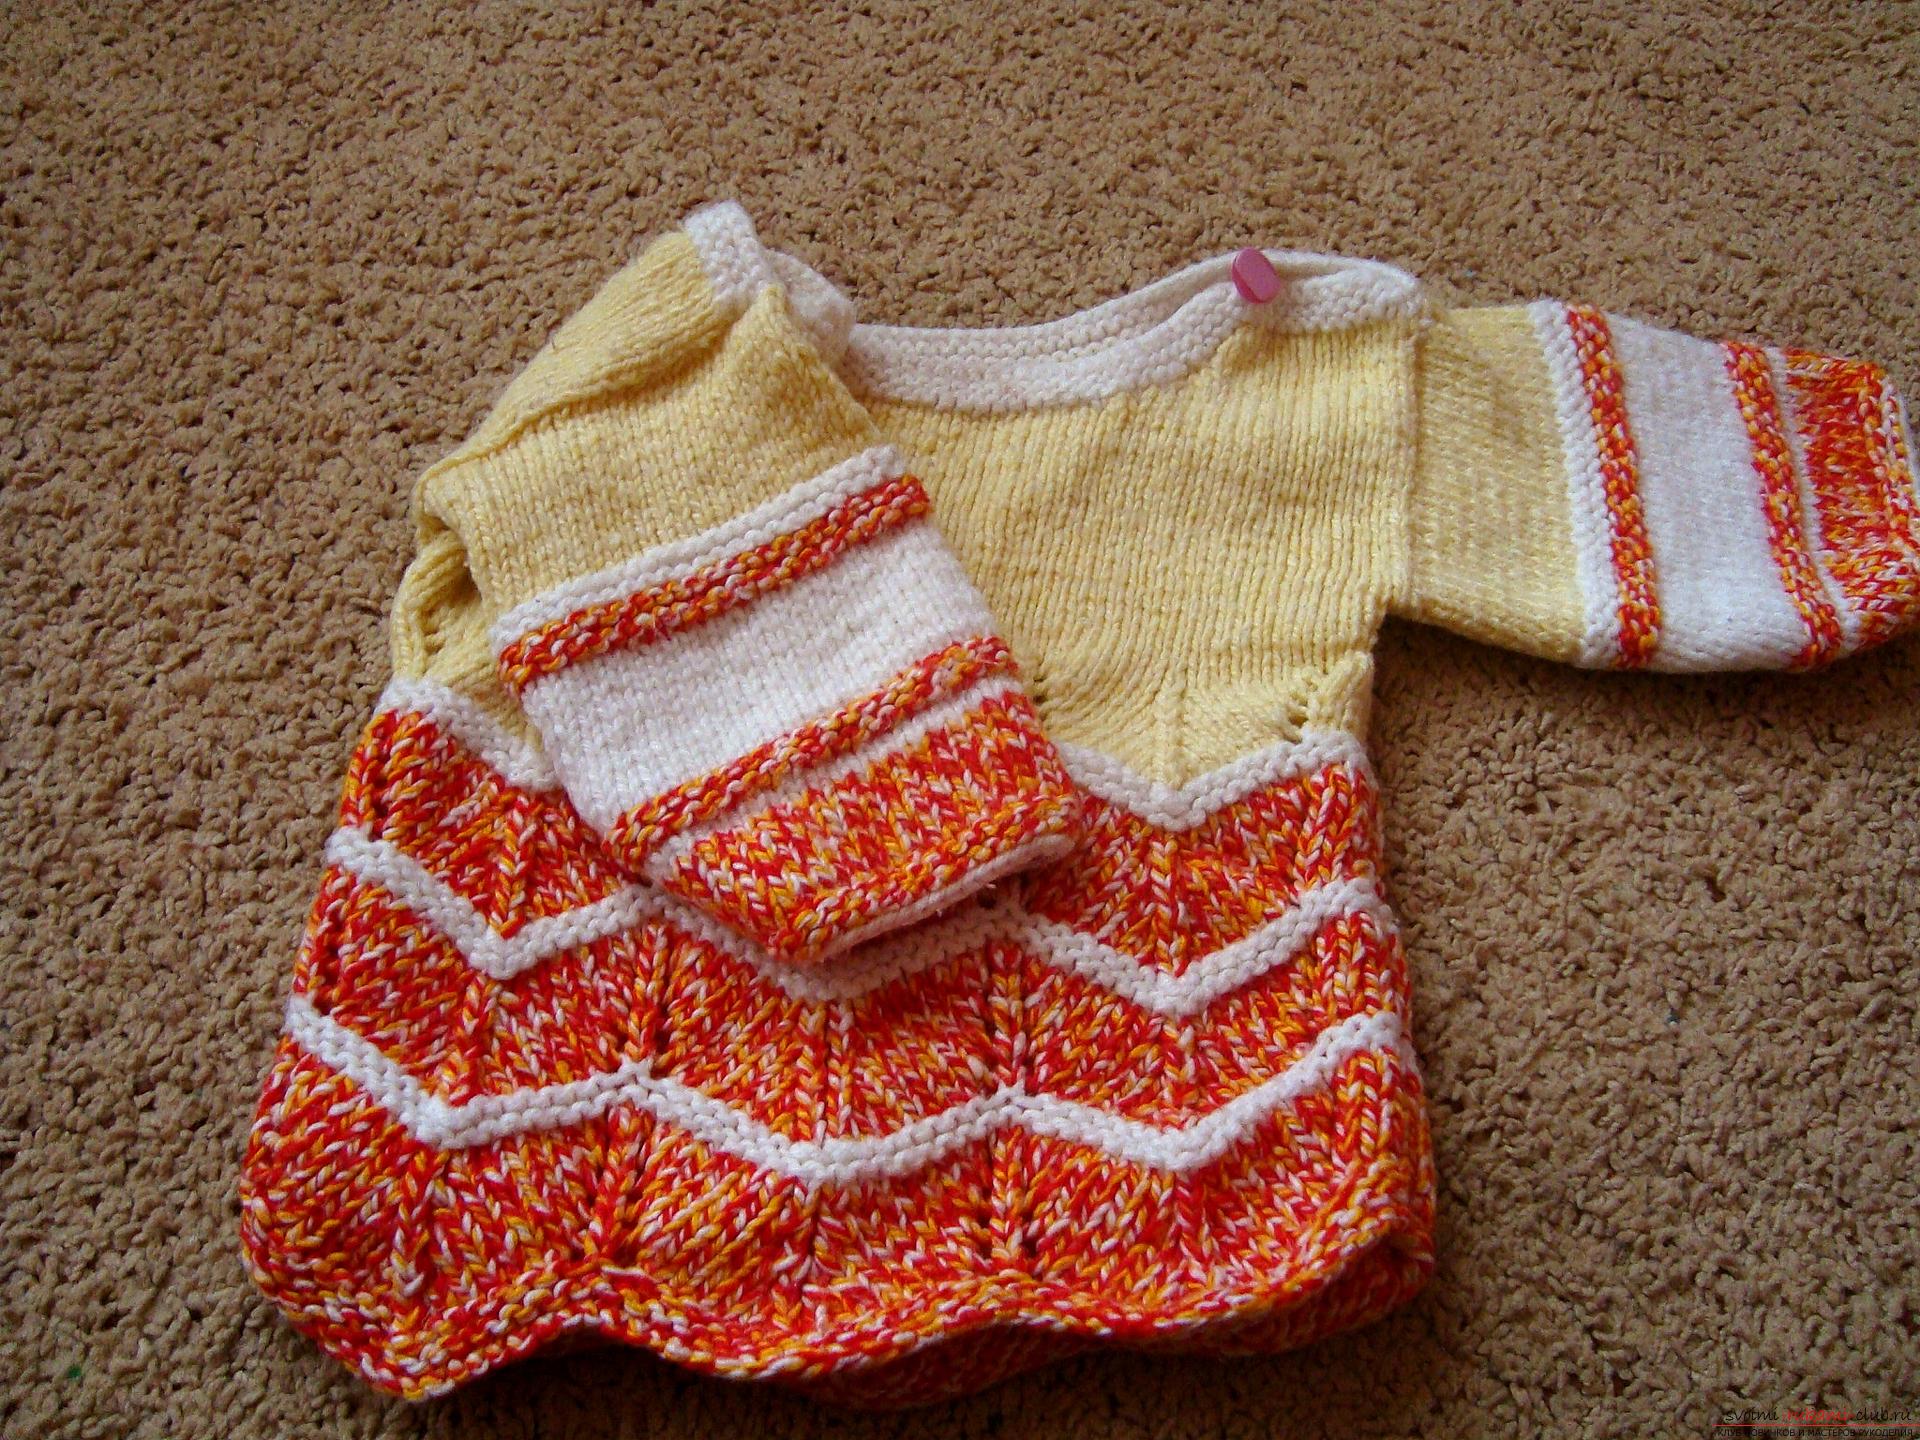 We start to work always with the fact thatchoose the yarn. Since this is a children's sweater, the strands should be bright unusual. At the bottom, the suite was knit from yarn, which all the way changed its color from red to orange and back, and the upper part was knitted from a monophonic yellow thread. White yarn was used for finishing, which helped to divide the contrast and make the thing more interesting. In the choice of yarn, be guided by "boyish" (blue, blue) and "girlish" (crimson, pink) colors, but you can create a sweater from medium tones that do not usually indicate the sex of the child, it is yellow, green, purple. Red, etc. Yarns will need about 70 grams of the color of which the lower part of the picture is made, also prepare 60 grams of the second color, from which the upper part of the cloth will be knit, a little white thread is needed for finishing. The sweater is created in stages: first you need to tie the front part, then the backrest, sew these details along the shoulder line, and type new hinges in the armhole zone, from which the sleeve of the product will be created. At the final stage, the side of the product is sewn from the cuff to the waist. We start by typing the loops first. The drawing report (that is, the repeating part) consists of 15 loops, so the number of elements typed must be a multiple of this number. But if you do not add a few stitches on the sides, the whole beauty of the pattern will be lost, since the edge of the pattern just drags into the seam line, so add five loops from each edge. If you use medium-sized threads, as in this sample, then enough for the front of the sweater 45 loops for the three repeating parts of the pattern, then add twice 5 loops that will increase the side and also need two loops on the edge, that is, the first and the last one. Thus, only 57 loops are required. Loops are typed on both spokes, and then the ode is extracted. Begin to tie the first row of the drawing. First we knit four facial loops. To do this, the needle with the loops is taken in the left hand, and with the right needle you do not tie the first loop (this is always done with the first loop), then you approach the front part of the second loop, the working thread should be located on the back side of the knitting tools. Fold the yarn on the right knitting needle and pull out a new loop, the tied loop on the left knitting needle simply falls down. After knitting four eyelets, create a cape and then we sew one loop and again the cape.
 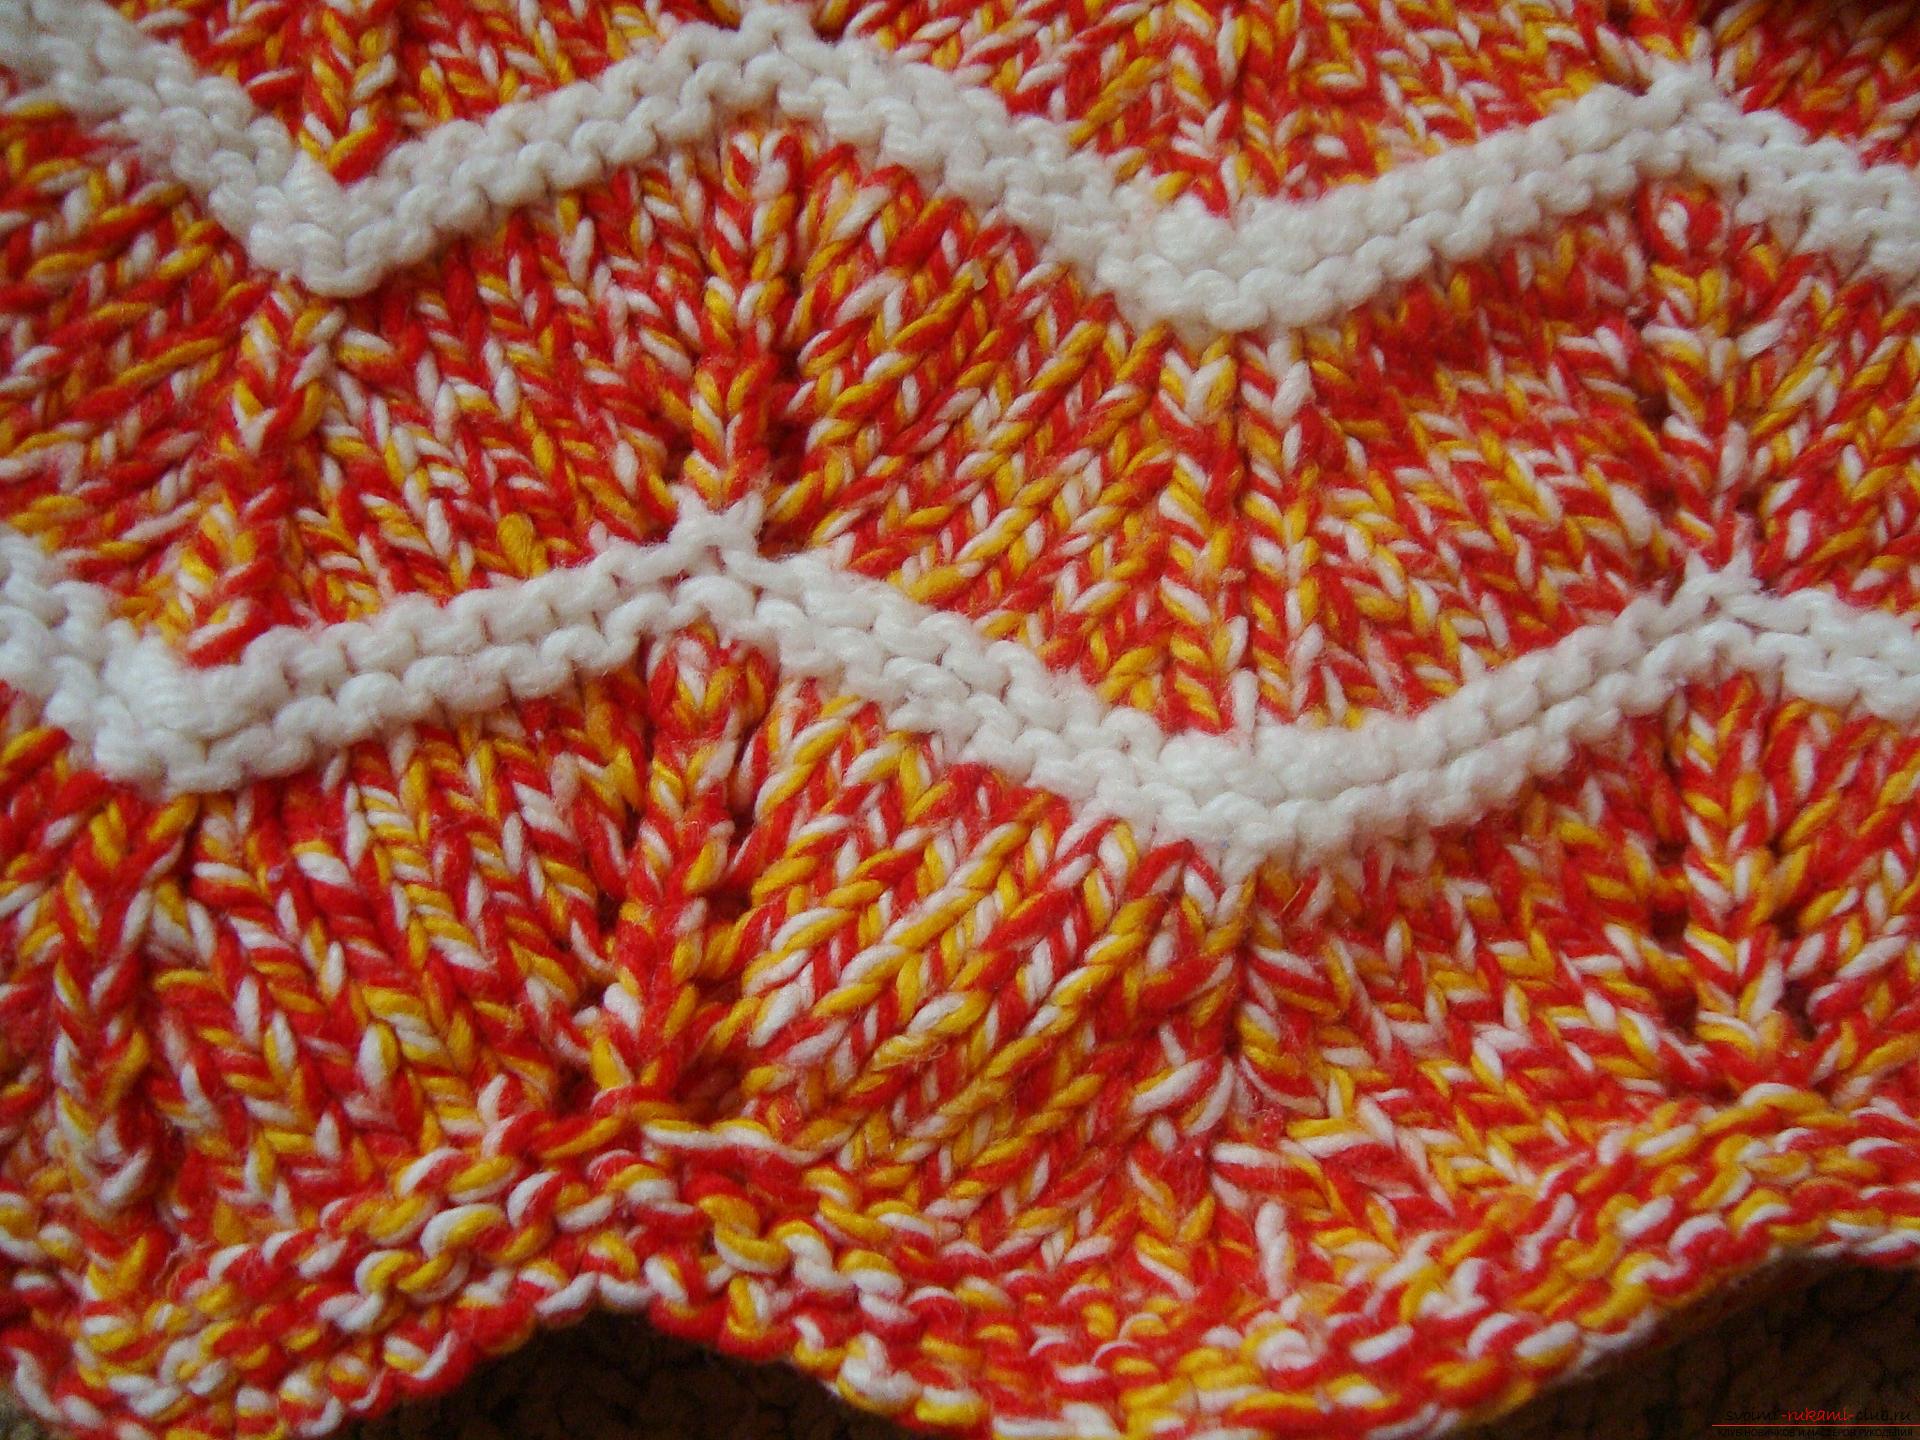 Now we form a repetitive report of sevenface loops, then you need to tie three loops together, but in such a way that the middle one remains in front, and the extreme ones hide behind it. To do this, remove one eyelet on the auxiliary needle or hook, then swing the next loop to the right knitting tool, return the loop to the left knitting needle from the auxiliary tool, then toggle the loop from the right knitting needle back to the left knuckle and poke all three elements, then tie them together as per type face loop. Again, you need to associate seven facial loops in sequence, create a cap and one face loop, after which you again need to thread the thread on the right knitting needle. Nakids allow you to make up for a reduction when three hinges are tied and therefore the knitted part does not change its width. Next, tie another two times the report and finish the series with facial loops. The last loop is always sewn on the wrong side so that the edge of the detail is smooth and beautiful. Turn the work over and begin to tie the second row. He, like all the other purl rest series, is created on a simple principle - all the loops are knitted according to the pattern, that is, the type of purlins. Start the new third row with the same report as the first one: 7 facial, three together so that their central leg lies ahead), again 7 facial elements, 1 cape, 1 facial loop and again the cape. Internally, again, knit all of the wrong side stitches. Create 5 centimeters of a plain pattern, and then connect the white yarn. From the contrasting thread it is necessary to link two rows, but not according to the drawing. A white thread is connected on an odd numbered row and a series is sewn with a series of solid purl loops. Then turn the work to the wrong side and tie an even number with the front loops, then on the front side of the product another one is created.
 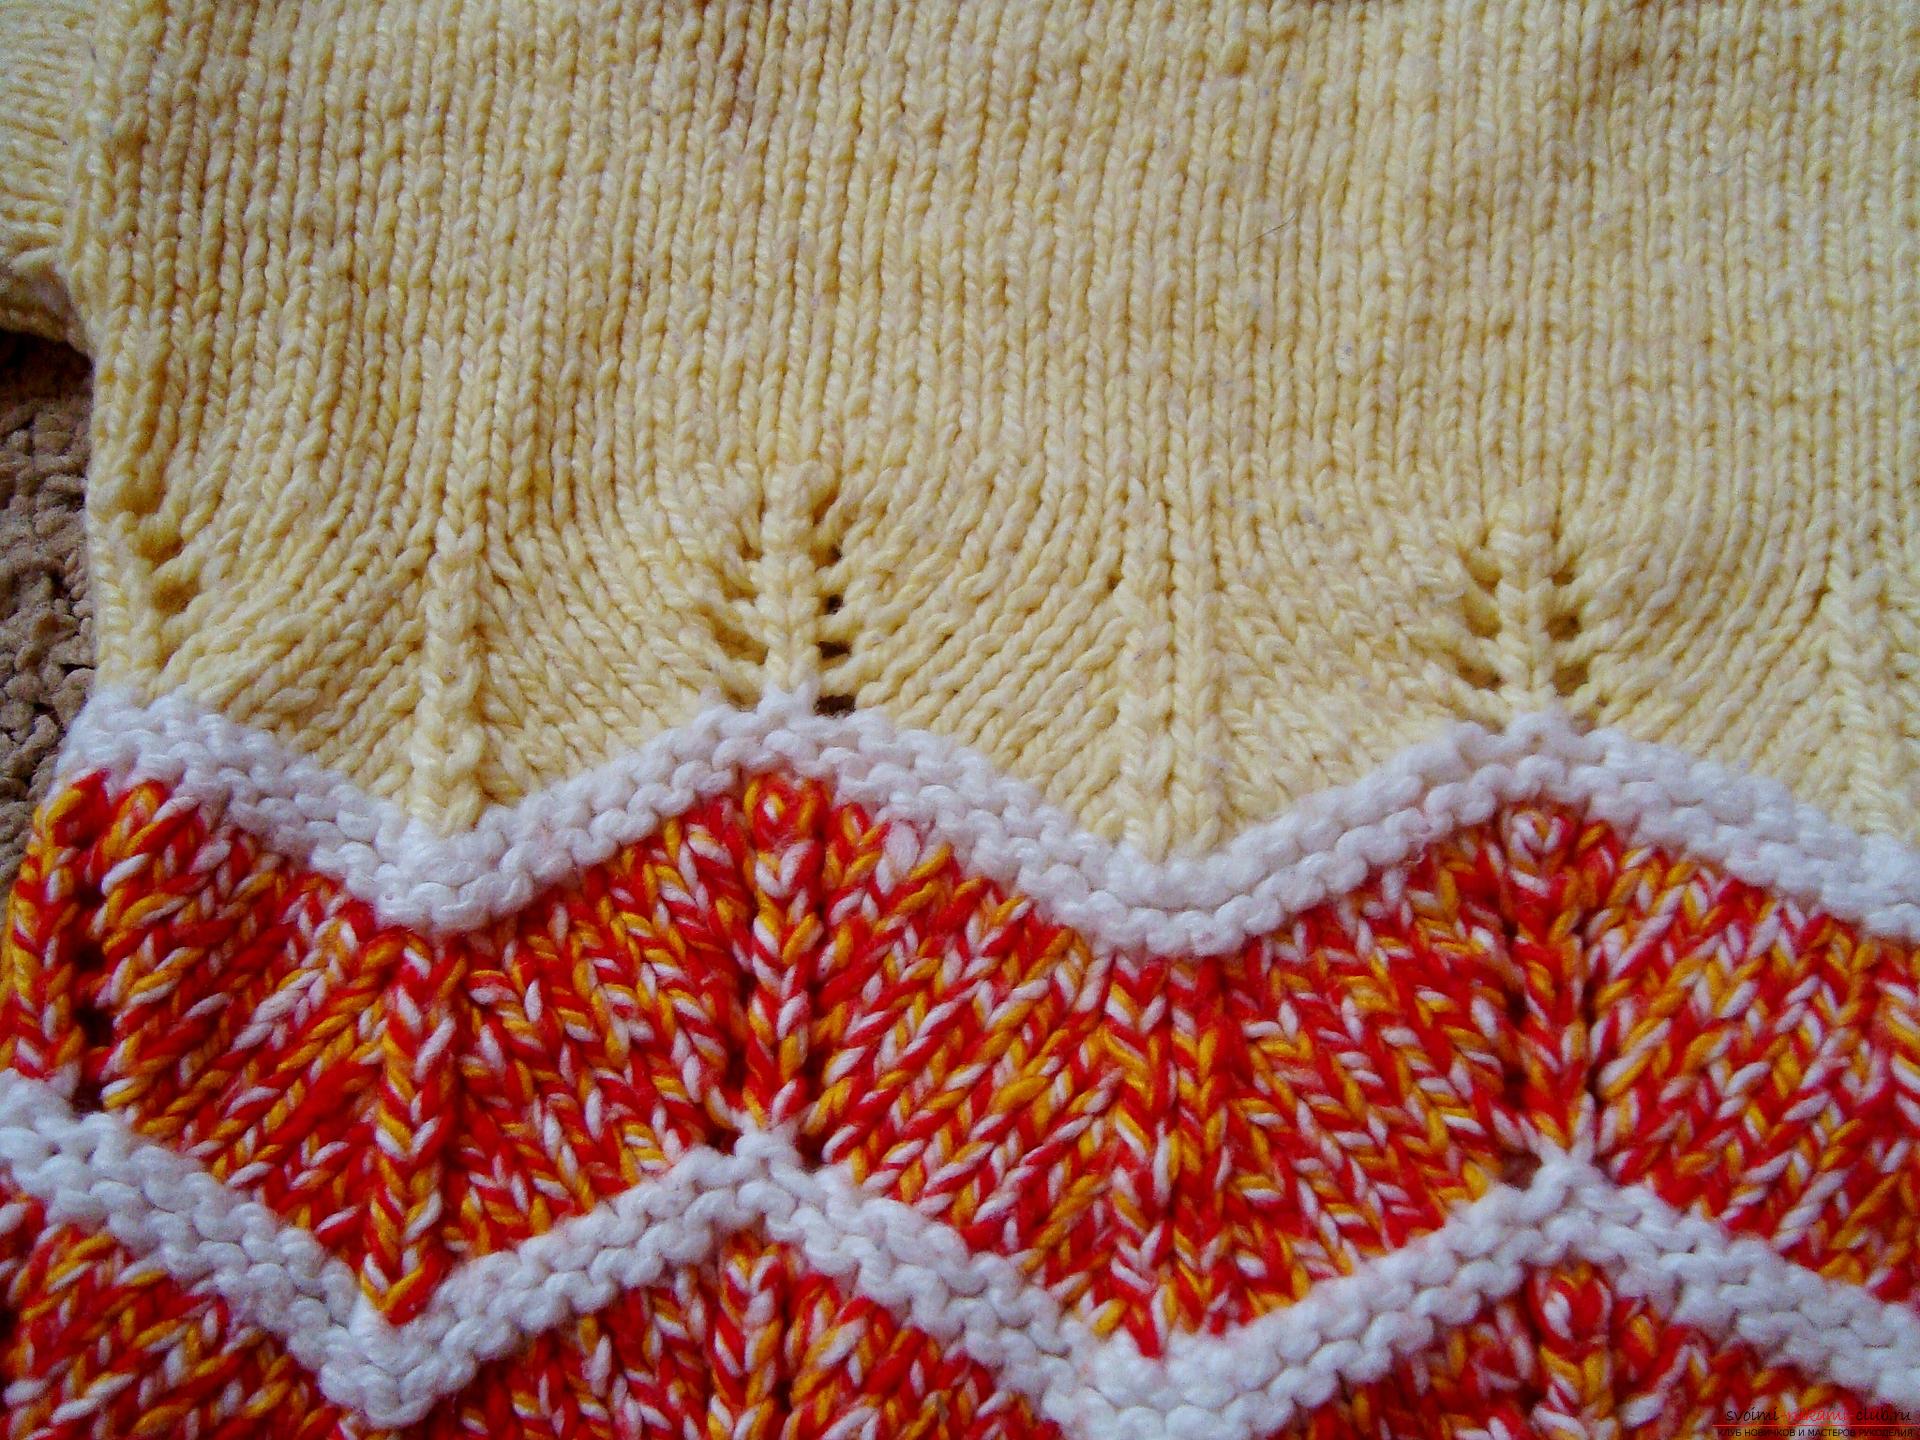 On the new row, go back to the colored thread and againcreate several rows according to the principle, as you knit from the first row. After five centimeters again, make contrasting rows of white thread, which will allow to highlight the pattern and make the knitted sweater brighter. Spray the third part on the same principle as the first two components. We proceed to the transition to monophonic yarn. On an odd number, we attach a new thread and we tie 10 rows with the same pattern as the rows with a flower yarn, that is, we continue to untwist the 7 face loops, three together, again 7 facial, nakid, 1 facial loop and cape. The original rows are always formed only by the wrong loops throughout the product. Now you need to go to the creation of the facial surface, that is, odd numbers are all tied in the face, and even rows are facial loops. So you need to knit to the neck. How to tie a neck:
  Now measure out the middle loop, that is, the 27th andStarting from it, remove the central 15 loops on the additional spoke (7 on the left and 7 on the right of the center loop). These loops remain below. Now we sew in stages the side hinges, every two rows leaving one eyelet on an additional spoke. First, create such a descent on one side, then on the other. After lifting all the loops on one spoke and tying two rows of the reverse side of the white thread. Close the white hinges, and the first facepiece is ready. The back knit in the likeness of the front part, but the cut on the neck should be smaller. Now put together the details and start sewing the upper edges, that is, along the shoulder line. Spread the details, mark the desired size armhole, so that the sleeve was free, and proceed to set the hinges from the armhole. The hinges are more convenient to hook.
 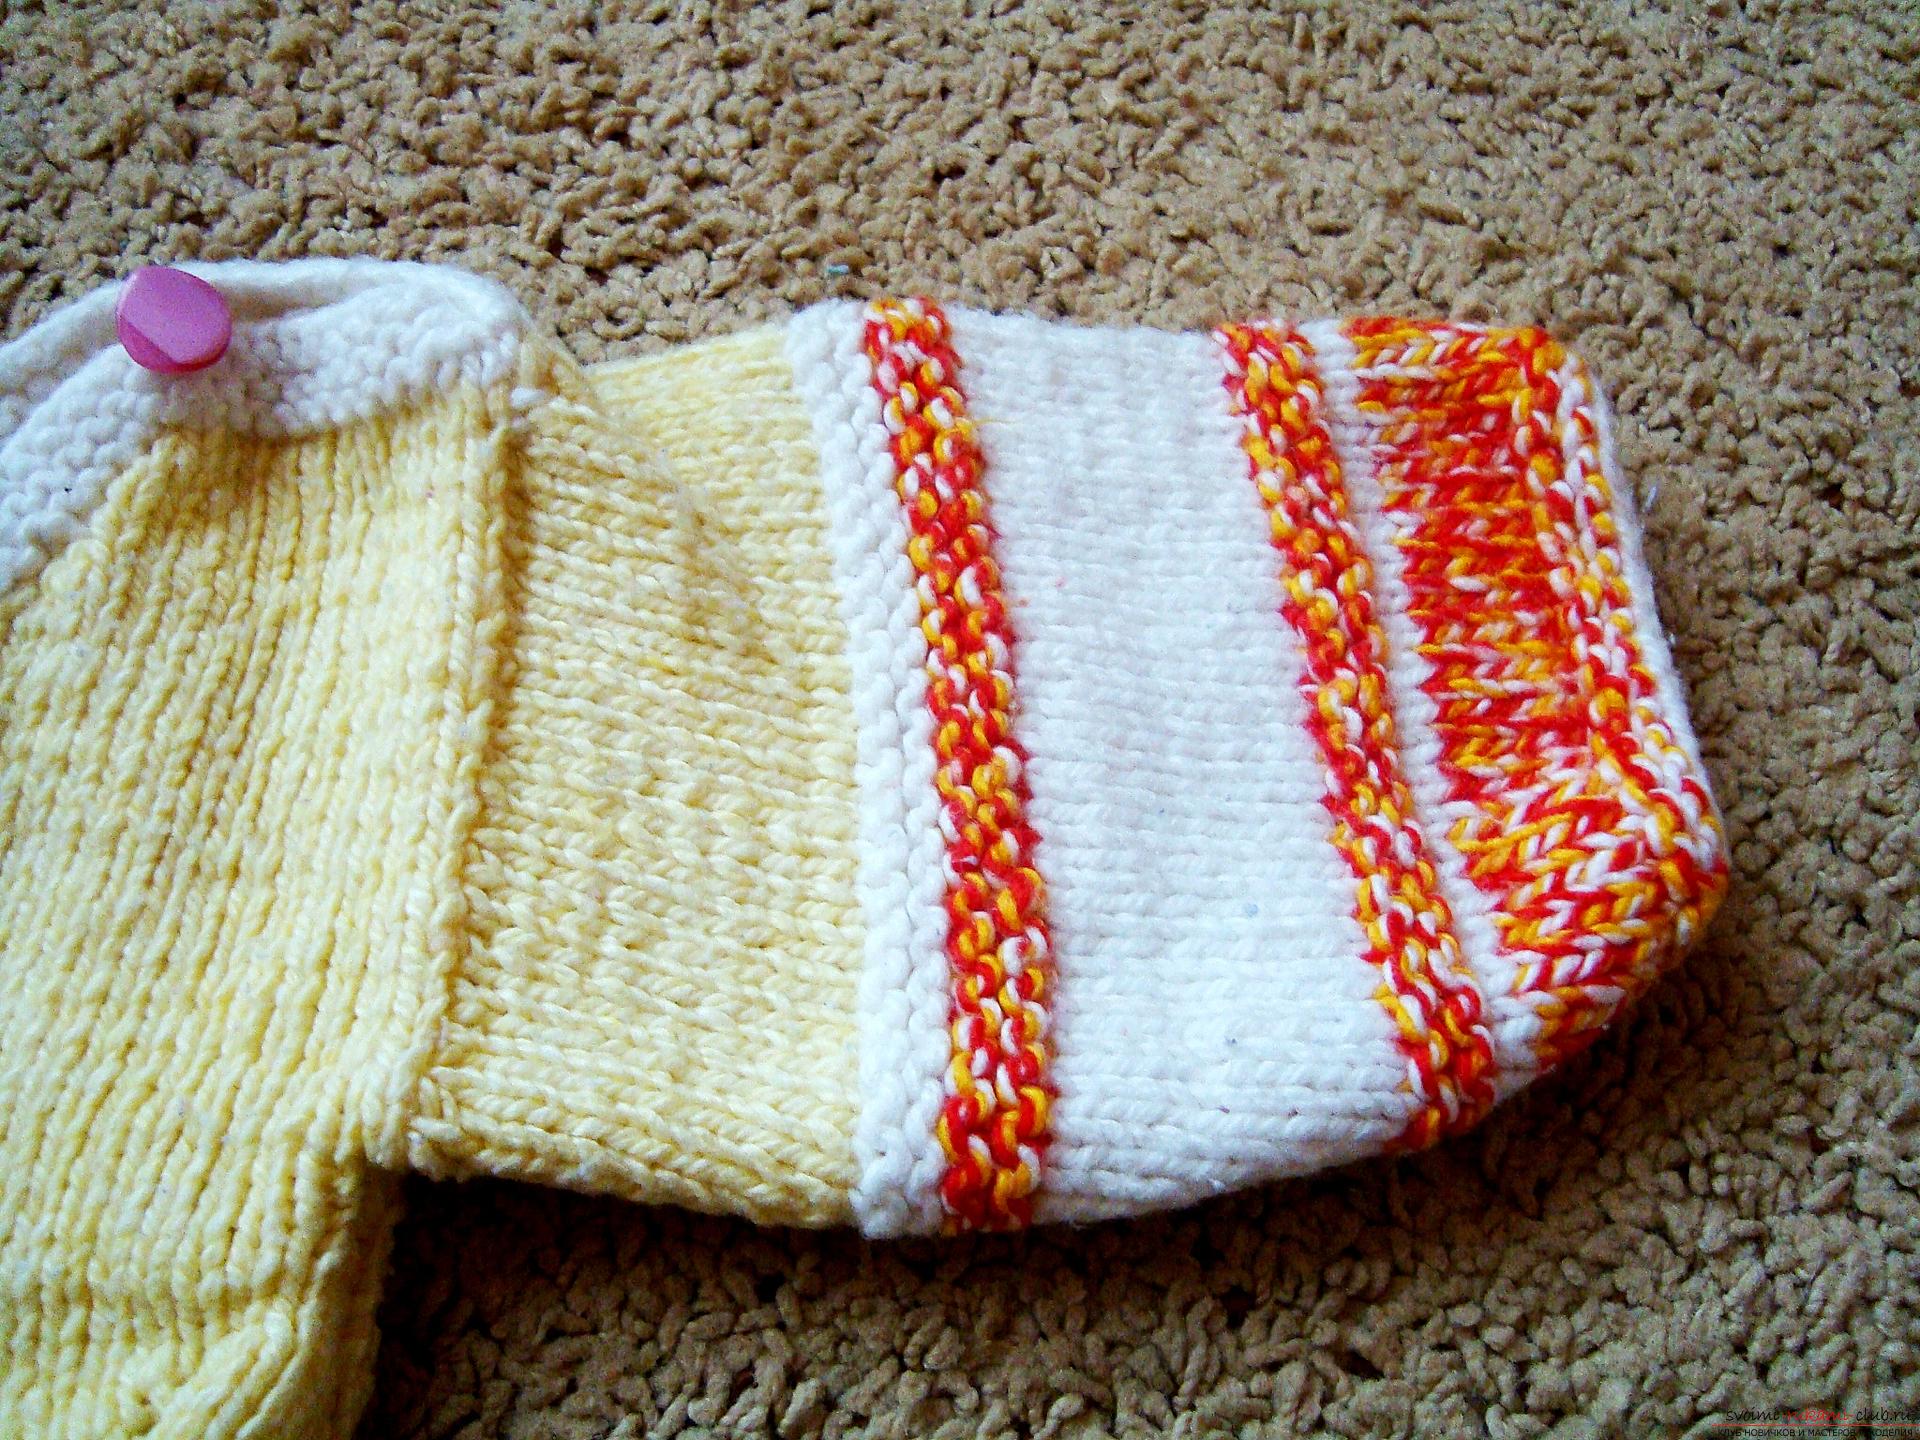 Spray a few rows of plain yellow yarn, they should all be 6-7 cm. The mating is the simplest - according to the principle of the facial surface. Then tie the white yarn and create two rows in white.
 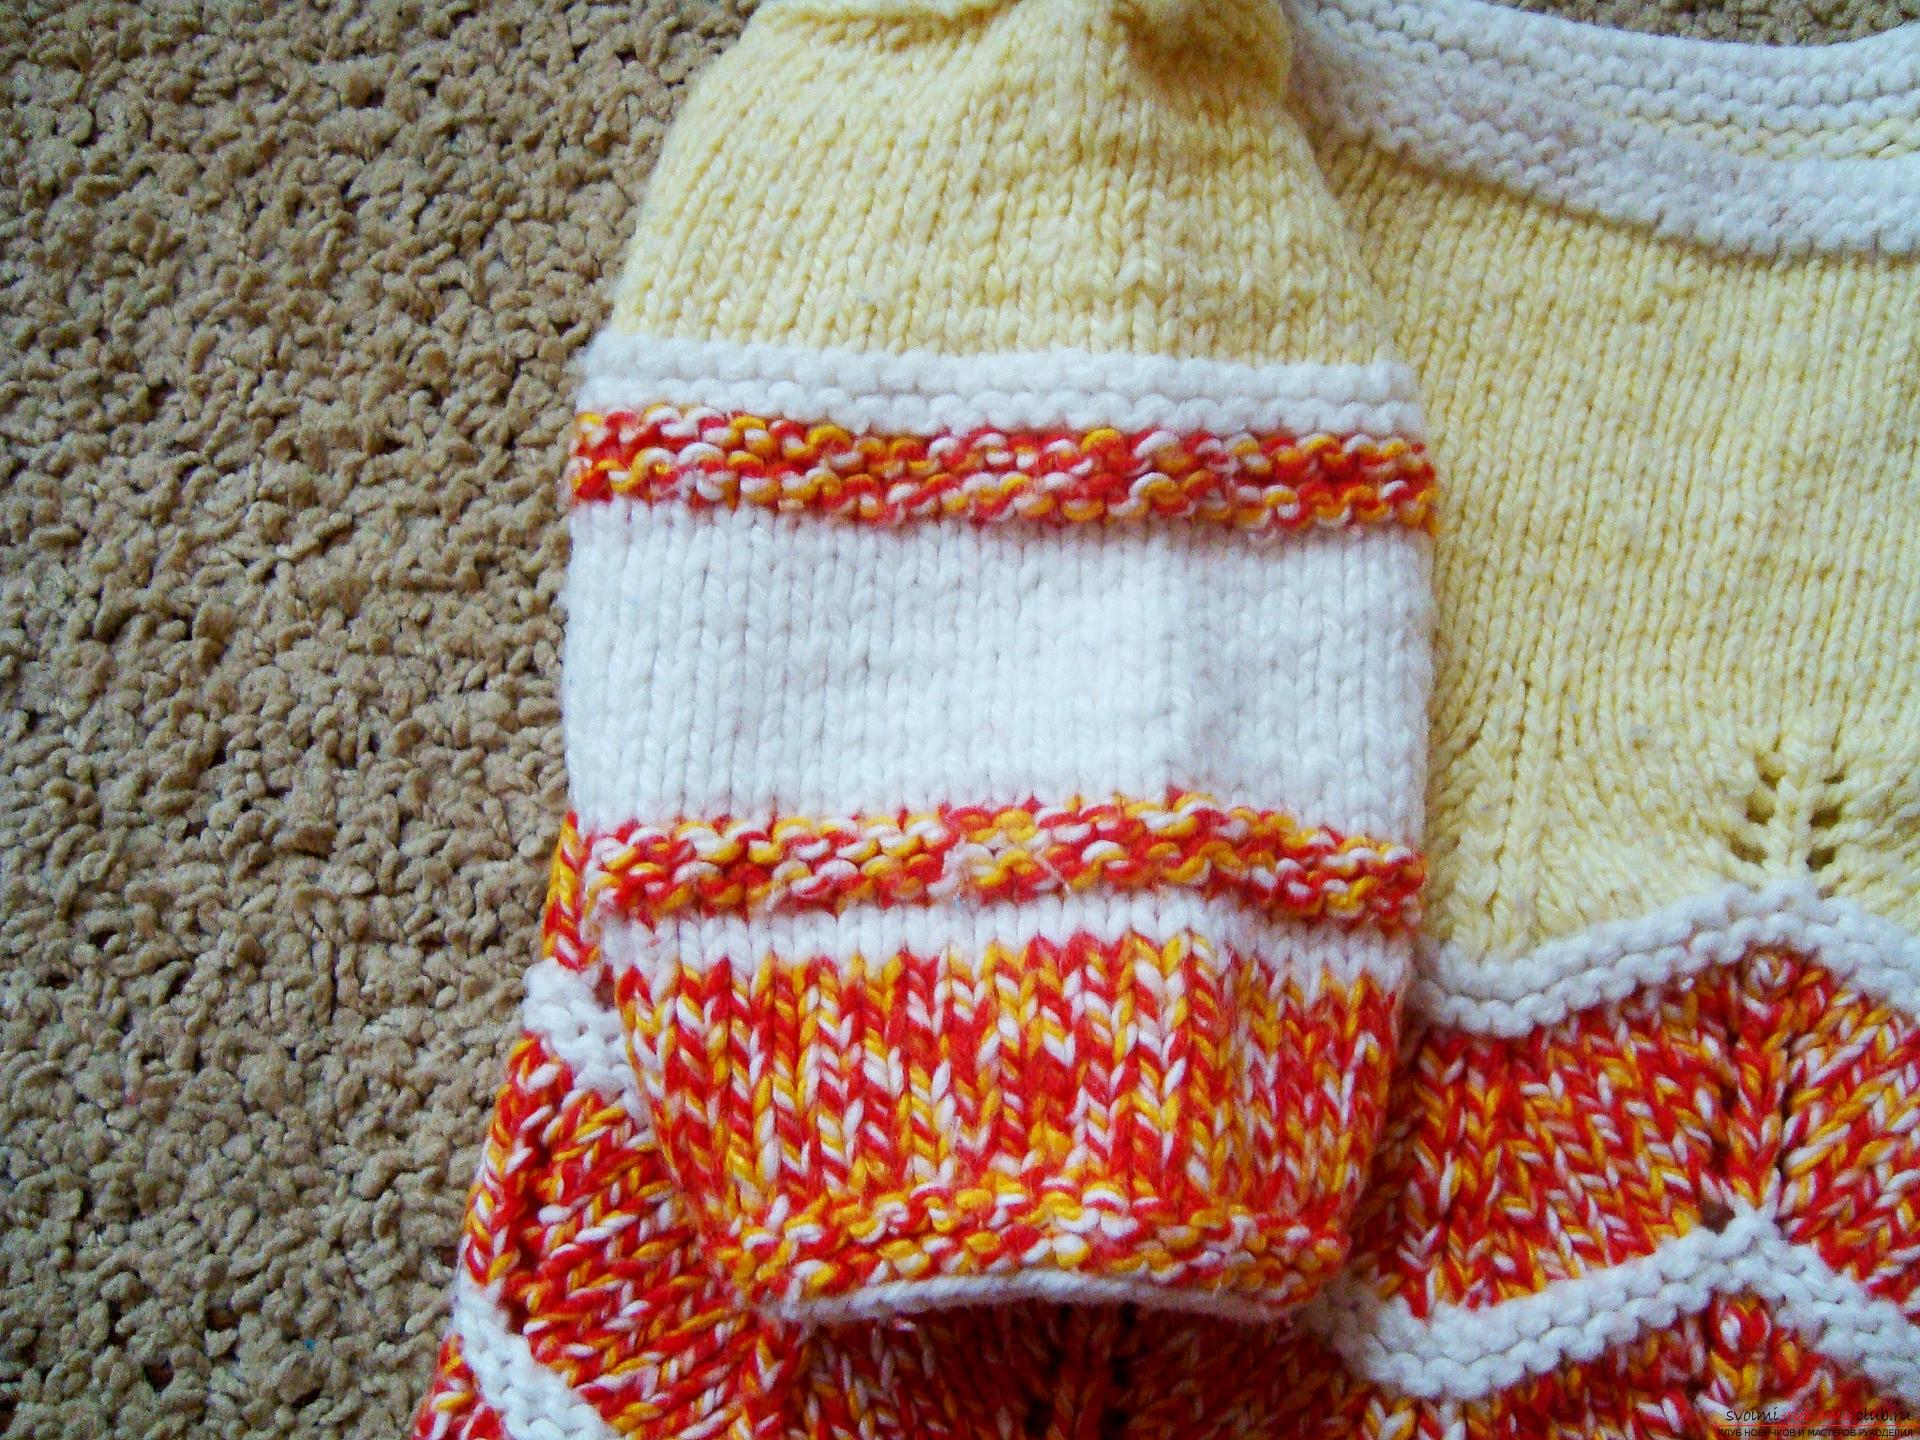 A new series needs to be made from colored yarn, itstie on the front side of the inside, and turning the work - make a series of facial loops. Then tie 5 cm of the front face of the white thread. Then the pattern is formed from two rows of colored yarn, then again a white thread turns on, and near the end of the hobble, connect the colored yarn. The last row for closing loops is created from white threads. which slightly tighten the end of the part. therefore knit two loops along with a stretch.
 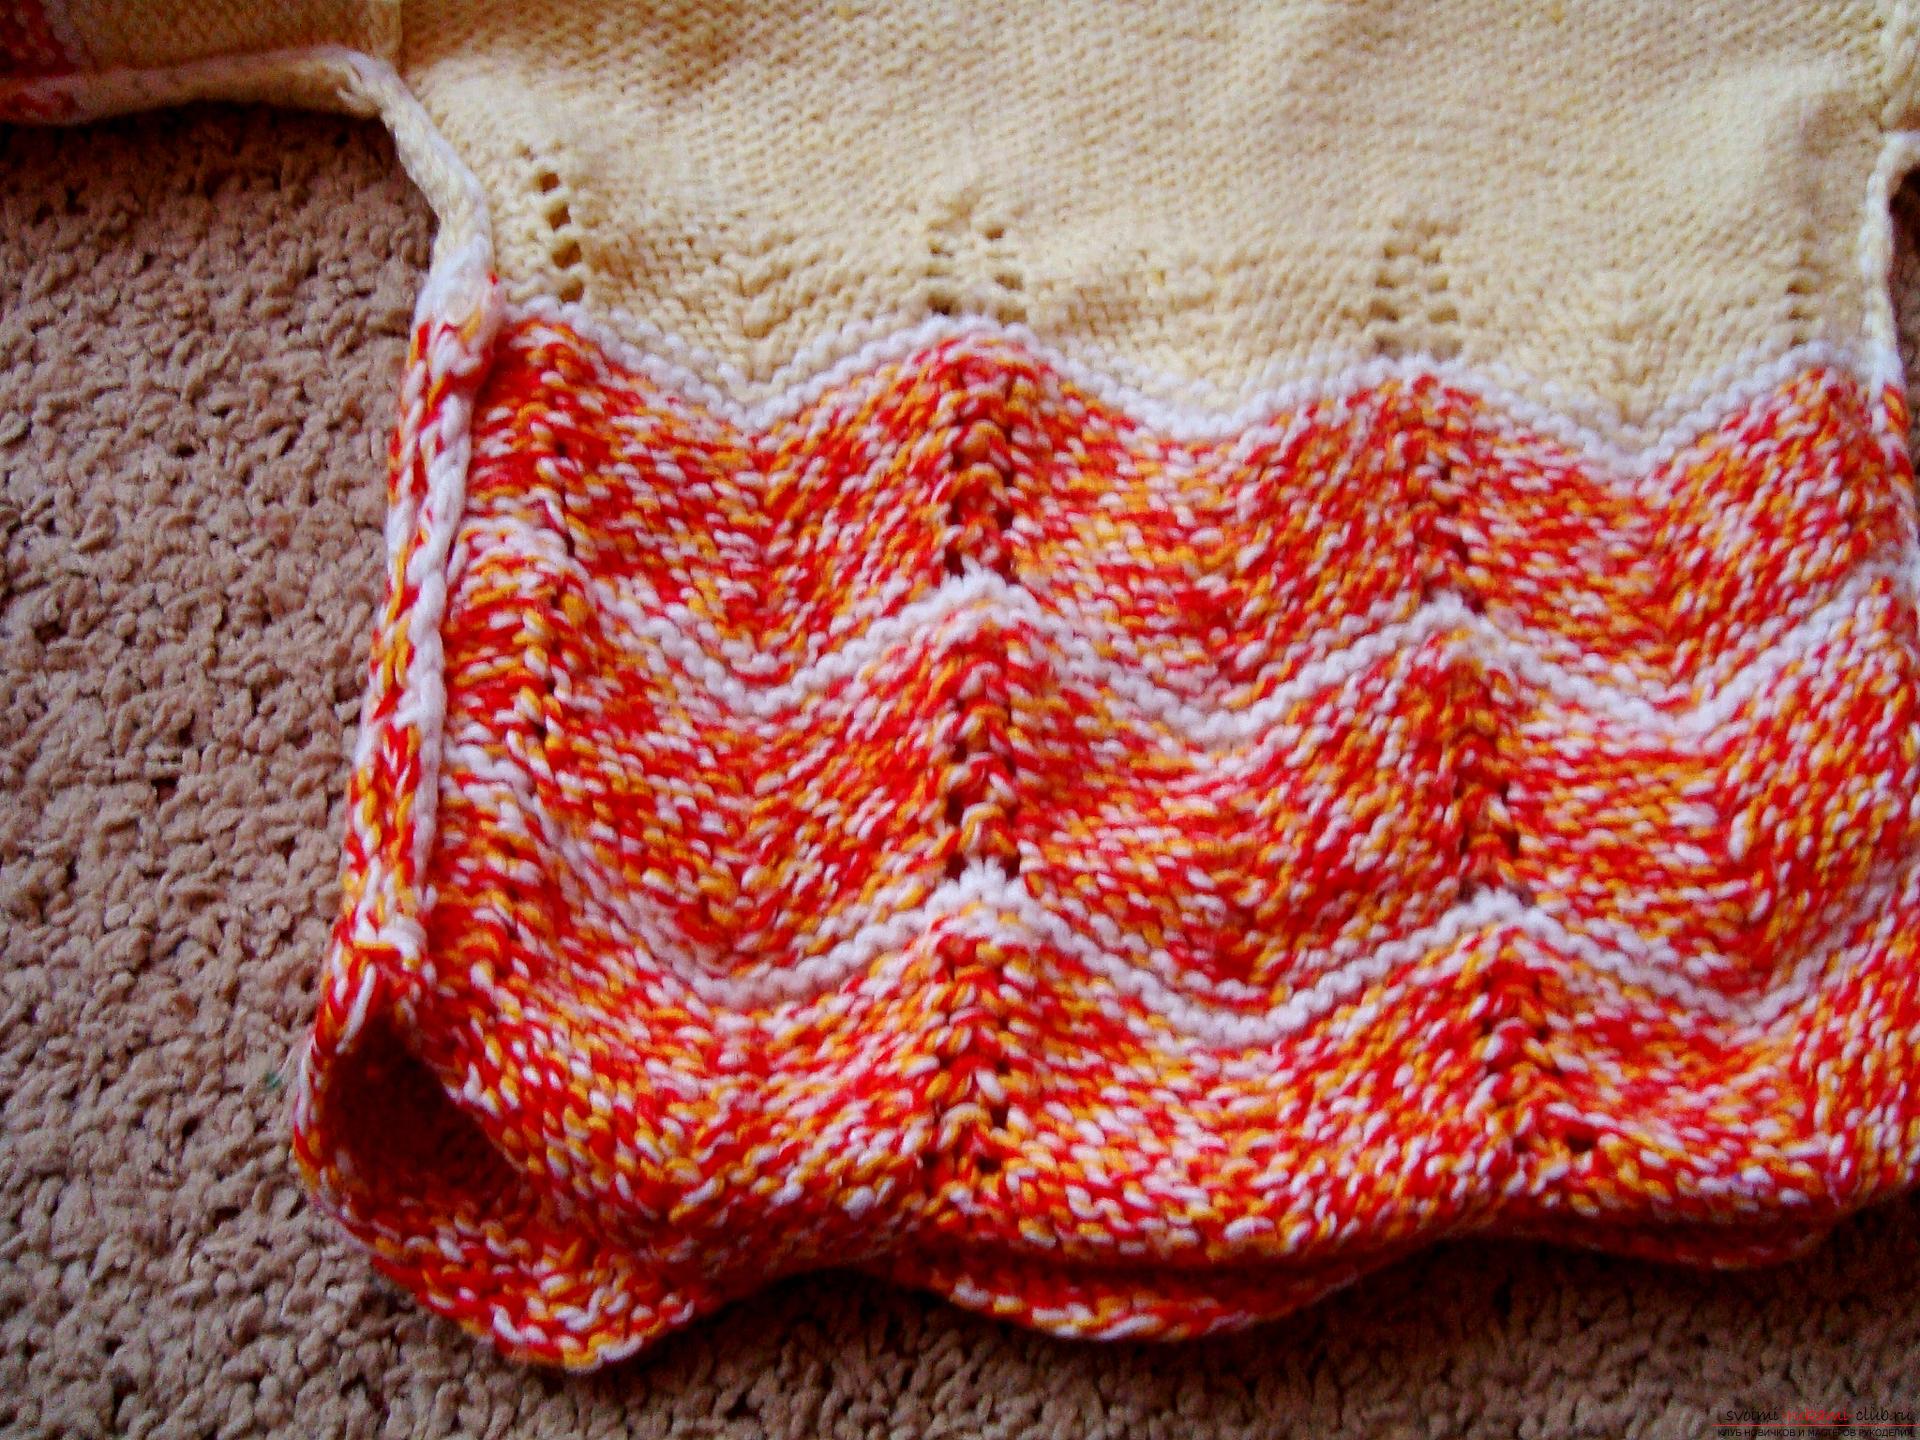 Sew the side seams so that all the moving rows coincide on the two halves of the product. At the last stage sew buttons.
 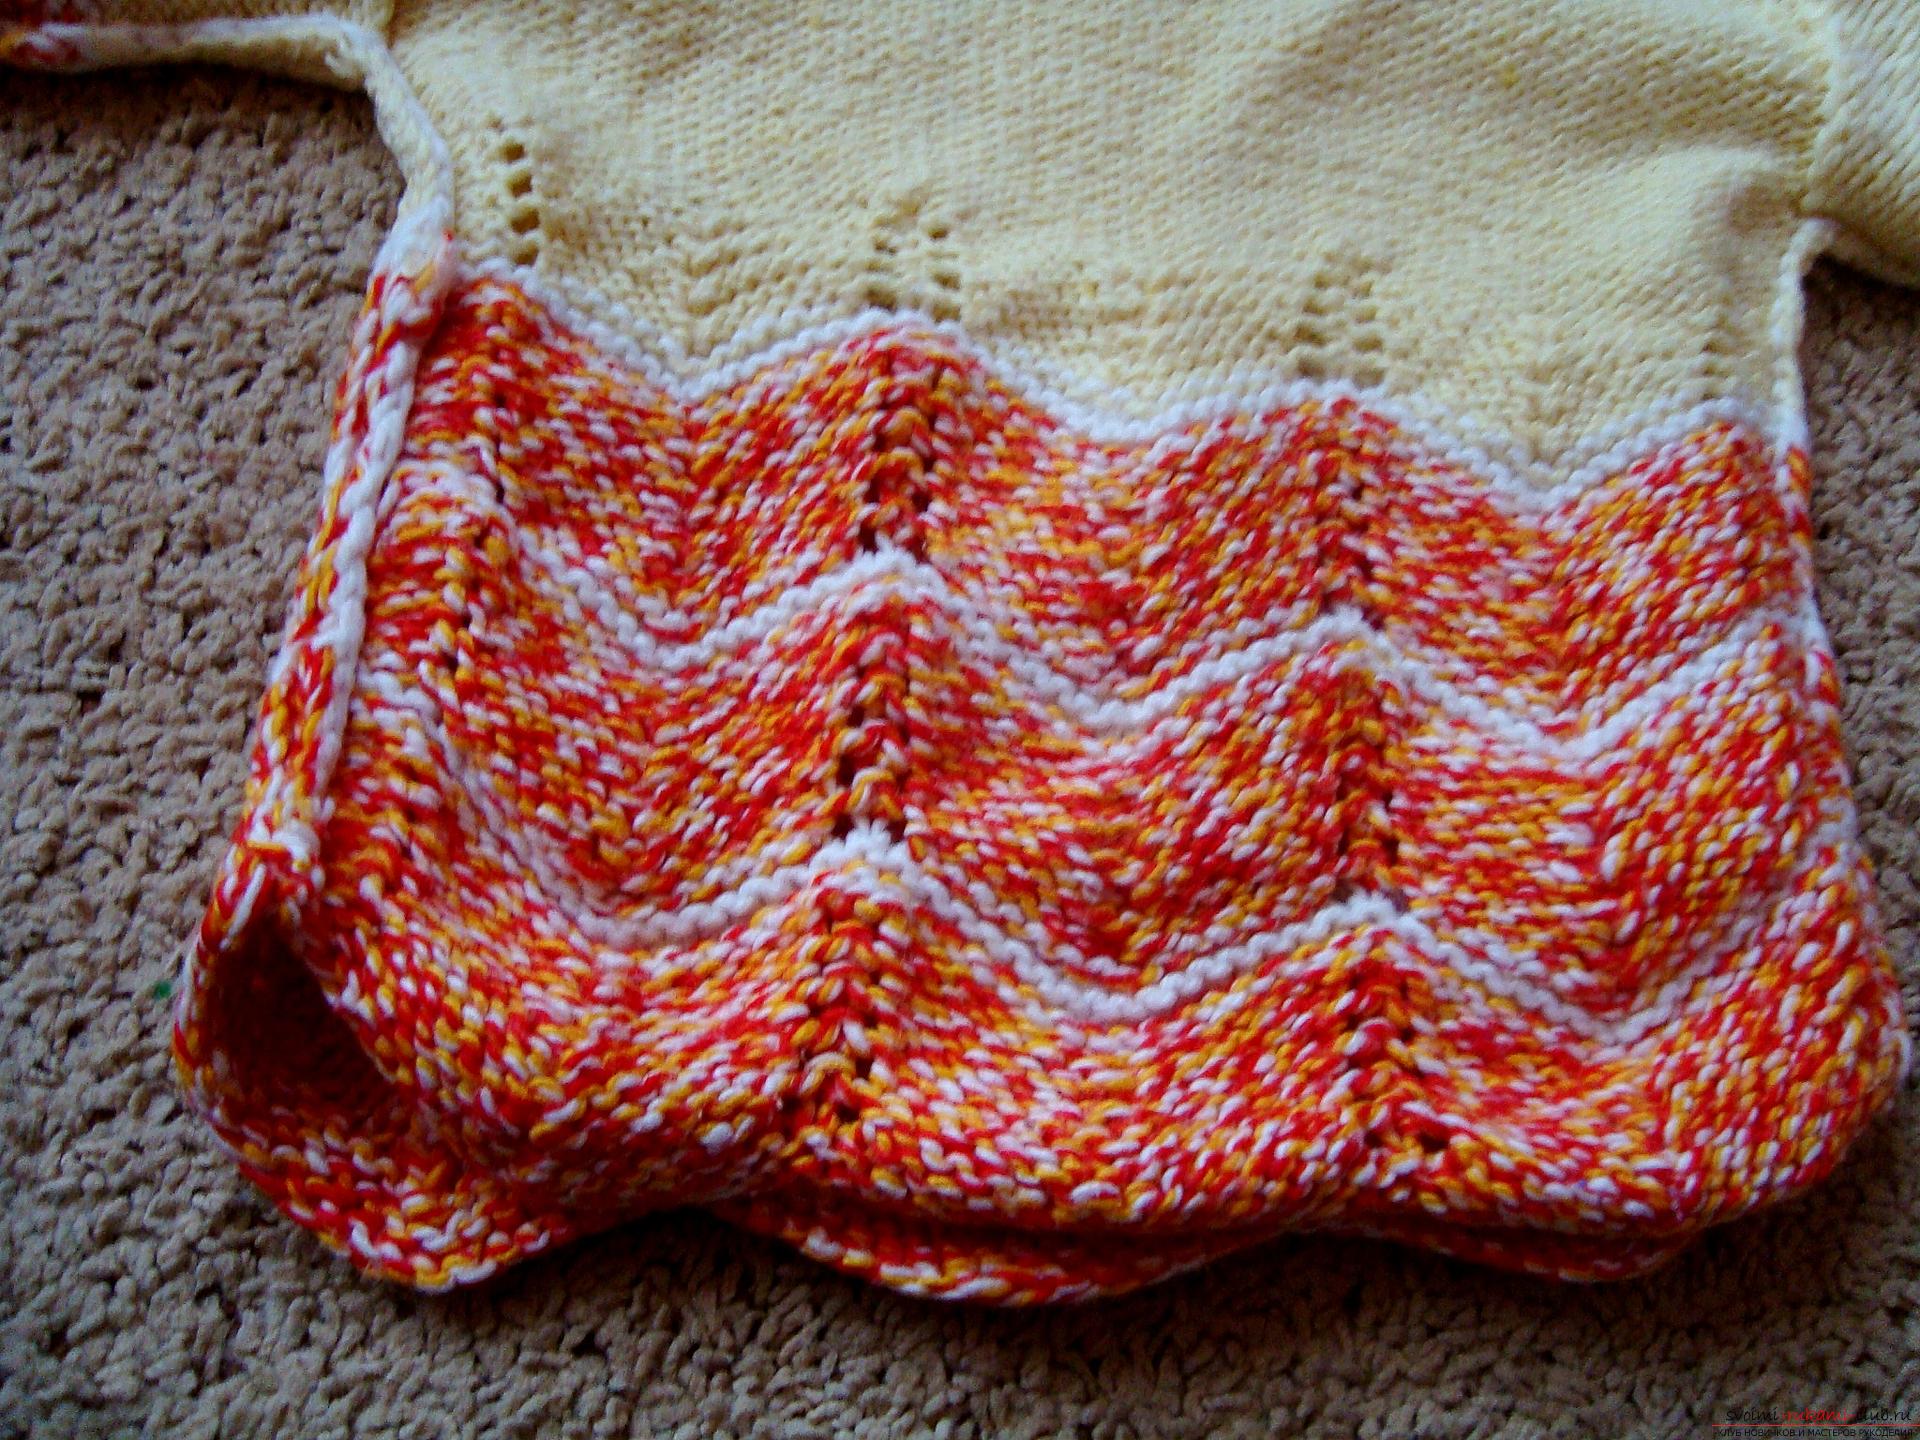 A beautiful knitted sweater for a child is ready, itsYou can wear a cool walk, like top clothes or winter podevat under the down jacket. Your child will definitely like such a colorful sweater and he will wear it with pleasure.
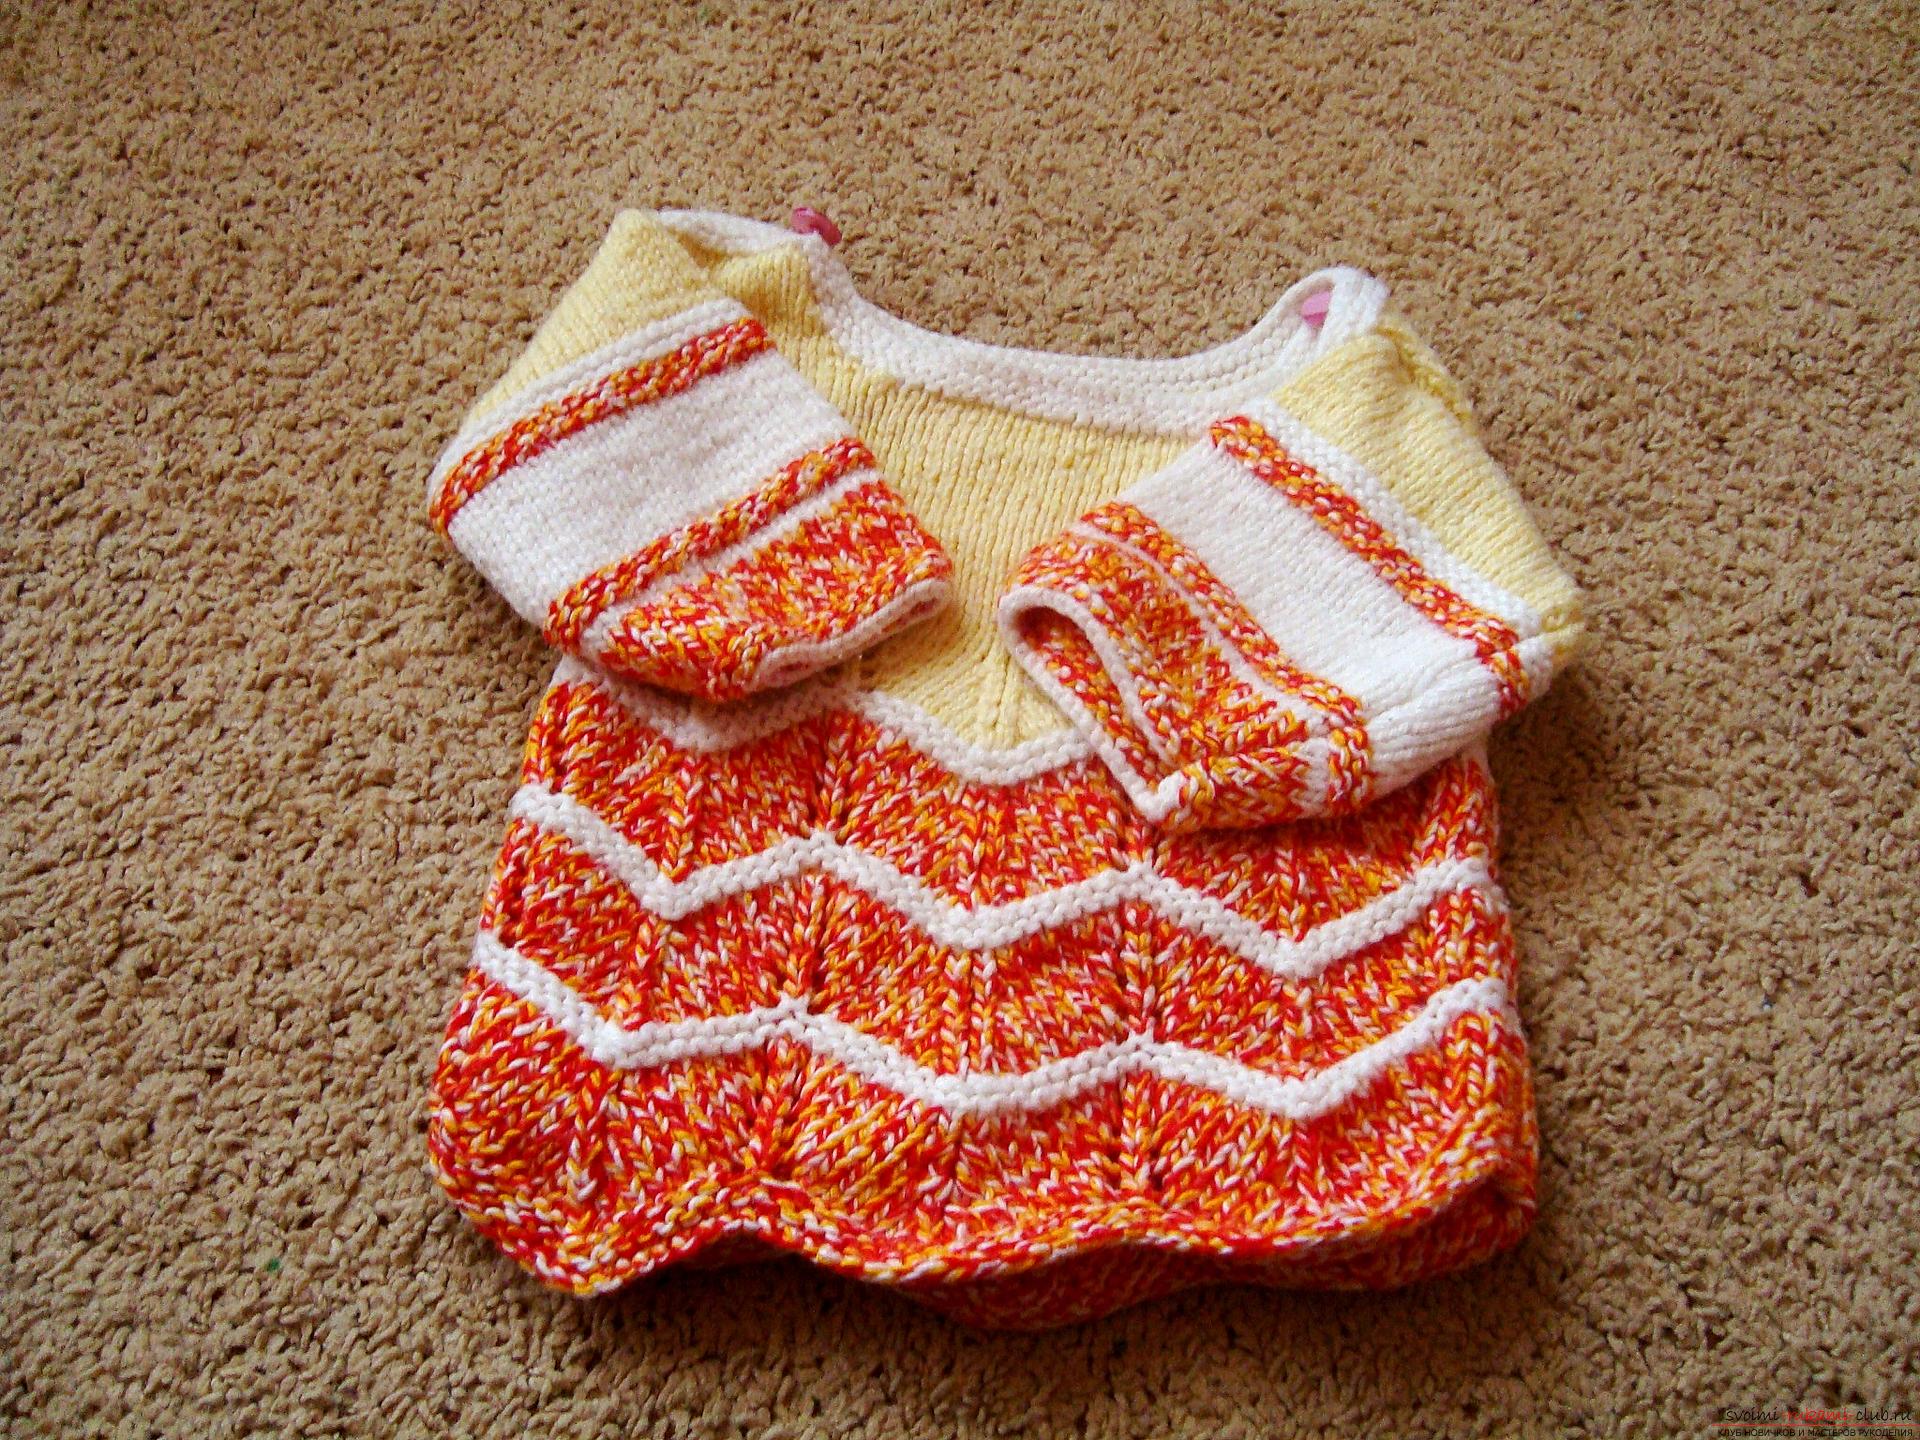
Comments
Related posts:
 Detailed instructions with photos and videos will helpcreate a beautiful hairstyle at home. Using the master class on hairstyles, you can create an amazing image for your holiday. The braid, laid in a flower, will make a hairdress on long hair of the most beautiful.
 Crochet flower crochet will help create a beautiful hair band. A detailed master-class with step-by-step photos will help you learn to knit even novice craftsmen.
 Sewing any thing you will help remove the measurements from the model for example, sewing a straight skirt
 Master class on knitting a bright jacket for beginners according to the instructions with photos and diagrams
 New Year's costume is not always convenient to buy, andTo sew a carnival costume for a boy can even a beginner skilled. A master class with photos and videos will help create a New Year's children's costume in the image of Santa Claus.