Master classes for the manufacture of beautiful crafts for the New Year 2016 with their own hands with photos and step by step instructions.
As soon as the firstsnowball, and children, in equal measure, like adults, eagerly waiting for the New Year holidays. To make the New Year 2016 go as you want, you must prepare it carefully beforehand. In addition to fancy dresses and poems for Grandfather Frost, gifts that can be created with their own hands are very useful. In this you will certainly be helped by our interesting master classes, which contain step-by-step descriptions of how to make unique and beautiful gifts with your own hands from materials nearby.  So, let's begin. Create a snow-white Christmas tree of cotton swabs. To create such an original Christmas tree, you will need: packing cotton wool; glue; cardboard paper; paint is white; a stapler; beads; strap; scissors. Description of work The first step. Preparatory work is considered the most routine. Here it is necessary to glue disks of cotton wool, which just can simulate snow-covered paws of spruce. To do this, you need to take the disk, fold it into two equal parts and fasten it with a stapler. So do with all the cotton wool. The second step. Next, we proceed to assemble the skeleton of the future spruce. At the same time, it is necessary to cut a circle of a large radius out of the cardboard (this will determine the height of our craft).
  The third step. With glue, attach a ribbon of white color to the base and finish with white paint. The fourth step. After the cone has dried, we proceed to glue the "needles" to our forest beauty. Fifth step. Thus, row after row, you should wear a Christmas tree. The sixth step. Let's go to the stage of decoration. Here we need to attach the beads, and then create the crown on the proposed scheme. Seventh step. The final stage, on which it is necessary to decorate the Christmas tree and impose a tinsel. That's all! Our forest beauty is ready. And now we will tell you how to make a Christmas tree-lamp with your own hands. Such a product will become not only a unique decoration of a festive table, but also a very original gift, as well as a beautiful craft for an exhibition at school or kindergarten.
  To create such a Christmas tree, you needstock up with such materials: a cone-like shape of dense cardboard; glue; sandpaper ("nulevka"); white paint; drill; drills; spangles; a light bulb or a small candle; scissors. Description of work 1. Using an electric drill, make holes in the cone. Having developed a fantasy, it is possible to come up with an original patterner that will be able to diversify your product. The light streaming through these slits will create a spectacular spectacle. 2. After the first stage, an uneven rough surface may still remain on the edge of the holes. To remove them, it will be enough to punch them lightly with a pencil, and then work the surface with sandpaper. 3. After the cone has been ground, you can proceed to painting it. For the paint to fall more smoothly, it is necessary to superimpose it in several layers. If you want, you can decorate the product with sequins. 4. And here it is, the most long-awaited moment: put a small candle in the middle of the cone, you can also use a small lantern and with pleasure watch the beauty created by yourself.
 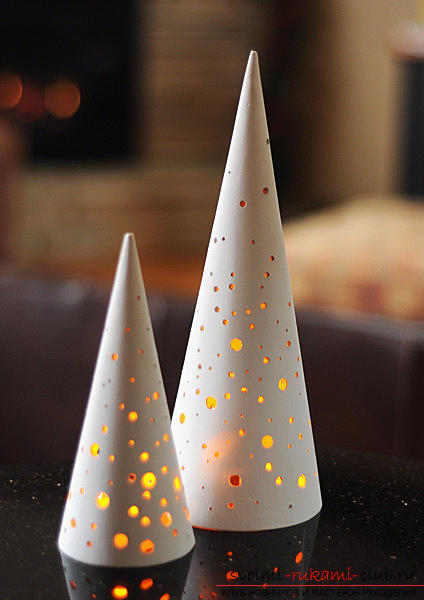 We make a beautiful toy on the forest beauty SuchA simple and interesting work can be done by everyone. She can rightly claim the title of the most original toy for the New Year tree. In addition, such an article can serve as a beautiful gift for your friends. We offer you a step-by-step description of the manufacture of such a product. To do this you will need: dense cardboard; several shades of corrugated paper; ribbon; beads and various decor elements; scissors; glue.
 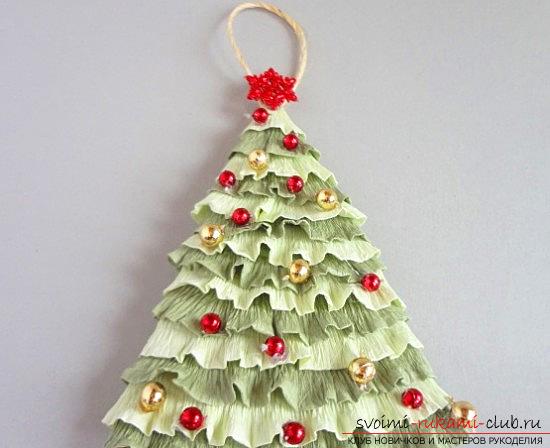 First we need to cut out with scissorsA triangle that will become the basis for your product. Corrugated paper should be cut into strips, which in width will not exceed 4 centimeters. Next, you need to add them to two equal parts and stretch them to the width in such a way as to create the ruffles. Then it is necessary to wrap the cardboard base with the cut out ribbons and attach them with glue. After these steps are completed, you need to go to decorating the toy.
 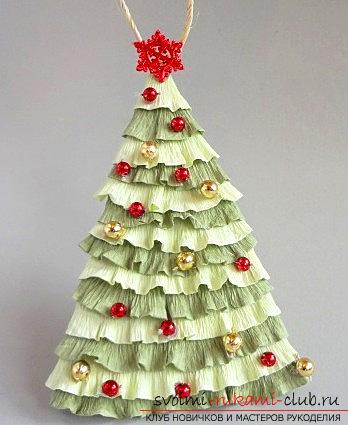 And now let's talk about how from strings you canmake a unique herringbone. If your child has asked him to help him make an interesting crafting item for the New Year in a kindergarten, then you can safely use our following recommendations. Now we will tell you how to create a non-standard decoration for the New Year's interior. In this case, you will need: tight cardboard; several shades of corrugated paper; ribbon; beads and various decor elements; scissors; glue; thread of yarn; film for packing; starch; water.
 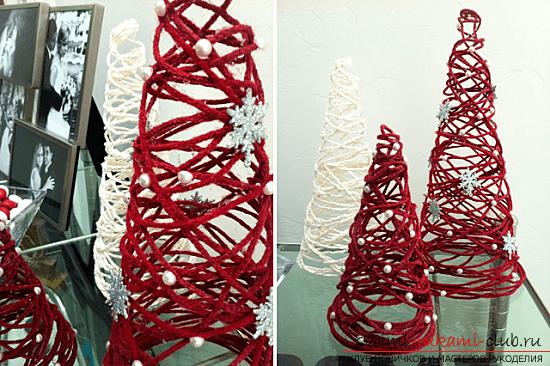 To begin with, you need to make your workplace newspapers or paper, so as not to stain the countertop. From the thick paper, we create the product of the cone shape, and then seal it. Next you need to mix the water and starch. Take a long string and dip it into the composition of the glue of your own preparation. Give her ten or fifteen minutes to soak. After that, wrap the cone with a film. And now we can thread the cone in different directions. Then let them dry out within 24 hours. The next day, you should take out the cone and decorate the craft with beads.
 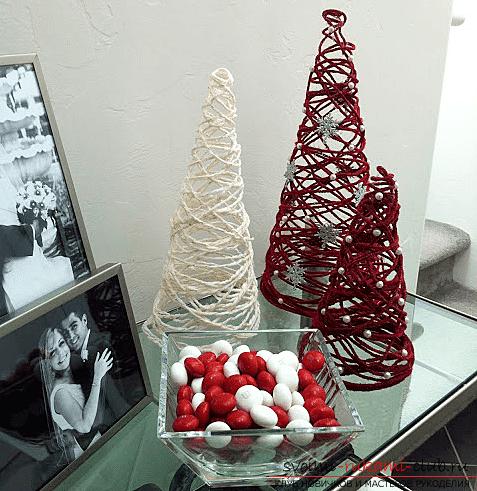 How to make a furry plasticine tree? Such a craft can make even a child. Despite all the simplicity of its implementation, it looks such an odd thing very original. In this case, you will need: green clay; balonchik paints or gouache; scissors; glue. From plasticine you need to form the basis of the future tree - its trunk. Next, it is necessary to attach seeds to it in the order of chess. When you reach the center, you should use smaller particles or simply cut them. After the crafting is completed, you can go to the coloring stage.
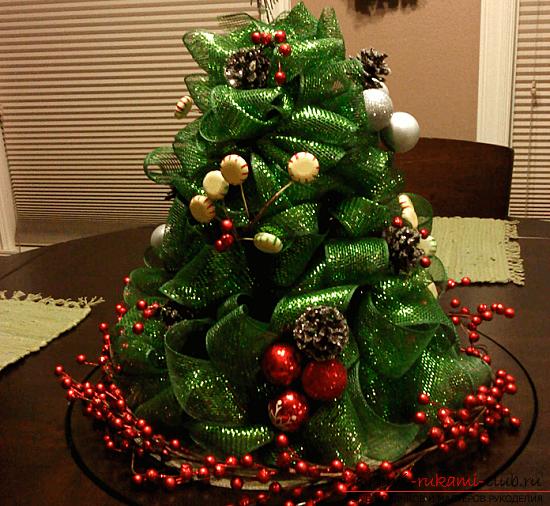
 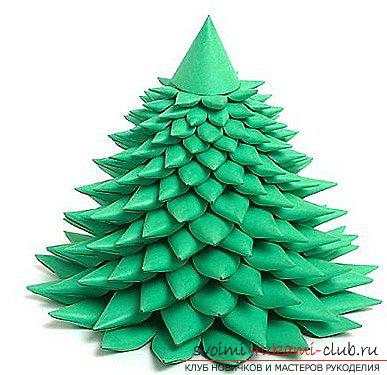 How to make a chic herringbone? You can create such a beautiful and interesting Christmas tree with your own hands. In this case, you do not need much time and effort. This craft is capable of becoming an excellent addition to any New Year's interior, bringing to it fairy-tale and magic. To do this, you will need: a mesh in the form of a tape (or a classic grid in a roll, which you will then cut); staples of a square shape (a stapler for furniture); cone made of foam plastic; beads and various decor elements; scissors; glue. First we need to untwist the ribbon and slightly curl it. Carefully fix the edge of the mesh, and then go to create a Christmas tree from the shuttlecock. Approaching the very top, it will be necessary to attach the tape more carefully. After completing this stage, you can go to decorating your crafts. That's all for today, that we wanted to tell you about New Year's hand-made articles for 2016!
Comments
Related posts:
 Master classes for the manufacture of beautiful handicrafts from shishechek with their own hands with descriptions and photos.
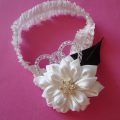 Master class on making a garter for the bride with their own hands with step-by-step instructions and photo
 The master class will tell you how to make an interesting craft for the New Year 2016 with your own hands - a melange crochet
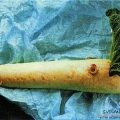 Master classes for making children's crafts from vegetables and fruits with their own hands.
 Pastry biscuits of monkeys for the new year - a master class in 2016 with their own hands