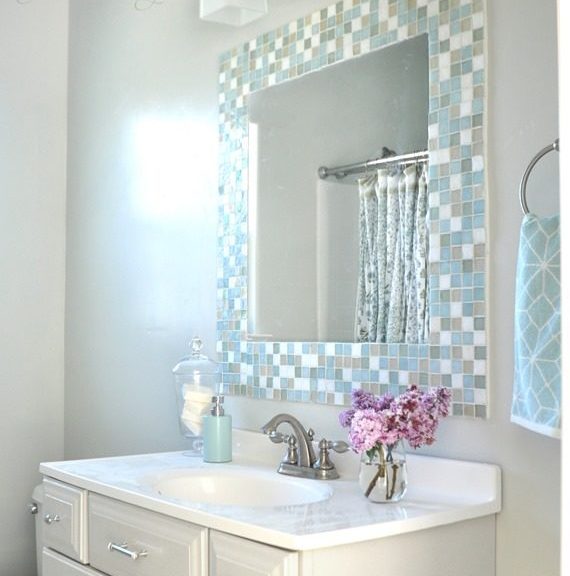
Mirror mosaic decor: a step-by-step master class with photos
Bathroom mosaic mirror framethe best solution, firstly, it is very practical and problem-free in the care, and secondly, the mosaic is an eternal classic, even in it is used and often used. In this article, we give a step-by-step and detailed master class on how to make a frame for a mosaic mirror in the bathroom with your own hands. Even more ideas on mirrors in articles:
- and step by step master classes
- - article.
 Mirror in a frame of mosaic Contents of the article:
Instruments:
- Mosaic ready on the tape, it is sold in any hardware store.
- Alcohol
- Construction adhesive
- Screwdriver
- 3 wooden strips for installation
- Grout for tile or plaster
- Silicone sealant
Manufacturing technology
In this master class, the installation of the mirror takes placeright on the painted wall. But, if you have a tile or other coating, or you are afraid to spoil the wall, then it is better to do everything on a sheet of plywood, and then fix it on the wall. TIP: before embarking on a large-sized mirror, try on a small mirror on a sheet of plywood. First step: laying tiles
 Sticking a mirror to the surface
 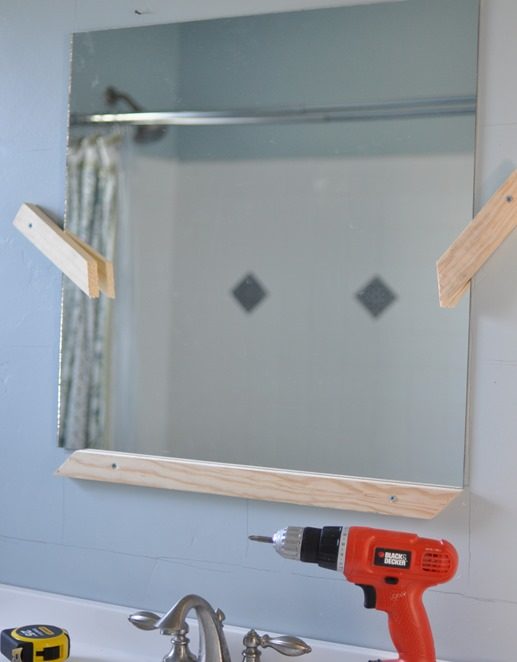 If you fix the mirror directly to the wall - then you need to fix it with bars and a screwdriver for 12 hours, until it is completely dry.
 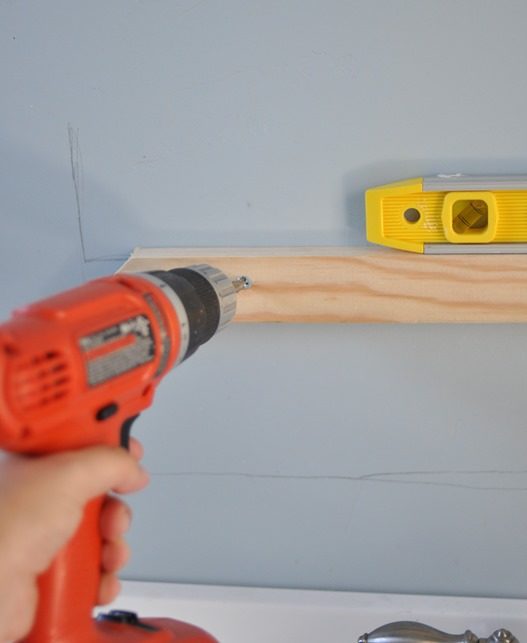 With vertical installation of the mosaic, it is also necessary to fix the lower bar so that the tile does not "float"
- Then, on top of the tape, place the pieces of the future mosaic in such a way that the rough side is on top.
- You need to make 4 strips and cut them in half lengthwise. Each mosaic is smeared with glue, then the strip is turned over and glued to the base.
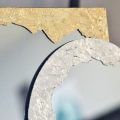
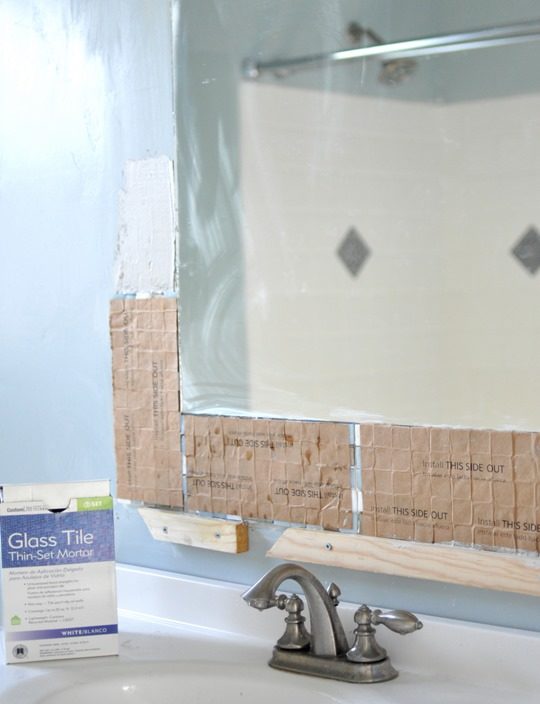 We put the mosaic around the mirror
  Remove the protective paper from the tile. Then the details.pressed and left for 24 hours. The second stage: “Grouting the seams” After a day has passed, you can begin the last stage of the mirror decoration, which is called mashing with a special mixture or plaster.
IDEA: you can buy any color grout not only white, but gray, blue, today the choice is great.  We rub the seams on the tile
  Remove residue with a damp sponge
- Then the product is left again for 24 hours. After the second day, it is necessary to clean the surface again from rubbing residue using a dry cloth.
- Two side ends on the tile outside and inside must be treated with silicone sealant. It is usually sold in pistols.
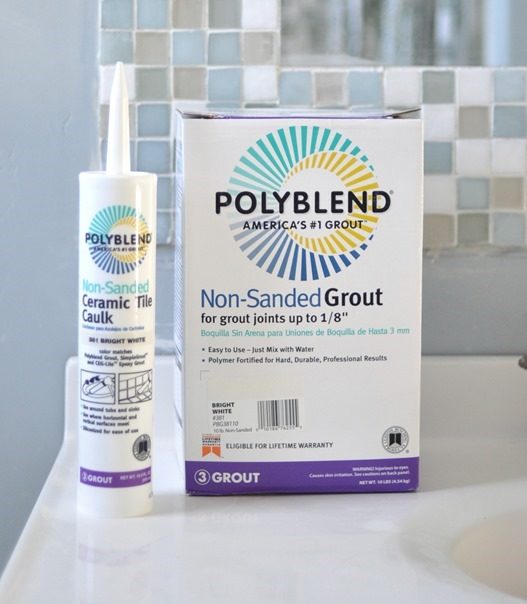 Silicone sealant
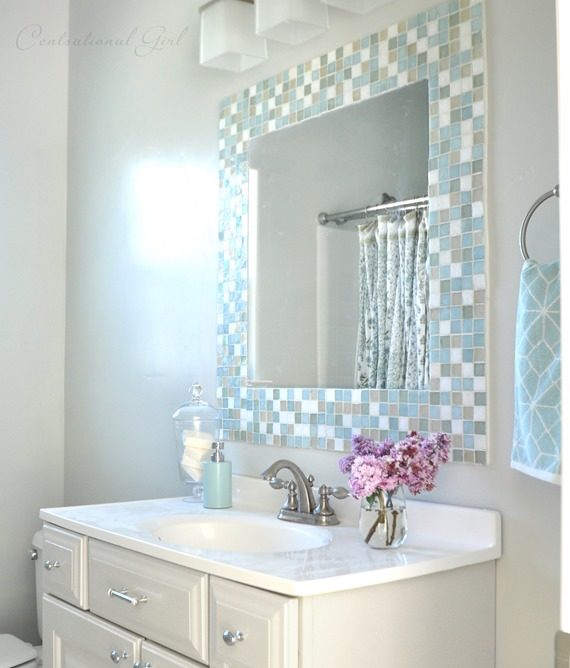
 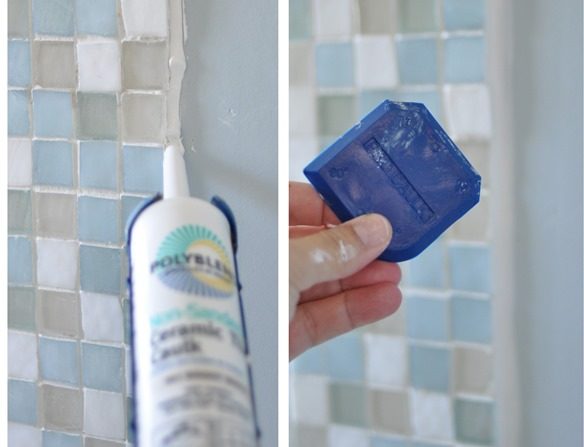 Mirrors in the bathroom will look just as attractive if they are selected in different shapes. You can also - here is a master class!
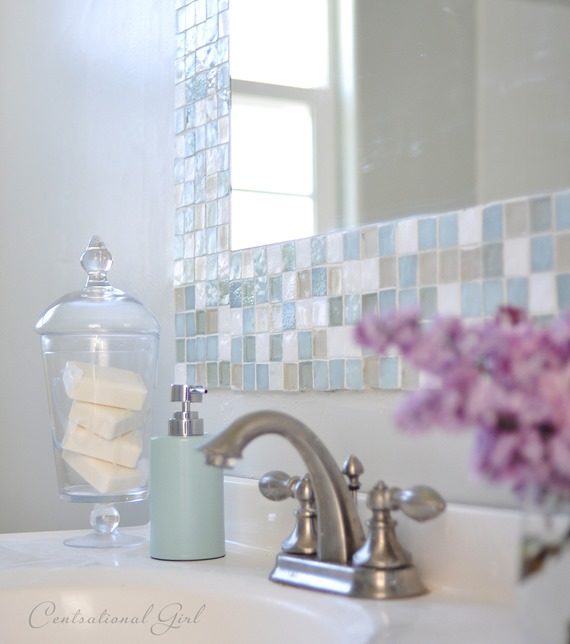
Comments
Related posts:
 DIY mirror decor: 10 master classes and 50 photos
 Learn to create embroidery with a diamond mosaic with your own hands, master classes for embroidery with diamond mosaic with photo and description.
 Master class crafts from handmade materials - the decor of the buttons for the photo frame with your own hands.
 Master class: Easter egg with mosaic
 Decorating Christmas balls with mosaic made of CDs