Mitenki knitting needles on the basis of the master class (photo and diagram)
Content
Strangely enough, but the mittens regain theirPopularity among fashionistas and admirers of knitting needles. Mitten with knitting needles can be combined with various clothes. They will give your image of refinement and originality. Such an accessory is not only a fashionable ladies' toilet, but also perfectly warms the handles in cold weather. Let's consider how to tie knitting needles or gloves without fingers for beginners on the basis of a photo of the master class and the scheme.


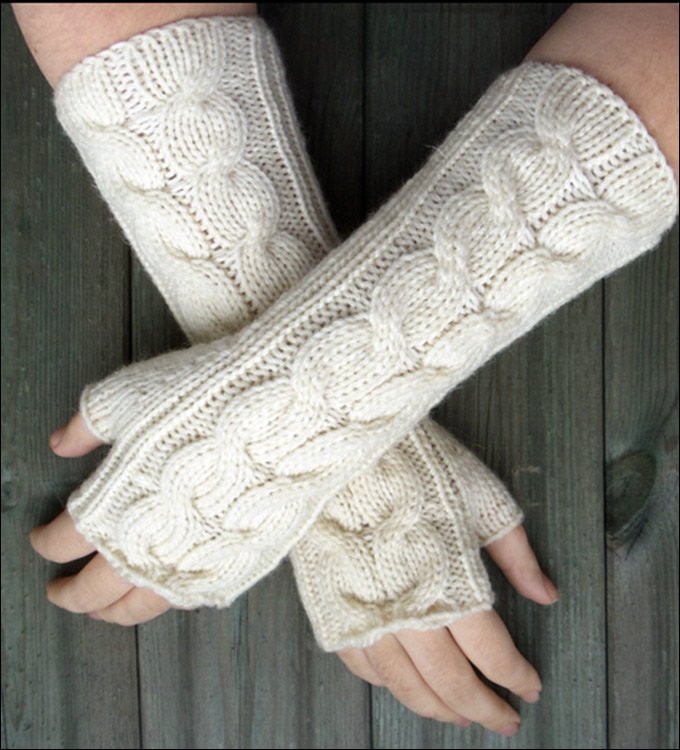

Knitting Mittens for Beginners
For work you will need a small listMaterials, which consists of stocking spokes in the number of five pieces and yarn, consisting of wool and acrylic. But do not immediately start to work. First of all, you need to determine the knitted density of the product and calculate the number of buttonholes that are needed. And after that, start knitting.
In this example, forty-eightLoops, which should be divided into four spokes. Now start to perform your own hands cuffs mitts patterned gum two by two, with the alternation of two facial and two purl links. Convert fifteen rows and go to the face, distributing all the buttonholes equally to the faces. And the reverse side.
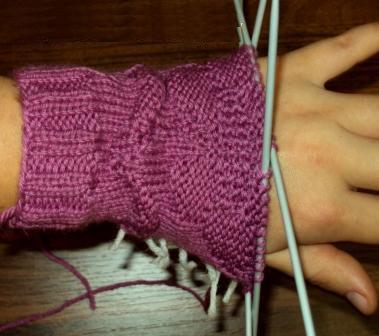
As you begin to approachWrist, begin to make reductions, so that the mittens are more clinging arms. In the third and fourth spokes, two joint facial loops from the opposite side. Thus, there will be a decrease.

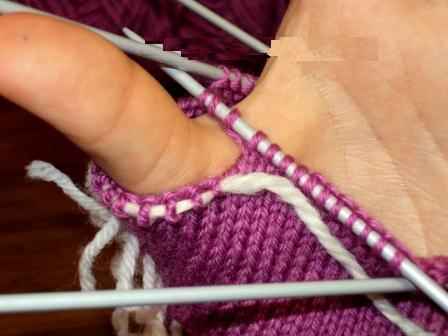
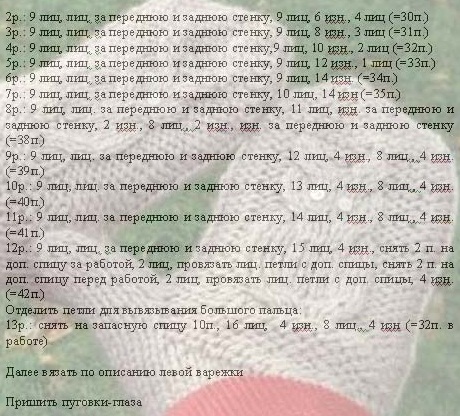
When you get to the place where thePalm, start forming the wedge of the thumb, as shown in the photo. Remember that on the first and second spokes knit the front side, then for the finger make an addition from the first instrument to the third. Doing stretching, broach the persons. Way, then the center loop is also performed by the face. Follow the addition for the thumb in three rows. As a result, you have to make only seven additions, increasing the number by 14 pieces. You can increase the links until you reach the bottom of this finger.
After that you need to remove the added buttonholesOn the pin, namely 14 pieces from the third spoke. Now, type three air loops and continue to perform this master class, tying the strips in a circle.
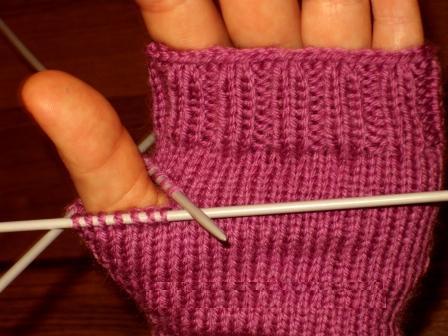
After tying up to the middle of the palm, go to the rubber band2 to 2. Tie ten or eleven strips, then close the remaining loops with a hook. We return to the big finger. Transfer the eyelets from the pin to the spoke and take six more links. Do knitting of a circular rubber band 2 by 2 in the amount of 10 p. At the very end, close the links.
Having finished knitting mittens, do the secondthe same way. Strike off excess yarn, and steal the product and dry it. After completing knitting these two accessories for beginners, you will not be able to stop. You will want to constantly experiment with patterns and colors of yarn to give mittens to your family and friends.
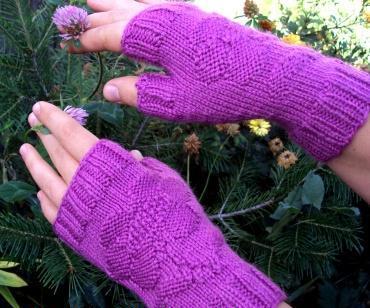
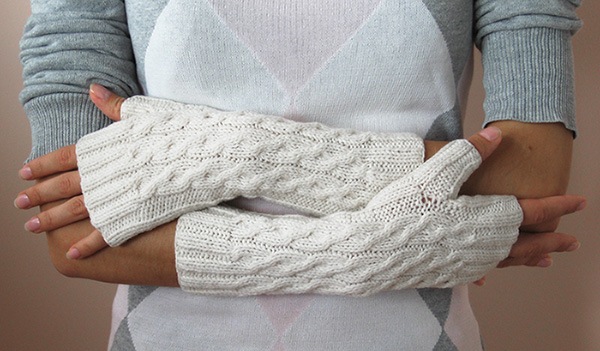
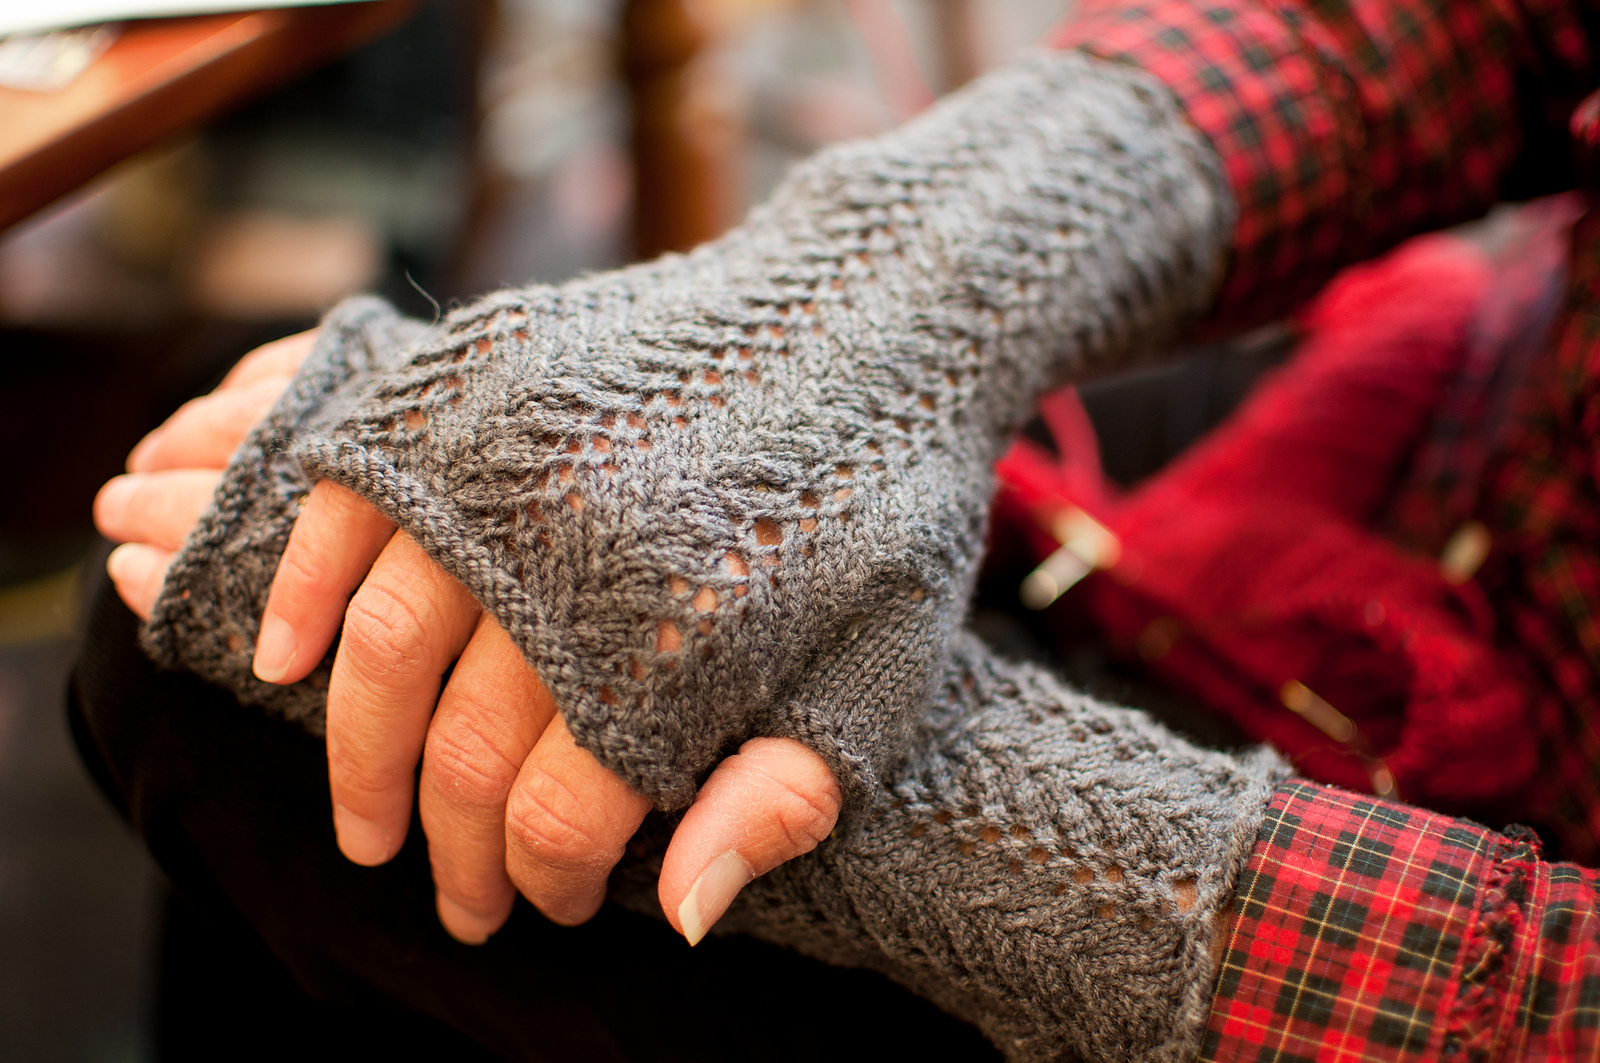
Mitinki with a leaf pattern
To repeat this master class, also prepare the necessary materials:
- Yarn of merino wool;
- Stocking knitting needles No. 3 and hook under the same number;
- Pin.
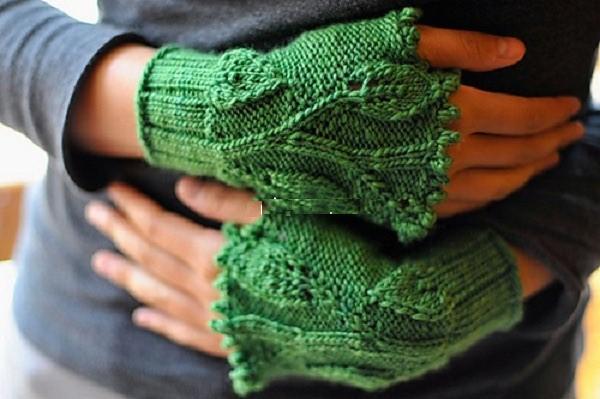
The knitted density of the product is 22 p. On 30 r. = 10 by 10 cm. Knit mitts with knitting needles better start with the right. Type 50 p. On spokes and tie 1 p. Facial loops. Then continue to knit the product with two faces. Etc. and two of them. Links, about five centimeters.
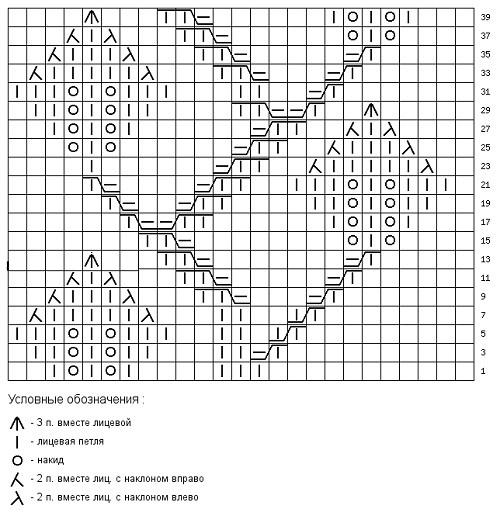
When the required height is reached,Continue the work according to this scheme: connect the first seven links with the reverse side, putting a mark at the beginning and at the end. The rest of the buttonholes also perform. Smoothly, evenly reducing them to 8 points. That is, 42 knots should remain on the spokes.
Pattern "leaves" knit according to the presented scheme, which will be in the article. And this means that you need to tie a knot. Smooth the first seven loops, and then execute the pattern of "leaves."
Having reached the height of the product in eight centimeters,Begin for the thumb to add on each side from the third and fourth first seven rel. Links, new buttonholes of capes. In the new strip, these outfits are performed with crossed buttonholes to avoid the appearance of holes. Also, you need to include these new buttonholes in the new. Smooth, when wake a thumb. It is necessary to repeat the addition in every second circular p.
Having reached the height of thirteen centimeters, you needRemove fourteen p. For a finger on the auxiliary pin, and in the new circular strip, dial two more buttonholes. Continue to knit the main links of the main pattern.
When the height of the mitten is already seventeen centimeters, tie one strip of faces. Smooth and close the mitten.
The master class and description come to an end,It remains only to finish work on the thumb. Return the loops from the pin to the knitting needles. Get four more things, and you will get only 18 points. Wrap in a circle, about two centimeters and close all the n. Hook all the edges of the mitt. The left mitten is done in exactly the same way, only in a mirror manner. At this master class and its description is over, we suggest that you look at an interesting video of knitting yourself with mitts in another way.
Video: Lesson knitting lessons
Comments
Related posts:
 Mittens needles: knitting on the basis of the master-class (photo)
 Knitting spokes hats with earflaps photo and video master class
 English gum with knitting needles photo and crochet pattern with description
 Cap knitting pattern with knitting needles on photo with description