Mosaic weaving beads on schemes (video)
Content
- Master class weave mosaics
- Video: Foundations of mosaic beading
- Master-class addition and subtraction beads
- Master class increase and decrease beads
- Mosaic weaving in a circle
- Video: Scourge leaves beaded mosaic
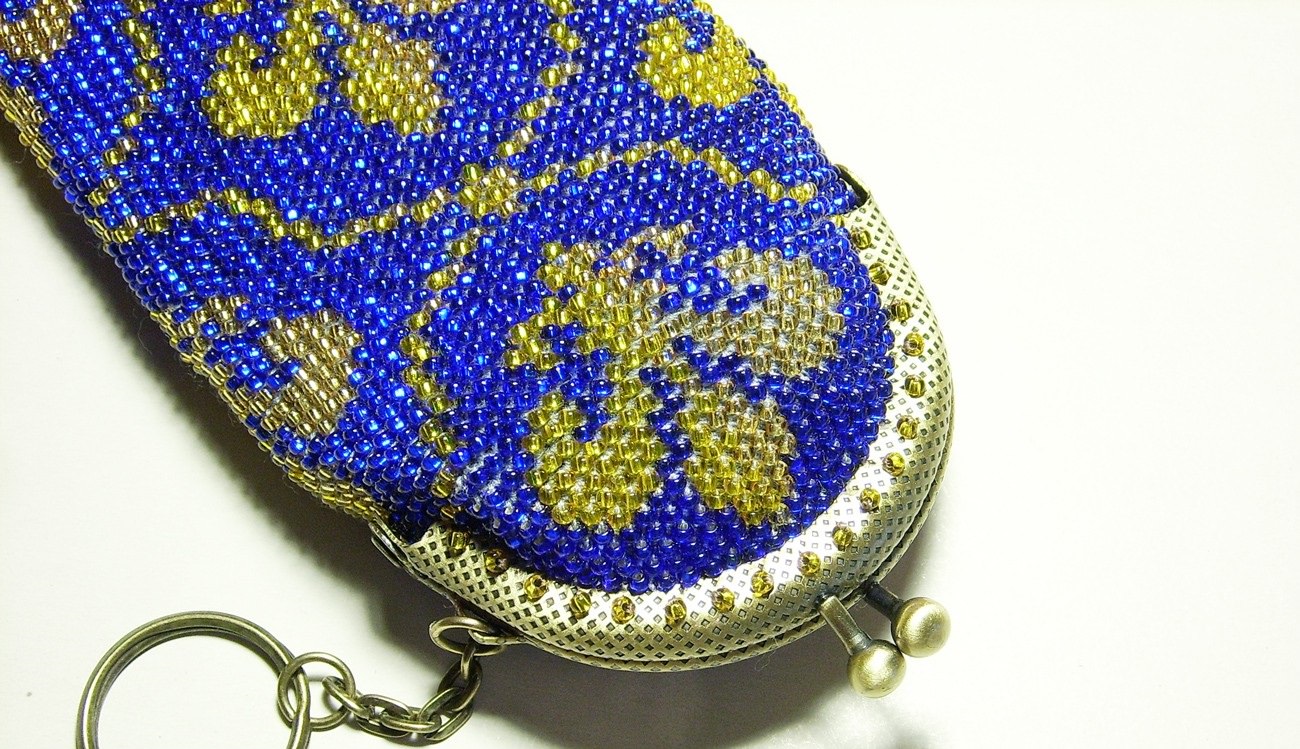
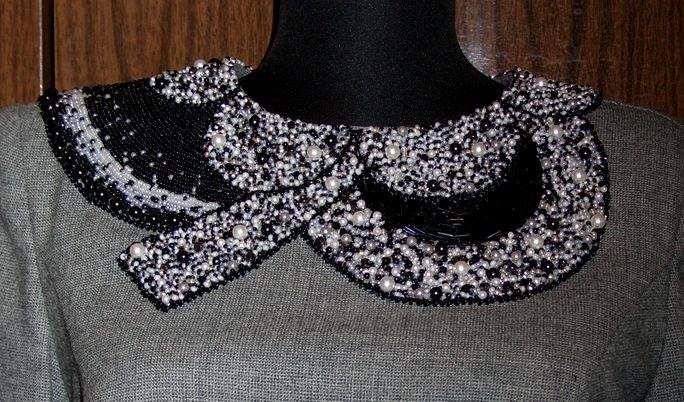
Technique of weaving a mosaic of beads isalmost the most interesting kind of bead works. The name of this type of weaving was for the fact that the canvas at the end of the work looks like a mosaic of beads. Item or fabric made using this technique will have a high density. And if you use several types of tile weaving in one work, every detail of it will be as close as possible to the original. To develop this technique is very beautiful and interesting circuit. Of course, the work is quite tedious and perhaps difficult for beginners, but it's even more interesting. Used for training, our master class and having comprehended all the details of this work, you will be able to weave their own hands, not only small beaded masterpieces, but the whole picture.
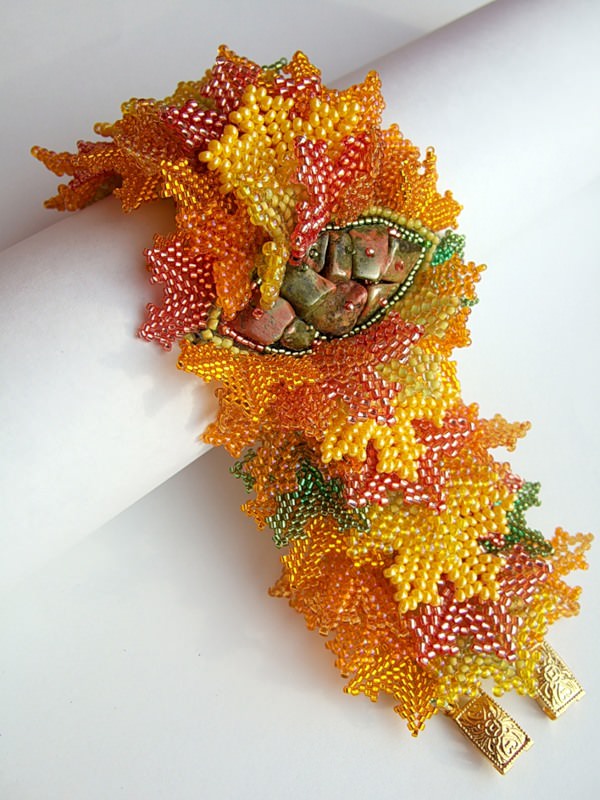
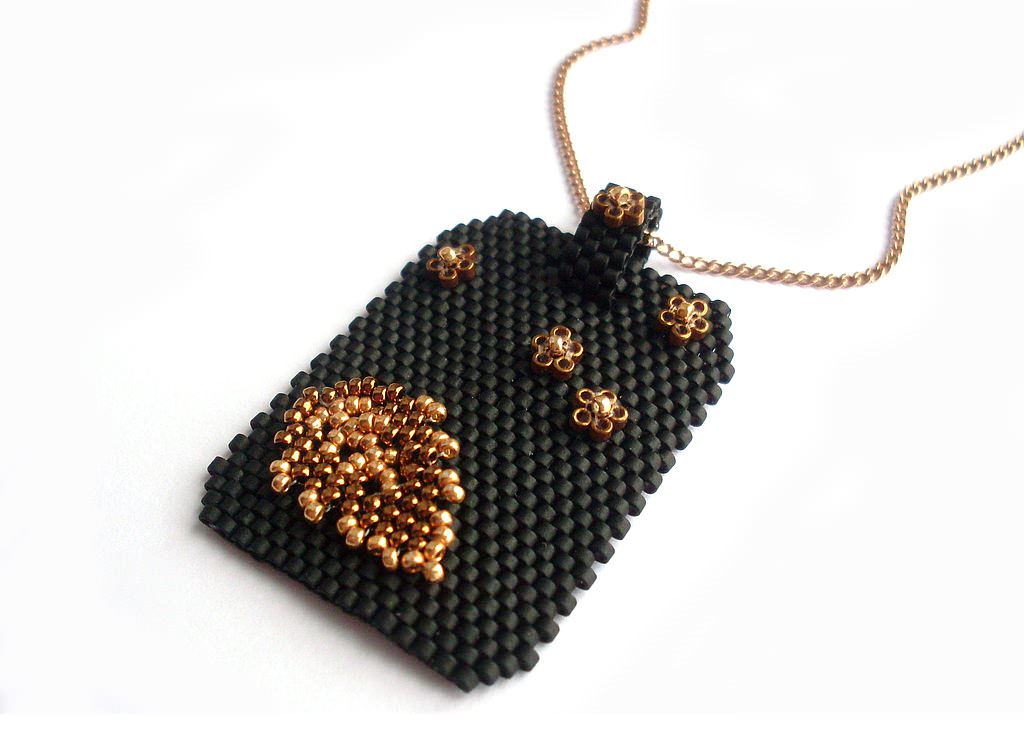
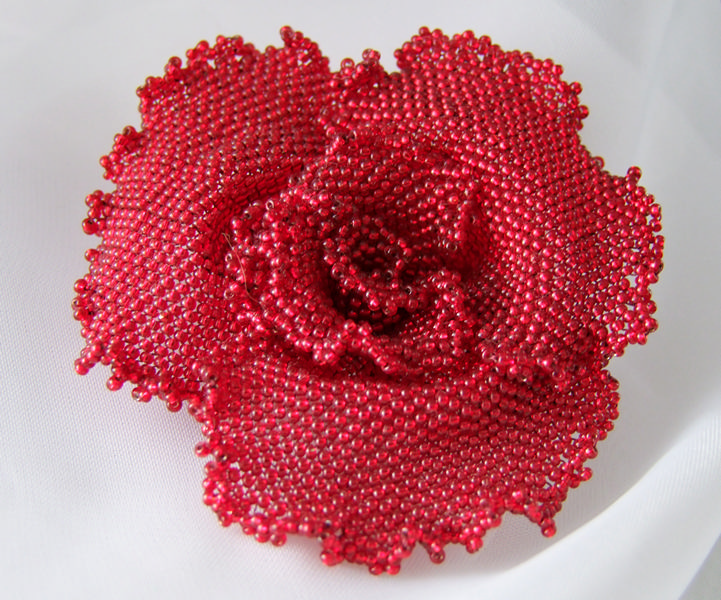
Most often, this technique of beadingIt is used to create decorations with your hands, but you can use it to weave as toys or animals and even pictures and three-dimensional flowers, which in this case are as lively.


Master class weave mosaics
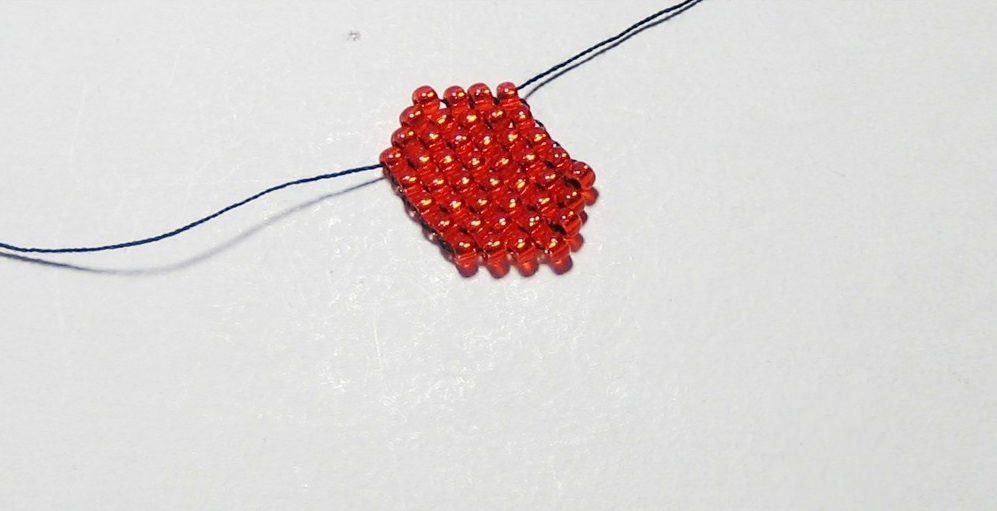
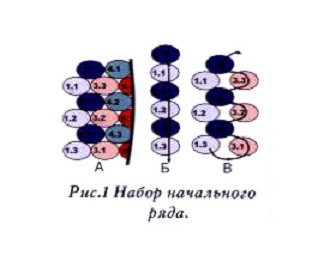
The highlight of this technique is considered to be beadingthat the elements of adjacent rows are not closely adjacent one to one, and the like are at a distance. Each of them is located in the gap, which is formed by several beaded woven previously. Therefore, to start to spin, you must first dial the needle once the two levels beads. For example in Figure 1a, it is necessary to string beads 6 - 3 for the first row and 3 second. The elements required to follow the line (1b). Now, we start to spin the third row (1c), wherein the beads are directly over those in the first and second beads are connected to. All of reaching next level of your mosaic products are weaved based on the same scheme as long as you reach the desired picture. If netting principle is not sufficiently clear, use a master class in video format.
To have a mosaic pattern of beads turnedsmooth edge, the beads must line up in a straight line (Figure 2). Here, straight edge started to be created during the formation of the third layer (2a) at the very moment when the first bead was the third of the last first. On one side smooth edge pattern formed elements of even rows, and on the other side - with the help of the odd. To get a web Scoring first number of beads bound to be even.
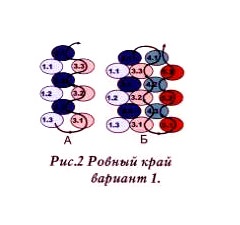
If the edge of the circuit is formed exclusively evenor only the odd bead line, the straight edge should weave in the second embodiment. In this case the initial number of elements are always odd. One edge should weave using the circuit in Figure 2, but the formation of another alternate stages. When attaching a third beads on the third level of the needle holding the first bead of the first level, as a necessary element to fix the third is simply not for nothing. To us now begin to weave a fourth level, the thread you want to display in the direction of its creation. Use the circuit shown in Figure 3.

Video: Foundations of mosaic beading
Master-class addition and subtraction beads
When creating bead work with his hands often becomes necessary to add or subtract the contrary beads during weaving at the end or beginning of the row.
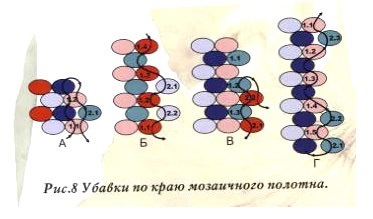
The addition of one element in a series beginningproduce smooth on the edge, created for option number two. It is important that the needle with the thread coming out of the last element in the direction of the article edge. To start fasten the last bead to the level prior to the addition of the needle and the output back to the same last bead. Use the circuit shown in Figure 5. Now put on the bead of the next row and then enter the needle on the last bead of the previous. That fulfilled the increase. Now just continue to weave, using the previous master class. If the gain in your painting scheme provides smooth edge, it will always be made by the first method.

If your cloth is made smooth edge firstway, you can increase the beads at the end (Figure 6). To complete the last fastening that goes beyond the number of beads, it is necessary to put it on the thread and pull the needle back into the first bead of the preceding series. You have completed an increase. In this case, even after the gain region will be created exclusively for option number two.

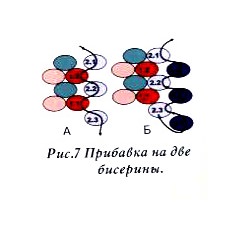
The increase in the two beads is only usedwhen it is necessary to perform immediately increase the number of beads at the end and the beginning of another level. In this case, strung on the thread of a single bead for current and one for the next level and introduce the needle into the one that was first recruited (Figure 7).
By creating a web of beads with your hands, you can easily get to a place where you will reduce the number of beads.
All ubavki conducted the same in all casesmethod. Just do not dopletaem or miss so many beads, which we need. If you remove an element at the end of the series, then spend the last strand bead prior and already from it continue to spin on. If you need to remove a certain number of elements, the needle is displayed in the bead of the previous row, from which will subsequently be made beading, using the above-described master class. And if you are inside the Bates number, then you spend your thread on the already finished fabric.
Master class increase and decrease beads
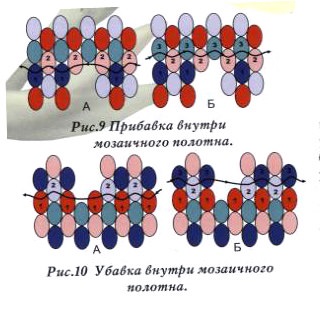
To help us increase the number of beads inspecific location within the web, you need to spin at this point not one but two beads. And in the next row between them will be added one more. With this method the number of beads in this row, we can increase by one.
Reduce the amount of it can be donesteps in reverse order. That is, at the point where instead of one captured just two beads, and subsequently a number of them need to spin only one bead. Additions, as well as decrease, you can produce several in the same row.
Mosaic weaving in a circle
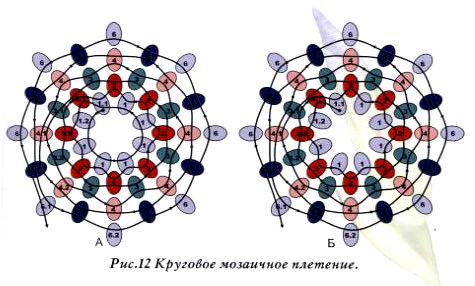
Such a method of weaving a mosaic as a circular,is used when you need to very carefully observe the symmetry of the pattern or scheme. Beaded distinct elements stacked in rows directed in the vertical direction and does not move relative to the sides. This effect is achieved through a series of circuits in a circle. If you will weave from a certain point, which is the beginning of the work, the first need to dial only the first row of beads and close it in a circle. And only then weave beaded between elements of the second round. You can start, and since in the flat embodiment, but only when your work starts from the middle of the product. The number of beads should always be clear. Starting twining volumetric figure recommended either the narrowest or widest part a.
Video: Scourge leaves beaded mosaic