New Year's wooden candlestick with your own hands
 Christmas candlestick do it yourself FlickerCandles that shine with real fire will create a cozy and romantic atmosphere in your home, especially for the New Year holidays. With the help of this master class and photos you can make excellent candlesticks with your own hands from a simple, affordable and natural material - wooden saw cuts or twigs. Such candlesticks are suitable for any room in your house or can be a great gift to your friends and relatives. How to do it?
Materials
In order to make a New Year's wooden candlestick, we need:
- Beautiful branches (wooden saws).
- Drill with a nozzle for cutting circles (the diameter of the nozzle should correspond to the diameter of the candle).
- Paint (preferably acrylic).
- Brush with a sponge.
- Ruler and pencil.
- Sandpaper (or hard washcloth).
- Candles (preferably tea in metal sleeves).
Manufacturing process
Step 1: Collect a small number of twigs or wooden cuts (it is important that they are of a stable form, so that at the most inopportune moment this building together with burning candles does not turn over!)  We collect branches of a steady form that well laid on a surface
  Be sure to dry them for 2-3 hours in the oven, or indry indoors 1-2 weeks Step 2: in order for the candlestick to be smooth and even, take the sandpaper (or hard washcloth) and rub it over the surface, aligning it.
  Remove the bark with sandpaper or metal wool
 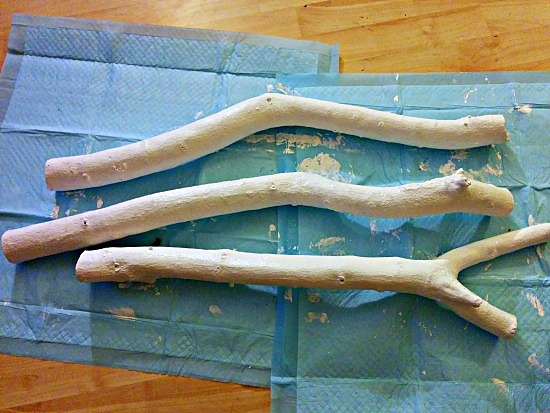 Branches ready for painting Step 3: You can choose the color of the future New Year's wooden candlestick yourself to your own taste. To do this, take your favorite paint and brush with a sponge and apply it over the entire smooth surface evenly.
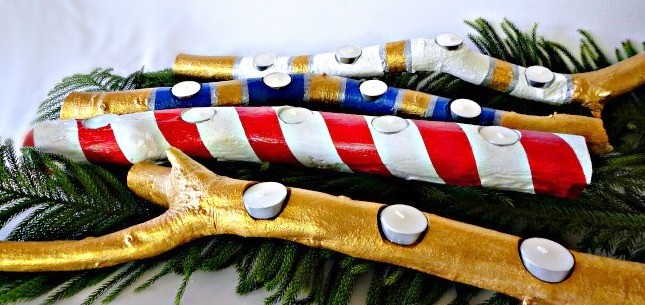
  Brush with acrylic paint or you canpaint with a favorite If you need, you can apply another additional layer of paint. And if you want to draw stripes, the best solution would be to use painting cattle. Thus, each strip will be flat. First you need to apply several layers of paint of the same color, give each layer of paint to dry. Only after that, apply paint of the second color. These colorful stripes will make your Christmas candlestick youth and more fun.
  Drilling make holes Step 4: When your future candlestick is already colored and shines with its originality, we take a ruler, a pencil and make markings at an even distance from each other, under the place where there will be candles. Next, take the drill with the necessary nozzle and drill through the round holes in the designated places under the candles. Do not forget, for your own good, wear safety glasses. When the holes are ready, take the vacuum cleaner and clean the branches (wood cuts) from the chips. Result: After the final step, it remains only to put the candles in the candlestick. Thus, it will turn out very wonderful, unusually beautiful New Year's candlestick. The appearance of the candlestick depends on your imagination. Imagine and your result will certainly please you.
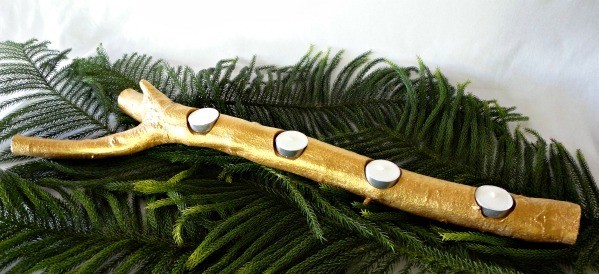
 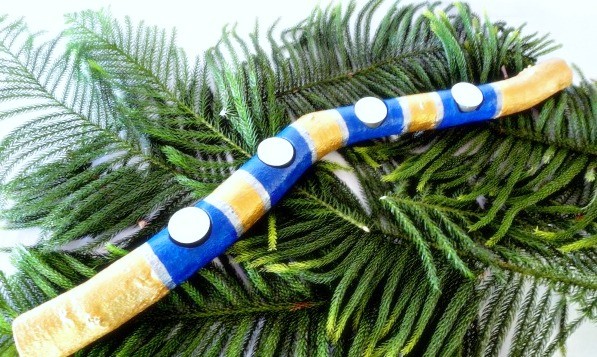 Ready candlestick In gold color, such a candlestick will be a great decor not only for the New Year
Comments
Related posts:
 DIY wooden candlestick: photo and description
 New Year candlestick with the help of quilling technique - master class with own hands
 Candlestick with own hands from laurel leaves
 Create an exclusive candlestick with your own hands from glass containers and sea salt
 New Year's house with their own hands, New Year's decorations with their own hands, ideas for various decorations for the New Year with their own hands, tips, instructions, and step-by-step photos with descriptions.