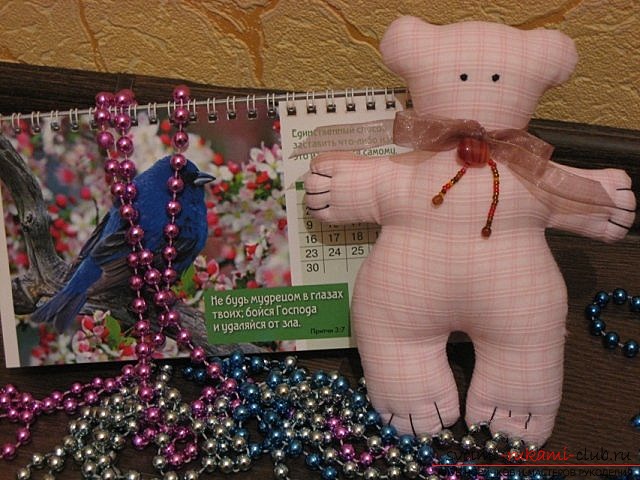
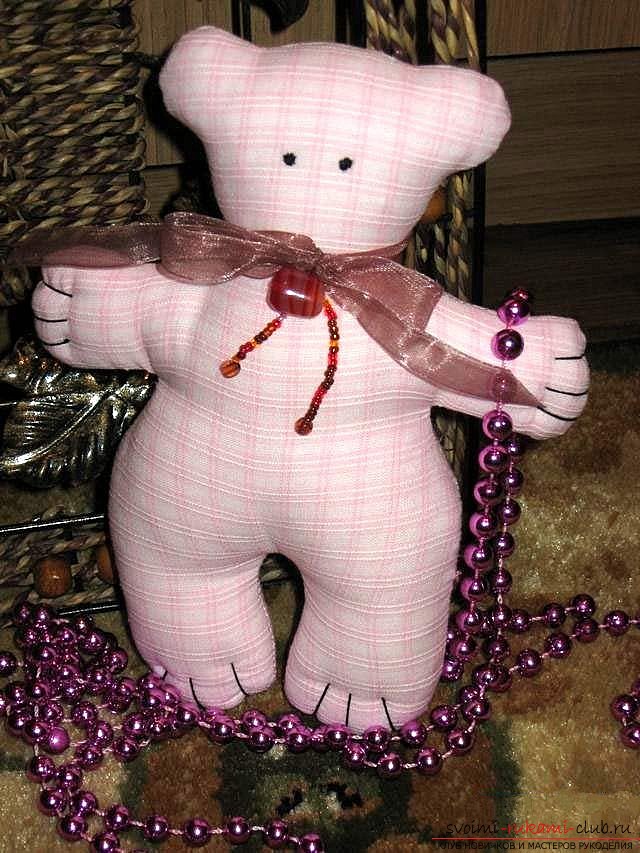
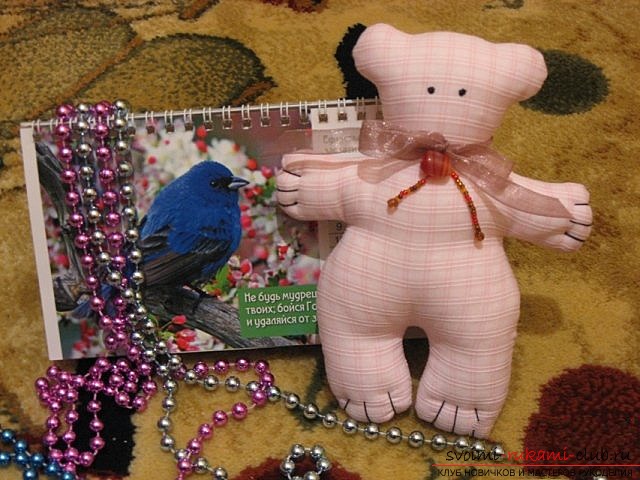
Beautiful teddy bear Tilda made by yourself will cheer you up and be a good gift for a friend
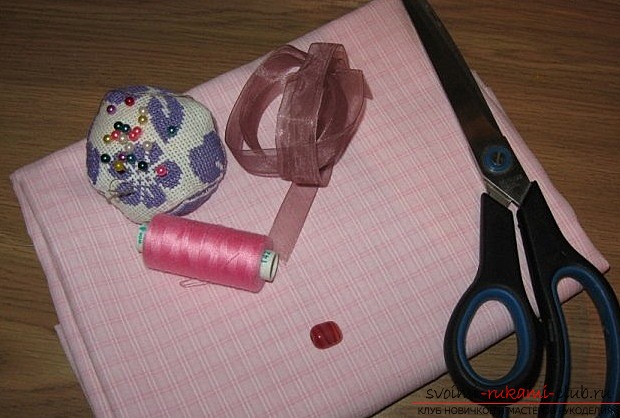
I greet you at my master class on technologyTilde! For those who are just beginning to work in this field, I would like to suggest as the first trial work - to create Tilda bears. They are very interesting to make and not difficult, but the result is impressive, especially if you do a variety of decor. And if we talk about the very tailoring and time spent on it, then Tilda bear is done very quickly, much faster than many other products that are performed in this technique. Today we are not too straining, we will perform this wonderful work - we will create Mishka. This work will not be difficult, since there are not many details here and a very simple pattern. For work we will need:
- fabric of the same color,
- needle,
- scissors,
- thread,
- ribbon for decoration,
- bead for decoration,
- black thread floss,
- filler for toys.
 Before you start working on anyfirst of all we need to find a suitable pattern for it. This pattern for Tilda bears must be cut and put on a fabric folded in two by the face inwards. Further it is necessary to traverse it or dry soap and pin it with pins. Then gently, adding allowances, you need to cut it out along the contour and sew. If you want, you can stitch along the line at the very beginning, and only then, taking into account the allowances, you cut out the finished workpiece. It depends on your preferences, there are no strict requirements. The pattern of Tilda bears can be found on the Internet on any hand-made site - this is not hidden information, but rather accessible to all. In addition, there is also a whole series of author's books on the Tildam dolls, but, unfortunately, for financial reasons, not everyone can buy it, although many have the desire. Of course, it is very convenient to have such a book available. You can at any time turn to her for ideas or help, podcherpnut something new for yourself. However, in recent years, more and more needlewomen have been using master classes that are found on various sites. In the same way, in our case, you can also enjoy the master-class on creating Tilda bears, thoroughly study each step of the work and analyze your mistakes, if any, in your work. Our site can also become such an assistant. Here you will find a lot of useful schemes, tips and recommendations. In addition, you do not need to pay for this information, as in the case of a book. All our materials are selected according to categories and levels. So if you want to make dolls of Tilde, look for schemes on our site. So, let's get started! First we need to print out our pattern.
 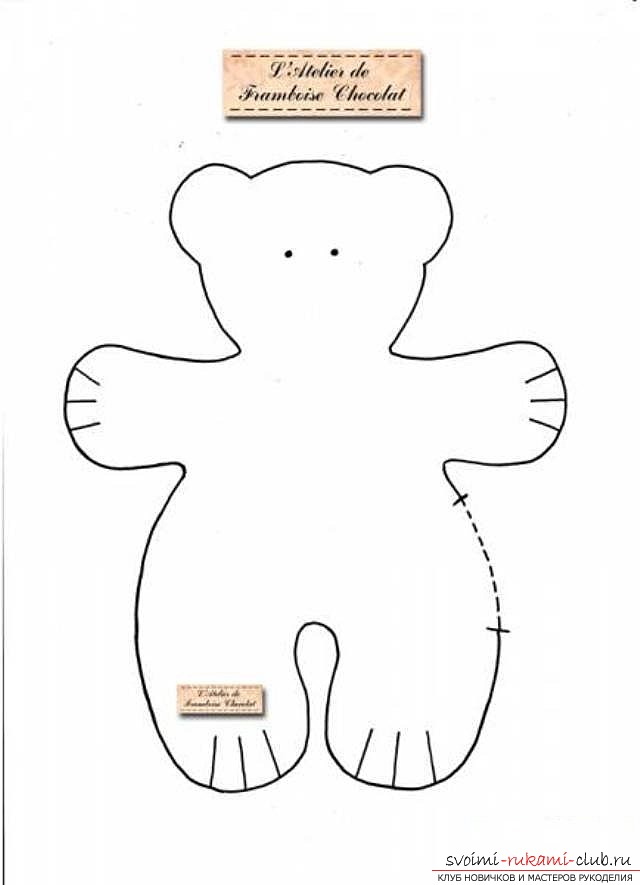 Next, you need to cut this pattern with scissors.
  Here is a pattern of bears we have turned out!
 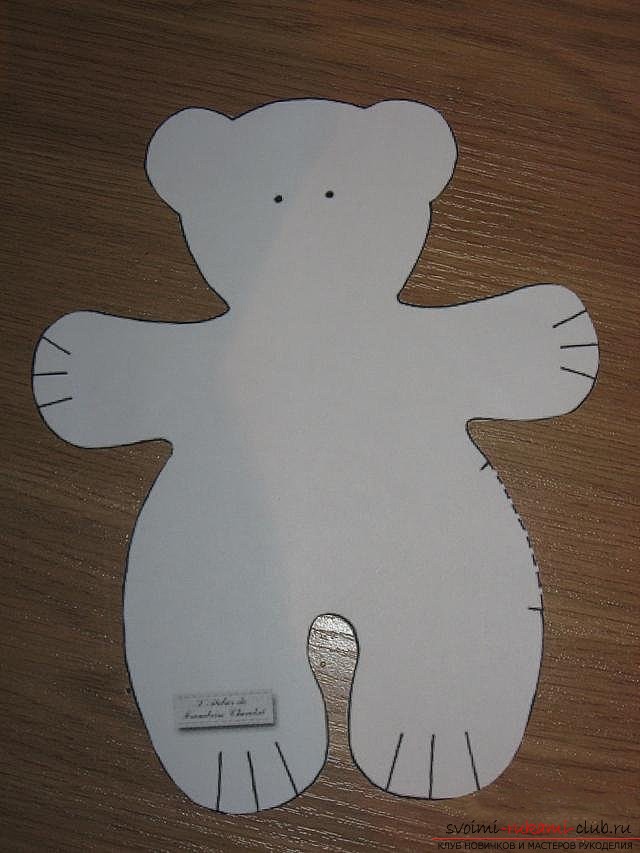 Take the fabric and fold it in half, face inward.
  We place on top of it a cut out pattern and gently pin it with the help of sewing pins. This is necessary so that as the pattern is transferred, it does not move at the most inappropriate moment.
 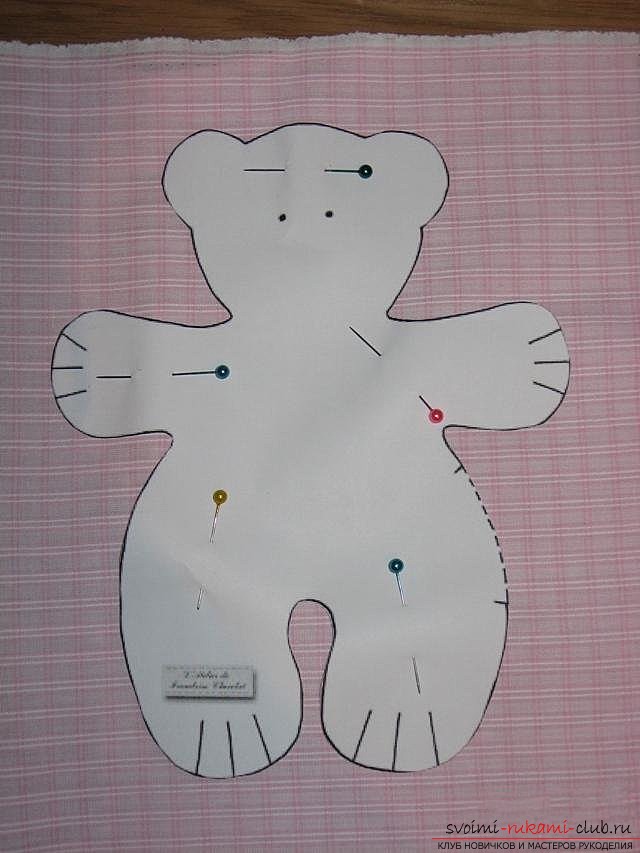 We outline the contours of our pattern with a pencil, ideally - chalk or as mentioned above, dry soap.
 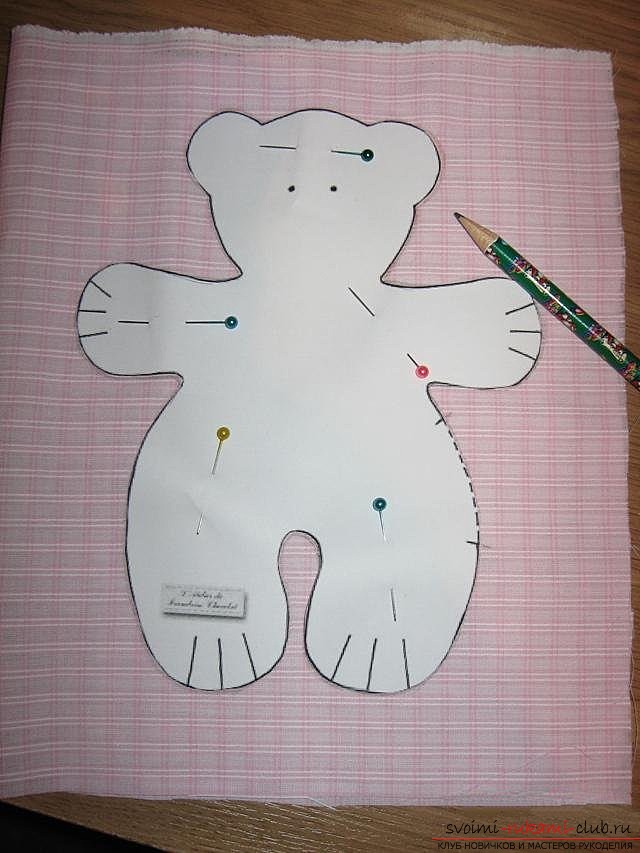 Pay attention to the marked place for filling the toy. We do not touch it with detachment at all.
 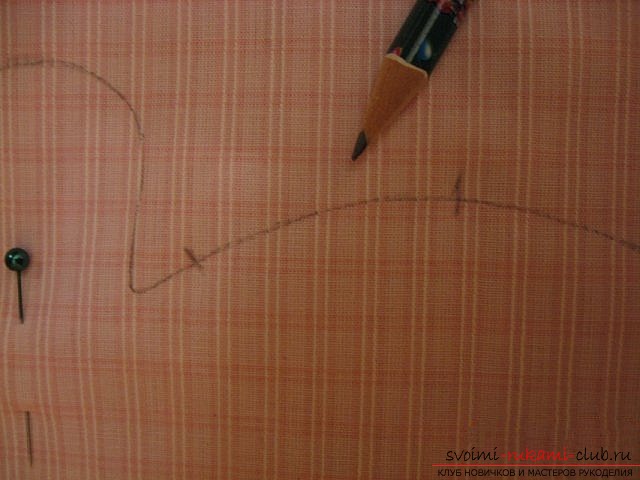 Now we start working with the machine stitch. Accurately spend our teddy bear, smoothly rounding corners, so that when turning out you can not see sharp changes and different "square" corners.
 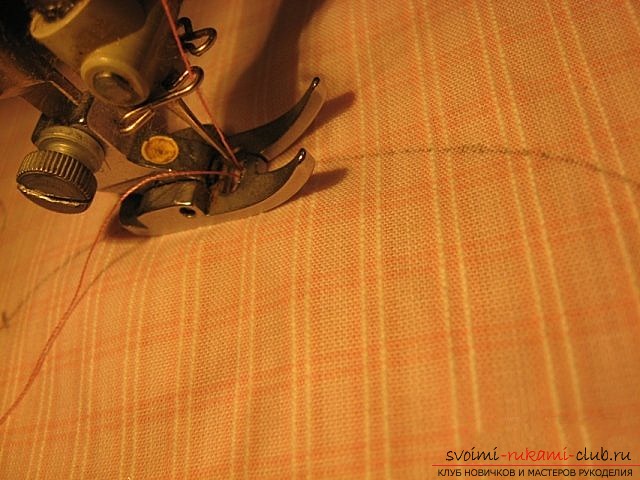 That's what we get as a result, after the work done.
 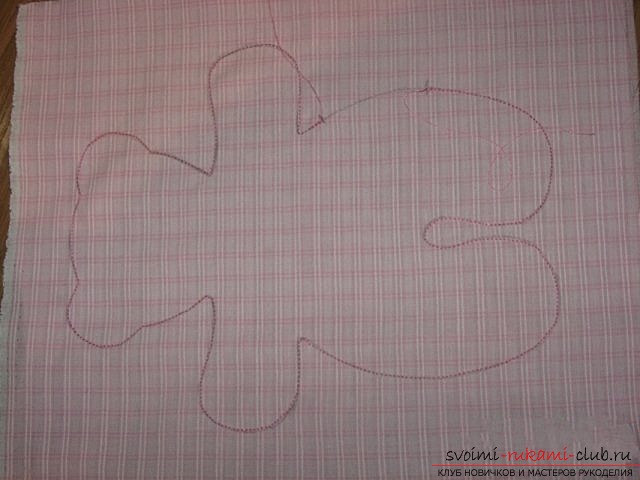 Then we cut out everything, leaving half a millimeter around the edges.
 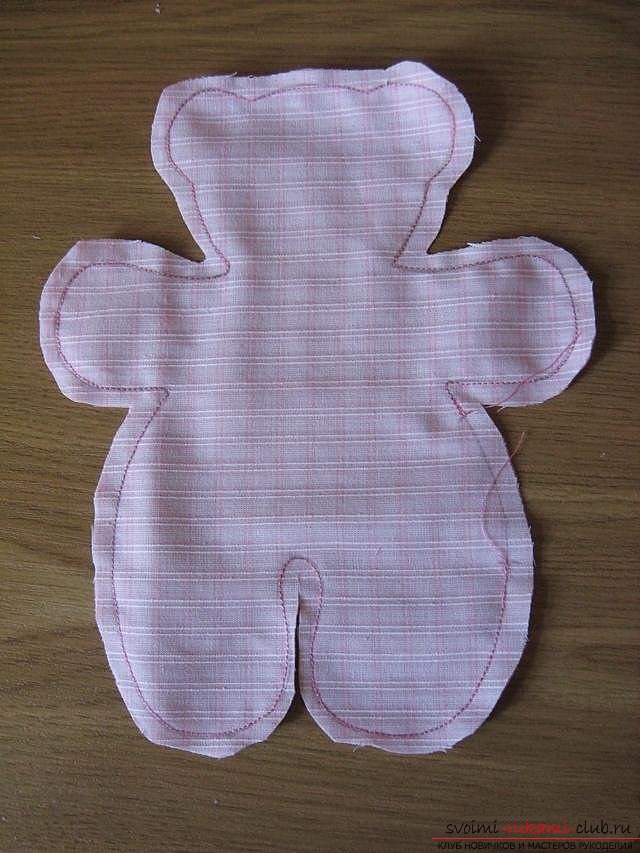 As usual we cut or cut our turns with the help of scissors, so that our work looks neat when the condition is turned out - no "creases" and wrinkles were formed.
 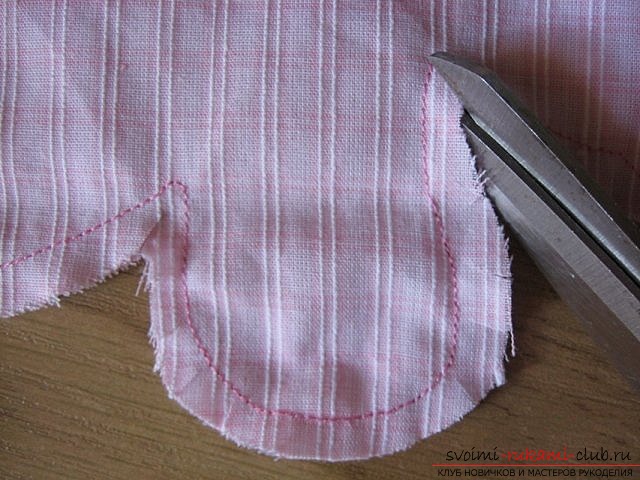 Now start to gradually turn our toy, going from the far corners.
 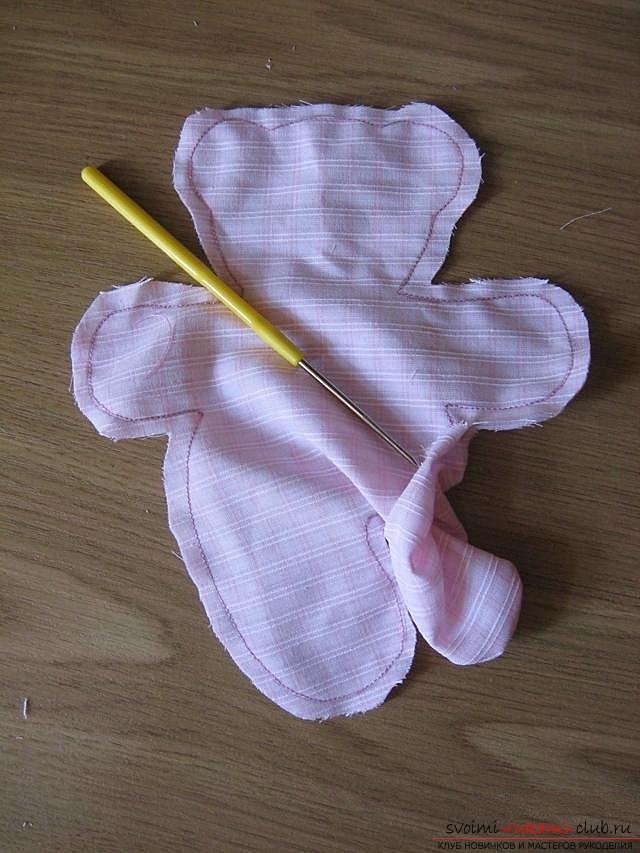 Here is such a miracle teddy bear - the workpiece should turn out in an inverted state.
 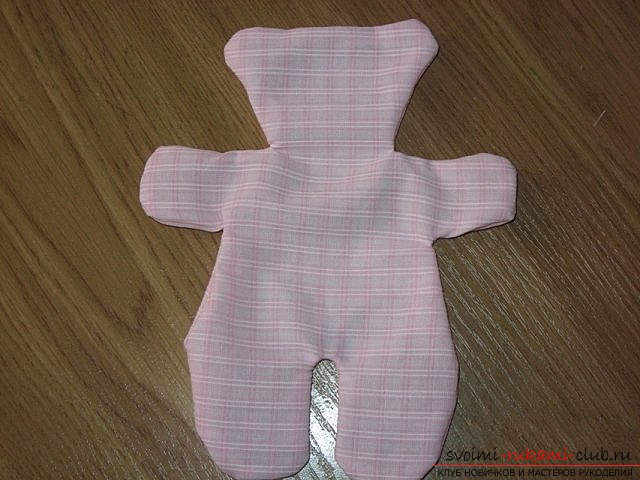 Then we proceed to filling the bears, today I use as a filler - khorofayber.
 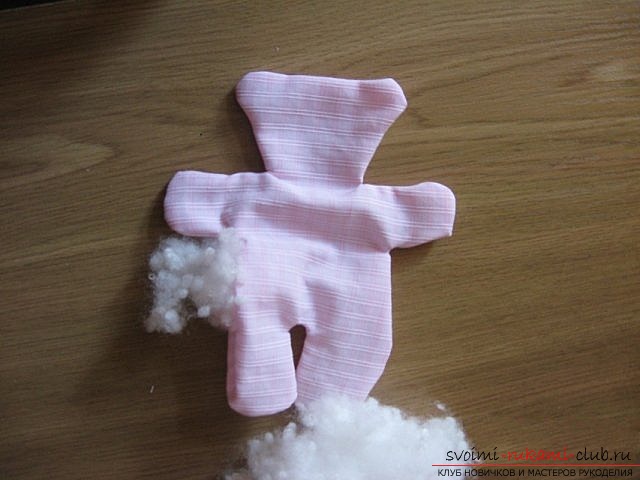 That's how we filled in completely our pet, while leaving a place to fill - not stitched.
 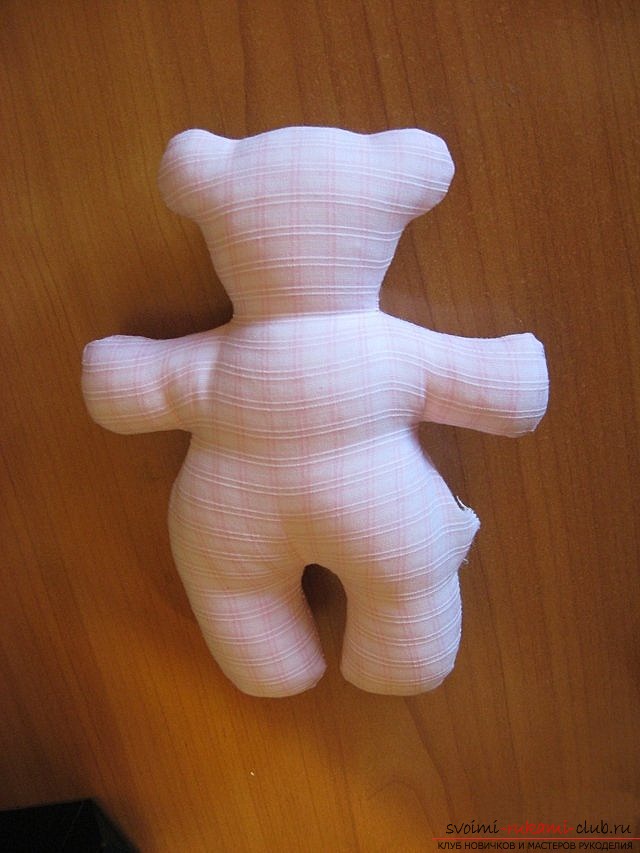 And carefully we sweep away our hidden bit of mischief by an imperceptible - hidden seam.
 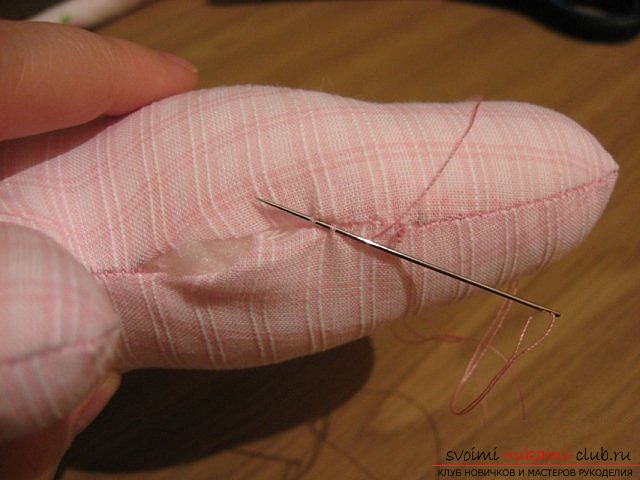 Without sewing it all the way to the very end, we fill this little side of the bears with a little chlorofiber to make it more dense. After that we finally close, that is, sew our hole.
 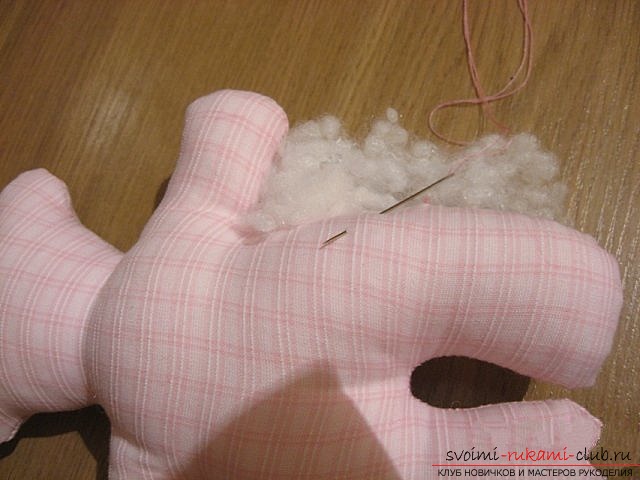 In order to well hide the thread, we are forwe fix it with a binder, and then we carry a needle and thread through the body of a bear and cut off it at the root. Thus - the end of the thread we hid inside our toy.
 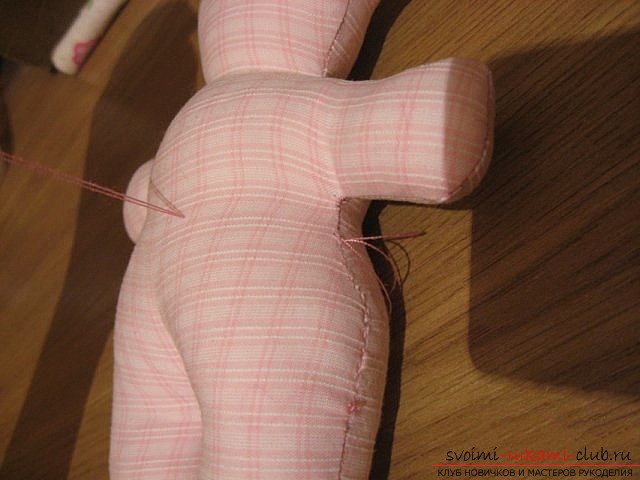 Now we can proceed with the design of our toy - embroider his eyes with the help of thread floss. To do this, we take and add one thread twice. As it shown on the picture.
 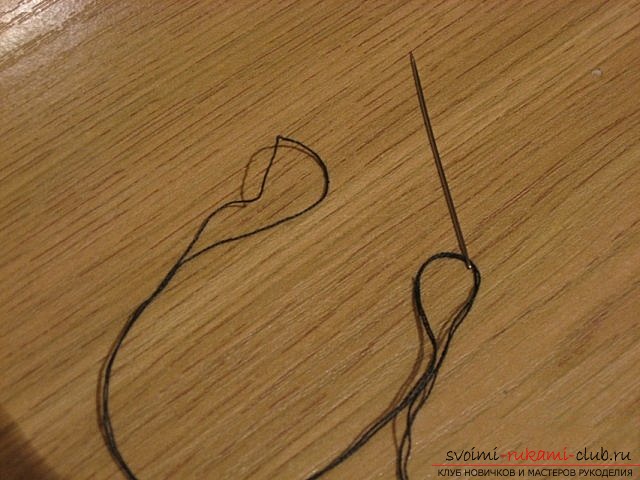 We put the needle in the place where the first eye of the bear will be located.
 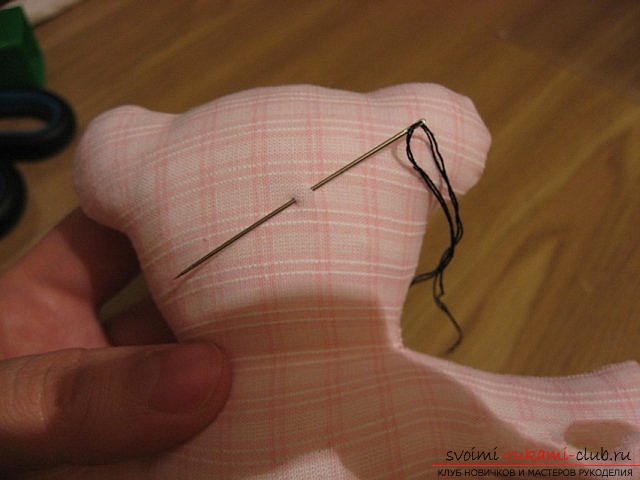 We thread our thread with a needle and tighten it - this is the bracing of the first glazika. Thus, carefully embroider his eye.
 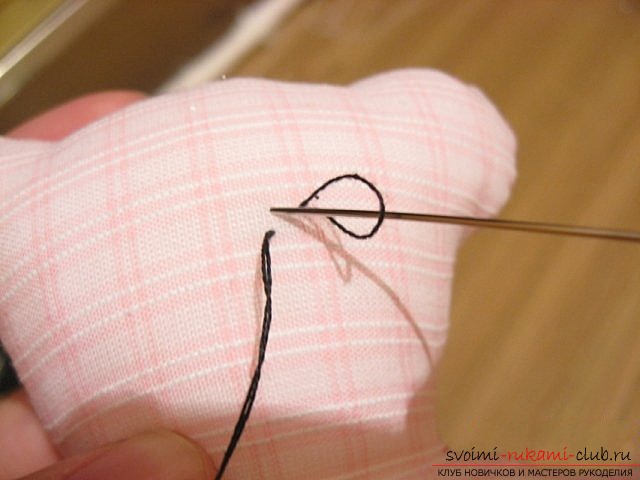 After making the first eye, without tearing the thread, pierce the needle to the place of the second.
 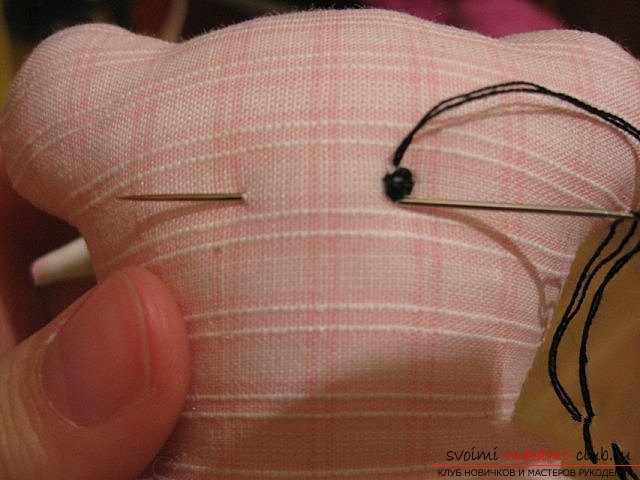 And we embroider the second eye.
 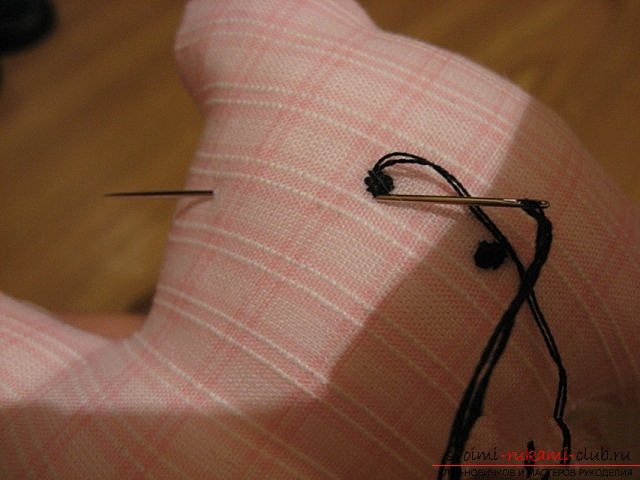 Also with the help of a clip - we hide our endthread, piercing through the torso needle and thread - cut off e at the root. We proceed to finish the first paw of our toy. Draw, or rather, sew the foot - as shown in the picture.
 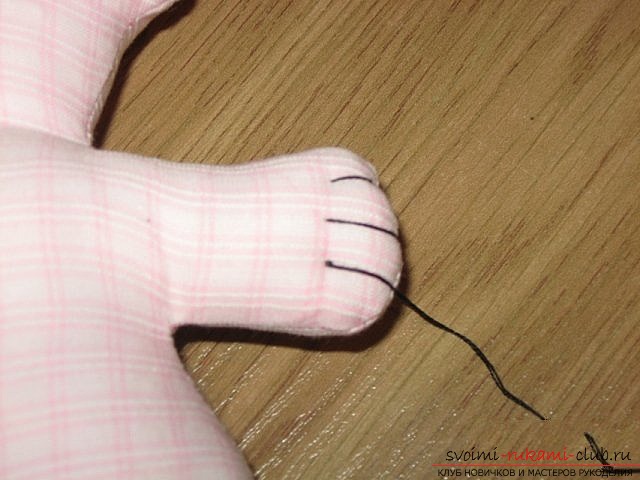 Then the second, and that's what we need to get!
 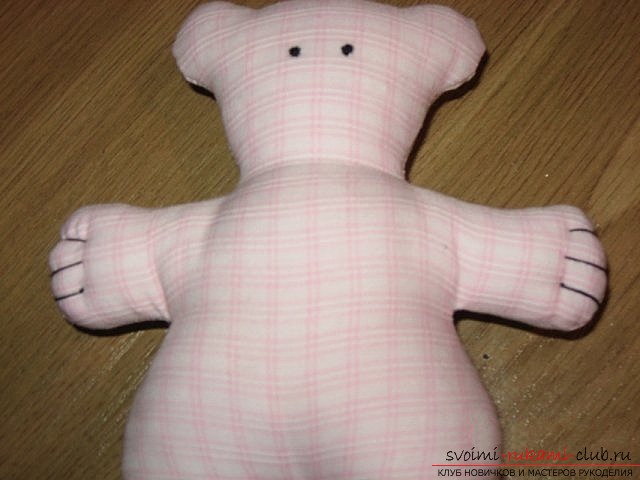 We decorate the lower extremities in the same way as the upper limbs.
 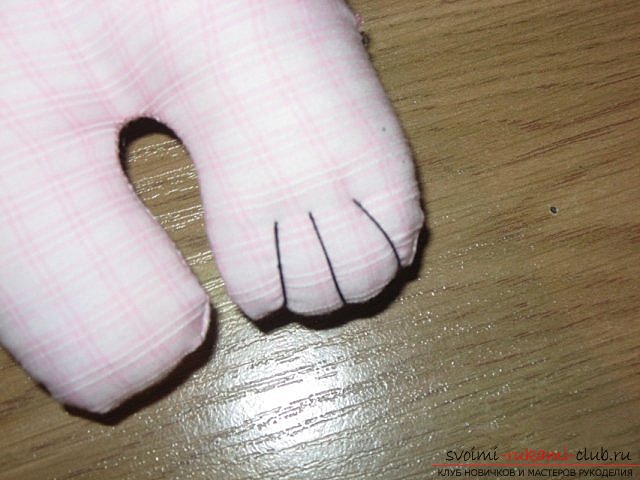 In the end we get such a beautiful bear cub with the highlighted upper and lower legs!
 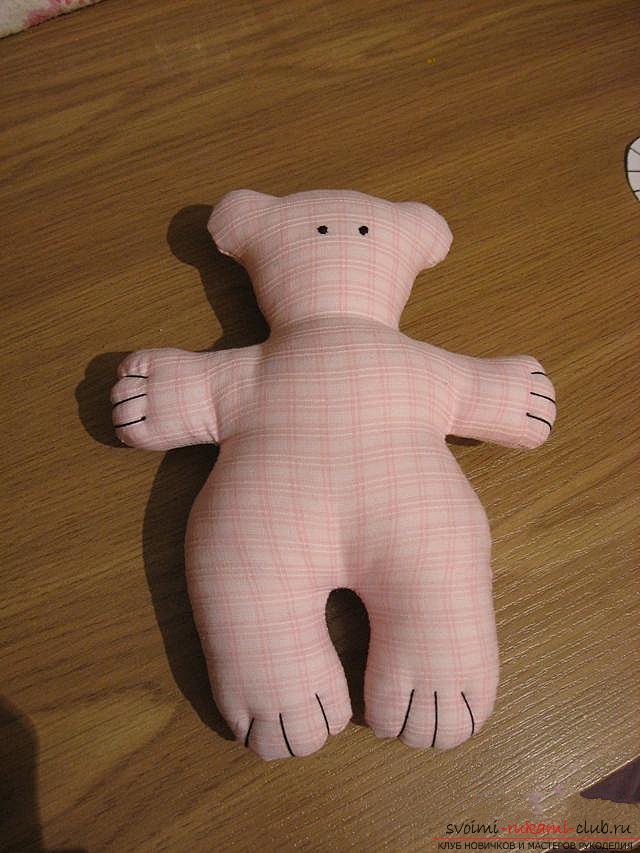 We pick up a ribbon and tie it around the neck. First we tie it once.
 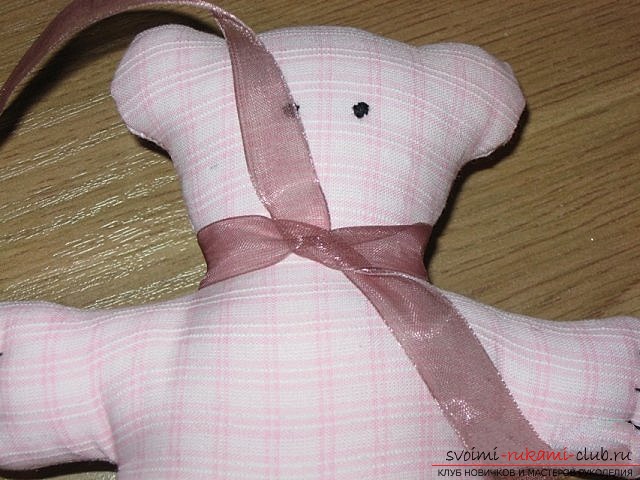 One more time to fix our knot.
 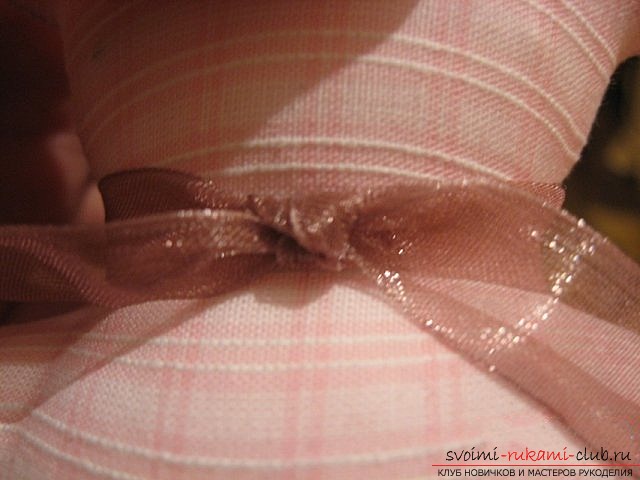 And we form a bow. That's what we got.
 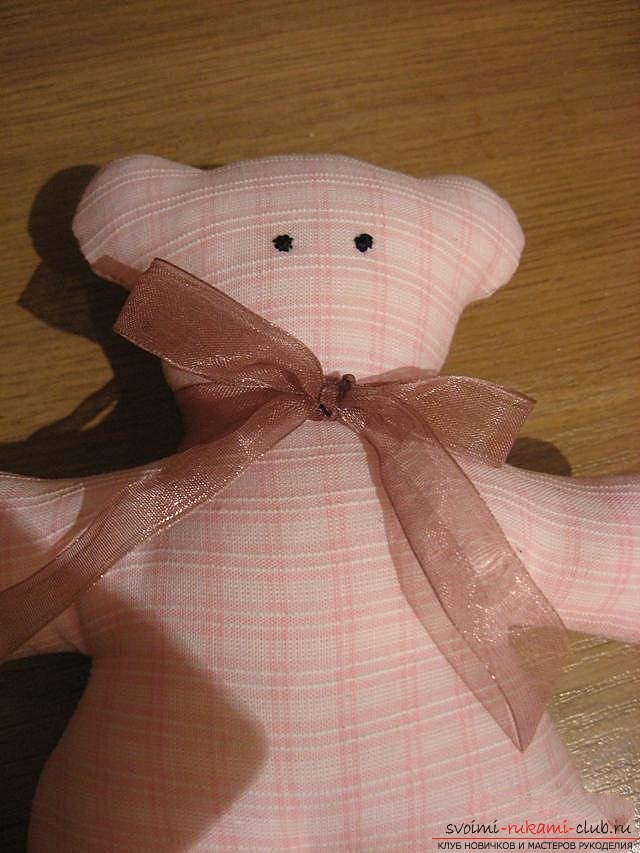 For decor we sew our bead - we introduce a needle under the bottom of the bow - this is where our bead will be located.
 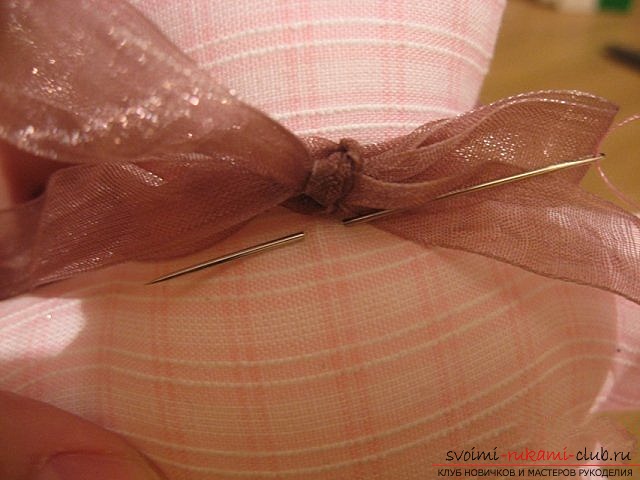 We introduce a bead on the needle.
 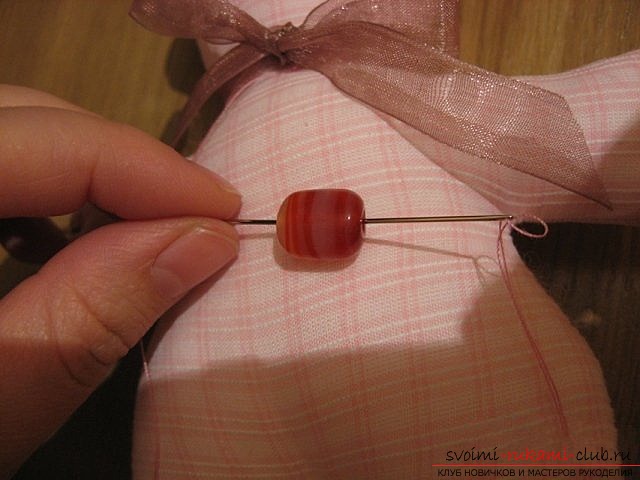 And we sew further, then fix it in that place.
 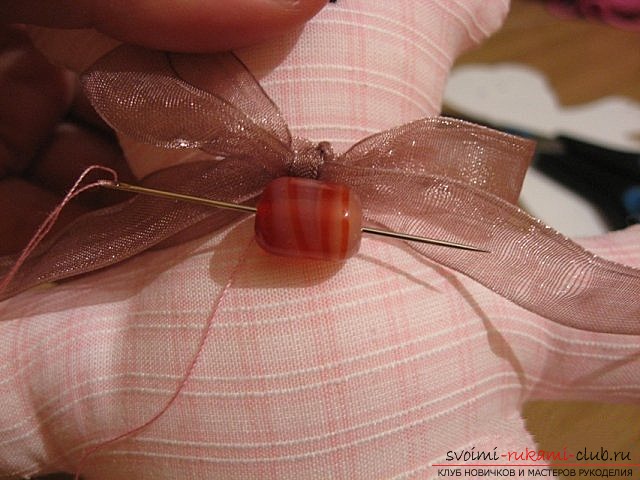 To hang it is better to use a different shade of beads.
  String it on a thin needle - special for beads, otherwise they will not pass in the place where the eyelet is located.
 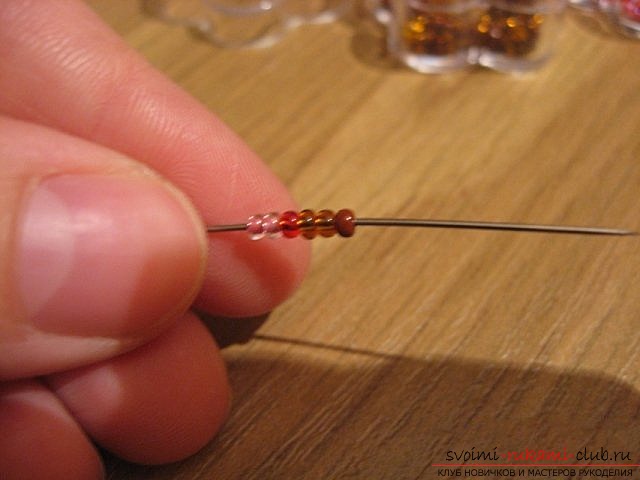 In the end we hang still small beads and so we form two pendants. So, you should get it.
 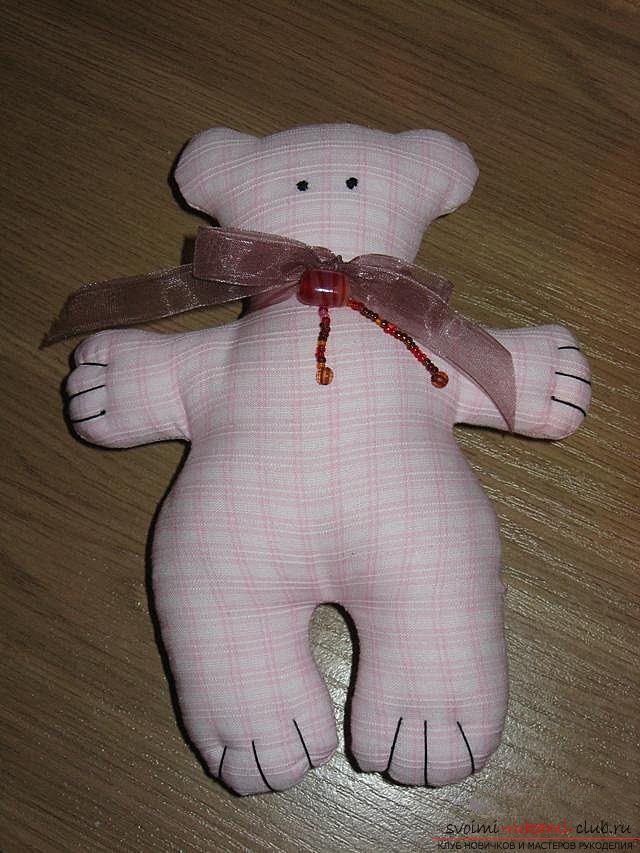 Actually we are all set! Look, what a wonderful miracle we did! Our golden pens can be proud of their creation!
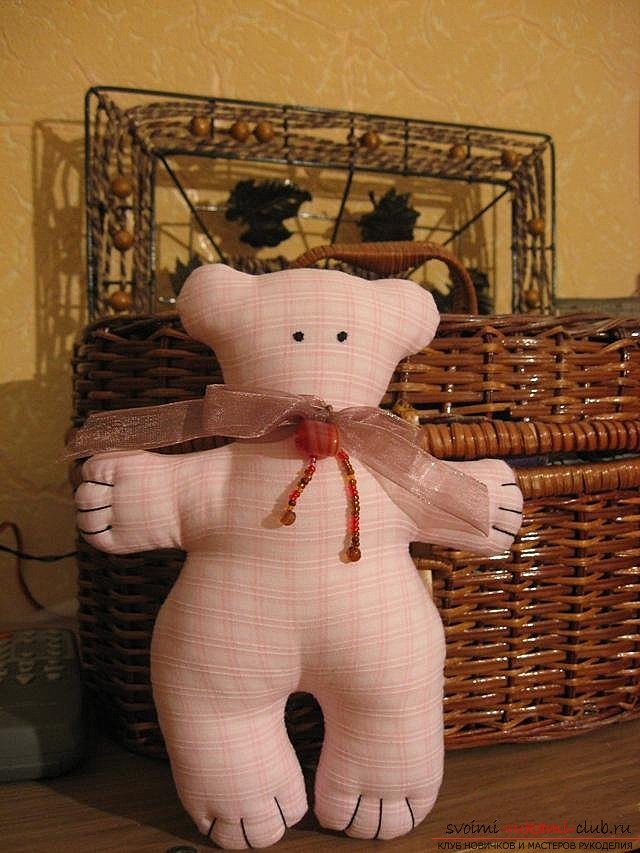


 I hope you succeeded! See you at the new master classes!
Comments
Related posts:
 A beautiful bouquet of toys made by own hands will be an original gift, which will be remembered for a long time
 Master class on creating tilde fairy dolls Beautiful doll Tilda Fairy made by her own hands will decorate any interior and will be a good gift
 A bead case will be a good gift for any holiday. A simple master class with an embroidery scheme.
 Doll Tilda own hands, the popular hare Tilda, the New Year's hare Tilda, how to choose the right fabric for sewing a hare Tilda, patterns of a hare, clothing patterns for a hare Tilda.
 How to make a basket of newspaper baskets with your own hands, which will be a good decor for your home