A beautiful panel for a salted dough kitchen. Master class with detailed descriptions and photos for beginners.
Today we try to plunge into creativity. In this master class we will make a picture in the kitchen. And it will not even be just a panel, but an amulet. Here's what you should get:  Consumables:
- salt,
- flour (only not pancake!),
- water,
- Double-sided tape,
- pieces of cloth,
- veneer,
- food film,
- varnish,
- Glue Moment.
We will sculpt panels from salted dough. The dough for modeling is made according to this recipe:
- 1 cup of fine salt (not iodized)
- 2 cups of flour
- 125 ml. cold water.
Water can be a little more or slightly less, independing on the quality of the flour. For modeling small details, you can add PVA glue to the dough. To make the dough more plastic, add a little bit of sunflower oil. The resulting dough is as follows, knead it, put it in a cellophane bag and put it away into the refrigerator for the night. We proceed to work the next day. After the plywood is ready, on which our painting will be located, we select the drawing. You can sculpt simply "by eye". If the eye is not very, then it is better to sketch the future work on the veneer. The veneer is closed with food film. The film is cut with the calculation so that it can be bent under the veneer. And we begin to sculpt.  The dough is kept in the bag, as it dries very quickly. For a detailed study of the picture, everything is useful - a toothpick, an awl, a ruler, yes, in general, anything.
  So our grandfather is ready.
  This work on the battery dried up. Although it is possible and in the oven, but not very hot, up to about 150 degrees, otherwise it can crack. After everything is completely dry, we primed the work. Ground - flour, PVA glue, water. This composition (zhidenkim) omazyvaem all the details. Very convenient for this work is a wide and soft brush. Again we put to dry. Coloring the work On the salty dough is wonderful to go to watercolor. Color best with soft, squirrel brushes. They need at least two. Thick, for applying the base color and thin, for detailed study.
  After painting dry drying. When the work has dried, we cover it with varnish. We used the most common, quick-drying, colorless, St. Petersburg varnish. To go to bed it is class. Covered the job with varnish, using a tampon - inside the cotton wool, on top of the soft xb rag.
  Again we dry. And at this time we are preparing the background. In this case, the background decor consists of a fabric. By double-sided adhesive tape we glue the plywood and pull the fabric on top:
  Once the background is ready, carefully, from the film, we transfer work to the veneer. We glue it point-by-point, glue "Moment". Well, again drying, so that everything is stuck and kept. The panel is ready!
Comments
Related posts:
 A master class with a detailed description and photo will show how to crochet a toy-symbol of the year - a monkey on a Christmas tree
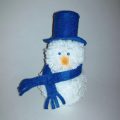 Masterclass with photos and descriptions will tell you how to make your own hands a children's hand-crafted snowman
 How to make earrings from polymer clay in the form of snowmen, detailed master class with photo and description
 Knitted needles dolls: a master class with a detailed description
 Master class on knitting with peacock tail patterns with diagrams and detailed description which you can download absolutely free of charge.