Nitkografiya unusual technique of drawing a picture (photo)
Content
- Master class in painting technique nitkografiya
- What nitkopis
- Nitkopis and nitkografiya for children
- Video: Master Class for children nitkografii
- Basic schemes for nitkografii
- Video: unusual lesson nitkografii
In our country nitkografiya became popular notfor a long time, but with each passing day, this new art form finds more and more fans. Nitkografiey addicted not only adults but also children. Even kids in kindergarten with pleasure to create their first paintings. Consider this unusual painting technique using threads.

Master class in painting technique nitkografiya
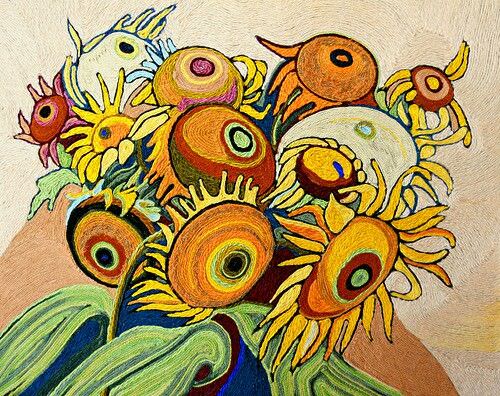
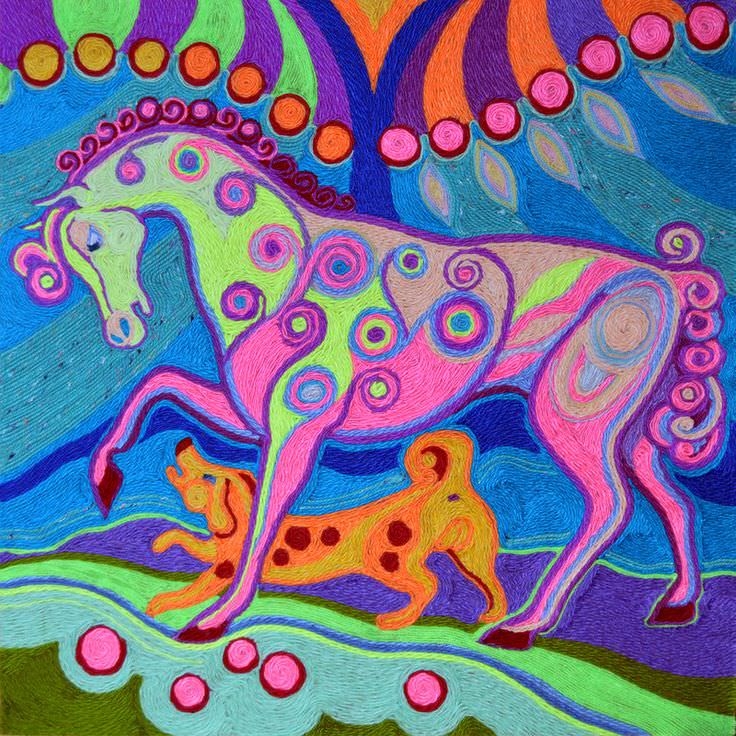
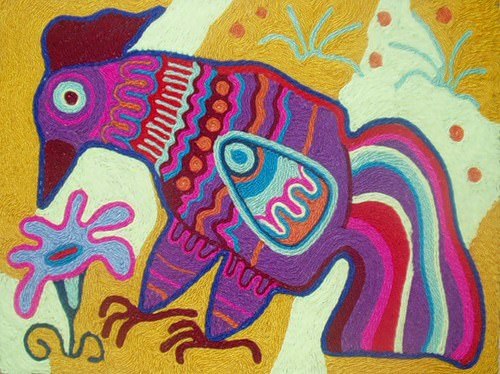
Paintings made using nitkografii always turn out very bright and colorful. In addition it is possible to give an additional amount using the "curly" or "shaggy yarn to create them."
Before you start creating your future masterpiece, you must first prepare all the necessary materials:
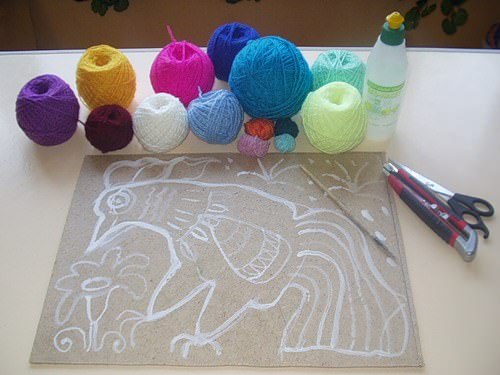
first of all you will need different threadcolors. For starters, the creators of best fit smooth yarn whose thickness is less than 2 mm. For example, you can take the floss, acrylic or wool yarn;- also you need to be the foundation on which you will be able to apply the technique of drawing thread in practice. For this purpose perfectly suitable hardboard, thick cardboard, solid color carpet or velvet paper;
- yet you will need polymer waterproof glue. If you plan to work in the company of preschool children, then you need to choose the adhesive is not very pungent smell;
- advance put on their desk toothpick and scissors. They will also be useful to you in the creation of
; - acrylic paints, brush or finished drawing.
Having prepared all the necessary materials, you can safely get to work:

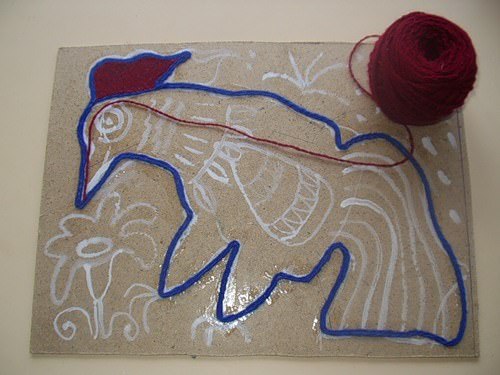

First of all, try to gently laythread basis of your drawing, and only then proceed to its completion and implementation of more fine details. Remember that nitkografiya - it's pretty hard work because you have to spread the strings close to each other and not to leave gaps between them. Pre-tune for quite long and requires perseverance job. In this photo it is seen that a gluing job started to thread loop pattern, and only then begins its filling. This technique of work will help you to create a neat and beautiful pictures;
The finished work can be inserted into a baguette anddecorate it his apartment. Your close and native people will be surprised to know that you are studying, this small master class, able to independently make a beautiful picture.
What nitkopis
Some people believe that it nitkopisoriginal painting pictures with the help of the thread. Constant attempts of artists find inspiration and try something new led to the fact that many of them began to get involved in drawing thread.
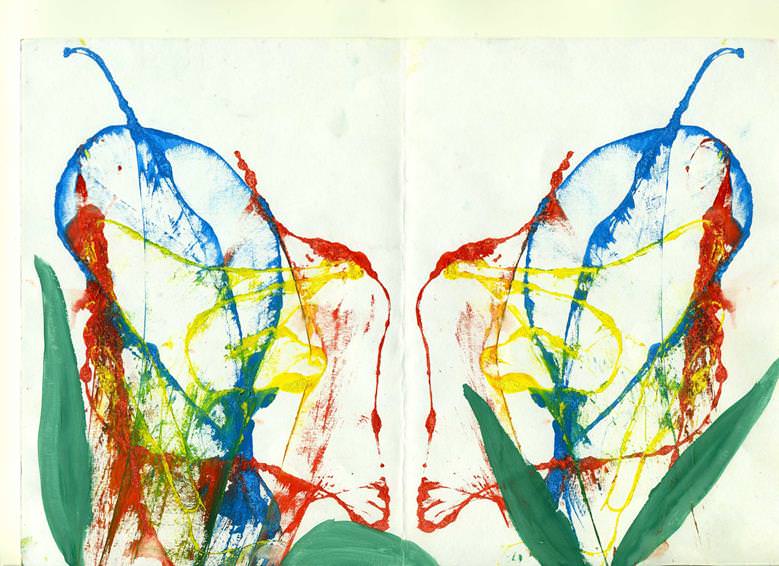
Draw a picture using nitkopis:
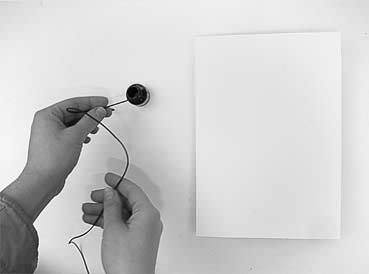
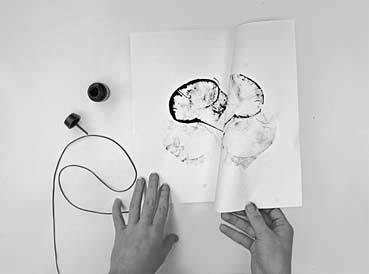
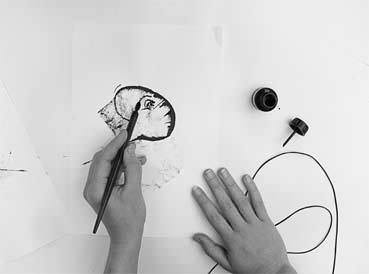
- first prepare the necessaryMaterials: paper, brush, thread, ink or gouache; Then soak the thread in the paint and, by expanding its loops or zigzags so that the tip of one of her lying on the table, cover with a second sheet of paper;
- press the top sheet to the bottom and gently pull the thread. Then remove the paper lying on top.
You will get two identical images, which you can modify using a brush and paint. Then it all depends entirely on your imagination.


Nitkopis and nitkografiya for children
In kindergarten studying witheducators, teachers, kids spend a lot of time to develop their fine motor skills and creativity. In addition, in most gardens for children are held additional classes in which they draw paints and pencils, molded from clay, make crafts and learn nitkopis.

Nitkopis good by the fact that with its helpgeometric shapes can be studied, even letters and figures. For children of preschool age are ideal occupation, during which they will be using strings a letter or geometric shapes. In addition children can briefly talk about what nitkografiya and easy to hold a master class for them, during which they will also be able to try their hand at this new direction of art.
In order to make children a lesson on nitkografii you will need to give them advance all the necessary materials in kindergarten:
- sheets of A4 paper with the already painted on them flowers.
- finely chopped thread of three different colors.
- PVA glue.
For children, this activity will be very useful, because during it they not only develop fine motor skills, learning perseverance, but also develop their artistic taste.
Video: Master Class for children nitkografii
Basic schemes for nitkografii
Nitkografiya primarily attractsattention to the fact that it is very easy to perform, it can master even a child. Besides this kind of art as a nitkografiya does not require any significant financial cost, but it's also a significant advantage.
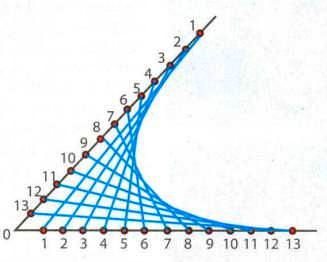
In nitkografii there are two main schemes: the circle and the angle. By mastering them, you will be able to embroider diamond, arc, triangle, square and oval.
Angle
Take a sheet of cardboard and on its reverse side, draw an angle;
Proceeding further along the same scheme, you get an angle.
Circle

Draw a circle on the wrong side;
Fill in the circle on the chords. From that how long you will be directly dependent on the frequency of the chord fill the circle itself and the size of its domestic empty circle.
Nitkografiya mostly "built" on the basis of these two schemes. With their help you will be able to master all the other geometric shapes, and easily make a unique picture.
Whatever kind nitkografii nitkopisi or you do notYou choose, most importantly, remember that any work in the first place should be fun. Do not be afraid to experiment and "unleashed" the imagination.