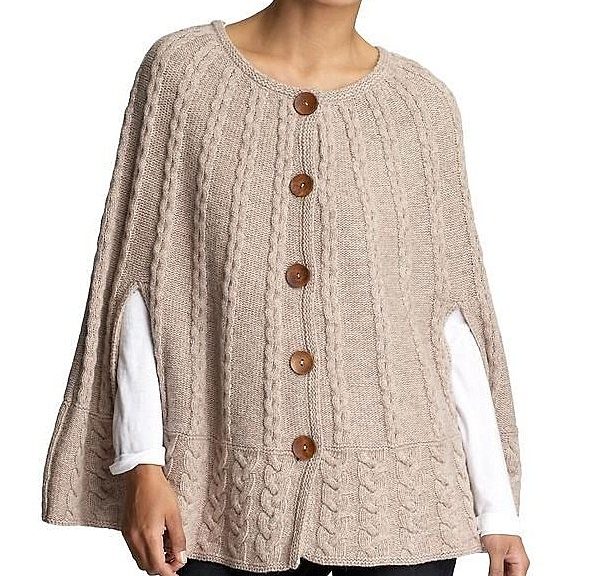
How to knit a warm and beautiful poncho. A detailed description of work on knitting a female poncho with the help of knitting needles
Currently, more women are giving awaypreference for poncho, replacing jackets and sweaters. It is well suited for any weather conditions and it looks perfect on girls with different shapes and age category. Despite the simple cut of the product, the poncho is made in a variety of interesting models. A great experience to tie the product yourself is not required. In the article we will tell you how to tie a beautiful poncho that warms you to any bad weather.  Selecting a style To begin with, you must select a styleand the size of the poncho. Choose the size of the product simply because it is suitable for different types of figures. The length of the cloak can be changed during the mating process, since it is usually tied over top. Then you need to decide on the color of the yarn. You can take any shade depending on your desire.
  Work process As a rule, a poncho is tied upwhole cloth from top to bottom. We knit with circular knitting needles, as it is easier to distribute a huge number of loops of the product. But you can knit separately the front and rear ladles, and then stitch them. When tying with circular knitting need to remember that the spoke with the final typed loop should be taken with the right hand, and the spoke with the initial - left. Knit begin with the first loop, which was typed, while slightly tightening the thread, so as not to get a gap. Next, we reach the marking ring, and ends with a circle of knitting. Then we move the ring to the right knitting needle and knit another circle.
  The mating around with the help of stocking spokes goes like this: the required number of loops is typed on the spoke, adding 1 additional loop. After remove the auxiliary loop on the other spoke, and knit further. Then place the knitting needles with the typed loops so that a triangle shape is obtained. The marking ring is located behind the final typed loop. Next, take an unused spoke and knit the 1st loop, considering that you need to tighten the thread. After mating the 1st circle, the ring is moved.
  To assemble the product,it is necessary to use a long thread left after the first row of one of the elements is set. Push the thread into a needle with a wide eyelet, lay the details face up. Pass the needle into the loop with the edge of the second element from the bottom to the top, draw with a "8" and also pierce the needle in the loop with the edge of the first element (in the same way). After a while, pull the product slightly until the edges are aligned.
 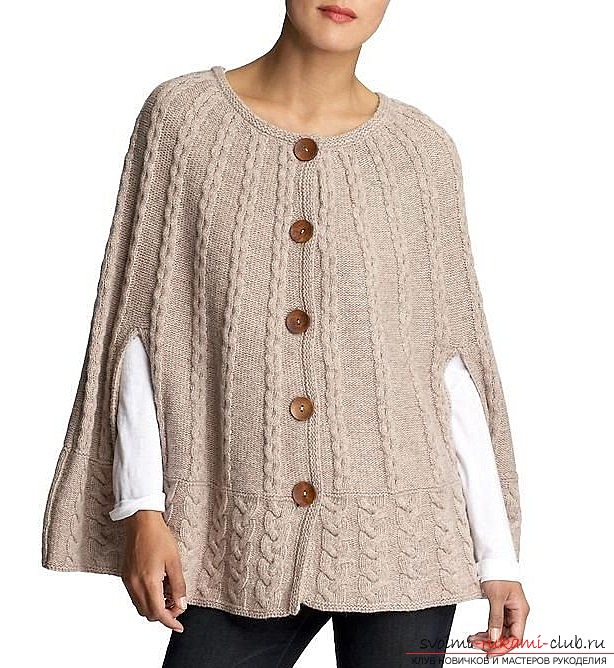 Decoration of the product Bottom of the cape can bedecorate with fringe. You can also decorate the product with brushes and pompons. For the holidays, you can add embroidered decorations, using various decor elements.
Comments
Related posts:
 How to tie asymmetric ponchos with knitting needles, description of poncho patterns, women's knitted ponchos 2015
 Knitting a classic warm female waistcoat with knitting needles. Knitting pattern, photos and detailed description will help to tie the vest even for beginners knitters
 How to tie a shirt for a woman with knitting needles, a detailed description of the work, recommendations for modeling the length of the front man, photos of finished products
 Knitting pattern with knitting needles of a women's sweater with a coquette of braid. Detailed description with photo for beginners
 A warm, beautiful set consisting of a scarf and mittens is knit by hand. Detailed description of the steps of creating a stylish set of yarn with the help of knitting needles