How to sew a soft and cute hare from the plush fabric with your own hands. Professional pattern and step-by-step recommendation for tailoring
For lovers to create toys with their own handswe propose to make a plush hare with a height of 45 cm. Such a toy, created by oneself, will become an original gift for close people and you can also play with your child with it. 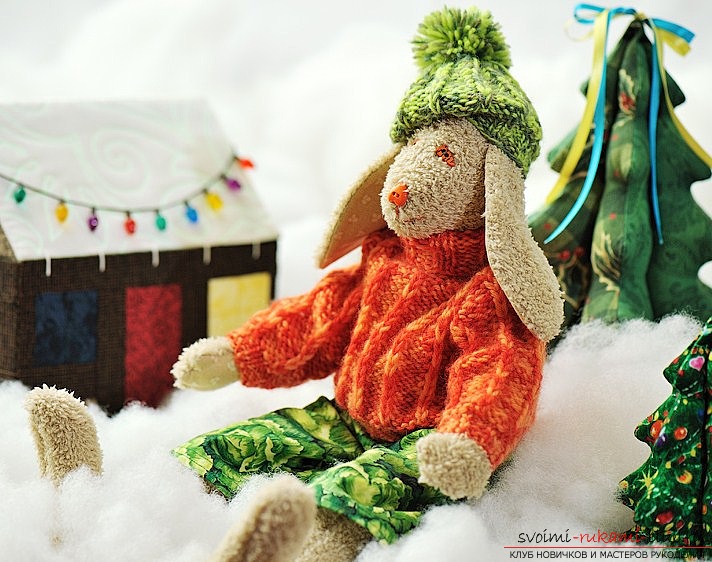 Necessary materials: • Plush fabric and cotton of the same shade • Filler • Threads that match the color of the fabric • Flat buttons with 2 holes to secure the feet • Decor buttons for creating the nose and eyes • Special needle for sewing soft toys.
  Work process: 1. You can build a pattern yourself, by hand .. Cut out the elements of the pattern, leaving a black outline, then it will be easier to sew. To draw a pattern on a plush fabric is difficult, therefore we will do otherwise. Fold the plush face inward, nazhivulivaem or attach pins, after sewing on the typewriter. Here also came the black outline from the printer, serving as a guide line. Cut out the body element, taking into account the allowances for the seams, and twist it on the face. In the same way, we make the legs of the toy.
  2. Note that the hare's ears are made of two materials: the inside is their cotton, the outer side is made of plush fabric. We perform the same actions, that is, we draw the pattern on cotton fabric, cut it out, put it on a plush fabric, pin it with pins and sew it. Also we act with the body of the toy, and with the legs.
  3. We pay attention, that the combination of plush fabric and cotton requires serious approach and attentiveness. After all, when sewing a rabbit, it is necessary to correctly lay out the patterns of handles and ears, because they are mirrored - the left eye and the right eye, the left handle and the right handle. The legs of this toy are made of the same material, so no matter where the left, where the right.
  4. While sewing elements of the hare, do not forget to leave the holes, then turn it off. Marked with a dashed line in the drawing. All the elements are filled with filler, excluding the ears, and sewed with a secret stitch.
 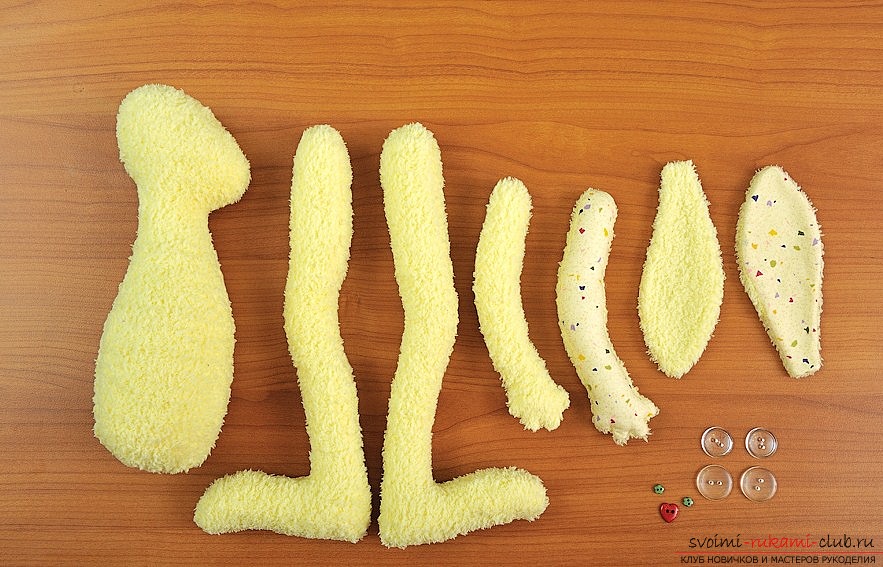 5. We collect the elements together. We use flat buttons to keep the legs firmly fixed. Take a long needle so that you can stitch 2 legs at once, and you can fold the thread several times, for strength. In the same way, we sew the handles, only using smaller diameter pouches. Ears are attached by an inconspicuous line at the desired level.
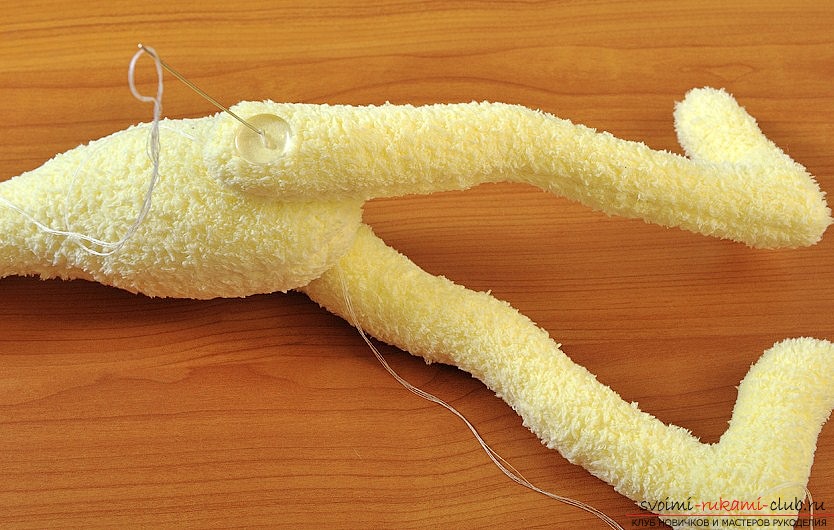
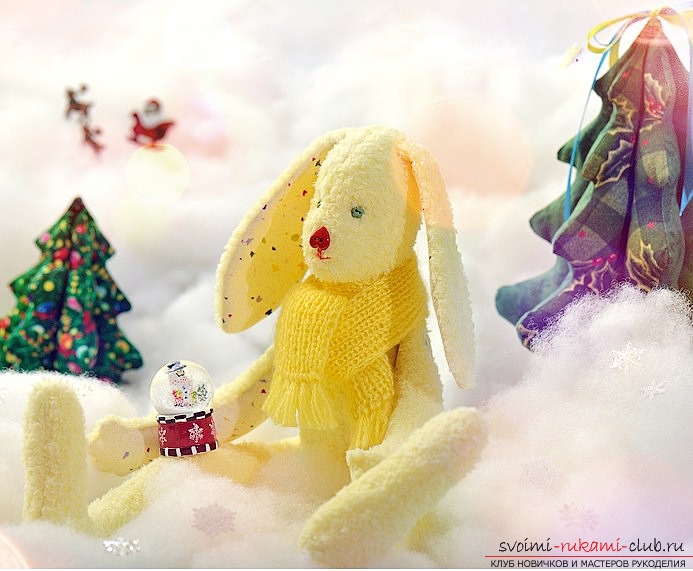
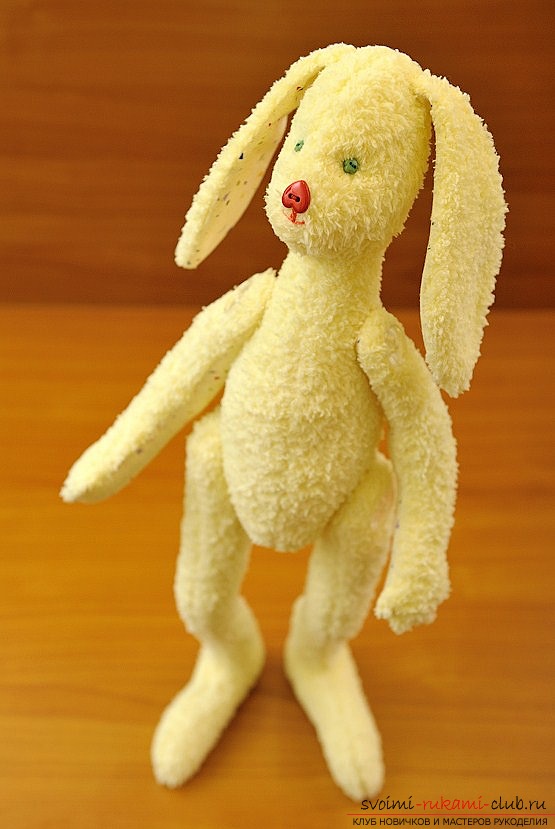 6. Attach a spout and eyes to a toy and your hare created by your own hands is ready! You can start making clothes for him. You can think of clothes for a bunny yourself, thus deciding who your bunny is - a boy or a girl. You can sew a pretty dress or panties with a vest. The needlewomen who know how to knit can make clothes for a bunny from yarn. We offer this version of the outfit for a rabbit: Idle knitted scarf will also perfectly complement your composition!
Comments
Related posts:
 How to sew fashionable jeans by yourself. Professional pattern of fashionable jeans with step-by-step steps of their sewing
 Festive decorations with their own hands, tips and advice on making pumpkin out of cloth.
 Simple sewing of a decorative cushion from pieces of fabric with your own hands will give an opportunity to decorate the interior
 How to make a stained glass painting. Step-by-step instruction, the algorithm of actions and materials of stained glass mural by oneself.
 Easy pattern of dolls for beginners.