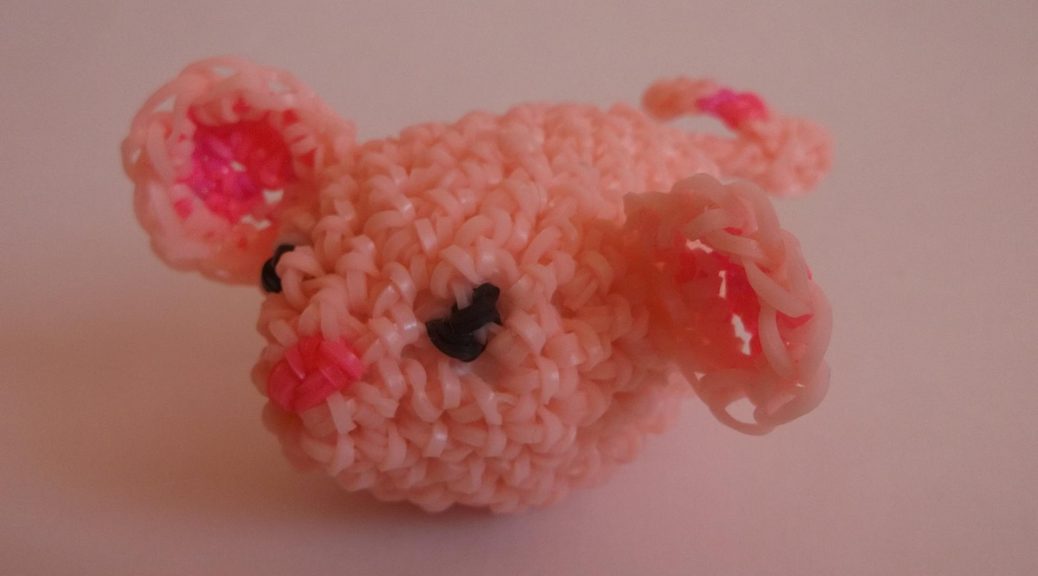
How to weave a toy for the cat "Mouse"? Detailed description of the work process, with recommendations and step-by-step photos
Every owner, who has a cat in his house, knows,how these animals love to play with tangles or candy wrappers or whatever they fall under their paws. But the most favorite toy for any cat is a mouse! In pet stores a large range of toys for animals, however, any owner can make a toy for his cat himself. In this master class we will weave a mouse of rubber bands, which can become a toy for a cat or for a child, or simply become a decoration of the desktop.
Materials for work
- Erasers are pale pink, pink and black;
- Hook;
- Clip;
- Synthepon.
Stages of work
Plysti this mouse is easy, because it flockshe is in the same scheme. It will be especially easy for those needlewomen who know how to knit, because in this case the Lumigurumi technique is used. First, we'll sew separate details: ears and tail. In order to weave the ears, we need to ring the ring with lumugurumi. This is an analog of the amigurumi, which is known to all needlewomen, who are fond of knitting. To begin with, let's take an elastic band of bright pink color and wind it three times on the hook. 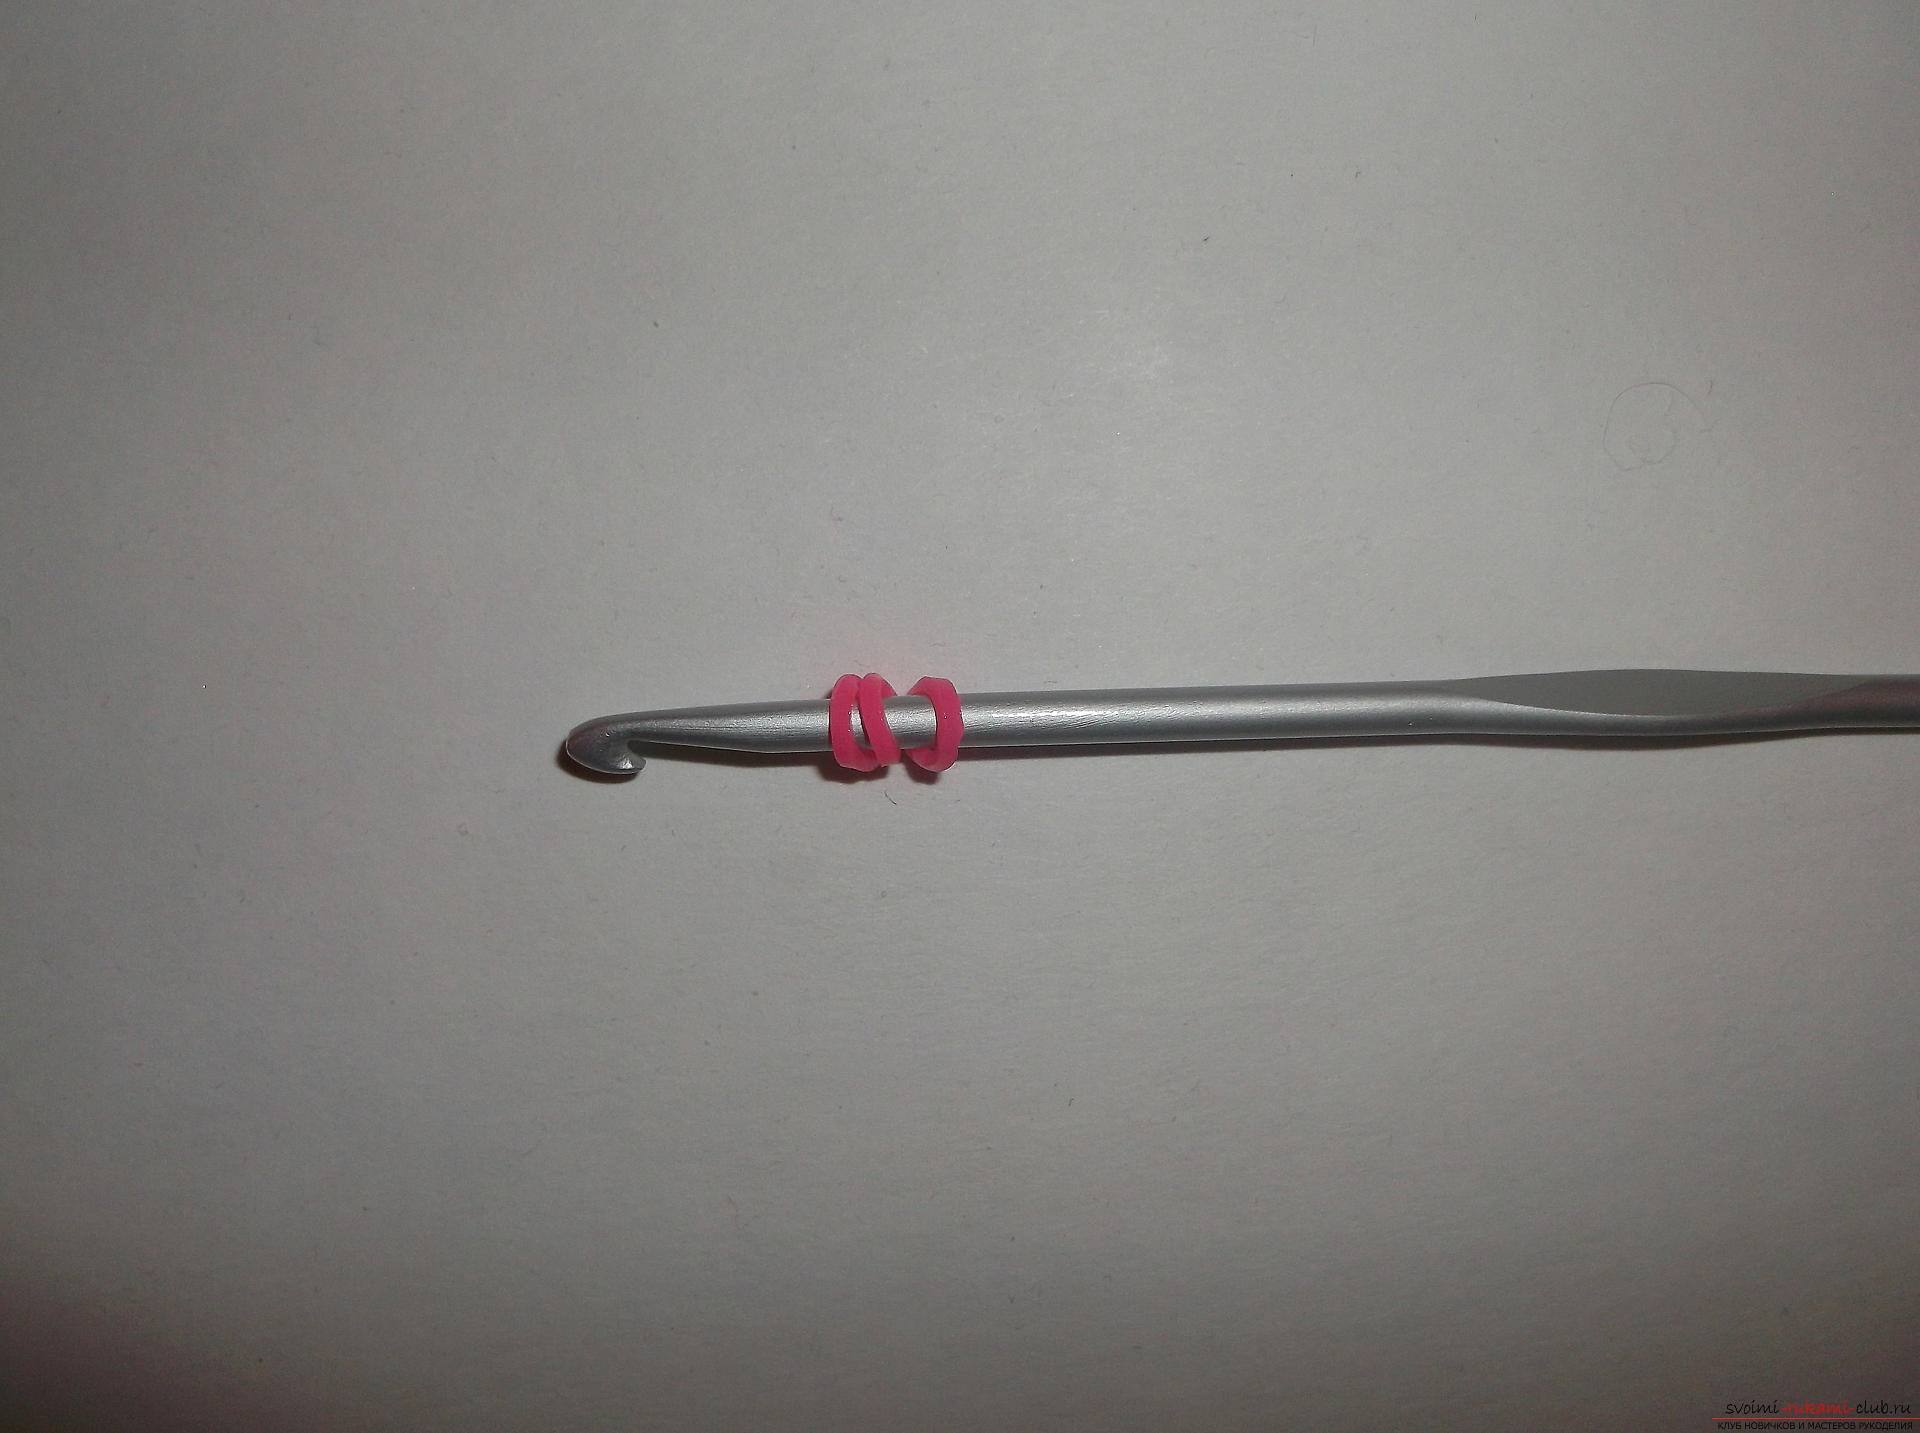 Next, a rubberized pink band is put on the tip of the hook and stretch it all three loops that were on the hook. The second side of the rubber band is put on the hook.
 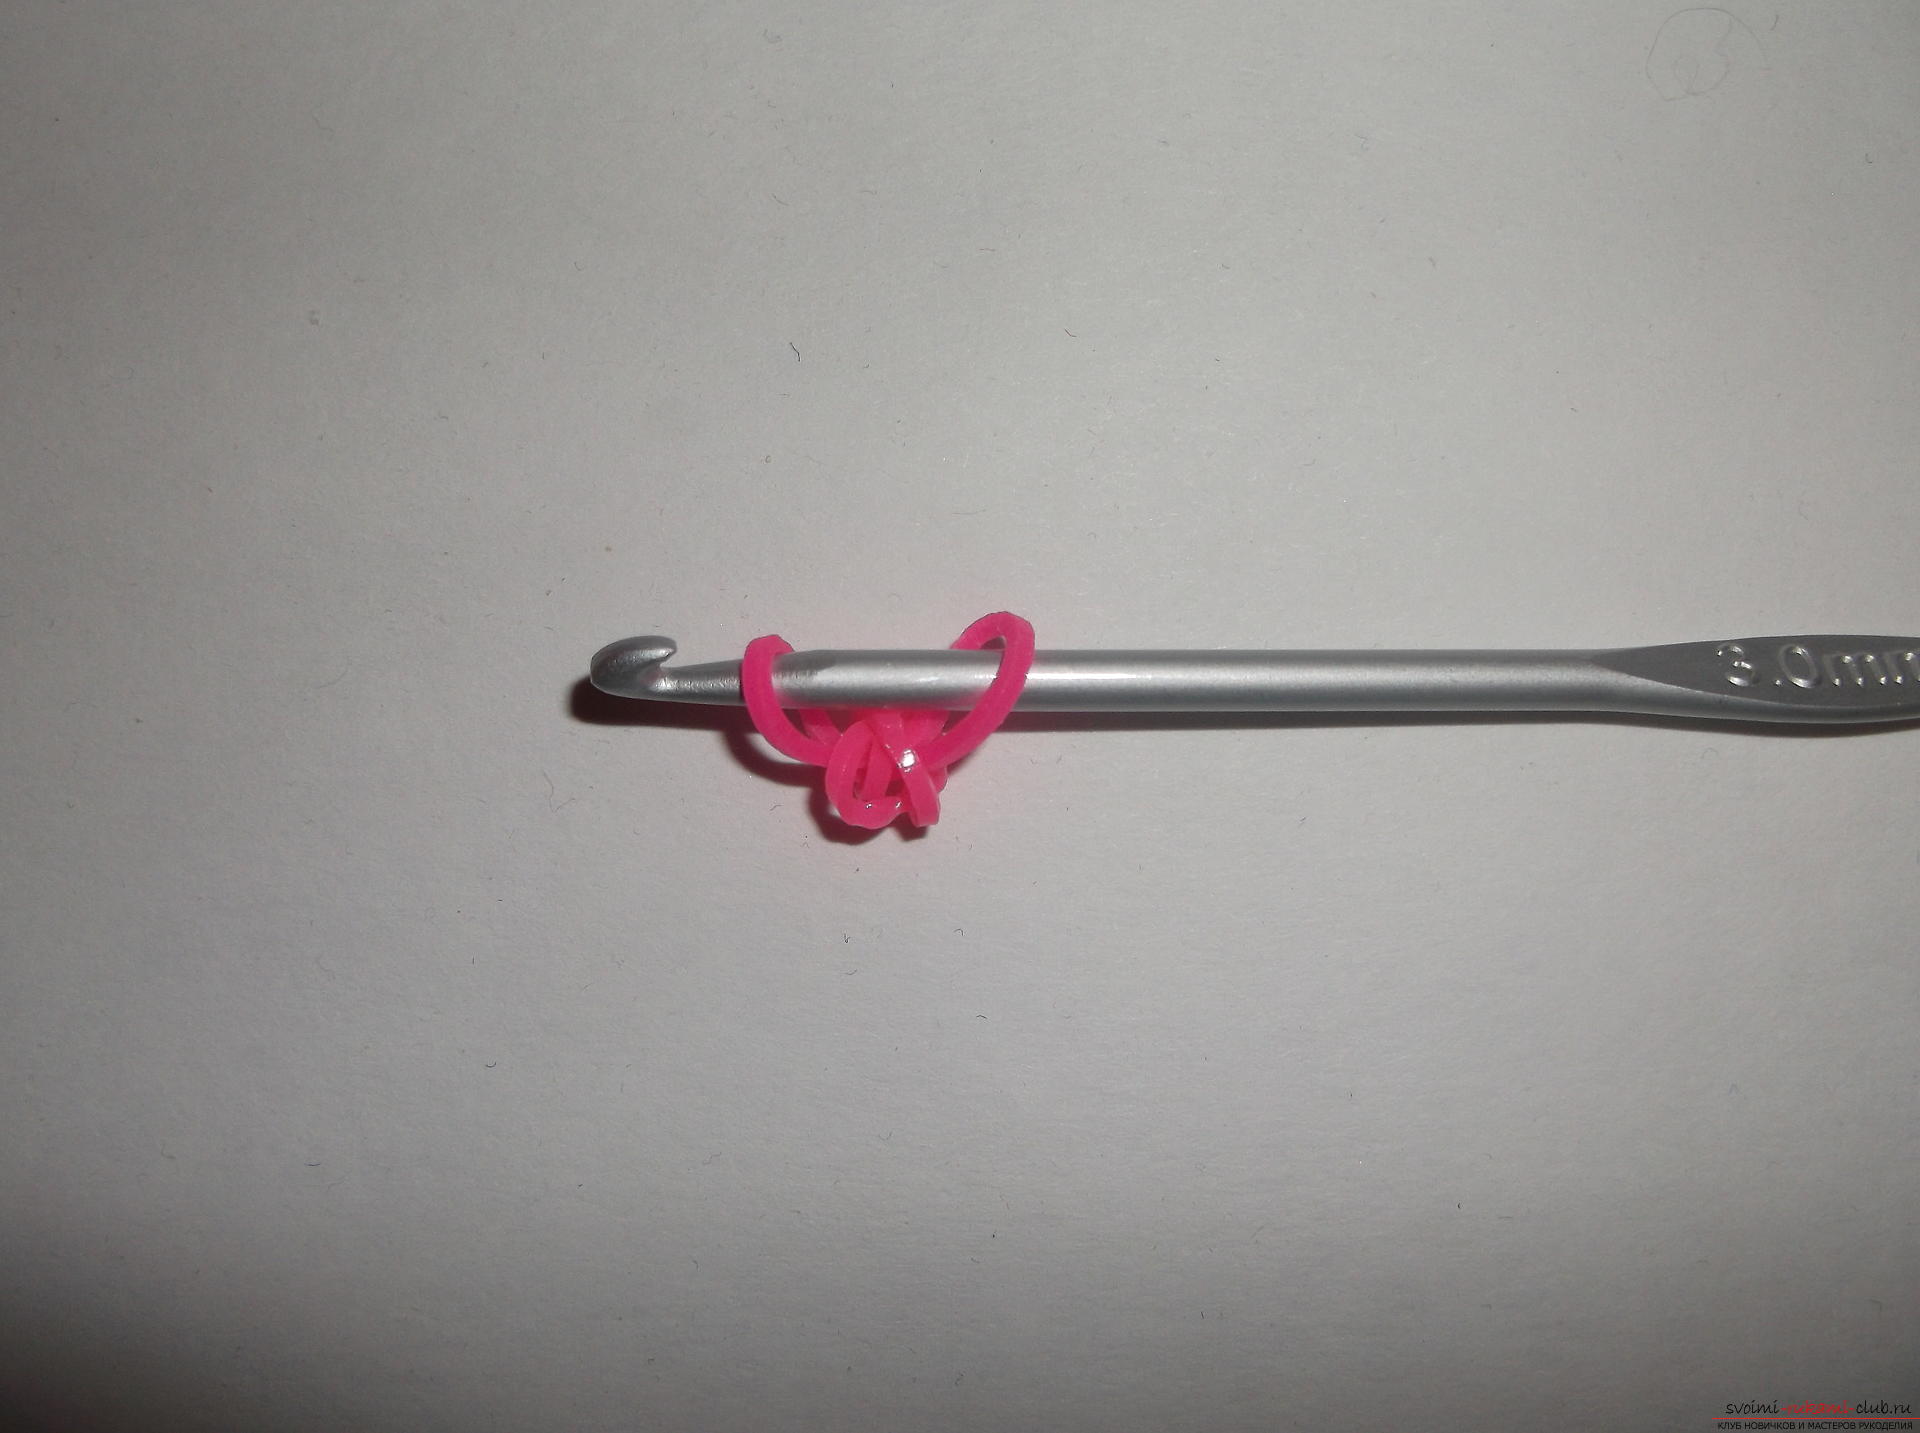 On the hook two loops, drag the first through the second. There is one loop on the hook. Next, we hook the three rings, which formed an elastic band, which we threw three times on the hook at the very beginning.
 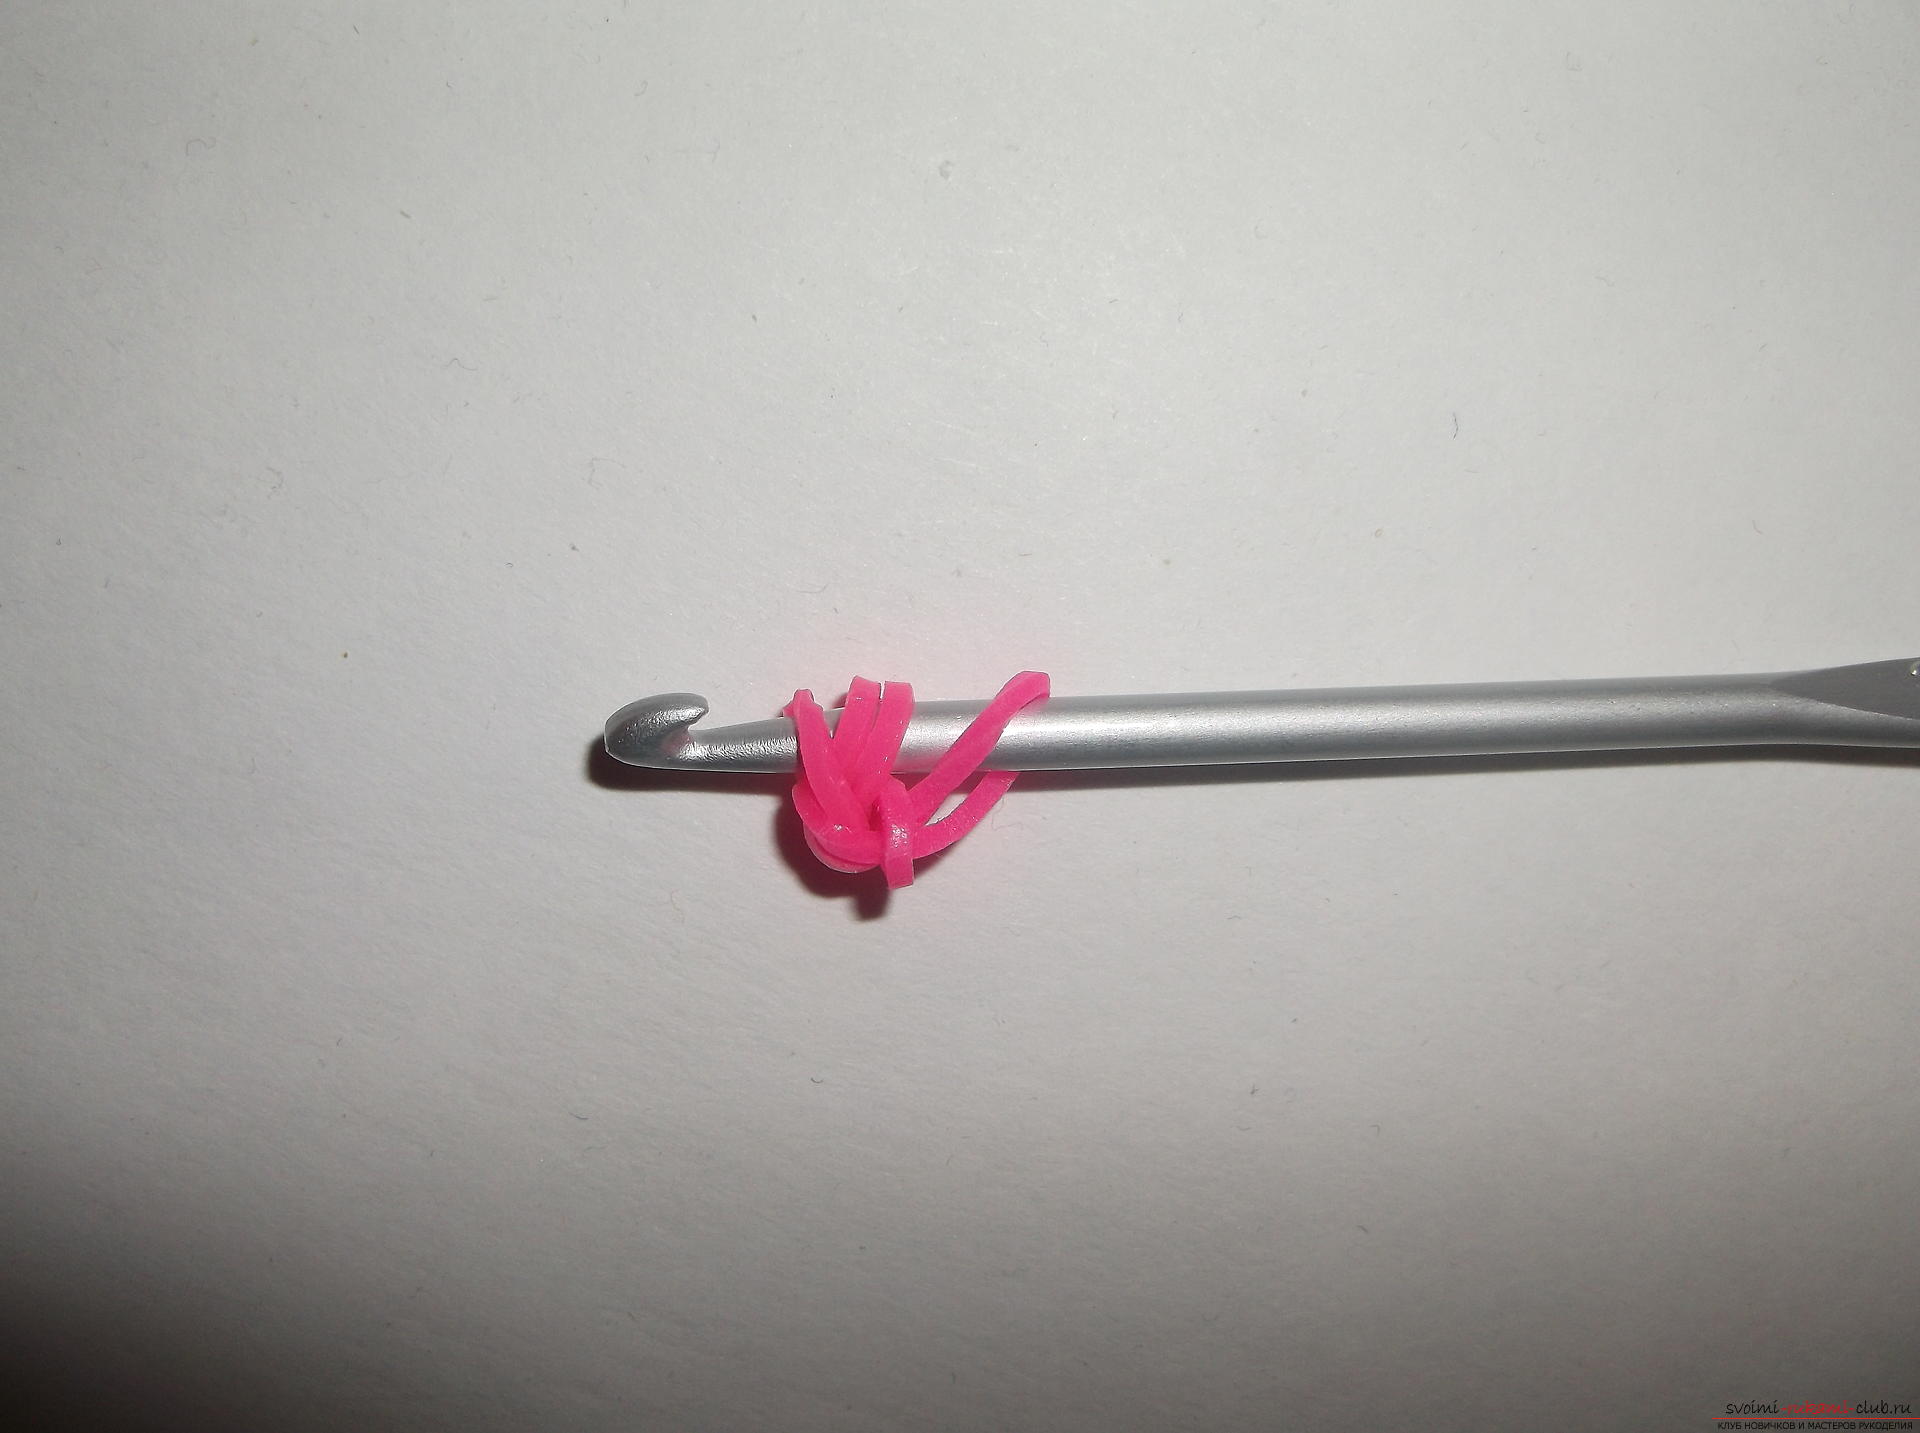 There are four loops on the hook. Eraser saturated pink color hooked to and loop through three loops on the hook. The second side of this rubber band is put on the hook.
  There are three loops on the hook. We lead the first through the second and third. On the hook again one loop. Then again, we put the hook into three rings and in the same way we sew another rubber band of the same color. We need to tie three more gums. There should be a chain of six loops. Each time we start the hook first into three rings, which form an elastic band, thrown three times at the very beginning.
 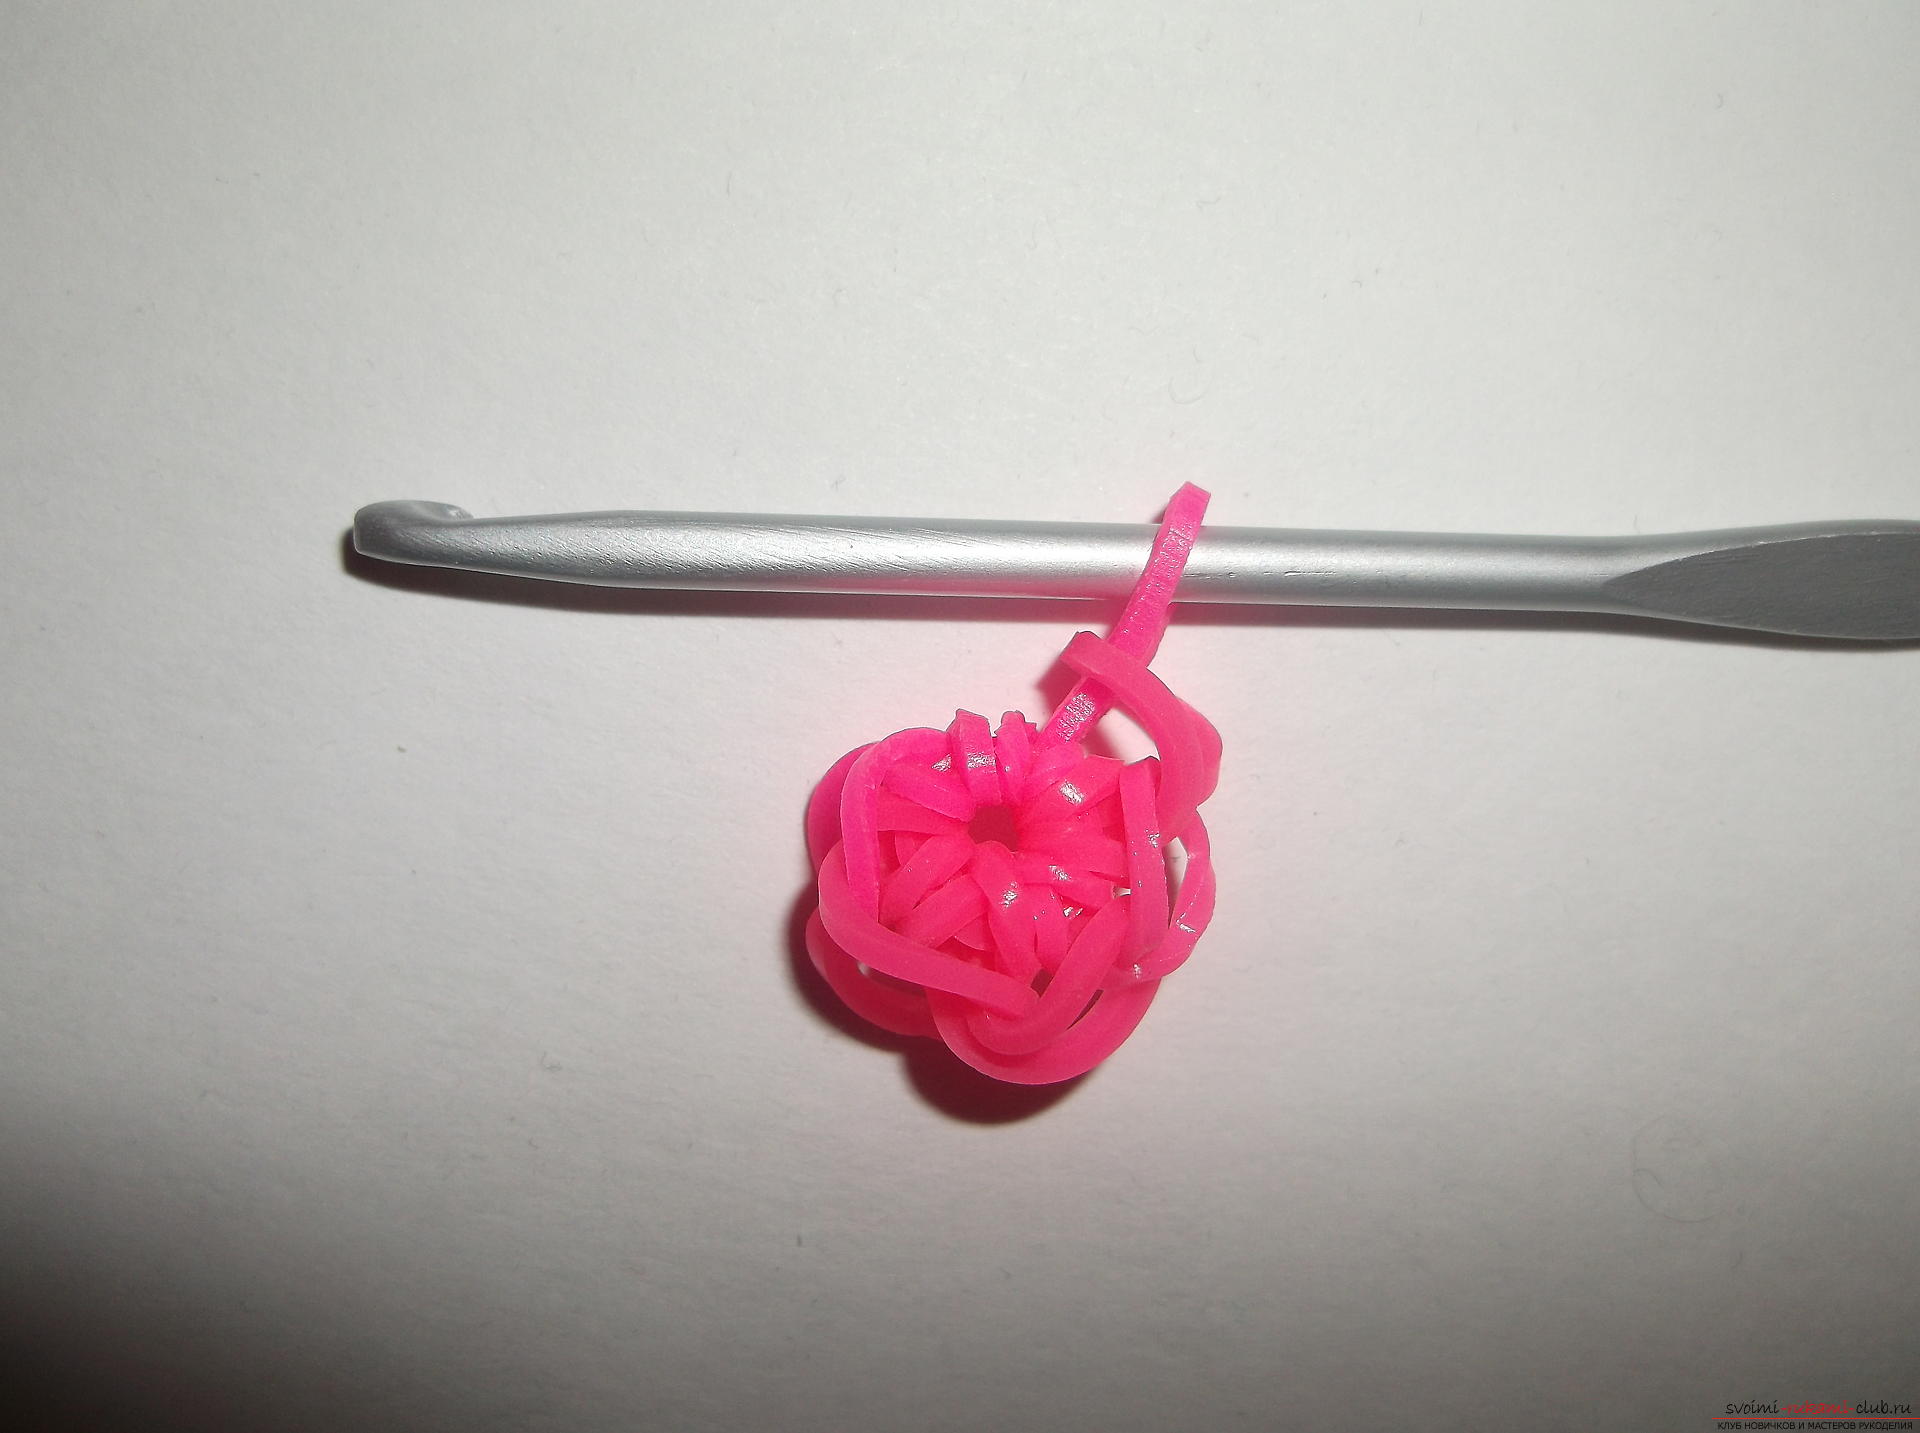 Count the loops from the top. They should be five and one on the hook. Now put on the hinges, which is hooked to the clip. So we will see where the series ends. Now we put the hook under the first two loops. That is, if you look at the weave from above, you can see five loops and one on the hook. They are like a chain of five links. We set the hook under the first link. On the hook we have a loop from the past row and two more loops with weaving. Now we put on the hook a rubber band of pink color and conduct it through the first two loops on the hook. They form the first link of the chain. The second side of the rubber band is put on the hook. There are three loops on the hook, the first through the second and third. We hook the next link and do the same. So we wipe to the end of the series. That is, up to the link on which the clip is worn. Shave one rubber band in each loop (link). When we reach the loop with the clip, we also weave it and change the clip to the loop on the hook. At the end of the weaving, the number of loops should not change, since we did not add or subtract. That is, there should be six. Now we need the gum base color, in this case, pale pink. You can be gray, white or any other. We will weave this series, tying two rubber bands in each loop. That is, at first one, then again we hook in the same loop and we sew another rubber band. The eye is ready. After a little retreat, we will make a nodule on the ear, so that later it would be easier to attach it to the head.
 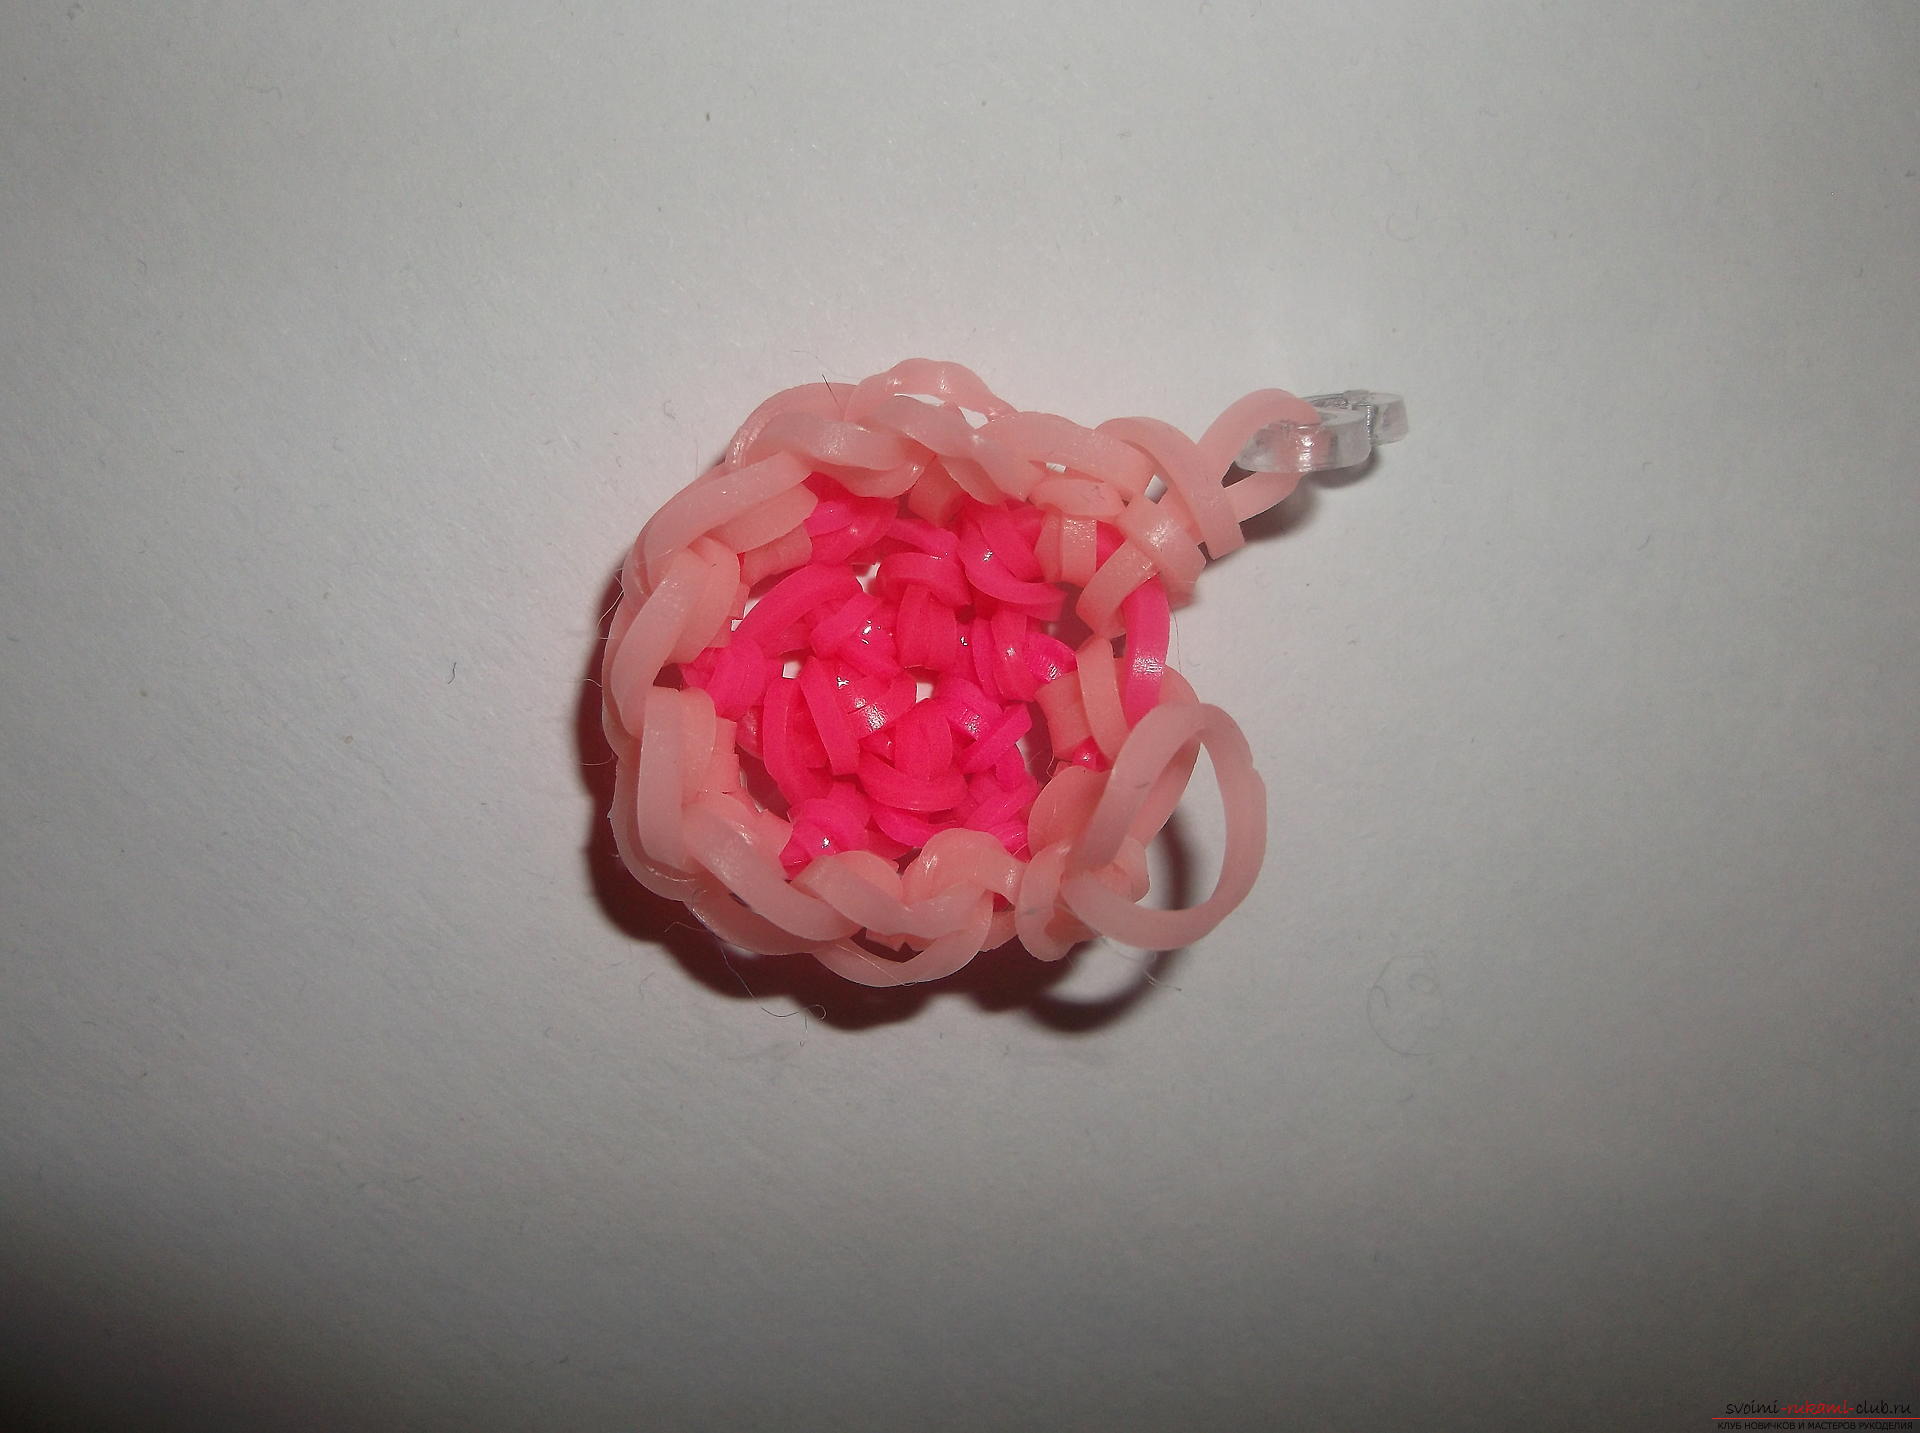 We need two ears, so by the same schemewe'll sew one more thing. Now we'll sew a tail. It is very easy to beat. We twist three times the rubber base color on the hook. Next, we take two gum base colors and conduct them through all the loops on the hook. We put the second side on the hook. We take two more gums just now full of pink color and put on them all the elastic bands from the hook. And so on, until the tail is full. The tail can be made striped, and can be monophonic. If you decide to make it striped, then you just need to alternate the gums in color. At the end we weave one gum and make a knot, passing the first loop on the hook through the second one.
  We pass to weaving the muzzle. The mouse will be solid. Again, dial the ring Lumigurumi from the gum base color. Now we will only use this color. The first row of the plait, just like the ears did, only six gum weeds, but only five. Do not forget at the end of each row to change the clip on the elastic band that is on the hook. So, we have five loops on the hook, we only wove one row. The second row will be slightly different from the weaving of the ear. We put the clip on the loop, which is on the hook, and continue the weaving. Through the first loop we weave one rubber of the primary color, passing it through all the loops on the hook, the second side is put on the hook. There are two loops on the hook, we conduct the first through the second loop. There is one loop on the hook. We hook again in the same first loop and plait in the usual way. And through the second loop and the following, except the last, we weave one rubber band. In the last, in the fifth, we will also weave two gums. That is, at the end of the weaving we will have six loops and one on the hook, in total seven loops. We change the clip to the loop, which is put on the hook. The third row: in the first loop we weave two gums, that is, at first one, then we put the hook into the same loop and we weave another rubber band. In the next two loops we will weave one rubber band through each loop. The next loop again two gum, and the next two again one by one. That is, the plait according to scheme 2, 1, 1 and so on. At the end of the series, ten loops are obtained. Again, we put the clip on the loop, which is put on the hook. Fourth row: plait in the same way, but according to scheme 2, 1, 2, 1 and so on. That is, through the first loop of the rubbed gum two times, through the second one, and through the third again two, through the fourth one - one. We weave to the end of the row and change the clip. In this row, fifteen loops were obtained. The fifth row: a plait, as usual under the scheme 1, 1, 1. That is, through each loop of the plait one rubber band. In this series, the number of loops does not change. The sixth row: we increase the number of loops according to the scheme 1, 1, 2. That is, at the end of the series, we have twenty loops. At this stage, we will make eye sights, because later it will be more difficult to do this. Determine the place under the eye. We hook in any two loops, we take a rubber band of black color, we catch it with a hook and conduct it through the rubber bands on the hook. We put the second side on the hook. We loop through the second loop. Remove the hook from the hinges. We start the hook from the inside of the weave and grab the black loop, hold it inside and fix it there, tying it into a knot. In the same way do the second eye.
 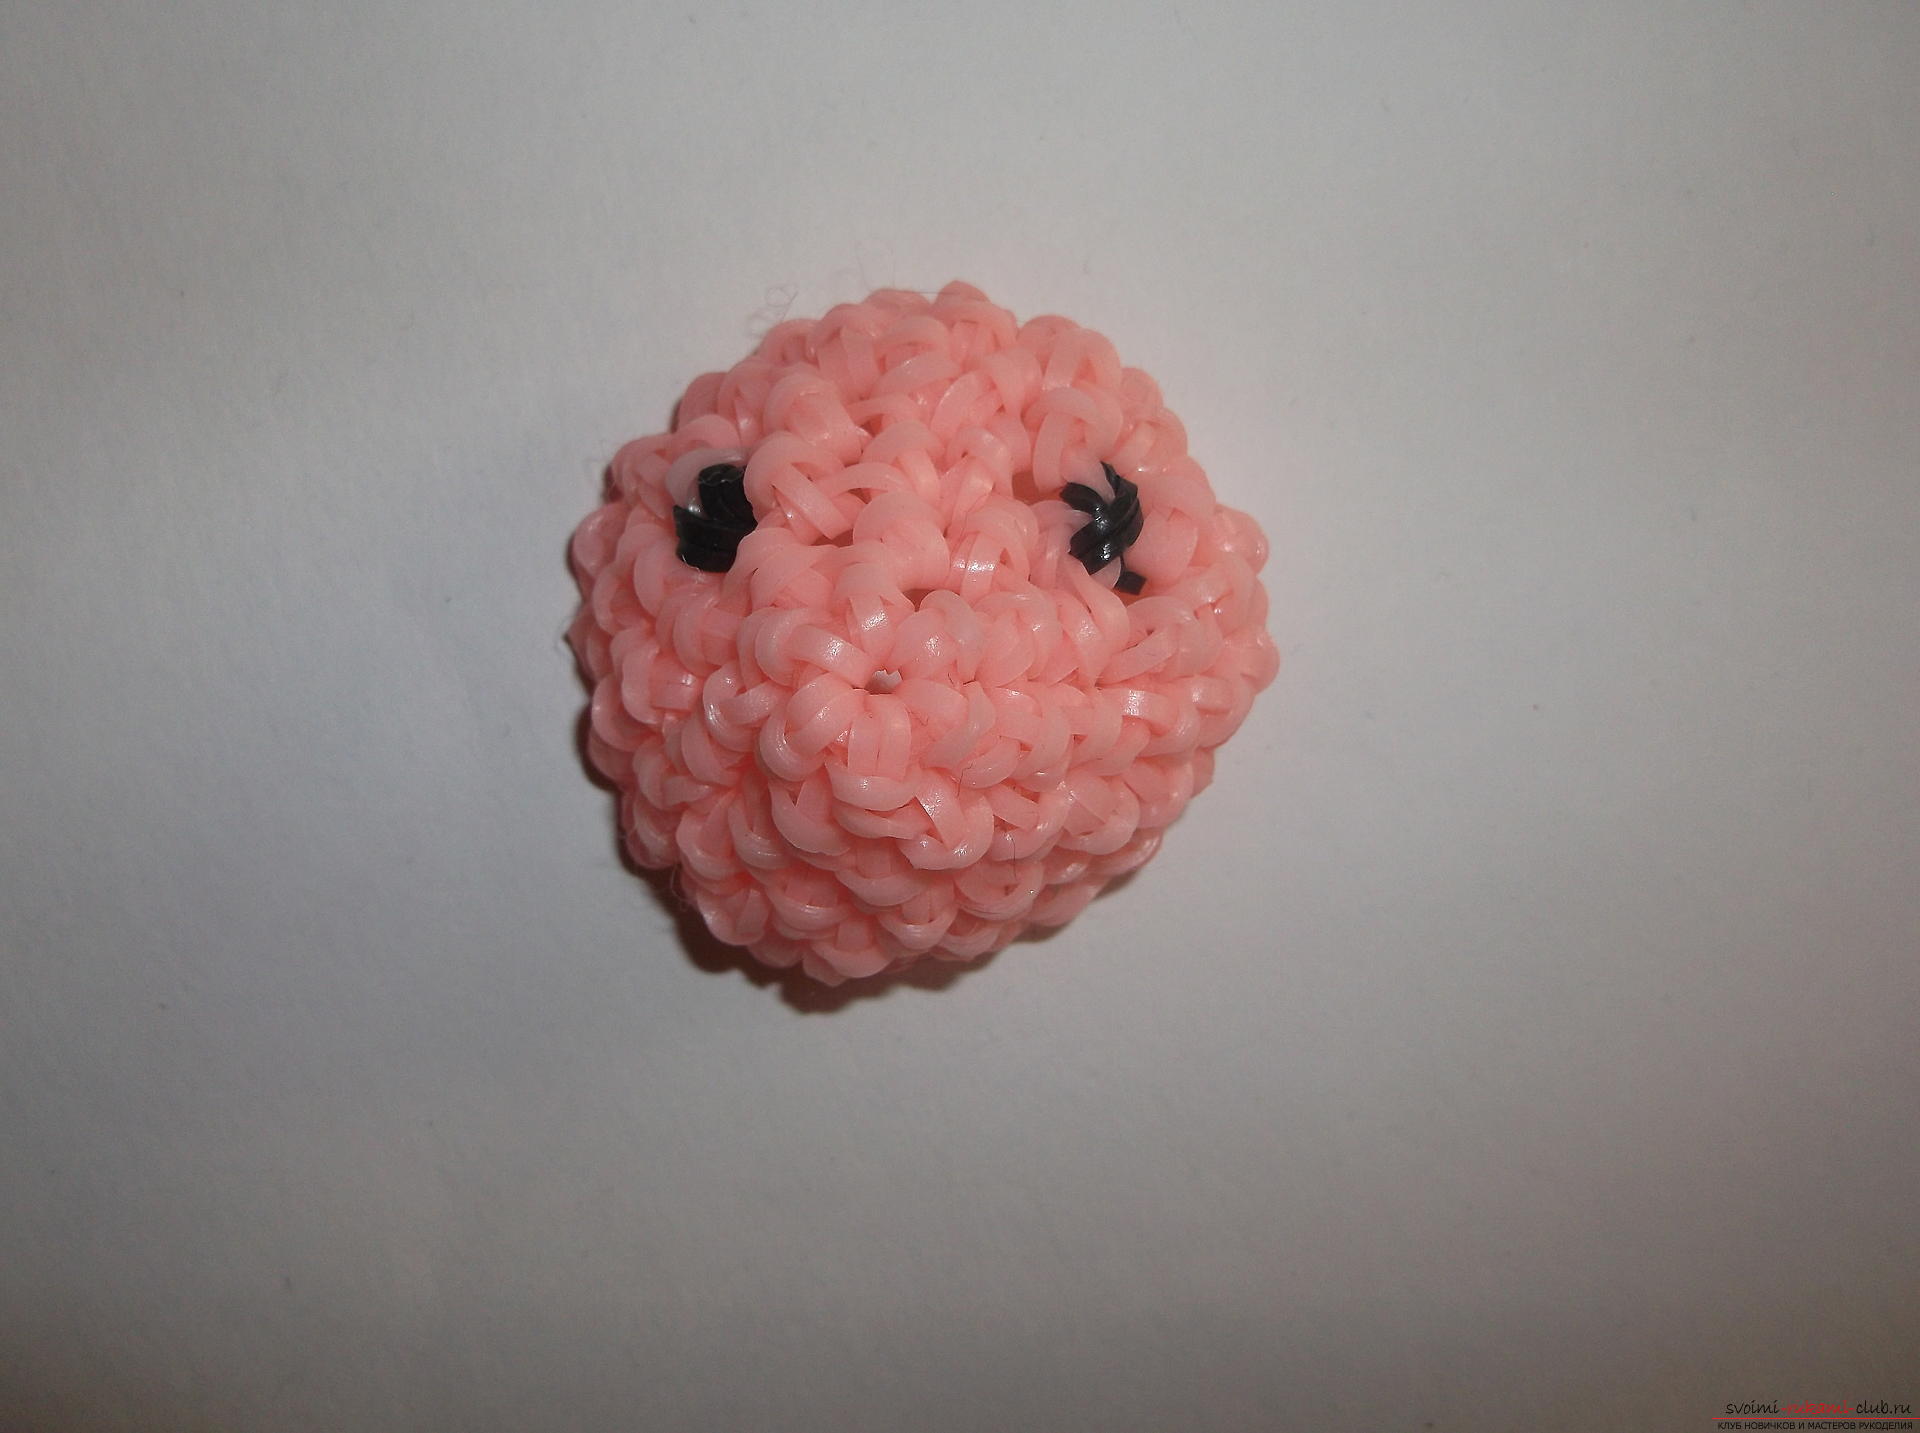 Let's make a spout. We pass the hook through the very first ring in the weaving. We put on the hook three pink bands on the outside and tighten them inside the weave. We leave these elastic bands on the hook, we hook the hook from the inside to the loop above, grab the second part of the rubber bands and put them inside. The hook is inside and has six pink loops on it. We lead them through one rubber band of the primary color. We make a knot.
 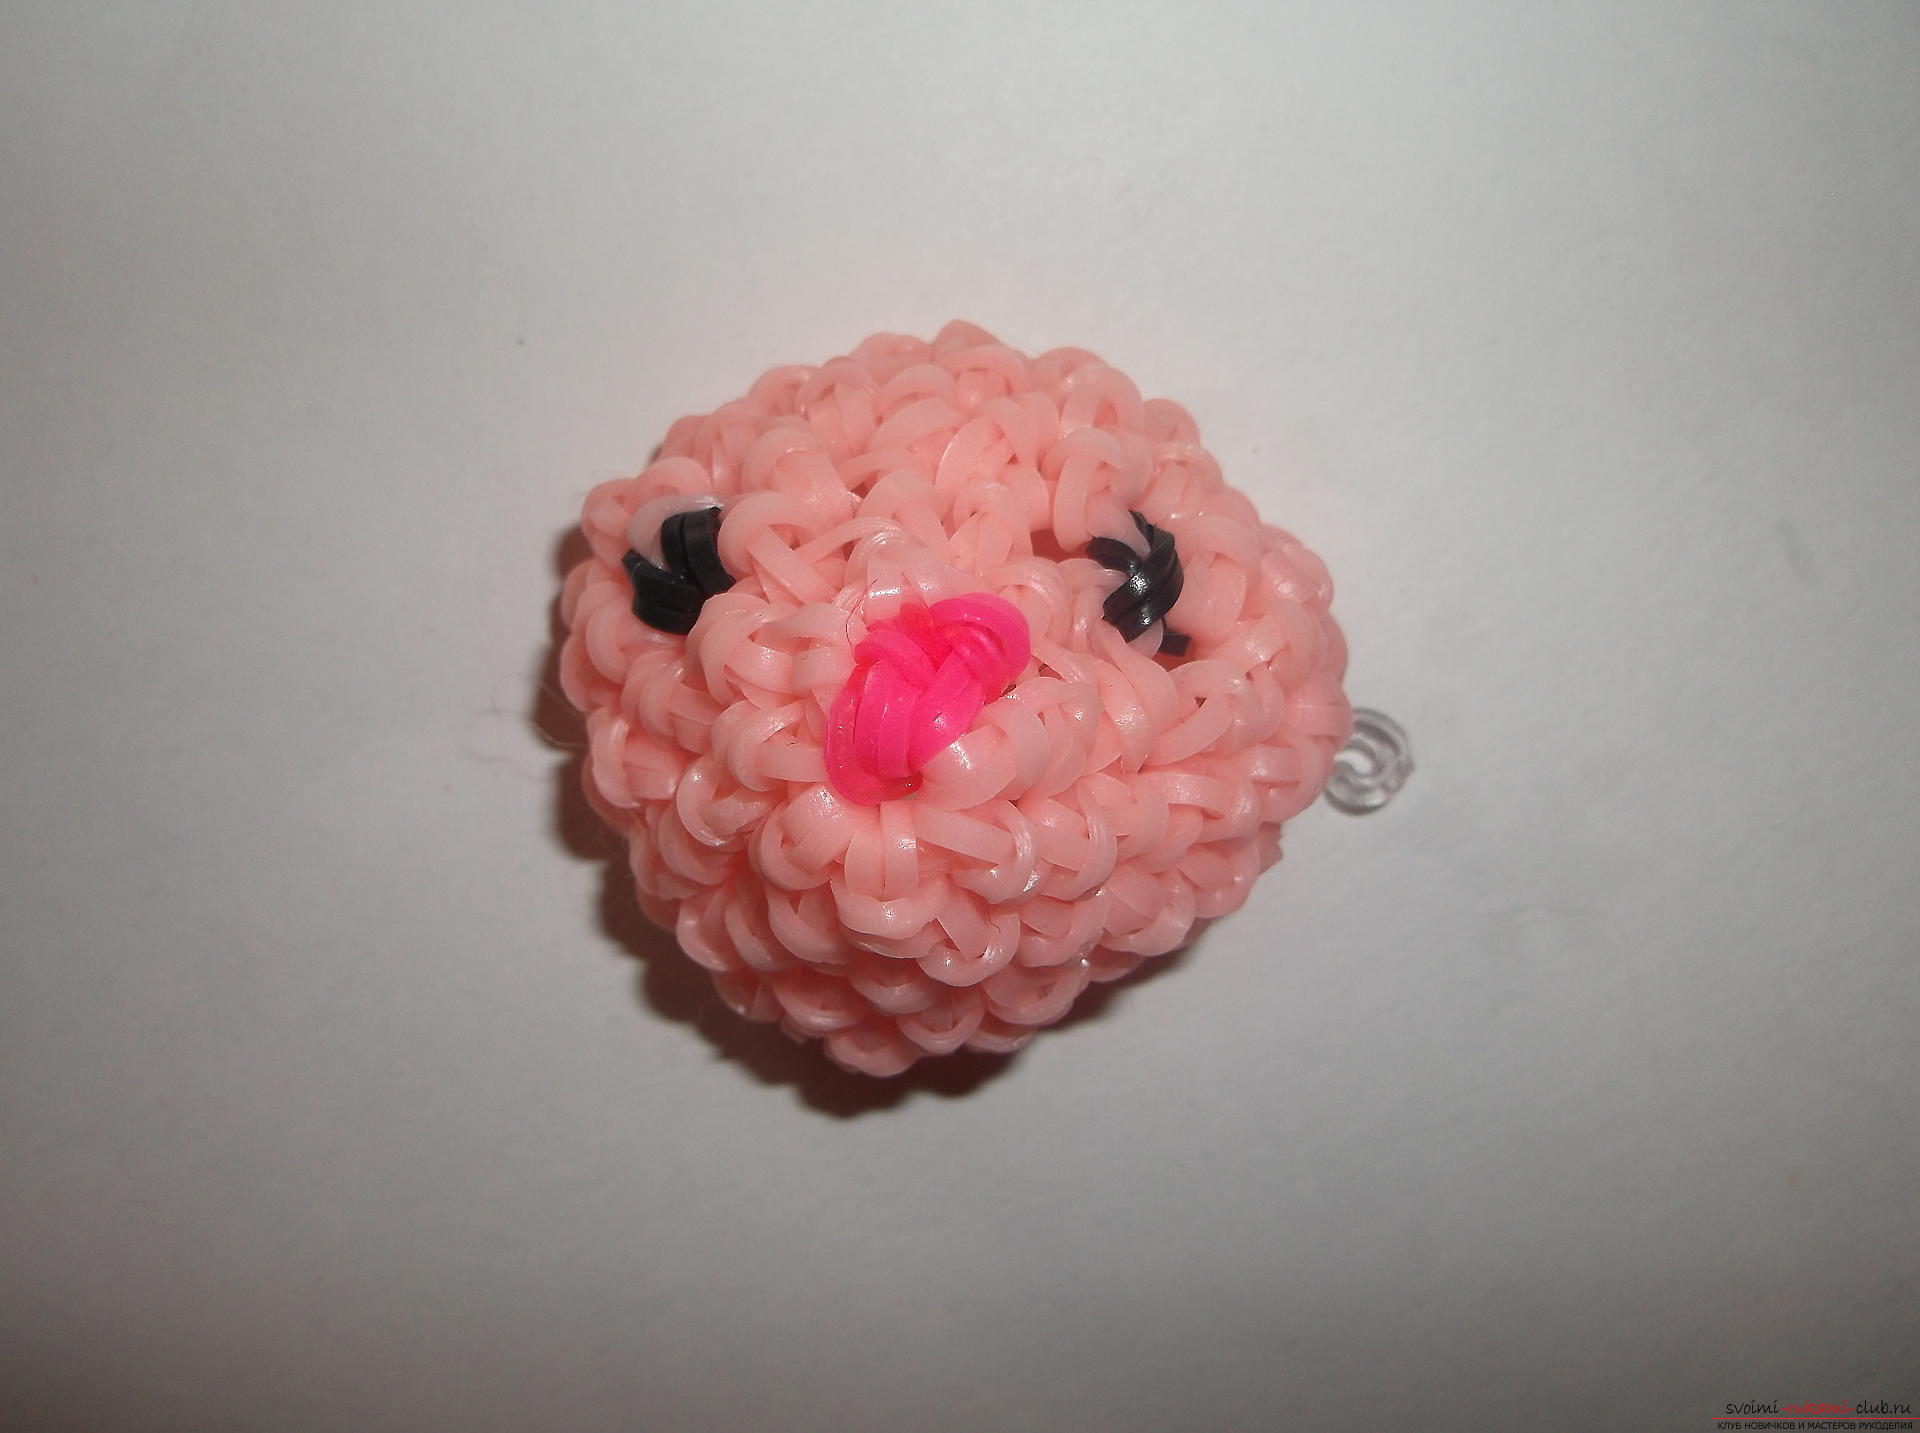 We return to the weave. The seventh row: a plait according to scheme 1, 1, 1, 2. At the end we get twenty-five loops. Eighth row: we begin to reduce. In the first three loops we sew one elastic band. Next, pass the hook into the fourth loop and, without tying anything, grab a fifth loop. And now we rub one rubber band through these two loops on the hook in the usual way. The next three loops are a sham on one rubber band. Then again, we rub one elastic band, capturing the two loops together. So to the end of the series. That is, scheme 1, 1, 1, decrease. From the ninth to the fourteenth row of the plait according to the usual pattern: 1, 1, 1. That is, we do not subtract or add. Fifteenth row: we will diminish. Shamrock according to scheme 1, 1, decrease. Loss is done, as in the eighth row, capturing two loops in a row. At the end of each row, do not forget to change the clip, so as not to get lost. Sixteenth row: we begin to close the weaving. Scheme 1, decrease, 1, decrease. So to the end of the series.
 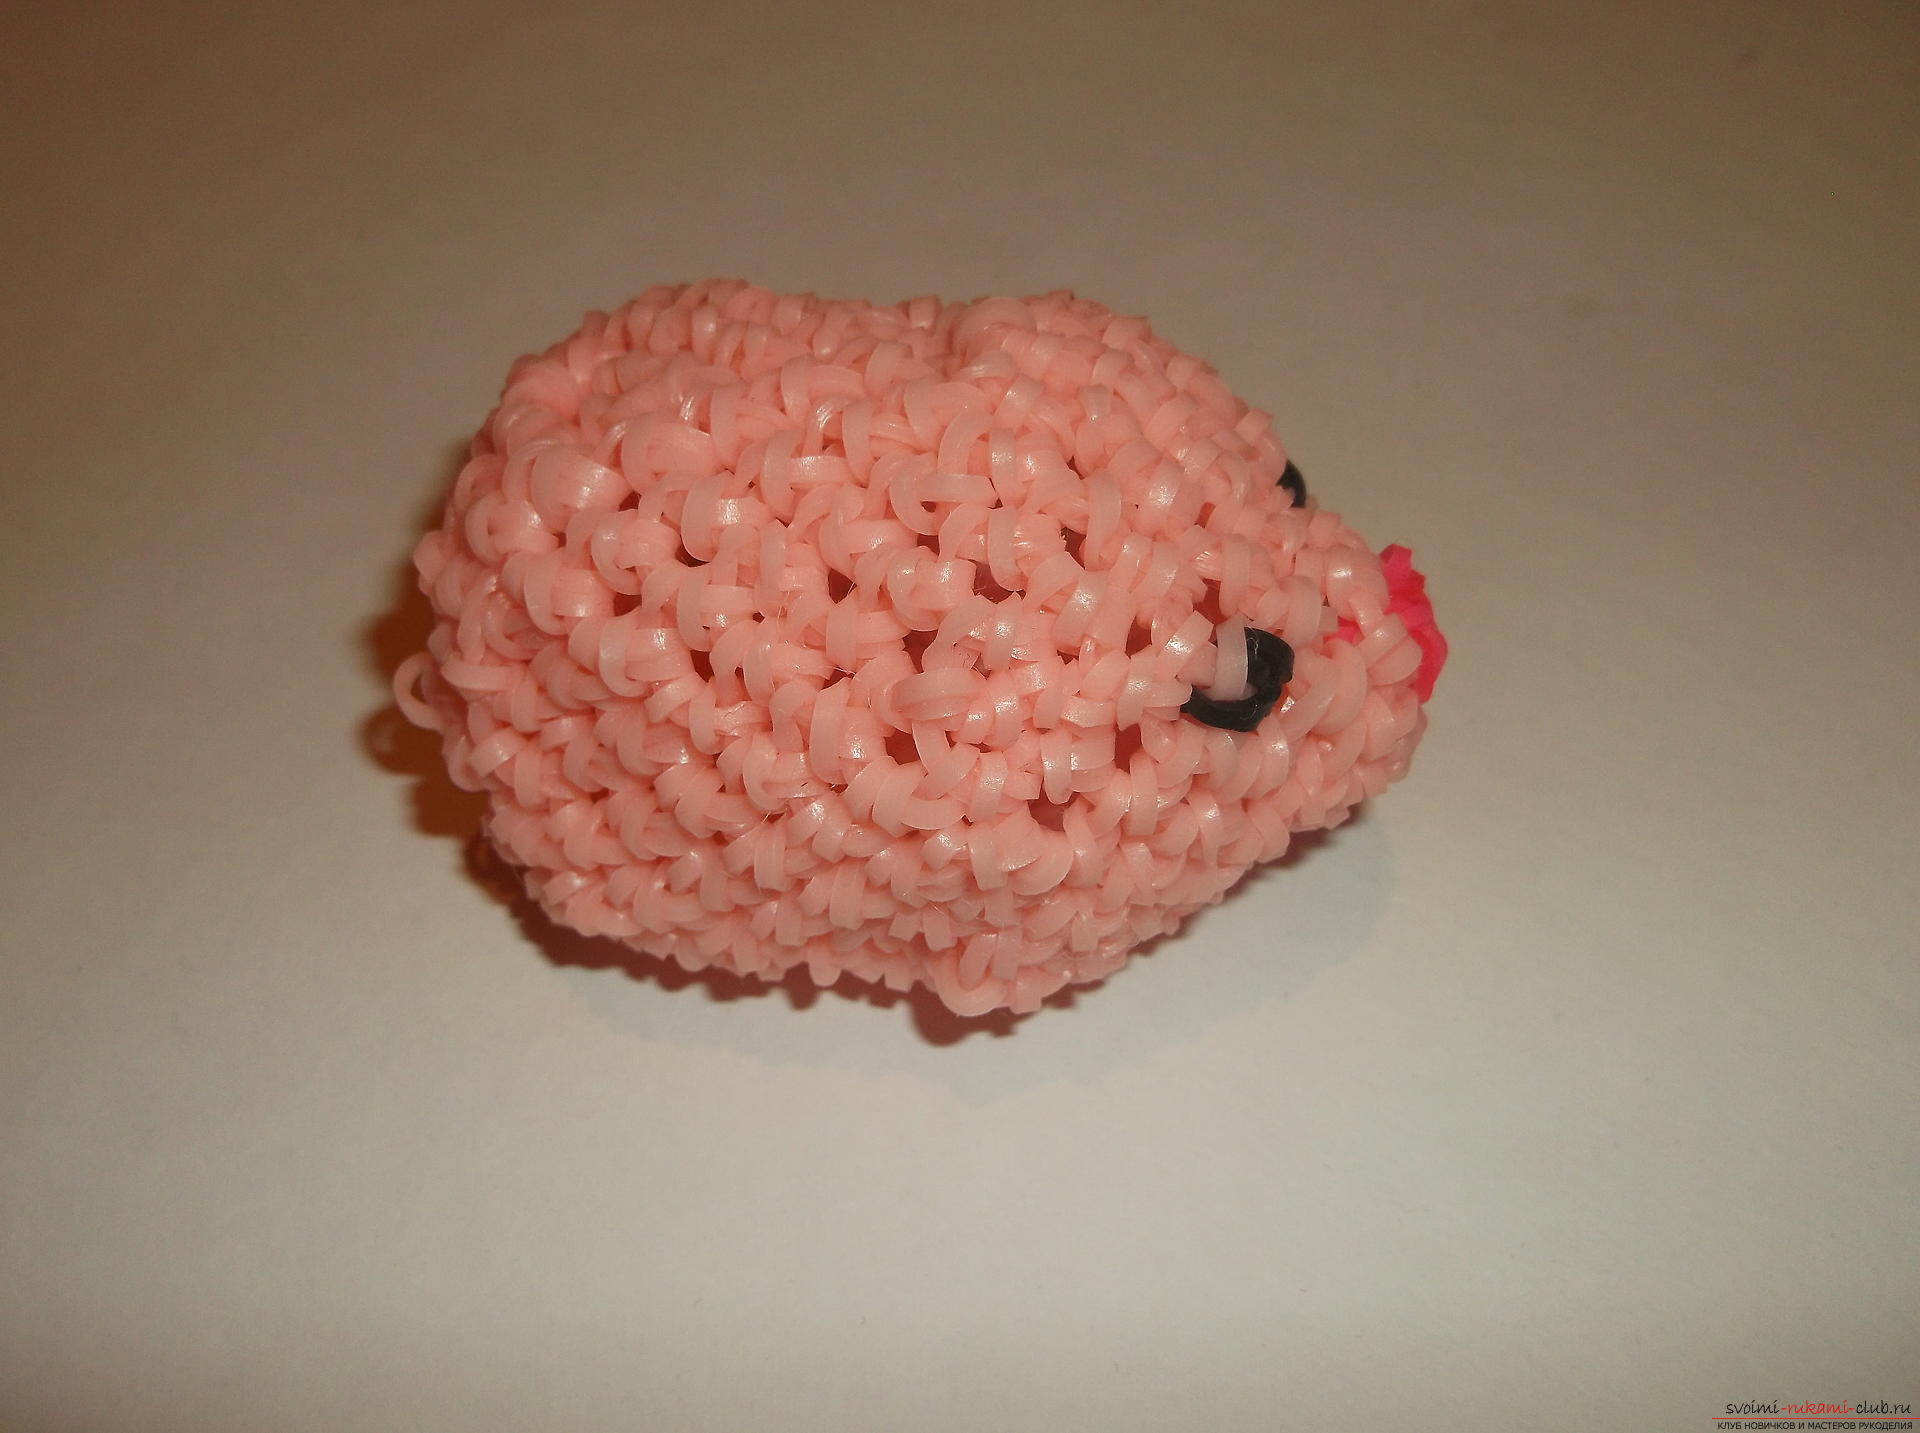 There are ten loops in the row. We'll attach the ears. Determine the place for the ears. Pass the hook from the inside and grab one loop of two long ones. Pull it inside. Further, leaving this loop on the hook, we step aside and again hook the hook from the inside and grab another loop and stretch it inward. We have a hook inside the weave and two loops on it. We stretch the first through the second and tighten the bundle. The same with the second ear. Now attach the tail. To do this, we determine the place on the body of the mouse and start the hook from the inside. Fit a loop on the tail and drag it inside. We hook under two loops and drag through them one rubber band of the primary color, the second side is put on the hook. On the hook, three loops, the first through the second and third, you get a knot. We tighten it.
 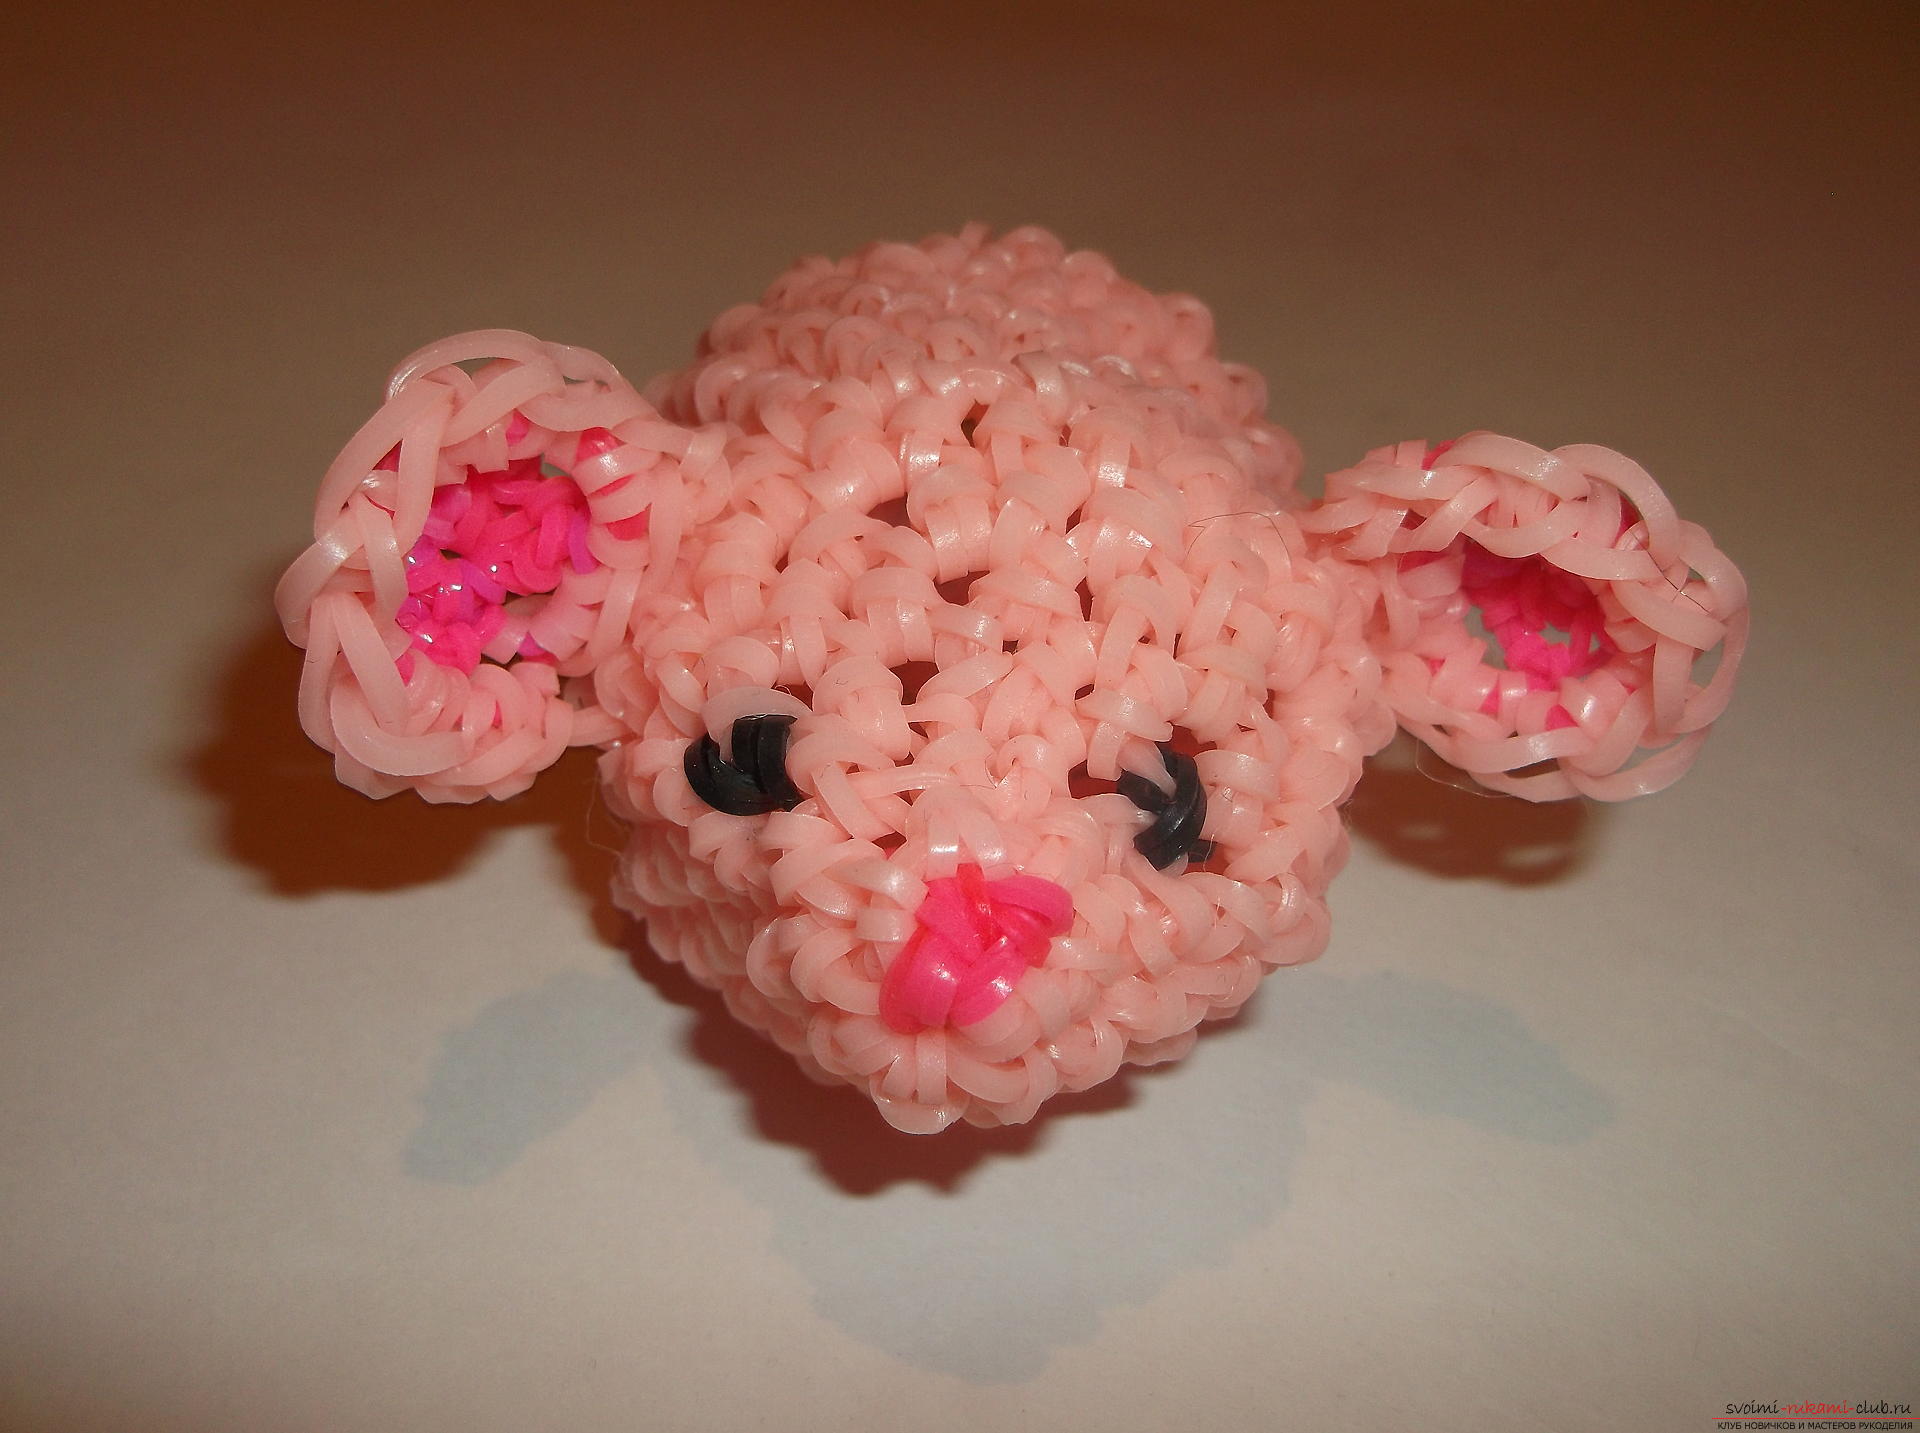 Next, fill the mouse with a filler. We had to close the weaving. Seventeenth row: plait every two loops together until the weaving closes. From the last gum we make a loop, tighten it and hide it in the body of the mouse. Our toy for the cat is ready!
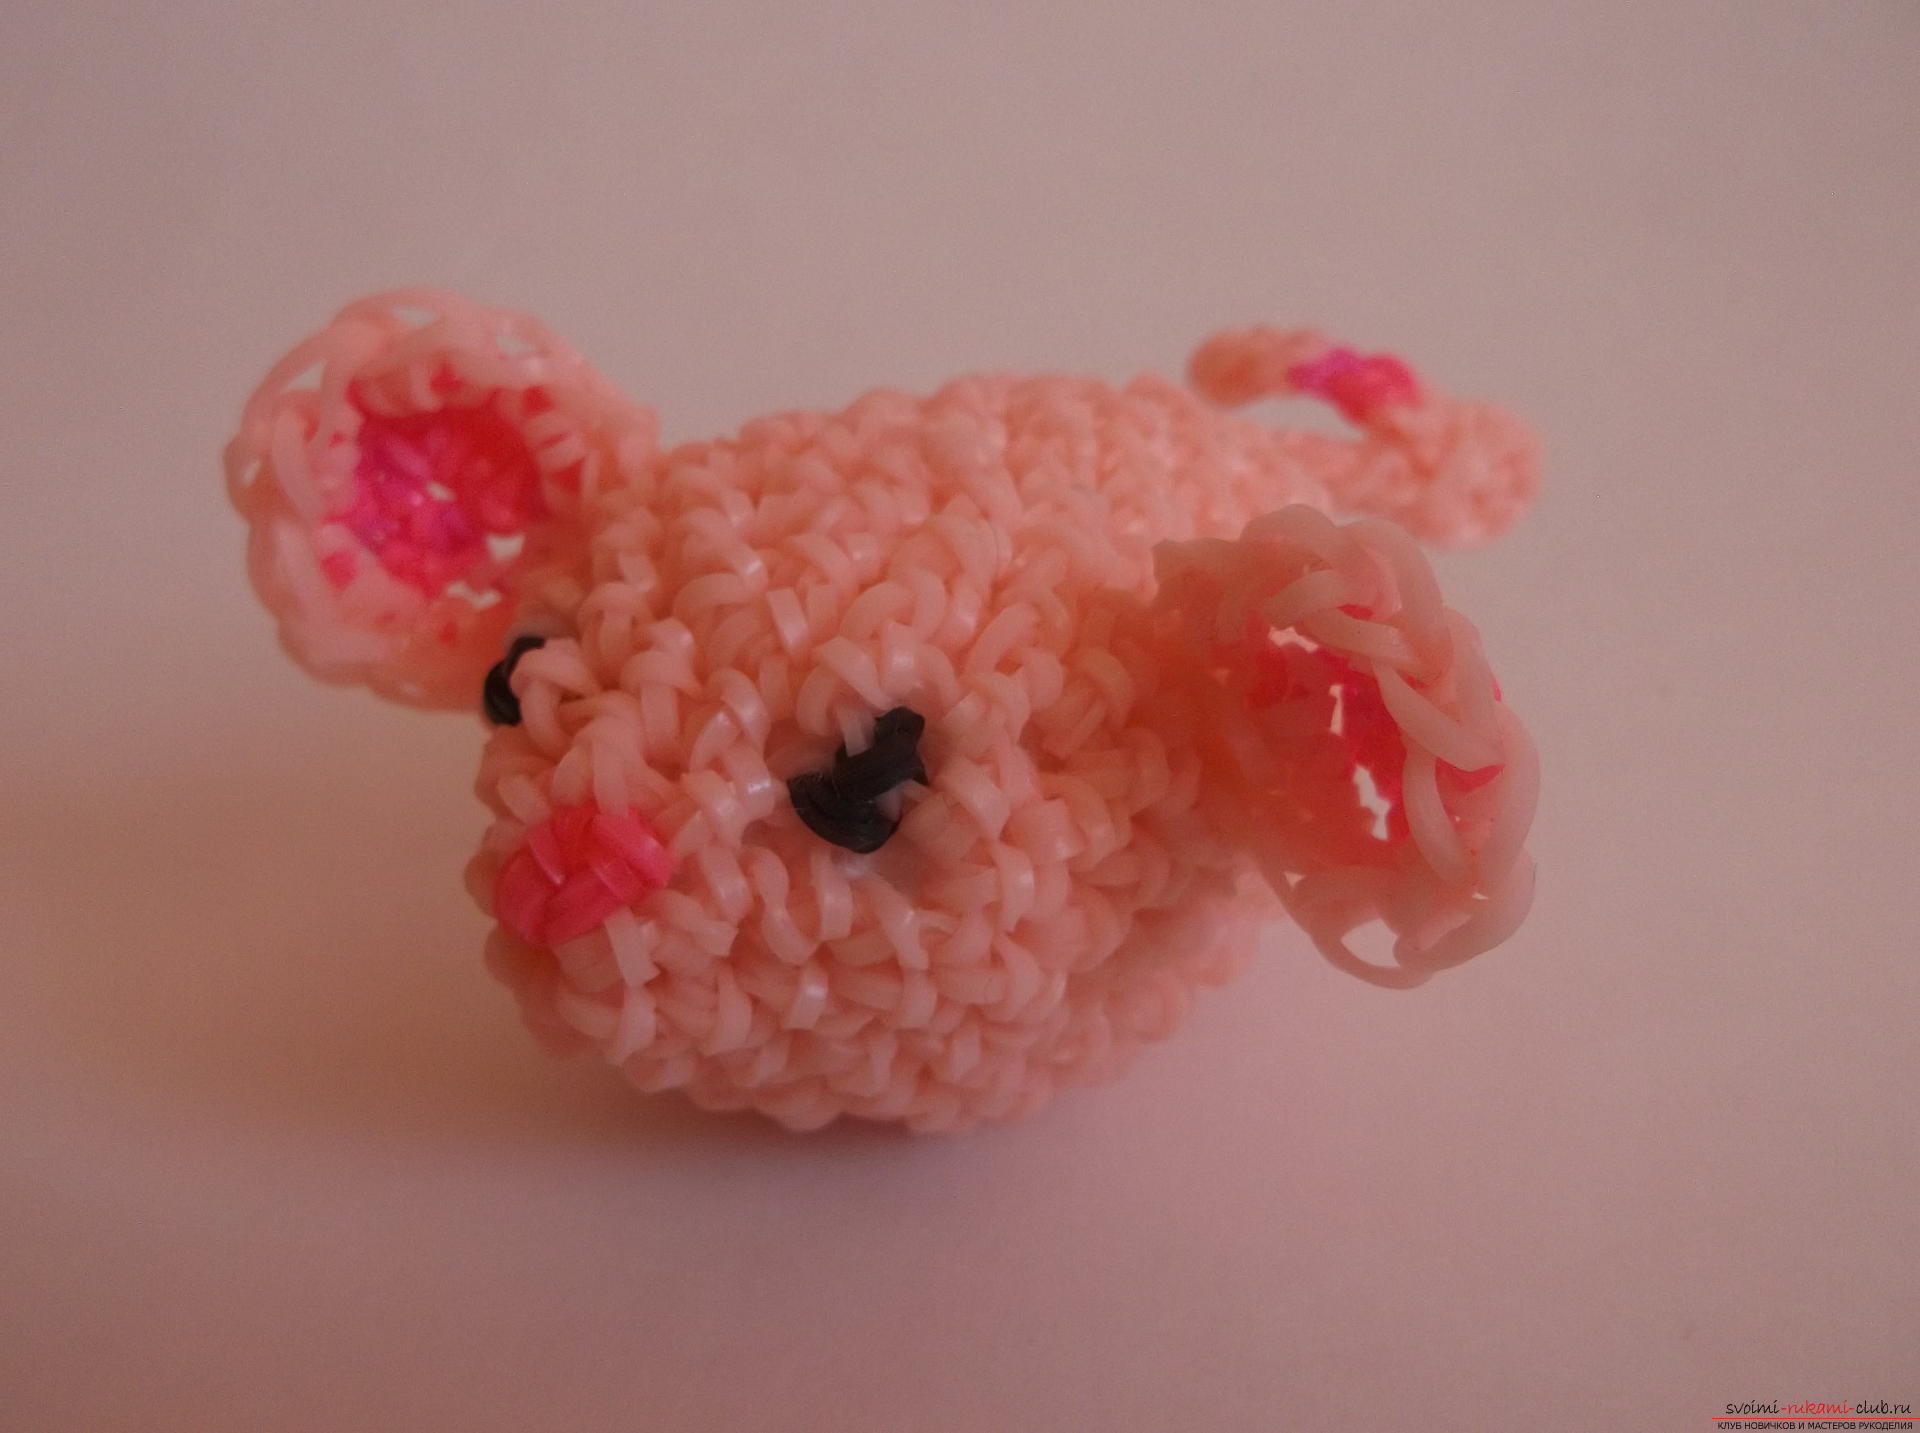
Comments
Related posts:
 How to weave a ball of rubber to decorate New Year's fir, you will learn from our lesson. Detailed description of the process of weaving with step-by-step photos
 How to weave a small snowman from the rubber for the New Year holidays? Detailed description of the stages of work with step-by-step photos
 How can we weave a small toy "Red-haired girl" out of multicolored rubber bands? Detailed description of the process of weaving, a list of necessary materials and step-by-step photos
 How to weave a funny suvenka from rubber? A lesson on weaving toys made from rubber with detailed recommendations, a description of the stages of work and photos
 How to weave a bracelet made of rubber bands with the inscription "2016"? Lesson on weaving bracelet with step-by-step recommendations and photo