How to properly embroider the first lessons for beginners (video)
Content
- Cross Stitch Technique
- Video: Learning to embroider a cross
- Popular techniques for embroidering paintings
- Video: embroidery on a special machine
- Video: logical and diagonal parking methods
- We sew and unpack
- Video: cross stitch for beginners
After the first works are completed
, You can understand how much you like embroidery. And if this handicraft becomes a full-fledged hobby, it's worth taking care to do everything without making mistakes. After all, retraining is much more difficult. That is why it is very important to understand immediately how to properly embroider a cross. Of course, there is no single answer to this question. However, knowing the different ways of embroidery and some tricks, you can choose the best option for yourself.


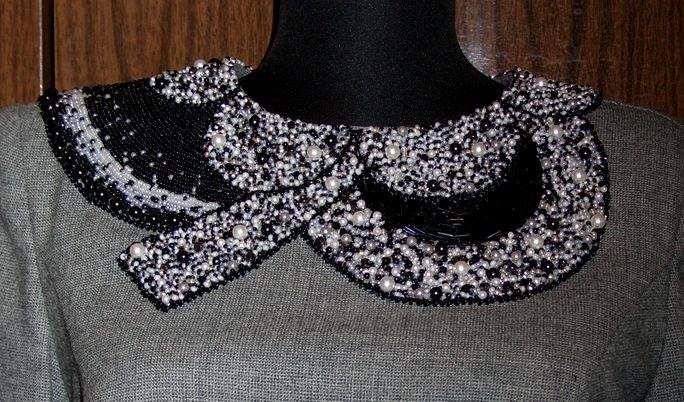
Cross Stitch Technique
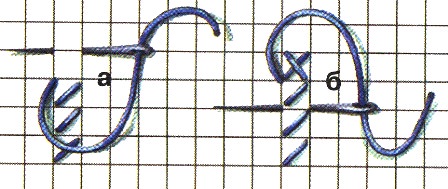
The first and most important rule
Is that it must be performed in oneDirection. In practice, this means that all the lower stitches have a slant to the left, and the upper ones - to the right or vice versa. However, even following exactly this rule, you can get untidy embroidery. The question arises why?
It is very important to continue to do all the embroideryIt is monotonous and monotonous. What does it mean? In fact, there are several techniques, how you can embroider a picture - with stitches, lines or fragmentary. On the first you need to sew all the crosses in columns, the second - line by line and the third - one color segment is closed. Have
It happens that they use all 3 options to speed up the work. In no case it can not be done. Based on experience, for embroidering paintings is most suitable fragmentary technique.
Technics of embroidery with a cross in a column (1 variant) 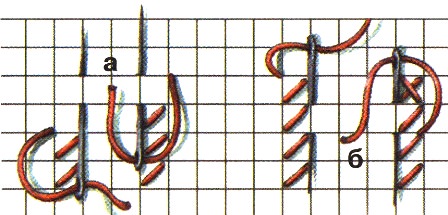
Technics of embroidery with a cross in a column (2 variant) 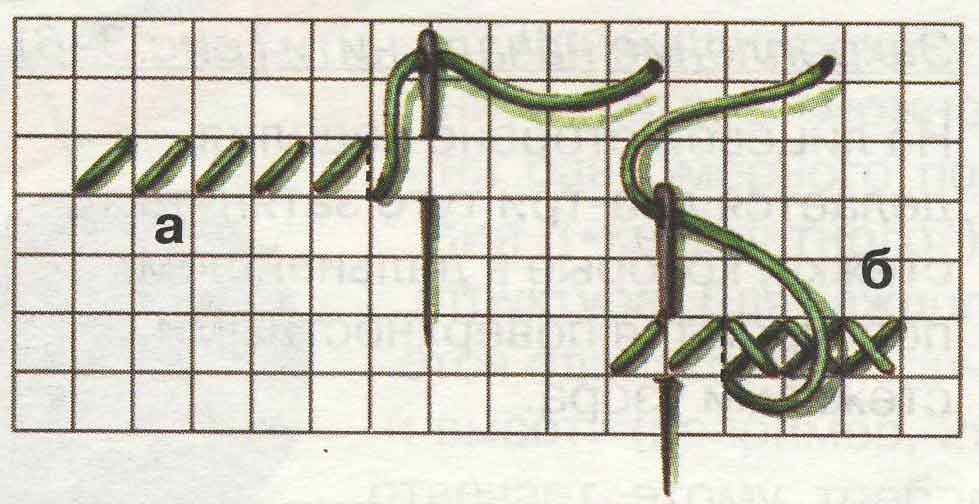
Embroidery technique with a cross (1 option) 
Technics of embroidery cross-stitch (line 2) 
Fixing the thread by the "loop" method Another bigThe error of all beginner embroiderers is a struggle for an ideal underside. Having read about the fact that this is a high-class indicator, the needlewoman starts even ripping off work for the sake of it. The result is a sloppy front. It is important to understand that no one will see the reverse side of the picture and the metric. So, do not focus on this. Over time, if embroidered correctly, the ideal side will appear by itself.
The last misconception of all beginner needlewomen- this is an incorrect fixing of the thread. Sometimes, even after reading about the fact that cross-stitching is performed without a single knot, they are still doing them. Basically for the reason that it is not possible to fix the thread even at the very beginning. If it is not clear even from the video, how it is done, one can act primitively. Just leave the tip of the thread, and then hide it under the embroidered crosses. This method is no worse than the popular "loop".
Video: Learning to embroider a cross
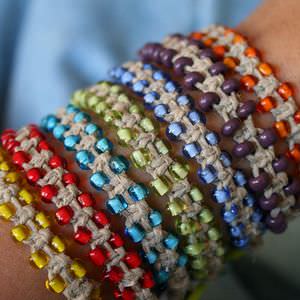
Popular techniques for embroidering paintings
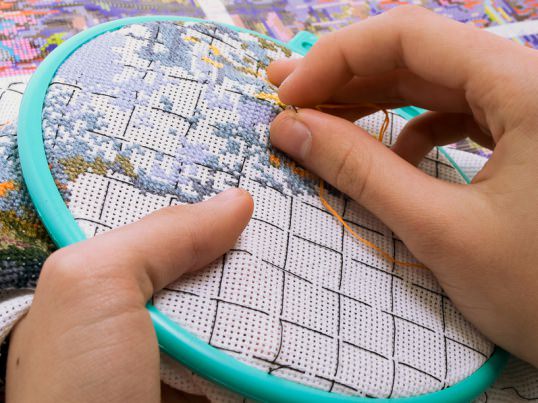
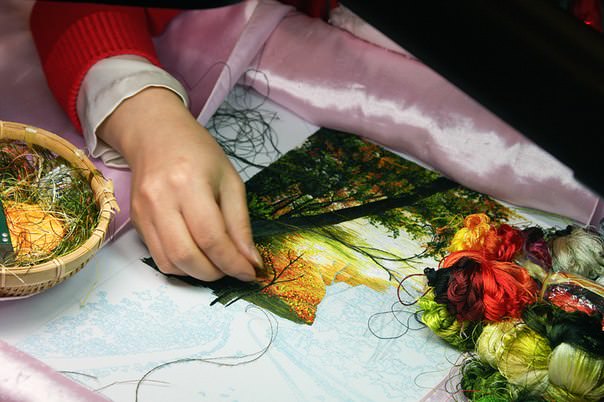
Unlike small works, where in factYou can embroider anything as you like, big pictures require a completely different approach. Therefore, it is worthwhile to learn other techniques that allow you to do this easily and quickly. First of all, we are talking about embroidery with both hands and "parking". For beginner needlewomen, they seem complicated. But it is necessary to show a little patience, and in 2-3 days it will become clear what they are so attractive.
Embroidery with two hands Unfortunately, replyUniquely on the question of how to properly embroider with two hands, it is impossible. Each needlewoman chooses the most convenient way for herself. True, there are still a few basic rules. However, there is no need to take lessons on such embroidery as a guide to action.
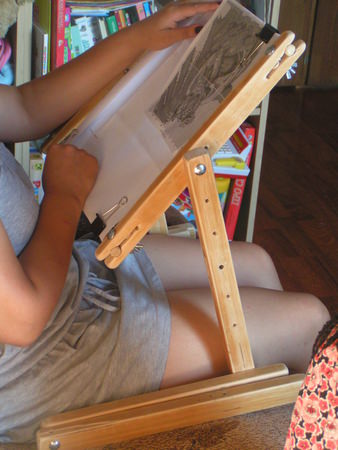
First, it is necessary to provide free access toThe wrong side and release hands. That is, you need to fix the future picture on a special embroidery machine. If the purchase of such is only in the plans, you can, for example, push a small table and place the embroidery, having rested one edge on it, and the second - on your knees. But this option should be considered only as a temporary one.
Secondly, determine which hand will be on top, andWhat - from below. Each needlewoman has it individually. It is necessary to try both options to understand how it is more convenient to embroider. However, choosing one method, it is no longer necessary to change it. Also, during the embroidery it is very important not to hold your hands on the weight and as much as possible to press the elbows to your sides.
So, as in practice this technique looks likeEmbroidery? One hand should be placed from below, and the other from above. Perpendicular to the canvas, insert the needle with the thread and take it from the bottom with the second hand. Next, pull the entire thread inside out, carefully monitoring its tension. Some needlewomen press her to the canvas, so that knots do not form. Then the tip of the needle is pulled out and captured by the first hand.
To make it more clear, how it looks onIn fact, you can watch the following video. At first, the technique will take a little longer. However, after she manages to learn, embroidering pictures and metrics will become easier.
Video: embroidery on a special machine
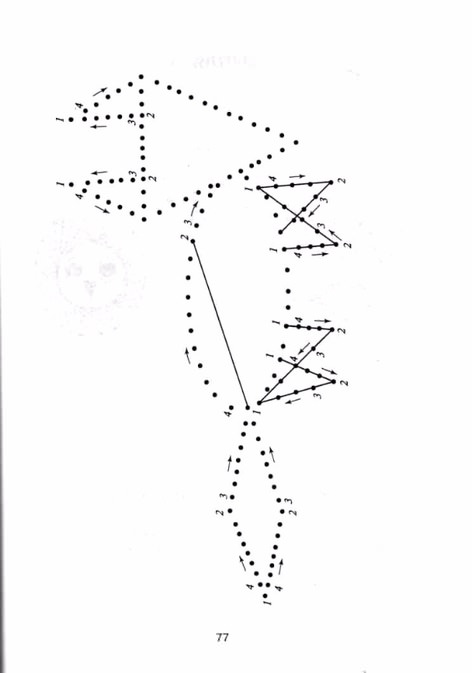
"Parking" This is another method that costsLearn, if you plan to embroider large paintings and metrics. There are several options for "parking": vertical and diagonal. Which one is better, hard to say, or rather impossible. However, they both help to hide the defects that inevitably occur when doing large, sometimes huge, work. And more: many needlewomen say that parking a little slows down the process of embroidery, but the work is more smooth and tidy.
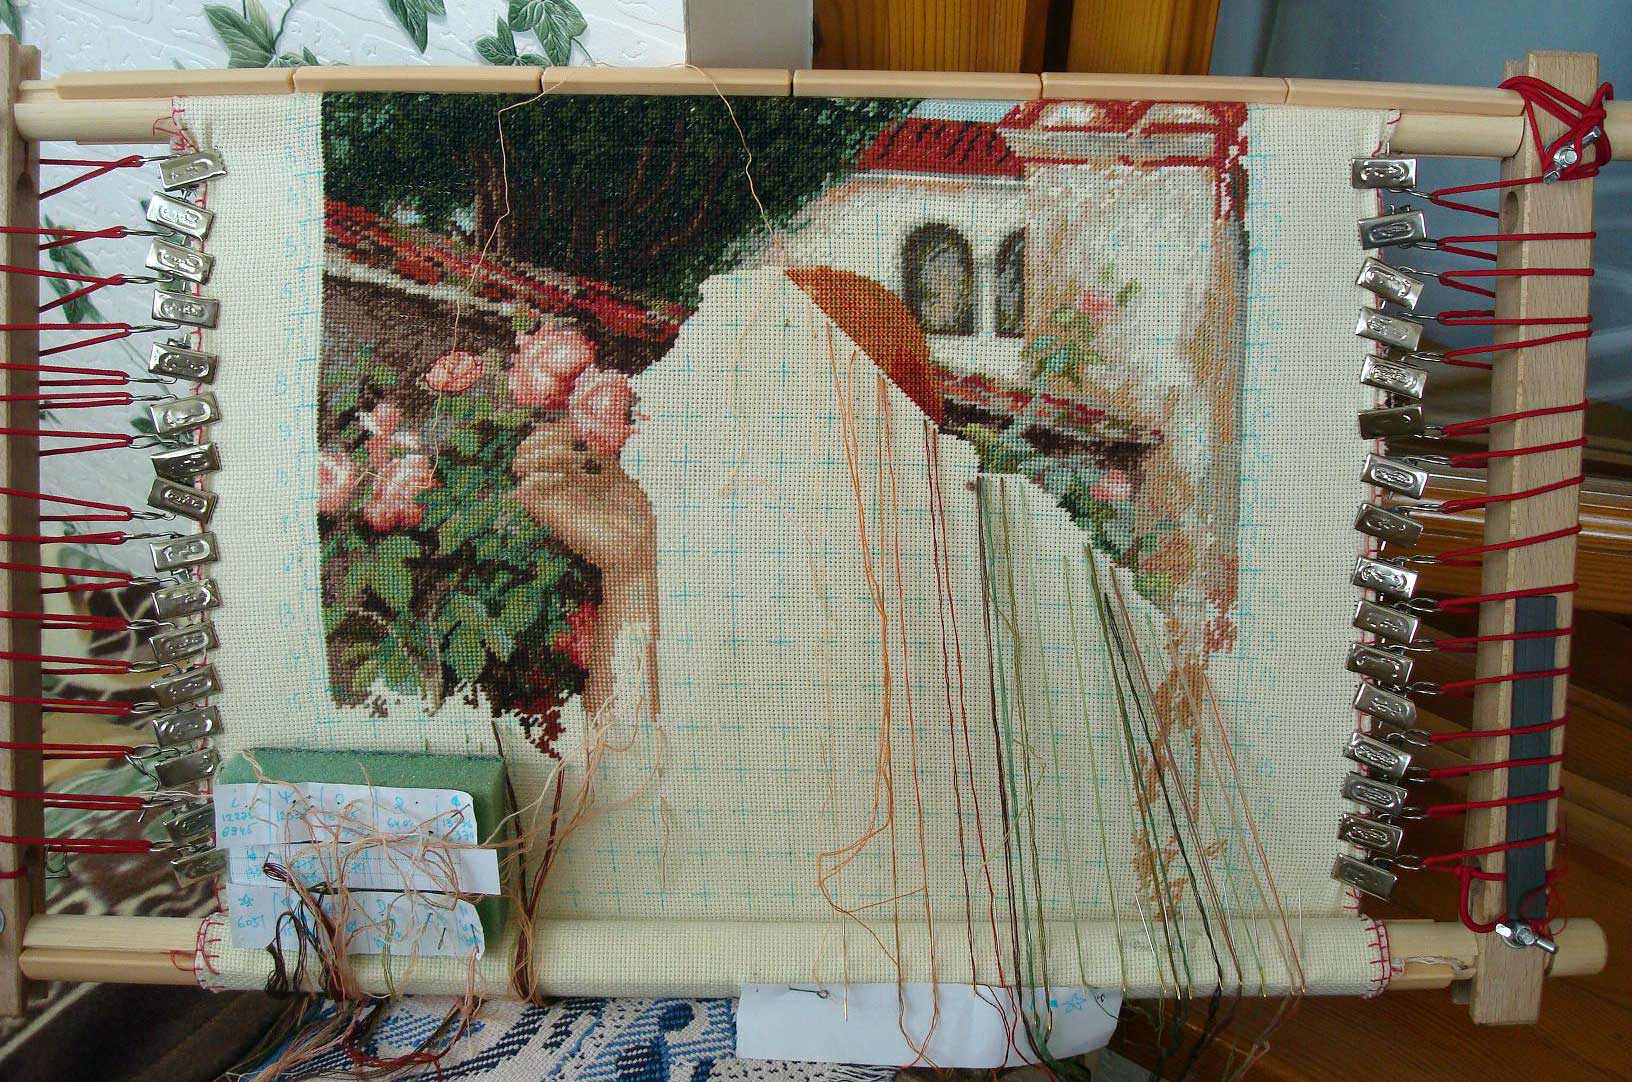
The method of vertical "parking" isThe following. One of the squares measuring 10 squares is selected and embroidered completely. In this thread is displayed where it is planned to embroider the next cross. Then it is fixed. This can be done by sticking a needle into a foam rubber cushion or by pressing only the thread with a clamp to the edge. Then you need to embroider the next and so on, until the square is finished. Then you can go to the other parts of the circuit. That is why it is called "parking" squares or rows.
True, this method has two drawbacks,Which can spoil the whole process. The first one is the possibility of occurrence of creases, since cross-stitching is performed in vertical rows. It is possible to shift fragments from time to time, sometimes the arrangement prompts the circuit itself. The second - left needles with threads can interfere with the work. You can avoid this if you are stitching it from the top down or fixing the thread in the "non-working" side.
Or you can choose to embroider a picture (orMetrics) diagonal "parking". Its main difference is that each new row is embroidered with a shift to one cell. As a result, a geometric diagonal is formed. But you can not strictly adhere to it, if you only have to finish sewing 2-3 crosses. This method has only one drawback - you can not easily embroider. A lot of time is spent on fixing the threads and marking out the scheme and canvas.
However, experienced needlewomen have their secrets. First, all the necessary tools are attached directly to the machine. You need to do this where the cross-stitching is not yet done. Secondly, it is better to spend a little time laying the thread in a bundle than after spreading it or untangling the tightened knots. For beginners, this technique may seem tedious. Only practice will show all its pluses, the main one of which is smooth and beautiful work (
, Metrics and so on).
To understand how to properly perform the "parking", the following video lessons will help. The first shows the vertical method, and in the second - the diagonal.
Video: logical and diagonal parking methods
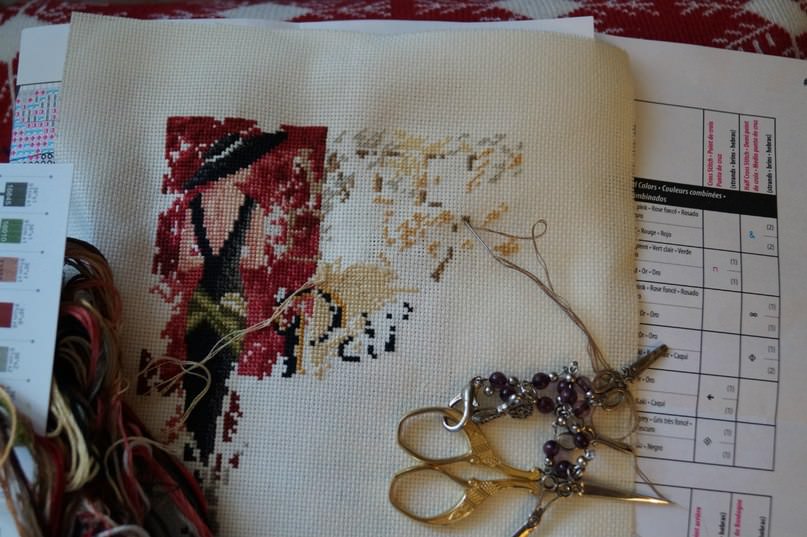
We sew and unpack
No matter how much you like, you can embroider everything from the firstCorrectly, but on the larger works of error the inevitability. Therefore, you need to immediately learn to hide the flaws and carefully dismiss the embroidery. Experienced needlewomen have their own secrets in this regard, so do not take lessons from your mistakes, but you need to learn from strangers.
The most common mistake is in the calculationCrosses. It can not be avoided by anyone. But before deciding to dissolve the work already done, it is worth assessing how much this will spoil the overall look. Hide a miss in 2-3 crosses on large landscapes will not be difficult, and even the author of the scheme can not find a difference. However, where strict symmetry is needed, it is simply not possible to hide the error. Therefore, it remains only to rip.
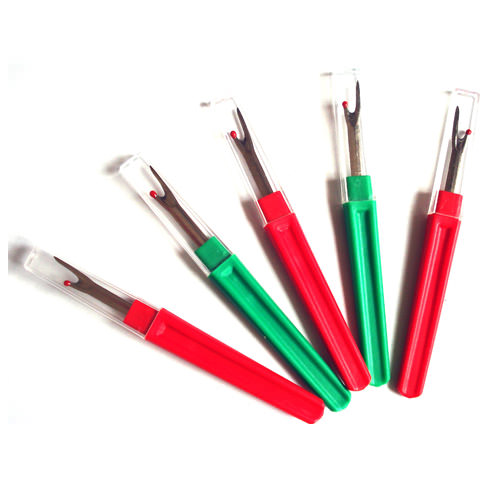
Seam ripper Fulfilled as followsWay. Using a very sharp scissors or special raspryvatel, cut the thread on the face and from the wrong side. Do this carefully, so as not to spoil the canvas. After all, hiding a slot is much more difficult. Then just take out everything that is removed. Small spools can be removed with a wide tape. Embroider the removed plot again. If the thread is well removed and a small area is to be corrected, you can dissolve without cutting it. Another common trouble is small incisions in the canvas. Hide them with embroidery from the top is almost impossible. But needlewomen have their secrets. If space allows around, you can glue a hole with a transparent fleece. The same method is suitable for gluing large holes. Small slots can be sewn neatly to the mulina in tone, connecting the broken canvas threads. Under the finished work, such "patches" will be almost invisible, although it is impossible to hide completely completely.
To comprehend all lessons of embroidery in one day is impossible. So do not rush to learn everything at once. In addition, if you have already learned how to comfortably and quickly embroider, then maybe you should not learn something new for yourself. The experience of other needlewomen can be useful in the event that they do not like the level of their work. Secrets and techniques of others in this case can come in handy.