Orchid beads with your hands in the master class (photo)
Content
It is difficult to imagine a flower more delicate and beautiful than the exotic orchid. A variety of grades and colors provide a wide scope for creative delights.
Orchid is quite moody and difficultflower to grow. And then, this flower will not be able to please you with lush blooms all year round. Flower created with their own hands, has a number of advantages:
- color, texture, number of flowers can be anything, like your heart pleases;
- Orchid bead does not require special care, can be placed in any location, regardless of the ambient light and drafts;
- the beauty of this flower is not inferior to the original, and its naturalness can only envy.
However, to create such beauty need to exert maximum effort and diligence. But it is worth it!


Workshop on weaving orchid Bead
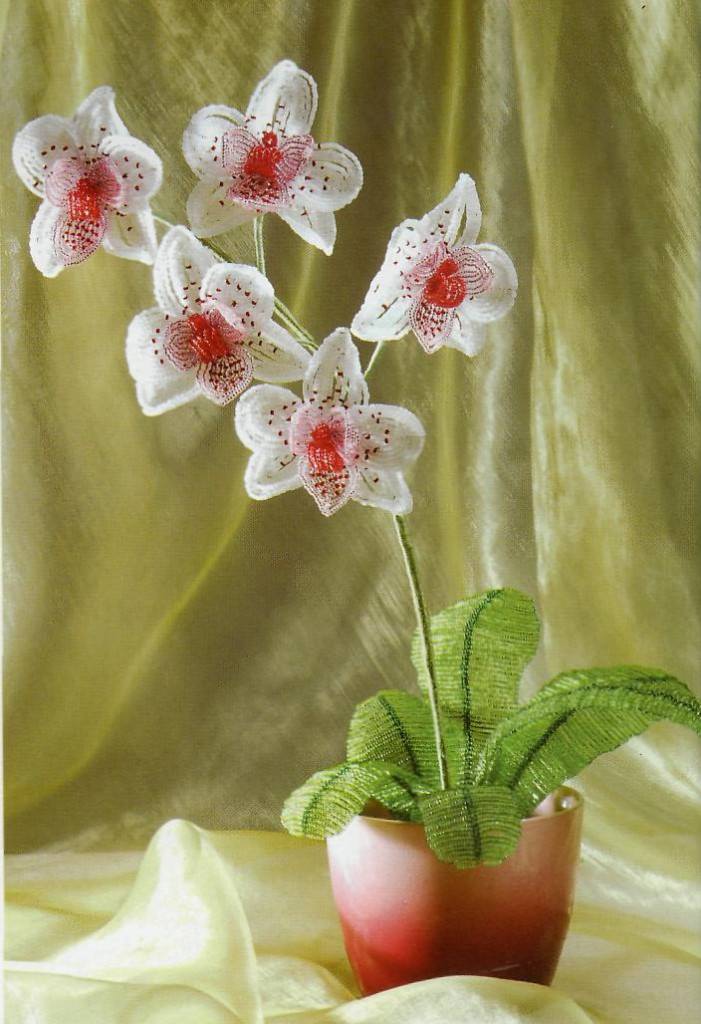
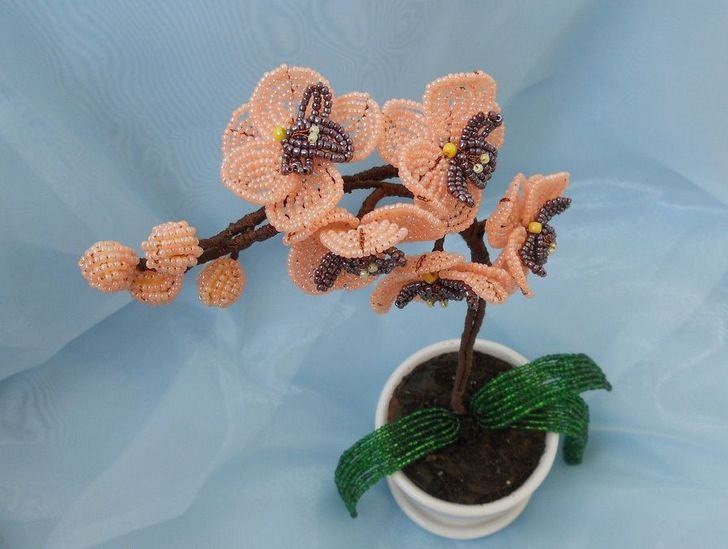
For the first lesson on creating charmer orchidwe offer spletsi delicate, peach beauty. Fantastically beautiful flower, which requires strict compliance with the instructions, look in the end very harmoniously and naturally. And, for the first of the creations of beads, use the lessons with step by step photos and video lessons. The photo depicted only the key points and the novice mistress beading have plenty of time to consider all the details and fine elements. Video makes it possible to use only a still picture, which is not always possible to consider in detail all the intricacies of weaving stage. In addition to everything in the video recording quality is often limp. Choose the most convenient option for you weave and start work.
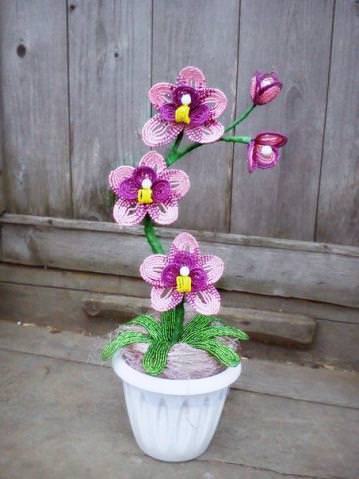
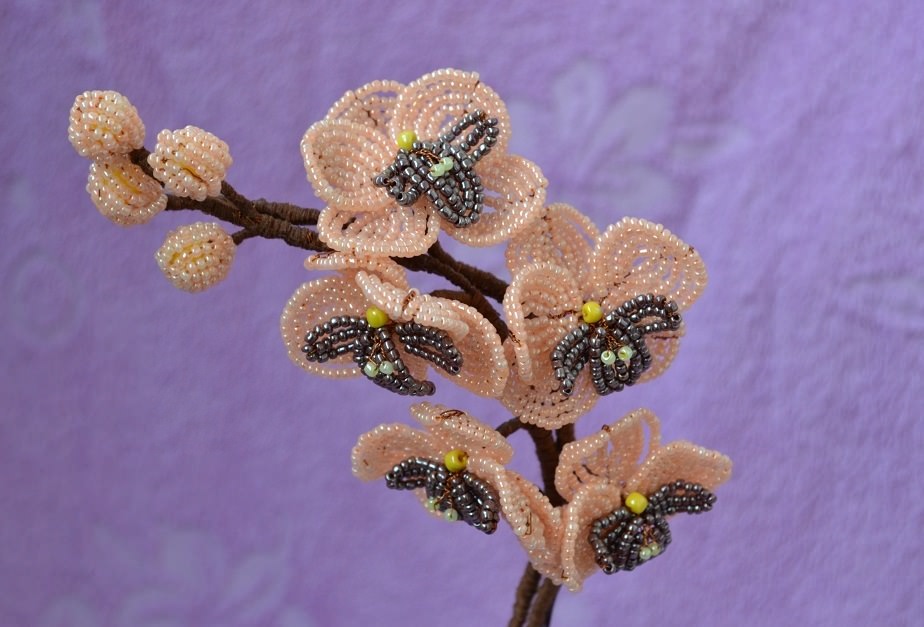
Orchid bead is made of five disclosedfour flowers and buds. The petals are made in the technique of French braiding and look very similar to real petals, so follow the instructions exactly for best results. The leaves are small woven of dark green bead, as shown in the photo. Use this detailed master-class in order to weave your very first flower in a pot. The next time Beading lesson you can try to perform an orchid of beads on their own schemes.
To create such a masterpiece in this master class, you will need:
- beads five colors: orange, brown, two kinds of yellow and dark green;
- yellow beads;
- thin wire for flowers and leaves;
- thick wire for the stem;
- brown yarn for winding the barrel;
- Low Goshokov;
- gypsum.
Now we begin the gradual establishment of a flower. The most laborious and difficult will be the first step.
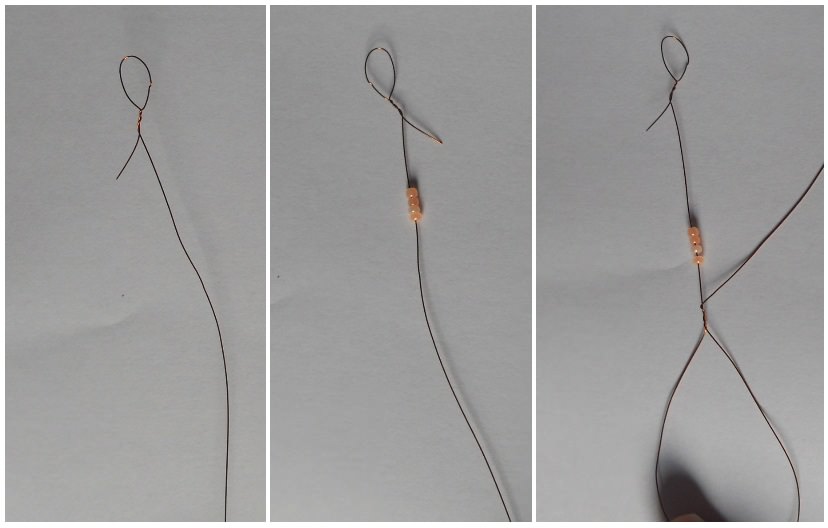
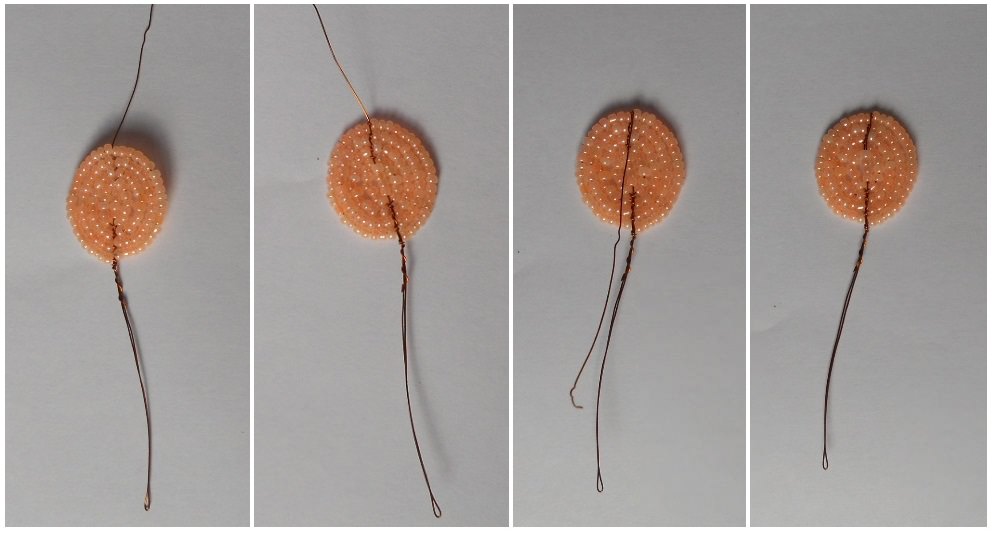
Weave petals and flower on the segment assemblywire length of about one meter need to make a small loop over the edge and strung four beads, and the other end to twist the loop larger size, as shown on the following photo.
We continue to weave our tab. Now we need a certain amount of beads strung, so that they are closely in contact with the first row and between them no formation of unnecessary gap. Then follow the 3 arcs on each side. In total, with the central series, we'll have to get seven arcs. Look at the photo of the finished tab, where you can easily calculate the number of rows.
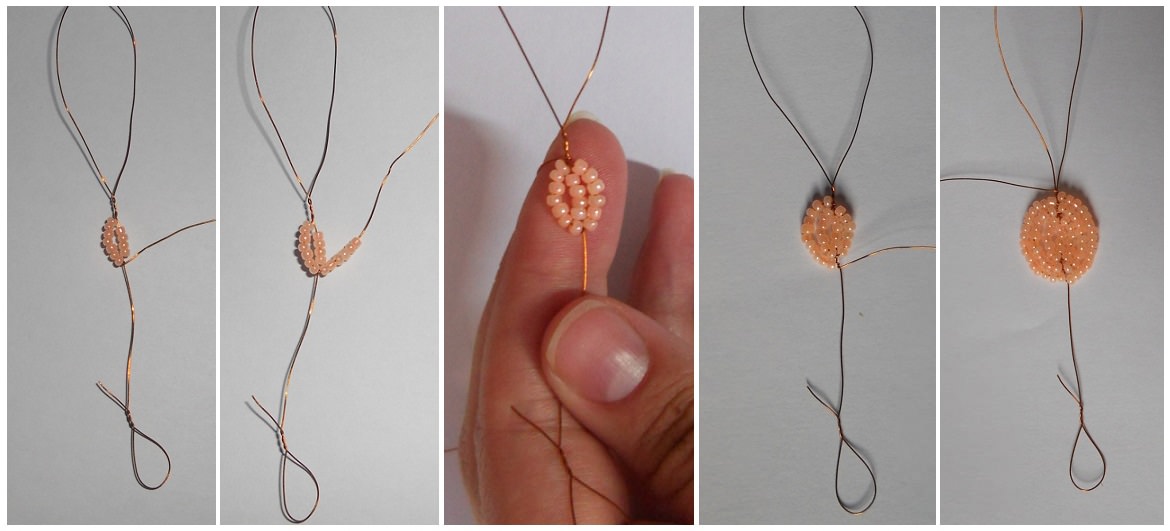
After we had finished weaving a petal,the tip of the wire will need to wrap a couple of times around the tabs. Now you need to seal the wire. To start, you need to roll out a small loop and straighten the wire, and twist a large loop so as to form the leg. Next, we turn to him the wrong side petals are bent by the top wire and reduce a her in the number of petals, which is located at the center. Cut off the tip. As a result, we get a nice lepestochek, as in the photo:
In order to produce a single flower on the need toaccording to the same scheme to continue to weave more of the same four petals. It is also necessary to prepare a large stamen of yellow beads, a stamen with yellow beads smaller and smaller petals, which will be located in the middle of the brown beads. Two side lobe should consist of two pairs of arcs with a central eight base beads. Petal, which will be located in the center, includes four arcs on both sides next to a central 6 beads.

Getting flower assembly process as follows:
- curl up with each other brown petals (it will be the middle of our orchid flower);
- curl up with each other 5 petals orange;
- inserted into the center of the blank of the two kinds of stamens;
- tightly wrapped all parts of another segment of the wire, thus forming a flower stem.
Total are preparing the same principle 5 colors for orchids.
Do buds for orchids Bead Forproduction of bud, we will use beads orange, one yellow round beads and wire. At bud doing well according to the scheme in the technique of French braiding, as well as our petals, but with a slight difference, which is that the wire, we will have to collect three beads and make one pair of arches on each side.
Now, in order to have not turnedlepestochek flat shape, it will need to take the form of a cup. This is done as follows: The following pair of arcs need to do on a smaller bead and tighten securely. It turns out that the beads will buckle themselves, forming at the same time deepening our desired convex shape, as in the photo:
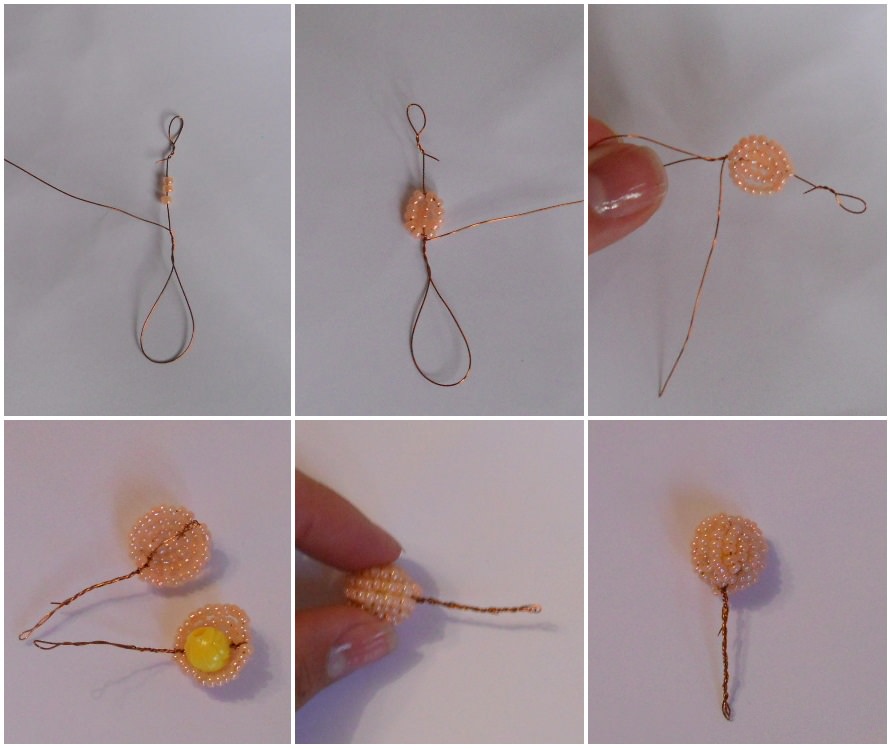
The first half of the bud should consist of 6 pairsarcs and a central row. Next, we continue to weave a similar second halves. The resulting preform is necessary to twist with each other and inserted into the interior of a yellow bead. The edges of the bud together with wire.
For sprigs of orchids do four of these buds.
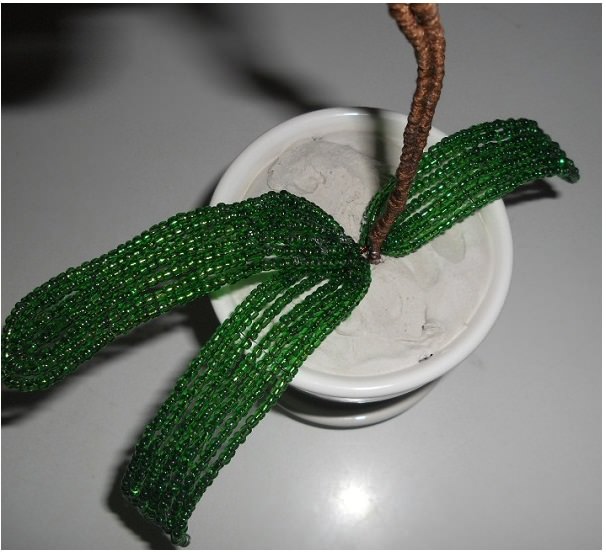
Let us weave the leaves green. Weaving is carried out by means of green beads and wire. In the leaves of this orchid for a similar weave scheme, as with all the details. Take the wire is thicker, because here we need more and more beads than petals, according to their weight will be greater. The length of wire should be about one meter.
Scourge three leaf in a length of about 11, 13 and 15 cmrespectively. Central ryadya will have a base in the first embodiment - 9 cm, in the second - 11 cm and in the third - 13 cm. All our leaflets consist of six pairs of arcs, i.e. three arc on each side and a central row. At its discretion, you can make the leaves a little more to the orchid did not look like "naked."
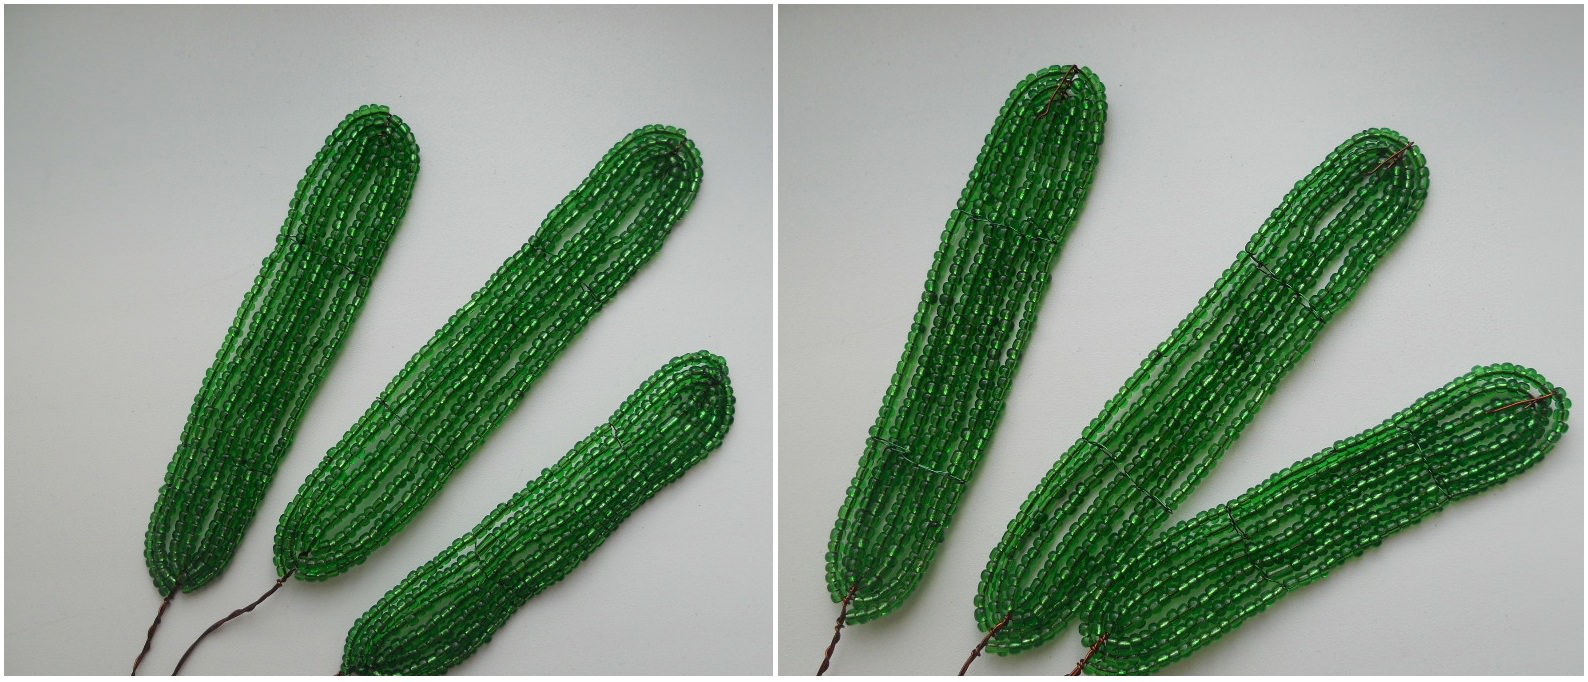
If you look at the photo, you'll notice that the leavesin some places stitched green wire. This is to ensure that our leaves do not decay. The sutures are held in several places, and she firmware barely noticeable thanks to pick up the tone wire beads. The ends of the wire to hide in the near lying beads and trim extra tips.
Formation and flower decoration of two segments of different length of wire large stalk perform.
Thick wire tightly rewind thin ends filbert-shaped legs. leg length depends on the diameter of the pot or pots. The orchid that will be assigned.
Evenly tighten the flowers and buds on the stem with the help of wires, buds should be on top.

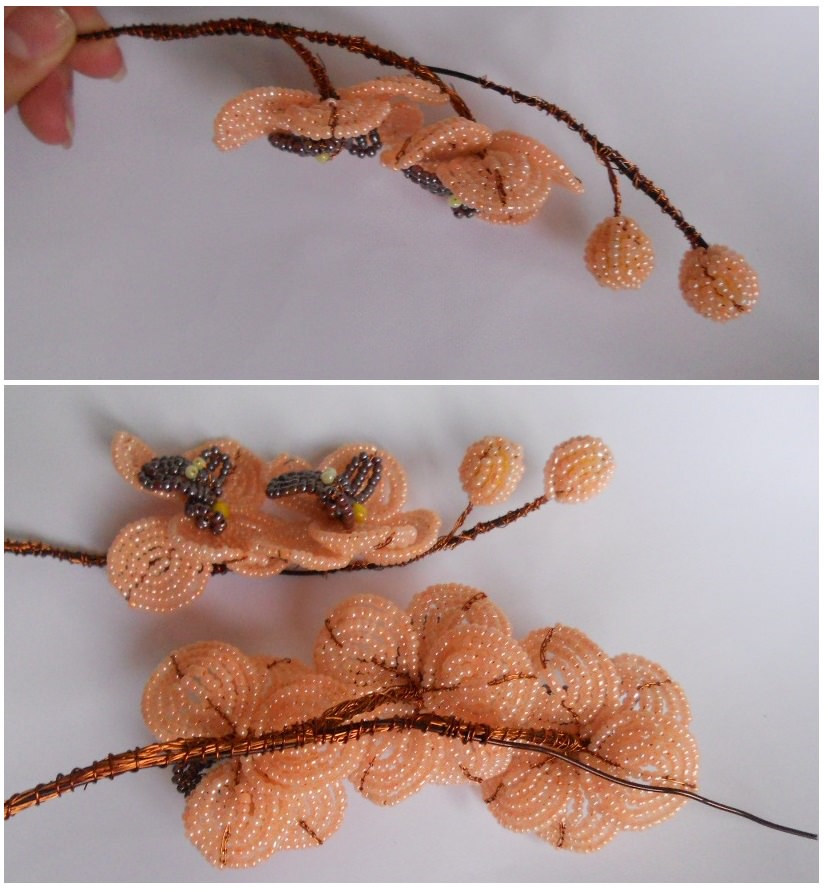
At the bottom of the stalk leaves are attached, as seen in the photo. It is important to distribute the sheets at the perimeter of the stem, so that the socket looked neat.
Now, for our design of the stem of orchids, use brown thread. Wrap the stem so tight, that was not visible wires.
In order to firmly secure the flower in a potYou need a cast. At the bottom of the pot can be put pebbles and fragments of old clay pots. Gypsum mixture is poured into a pot almost to the top, so that the finished composition was stable. Flower itself is necessary to wrap up, so as not to stain the plaster.
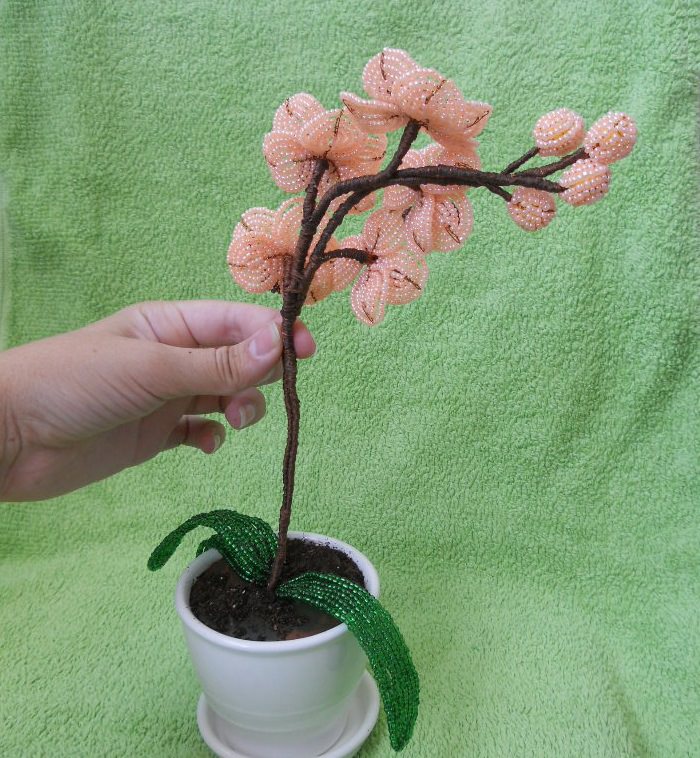

The master class is almost complete and is leftto make the finishing touches. Paint the surface of the dried plaster, spread the leaves and petals and set the perfect pattern of beadwork made by the hands, the most prominent place. Such gorgeous flowers will not leave anyone indifferent. If all items are OK, good quality material, the result is stunning.
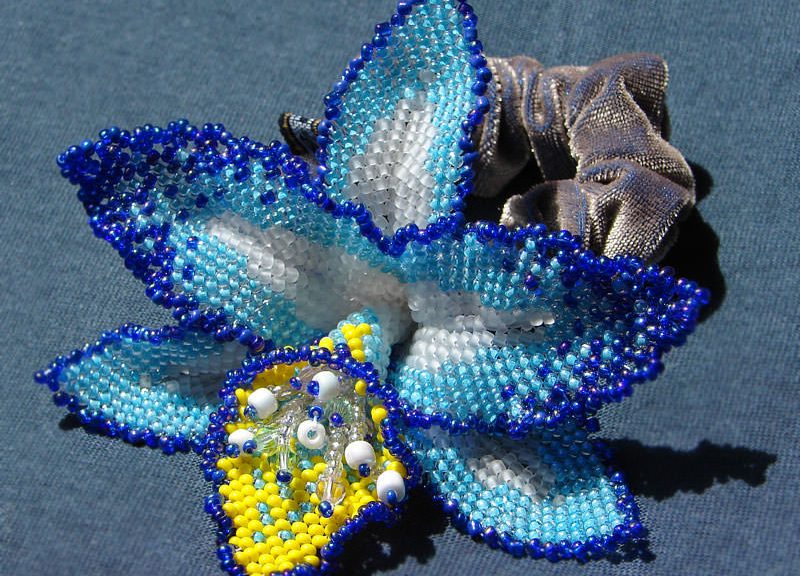
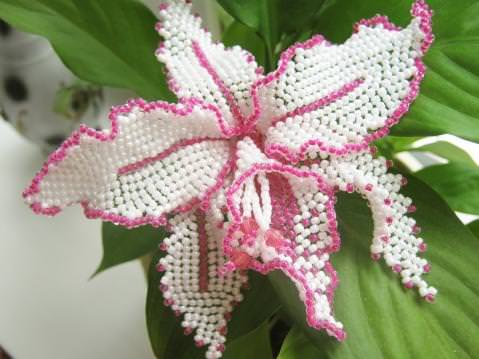
Driving orchid mosaic weave
Make orchid beads can also be in the art of weaving a mosaic. To do this it is best to use the diagram below:
scheme №1 
scheme №2 
scheme №3 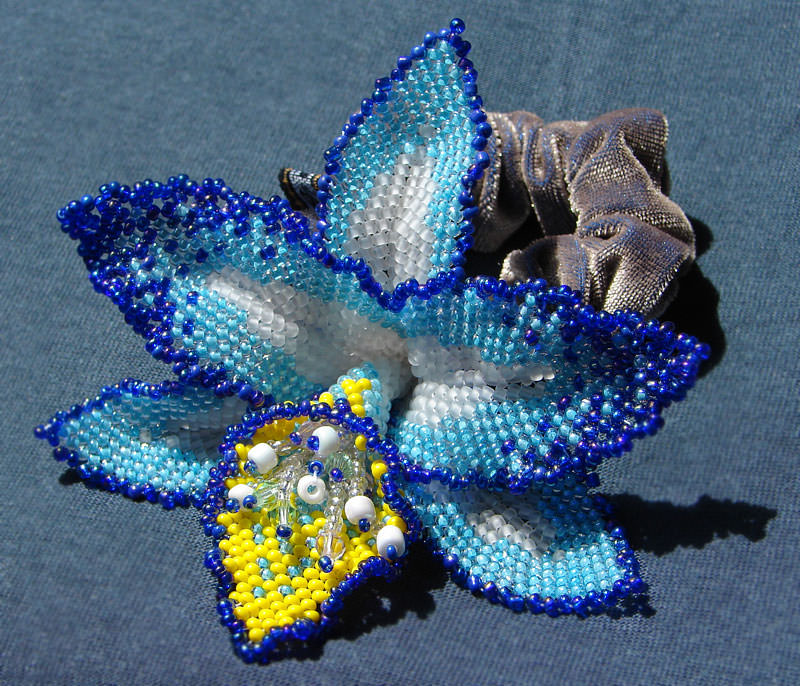
According to the scheme number 1 is necessary to weave a narrow 3petals, strung to begin with ten beads. Next, go through the middle and plaiting additional beads (Scheme №2), you now need to go back and pull. As a result, we get a leaf relief.
The next step is to sew the petals, connecting the edges, as in a mosaic weaving.
Getting weaving broader petals,by analogy with narrow. The only difference is that in the beginning should be strung 14 beads, according to the scheme №2. Coming through the middle and plaiting extra beads. We go back and tightens.
One of the petals have to fold and sew the edge.
Braided edges wider leaves perform№3 according to the scheme. It remains to connect petals alternating wide and narrow workpieces. You can attach a clasp, and use this wonderful orchid as a brooch.
Video: Beaded delicate orchid