Organizer yourself, an organizer for cosmetics, how to make an organizer for cosmetics with their own hands.
In addition to all known problems with the wardrobe,women have a second problem - the storage of cosmetics. It would seem that only in an overabundance, however, having reached its use, it is rather difficult to find anything that is necessary. And the more cosmetics you have, the more problematic it is to navigate. That's why the organizer is simply necessary. Keeping cosmetics in it, you can arrange everything, and find the right tube will be much easier. You may think that the cosmetic bag will be enough. But its use is relevant only when you need to grab a few cosmetics with you on the road. But keeping all the means at home in a cosmetic bag is not convenient. To throw all cosmetics in one box - too not the best output or exit. And if you break this box into separate sections, dividing all your products according to certain criteria, finding the right thing will not be difficult. Such boxes for cosmetics can be purchased in stores. However, the necessary, at times, is so hard to find: the purchased organizers are too high, too narrow, or simply do not fit into your box. And the most logical way out in this situation is to create your own organizer for cosmetic products, which will suit you. To make a cosmetic box you will need a tight cardboard, an adhesive gun that can be replaced with the Moment glue, a suitable coloring cloth, and other accompanying tools in the form of a pencil, ruler and scissors. First you need to make all the measurements. If you want to put the organizer in a box, measure the length, width, height along the inside. Organizer should be less by 1-2 cm in all indicators - so putting it inside and taking it out from there will be much easier. If you want to make a separate organizer, with the measurements, determine yourself, starting from the number of funds that you want to store in this box. 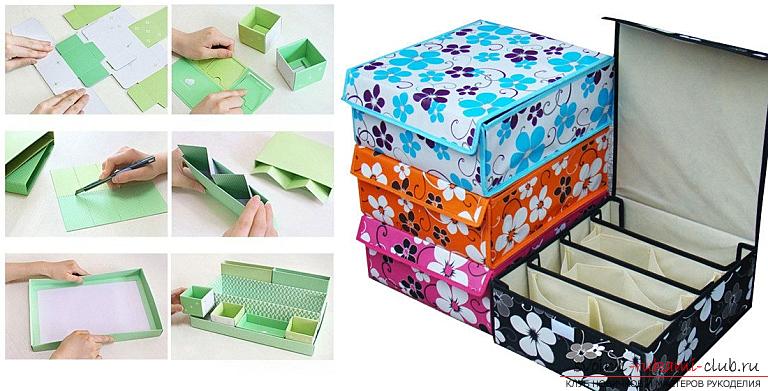 The bottom of the organizer should be executed from onea whole sheet of cardboard. The cardboard cut from one big box is perfect. If it is not available, you can use several separate sheets, glued together with ordinary or paint tape. Further on it it is necessary to designate the location of the future compartments. Here everything will depend on you. You can make a lot of small compartments, also it can be two long compartments for shades with pencils and pencils, and a few smaller ones where you will place lipsticks and other single cases of small size. So that you do not pick up for yourself, sketch out the scheme on the cardboard before it is finalized. Cut out the side walls and partitions from the same box. Note that the walls should be above the partitions by about 0.5-1 cm. Now the work with the cardboard is finished. The simplest way to design such an organizer is to use tissue. But here it is necessary to take into account one thing - the final assembly of the organizer takes place after dressing the fabric case on the bottom, due to this you will not be able to wash your organizer for cosmetics. You should choose not branded fabric, so that the organizer can serve as long as possible. The cardboard should be wrapped in a cloth according to its shape, all the seams are fixed with threads, you can fix all the ends of the fabric with an adhesive gun from the inside - so you will not create unnecessary creases and bumps. To place all the partitions, glue them first to the bottom, and only after that on the joints. At the end, the side walls are attached. They also initially glue to the bottom, and then proceed to the sides. If you plan to place an organizer in a box, then you can finish your work on this. If you plan to use it as a separate object, then you need to make a lid, it can protect all your makeup from dust and dirt. Cut out a rectangle of the appropriate size from the cardboard, tighten it with a cloth, place the cut off inside, pasting it to the box. In addition, make a decorative handle, you can decorate it in the form of a pompon. Decorate the entire lid, tape it with ribbons, rhinestones, select any materials that can complement the overall interior of your room.
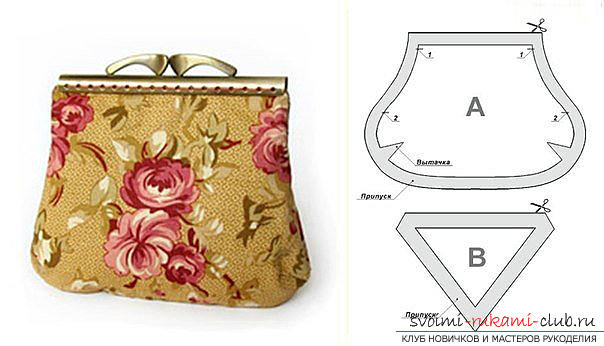
 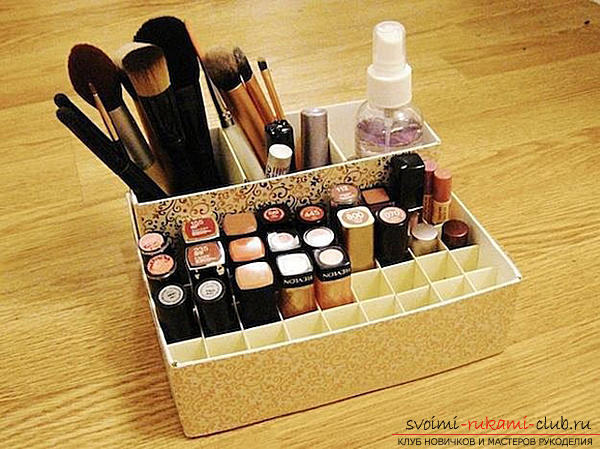 In addition to the above method, you can gothe easier way. Pick up a box of the right size, glue it with beautiful material. Partitions in this case are created in the same way as in the previous one. Cut the cardboard out of the other box. Arranging the storage of such items of cosmetics, as pencils, mascara or lip glosses can be more simple way. To do this, you need a glass jar. Paste it with beads, rhinestones, etc. At the bottom of the decorated jar, put a grain of coffee, where you will place all the tubes, so they can be stored in an upright position. Also, for storage of such cosmetics in an upright position, you can use a stationary pencil case. True, they look rather boring. To turn it into a stylish little thing, you will need different elements of decor in the form of foil, acrylic paints, etc. If you are a supporter of beauticians, or you need to collect a small amount of cosmetics in one handbag, you can always sew a cosmetic bag yourself. Moreover, sort your makeup by sewing a few cosmetic bags for different types of cosmetics. Patterns of cosmetics are pretty much. In its construction there are no special difficulties. It will be a small handbag consisting of two identical walls with a zipper. All its seams are hidden inside, and the edges are processed in a zigzag-like seam made on a sewing machine or overlock.
  And so that your cosmetic bag can stand, cut outthe third part is the bottom, and the edges are sealed with additional material - this can be cardboard. Note that in this case, twice as much fabric will go to the skin of the skeleton. However, you can not wash your cosmetic bag. To understand what sizes a cosmetic bag should have, think about what exactly means you are going to store in it. All of them must freely pass through the neck and be located inside. For home cosmetics, the use of a lock is not necessary. It will be easier for you to get the right object from there. And to protect all cosmetics from dust, use a button or a string to pull the cosmetic bag around the perimeter. Storage of cosmetics at home should be neat and beautiful, and most importantly - comfortable. Attach all your skills and imagination for making such an organizer. Your individual things will always have a neat look and personality.

