
The original cherry blossom bead, made by own hands, will decorate any interior
Flowering sakura from beads - beautifulinterpretation of this tree, which you can easily do yourself, having spent some time on it. The work is rather laborious and requires attention, but it does not cause absolutely any difficulties. Even if you have never encountered such an occupation - you will always succeed. The material of this article will be a great help for your creativity. Beads - very beautiful material, which is used in many kinds of needlework. One of them is beadwork. Such products, made with their own hands, attract their beauty, refinement and eccentricity. The main thing, to create your masterpiece will be absolutely everyone who has such a desire. It does not require experience and supernatural knowledge. A little patience and perseverance and an exclusive piece of decor or decoration will please your creator and everyone around you. A very interesting option is a tree woven from beads. It can be small or large, can have any color solution, but always remains invariably beautiful. Today we will make a cherry blossom of small size that will decorate your house or become an excellent gift to loved ones. First we need to pick up materials. For work we will need:
- beads of pink (in this case it is two shades) and green colors;
- capacity for beads (a small dish or a box for a better convenience);
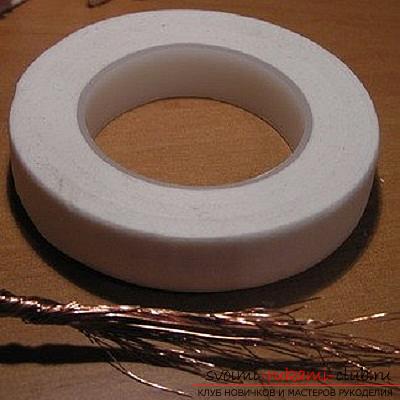
- wire (should be thin enough, its diameter must match the diameter of the hole in the beads);
- scissors;
- finishing material (decorative material);
- soil (clay can be clay, silicone);
- paint (you can take any, in particular watercolor) for staining the trunk.
 First we need to mix the beads in the container. We'll take two shades of pink, a total of forty-five grams of beads, and green, fifteen grams.
 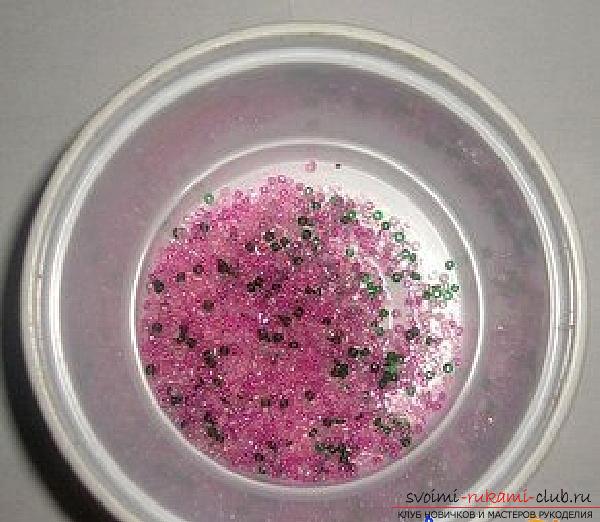 Now we prepare the wire. We cut it into segments, each of which is equal to seventy centimeters. Then we will retreat from one of its edges fifteen centimeters, we will make a small loop. At the long end of the wire we will string beads.
 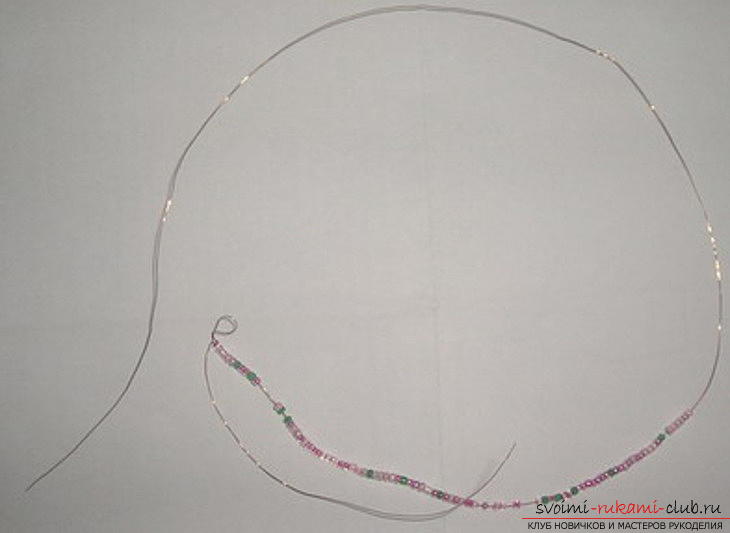 So we will do the leaves. For one leaflet we need 4 to 5 beads. The distance between the leaves will be five to seven millimeters. After reaching the loop, we remove the remains of the beads. We pour it into the bowl.
 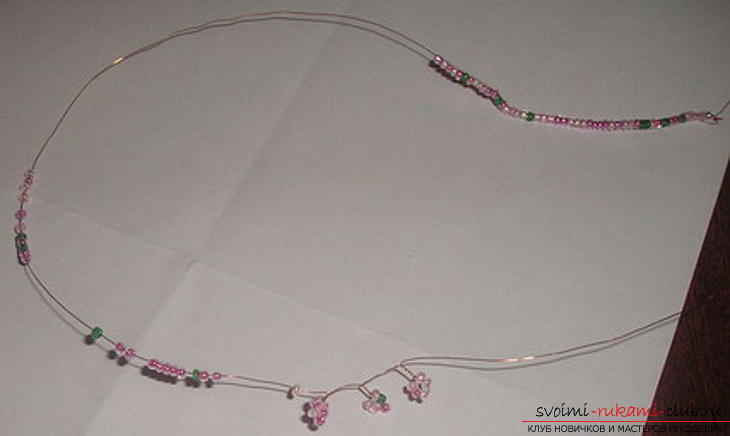 Then we double our twig and twist it as shown in the photo.
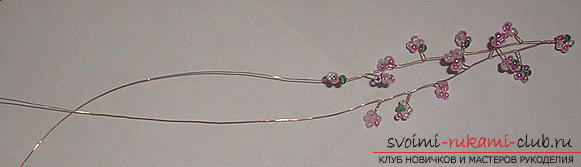
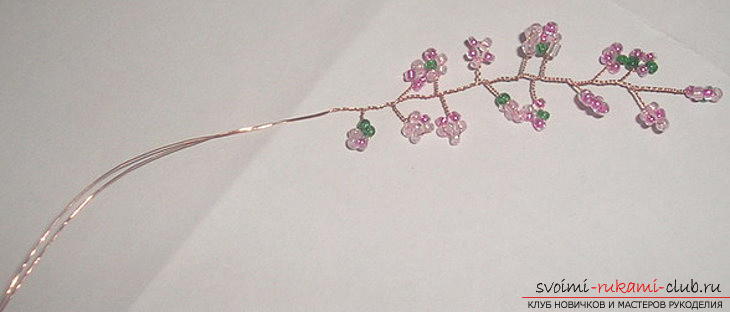 Straighten each leaf.
 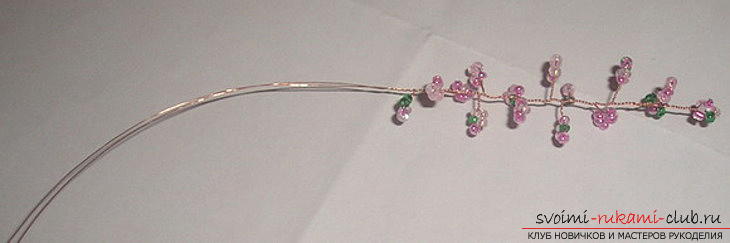 For a small sakura tree, we add five similarly made twigs into one bunch. For a bigger tree, more luxuriant, in one bundle there should be eight branches.
 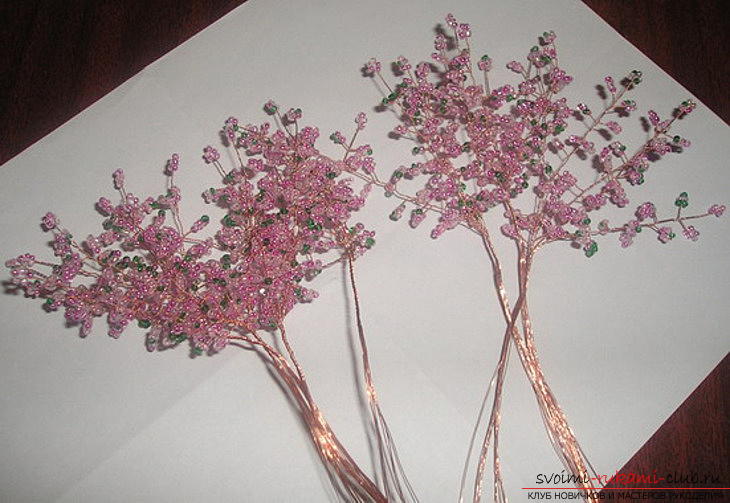 We need to make nine identical beams. In our case, there are six branches in the bundles. As a result, nine large branches were made, consisting of fifty-four branches of a small size.
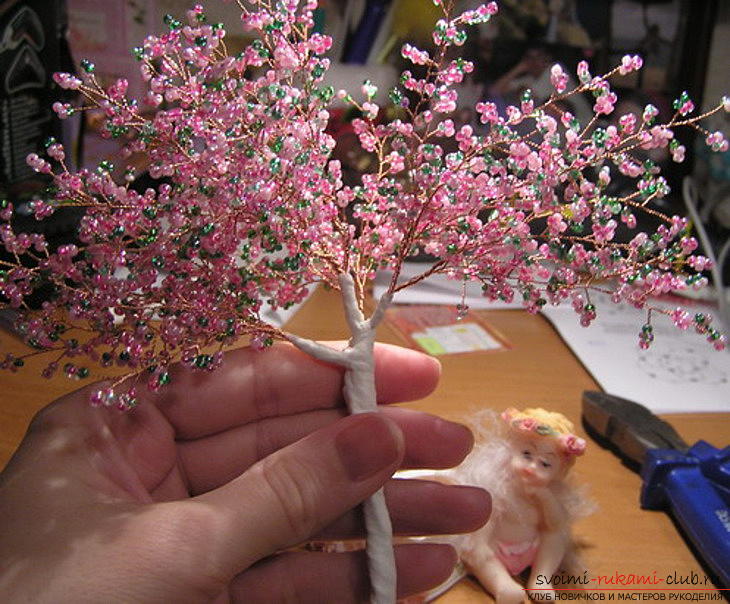
 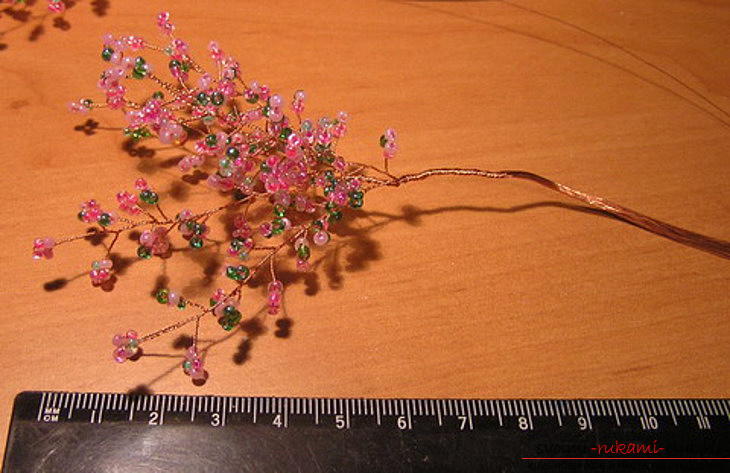 Now we twist together two large branches (we need three such branches) and one of three large branches - this will be the tip of the cherry blossom.
 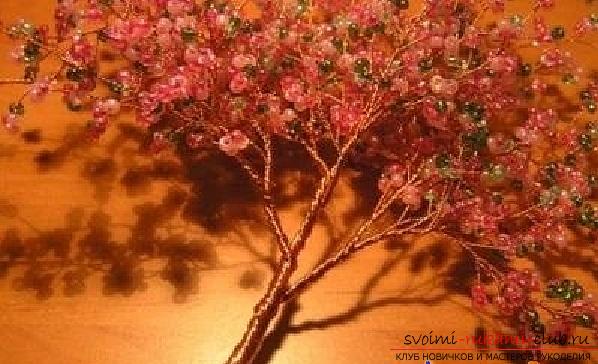 For the tree, we need a pot. It can be anything, even a casket. Something like the one we see in the photo.
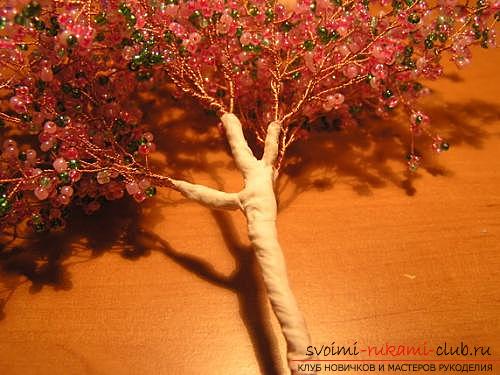
 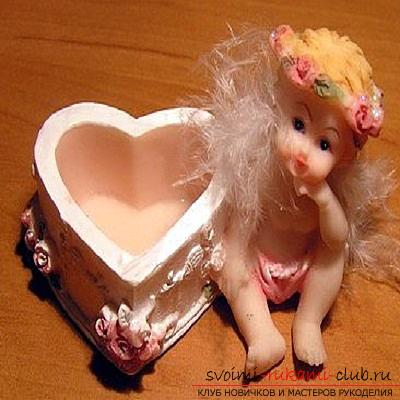 To the tree was kept and not untwisted, we can wrap it with threads of mulina, wire, a white ribbon used by florists and so on.
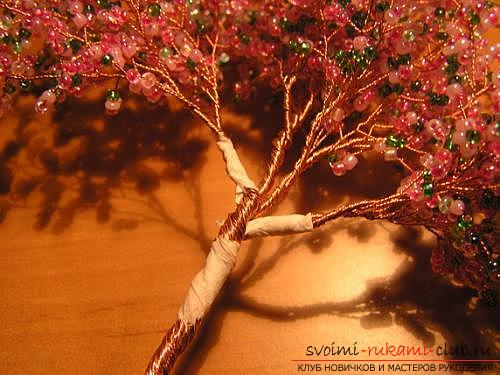
 It remains to plant the tree in a pot, in the ground. As a primer, we will use clay or silicone. In such a soil, it will be well fixed, which will create a solid, unified structure.
 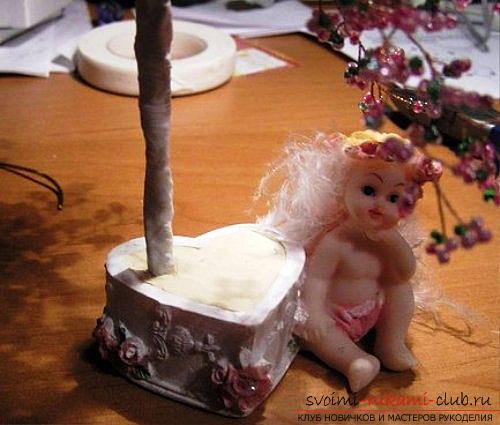 Further our action will be decorating the soil - decor. For this we can take the beads or use small colored stones, beads. It all depends on your desire.
  It remains to give the trunk color, if it does not match the right one. For this we will need paints. Now it remains to spread all the twigs and leaves on sakura and the product is ready.
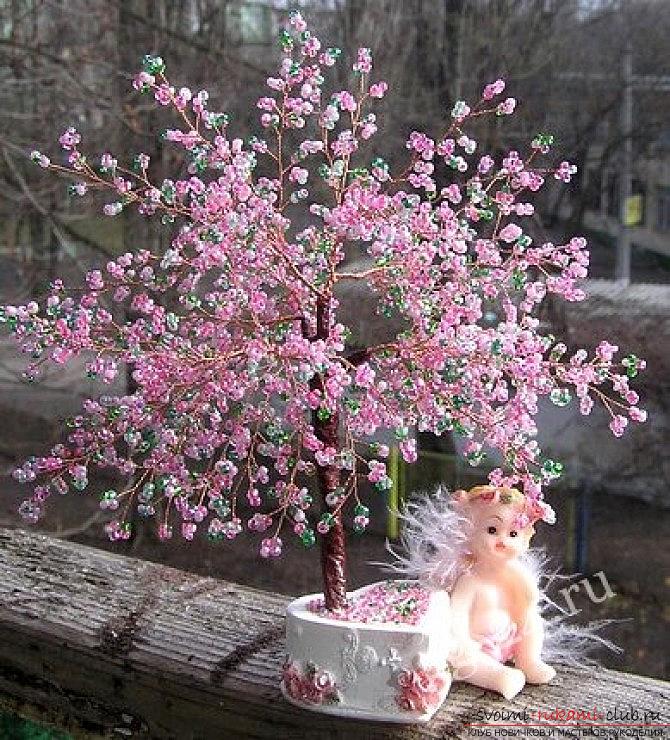
Comments
Related posts:
 The original decorative pillow in the form of a flower, sewn by hand, decorates any interior
 Master class on creating tilde fairy dolls Beautiful doll Tilda Fairy made by her own hands will decorate any interior and will be a good gift
 Sakura from beads blossoming tree with own hands (photo)
 A corrugated paper tree made by own hands can decorate any interior.
 Bonsai from beads with own hands, how to weavetree of beads, schemes of weaving of trees from beads, birch from beads with their own hands, herringbone-souvenir from beads, creation of albition from beads, advice and recommendations on performance of works.