
Original master-class felting children's boots with a photo and detailed instructions
Master class on felting children's boots"Sunflowers" This article details how to make felt boots for a child of three years by the felting method. Since this shoe is intended for a boy, we traditionally worked with blue and blue shades, which became the backdrop for yellow sunflowers. These boots can be worn as slippers. They are less dense than street boots, but not too thin, like warm socks, which do not quickly disappear. The cold weather is not far off, so it's time to take care that your baby's legs are warm. 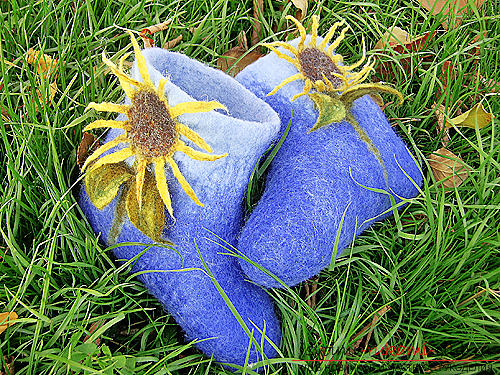 To create such boots you will need: Semenovskaya ribbon (combed) of several colors: cornflower blue, blue, dark gold, linden, marsh; ribbon Trinity combed (yellow shades); polyethylene film; paper; pupyrchatka (film); kapron; soap solution; grinding machine or massage machine; gloves. Description of work To create a pattern, you can use the shoe, which is now in time for the child. Draw an oval, and then add forty-five percent of the stock to make room for shrinkage of the wool. The height of the felt boots is the width of the foot, and the width itself is two-thirds the width of the foot. Draw a pattern around the paper with a felt-tip pen.
 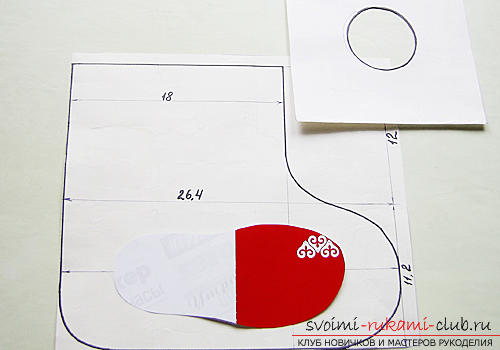 To make a flower of a sunflower, you need to createthe square (all sides - seventeen centimeters - one centimeter less than the width of the valenochka), and the hole under the foot - six centimeters in diameter. The pattern of the shoe and the resulting square should be transferred to a thick film of polyethylene (2 pcs.).
 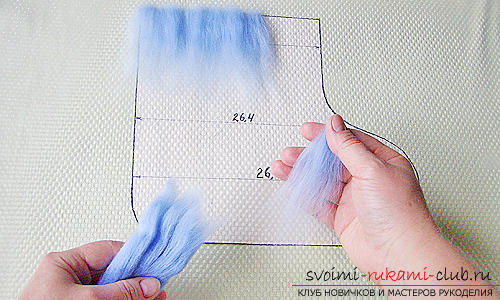 For the very same process, felting is necessaryto use a film-pappurk. We put it on top of the felt boots so that their noses are facing in opposite directions. The manufacture of felt boots will require four layers (horizontal and vertical). The first layer is horizontal, facial. We take and unfold thick wool strands, with a dense end to the edge of the product. The 1st and 2nd rows are created with blue wool. And then we use cornflower blue.
 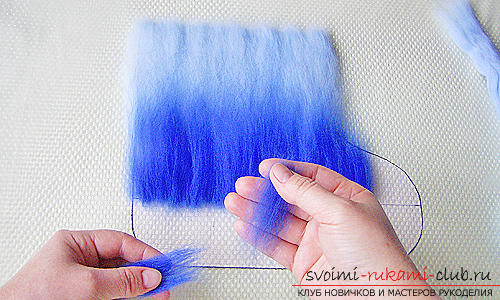 But the second and all the other rows createthin ends up, so that the dense edges of the first row cover them. 3-rd row to lay out so that the strands of wool were torn along the length on the spout of the felt boots. The layout of the felt boots must be carried out simultaneously, so that they are the same. On an example of one valenok we will demonstrate the stages of manufacturing. Combine the pattern of the square through a papyrus.
 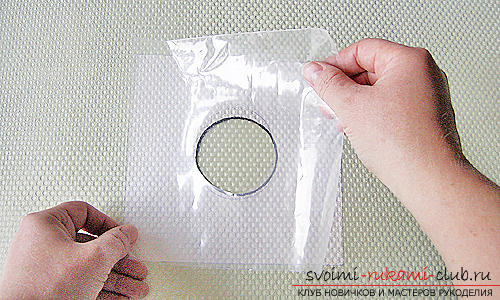 With the help of yellow wool to expand a round flower, and in the middle of the circle - brown wool. Use green wool to create stems and leaves.
 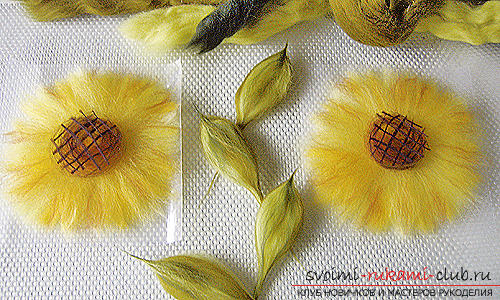 Stems lay parallel to the middle of the valenochka. Next comes the grinding stage. All the details put under the nylon film. Then evenly soak them with a soap solution. After taking a bag of cellophane, proceed to grind.
 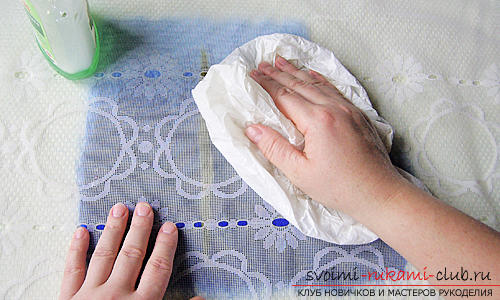 First we do the grinding by the method of wetting frommiddle to the edges, and then - apply more force. At this stage, the wool is maximally wetted and pressed. Details of a sunflower should be used separately. Put a flower on the stem. On top of them put a capron cloth and continue to continue to rub. Pay attention to the fact that the pattern does not move, and the parts do not move. Above the ground valenochka should put a pattern, which we made from the film. Those tips of wool that protrude, you need to bend on the pattern itself. Then the 2nd face should be decomposed similarly, but in the reverse order.
 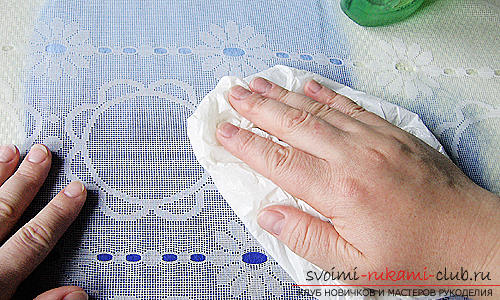 All the details put under the nylon film. Then evenly soak them with a soap solution. After taking a bag of cellophane, proceed to grind. First we do the grinding by the way of blotting from the middle to the edges, and then - we apply more force. On top of the ground valenochka should put a pattern, which we made from the film. Those tips of wool that protrude, you need to bend on the pattern itself.
 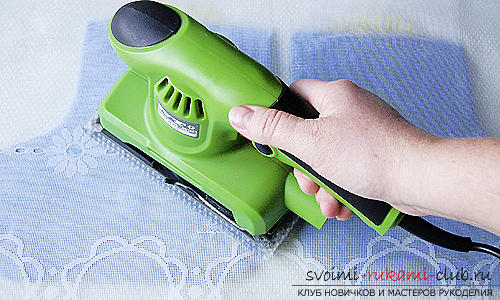 Now our layout is complete. We proceed to the main stage of grinding, its main task is to fix all 4 layers between each other. Here you can use a typewriter or a hand massager. To rub the felt boots for a long time, turning them from side to side. With the machine this process takes about forty minutes. To determine if the material is ready, you need to pinch it by the surface itself. If the hair does not move - it can be stopped. We lay the product on a mat of bamboo. Screw the felt boots onto a stick in a mat of bamboo and within five minutes beat-roll. Unfolding the mat, change the position of the boots. Do until the product has passed a full circle. We get the pattern-pattern from the felt boots.
 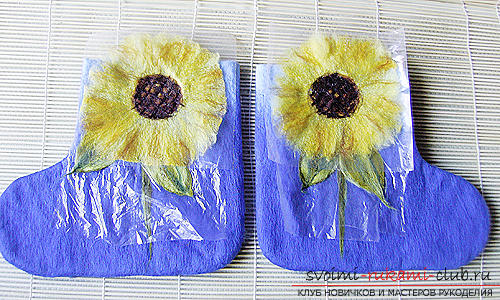 Then again roll the felt boots two circles. After that, remove the cellophane. Further we spend felting in hands. To protect your hands from soap, you can wear gloves.
 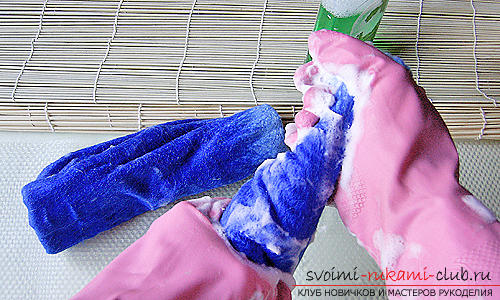 After being crushed, you should carefullystraighten all the folds and seals. Fully align the surface of the boots. Footwear should not only be along the boots, but also across. So we act until the product is ready. At the stage of felting, as well as during the grinding and felting on the bamboo mat, be sure that the humidity is moderate, if necessary, add water. Then you should rinse the felt boots from the soap solution in a warm water, then get damp with a cloth or a towel, straighten all the creases and level the surface with your hands. In the same way, manually, we form the socks andheel of the product. Give the volume to the felt boots and dry them. After they dry out, you can try to attach a footbed of felt or any other material used for the sole to their soles. This will help prevent the shoes from slipping on the floor and slowing it down.
Comments
Related posts:
 Creating decoupage on a plate with your own hands using a master class with a photo and detailed step by step instructions
 Master class with a photo of making by own hands toys made of wool - guinea pig - by the method of dry felting.
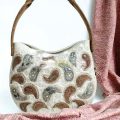 A detailed master-class on felting a stylish bag made of wool with a photo and step-by-step instruction
 Making flowers from plastic bottles with their own hands with detailed instructions and photo
Master class with a photo of dry felting from the wool with their own hands toys - horses.
Making flowers from plastic bottles with their own hands with detailed instructions and photo
Master class with a photo of dry felting from the wool with their own hands toys - horses.