
An original valentine-gift for Valentine's Day in the shape of a heart made of rubber with his own hands with a photo.
Not far off the holiday of all lovers - DaySaint Valentine's. And it's time to take care of the original gift to your second half. If the usual souvenirs from the shops do not suit you, then try to make a unique and practical thing with your own hands. In this article, we will tell you in detail how to weave a heart-shaped keychain using step-by-step instructions. So, let's get started. 1. For starters, it is necessary to install a weaving machine in such a way that the holes of the rows are directed to the right, and the columns of the central row by 1 are pushed forward. 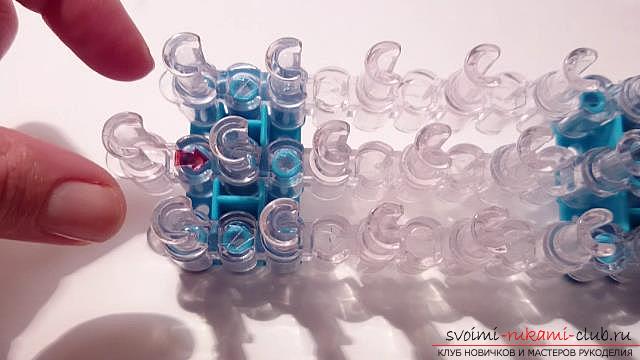
 2. The weaving itself should begin with the columns of rows that are at the edges. First you need to create a key, and only after - the lock itself. To weave the key, you can use one rubber, which is twisted into two parts. To do this, take the yellow rubber, twist it so that it turns out 8-ka, and then throw on the first column of the central and the lowest row.
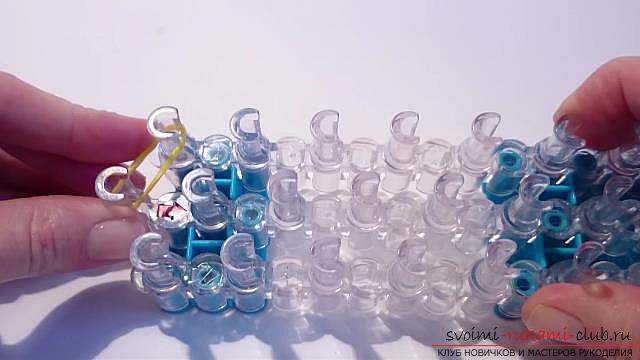
 3. In a similar way, you should put two rubber bands on the columns of the upper row. Next, the rubber band is twisted so that it turns out 8-ka, and then put it on the first column of the central and lowest rows. In a similar way, you should put two gums on the columns of the row located at the bottom.
 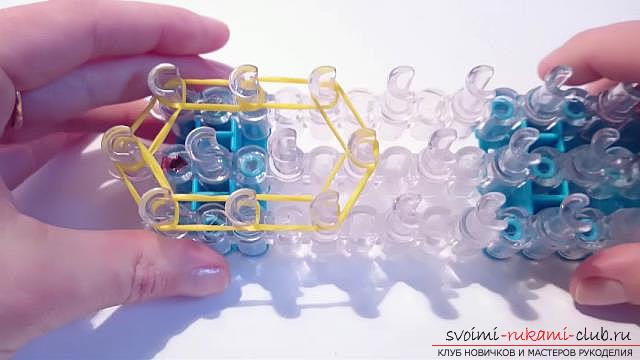 4. Then it is necessary to connect the lower and upper rows to each other so that a circle is formed as a result. After you need to throw gum obliquely (from the 3 columns of the lower and upper rows to the fourth column of the central row).
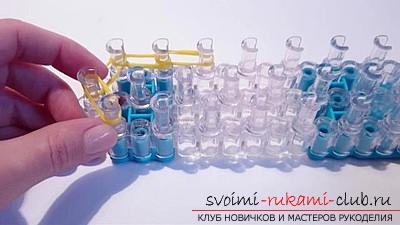
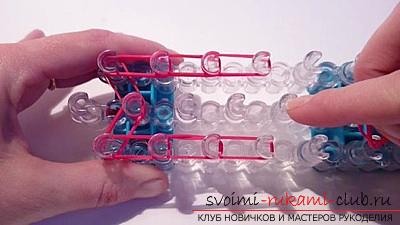
 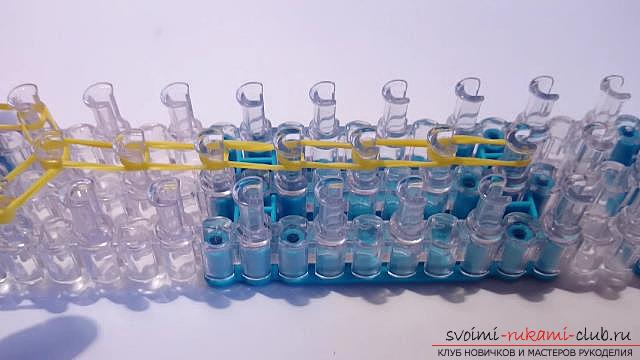 5. Starting from the fourth column of the central row, you need to count six columns of the central row, and then throw on them six yellow rubber bands that are twisted in the form of a figure eight.
 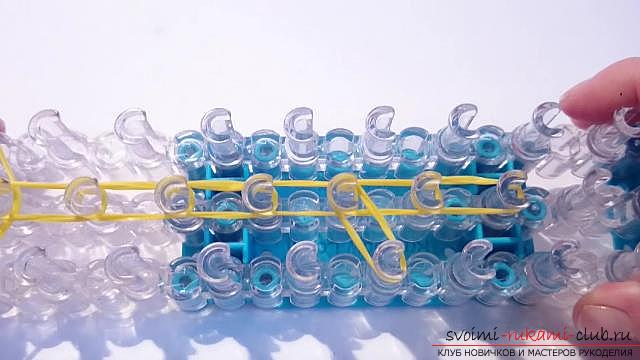 6. Starting from the 6th column with an elastic band of yellow color, you need to count the three bars in the left side, and then throw them on the next three rubber bands, which are twisted twice.
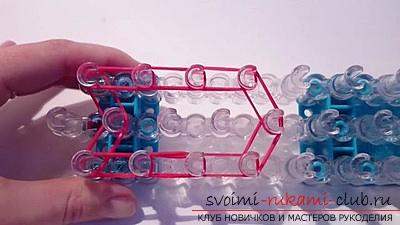
 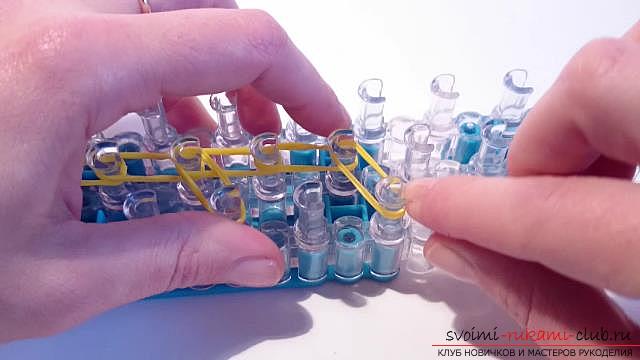 After you need to put the elastic bands obliquely on the columnthe bottom row. 7. Similarly, it is necessary to throw gum obliquely curled rubber from the final working column of the central row to the column of the bottom row.
  8. The final yellow rubber should be thrown on the seventh column of the bottom row, located on the right side of the worker.
 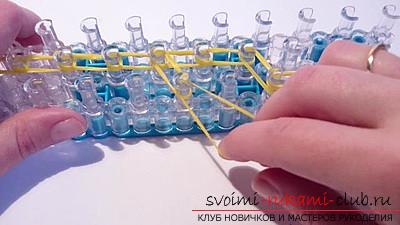 9. Rubber yellow color should be thrown on the seventh column of the bottom row, on top of another one of the same gum. Next, the yellow rubber should be twisted so that it turns out 8-ka, and then throw it three times. The result is four rings.
  10. Rubber yellow should be thrown on the final column of the bottom row, it should be twisted so that it turns four layers, and then throw it as tightly as possible on the column.
 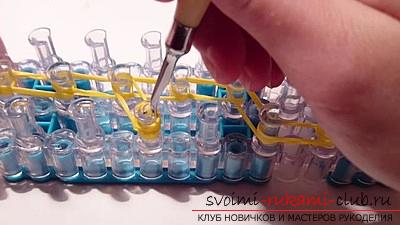 eleven. Using the hook, the rubber should be fastened on the seventh bottom column. In this case, the hook must be inserted into the hole, led back to the four rings, and the two lower hinges extended. Then toss them obliquely to the column of the central row.
  12. Then you need to tie other bands. In this case, you should start with the final part. It is necessary to take five rings back, stretch the two lower loops. Then, tie it to the column of the previous column.
 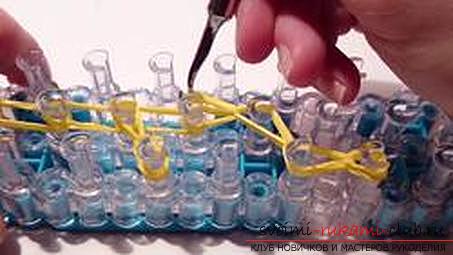 13. After you need to throw an elastic band from this column diagonally on the column of the central row, then tie three gums in the center row.
 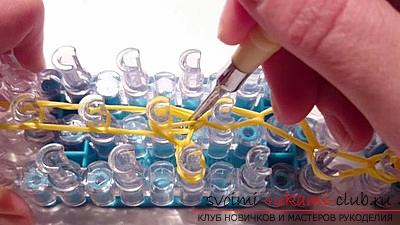 14. On the third column there are four rubber bands. They should be carefully withdrawn with the help of a hook, then to spend two gums, located from below.
  15. Then you need to continue to do the tying of the rubber of the central row to the fourth column to the place where the rubber bands of the side rows go.
 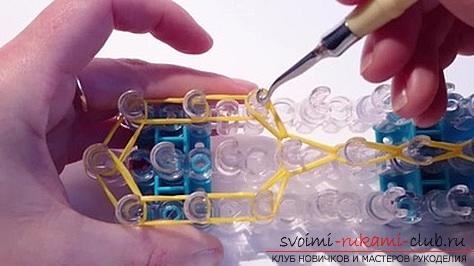 16. First, you need to make a bandage of the gum running from the bottom edge. It should be thrown back, on the column of the bottom ryadochka. Those gums that are still left, you need to throw on the top row.
 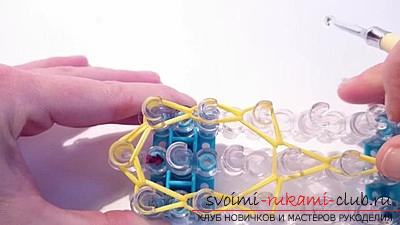 17. It is necessary to make a bandage of the gum on both the lower and upper rows. Eraser from the 1st column of the bottom row should be thrown on the 1st column of the central row, and the rubber band from the top row should be thrown into the same place. Then you need to pay special attention to ensure that all the rubber bands that you have already knitted, had the form of a drop.
  18. Next, hook in the hole of the 1st column of the central row along the line of the rubber bands on it, and then, after grasping the subsequent rubber band, hold it along the line of those already located on the column. In one edge hold the hook, the upper loop to transfer through it and release. As a result, a knot will appear, which should not be tightened too tightly.
 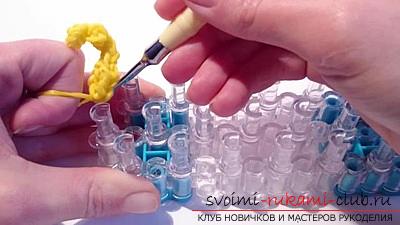 19. It is necessary to remove all the rubber bands to the machine axis using a hook. Then spread the key, which we got, turn it around. 20. To create a lock, it is necessary to put elastic bands on each column of the bottom row. The first rubber band should be thrown on the 2nd column, without making a figure eight from it. Then it is necessary to hold the nakidy folded in 2 times the rubber until the end of the machine. In total, eleven rubber bands twisted in 2 times, and 12 - single.
 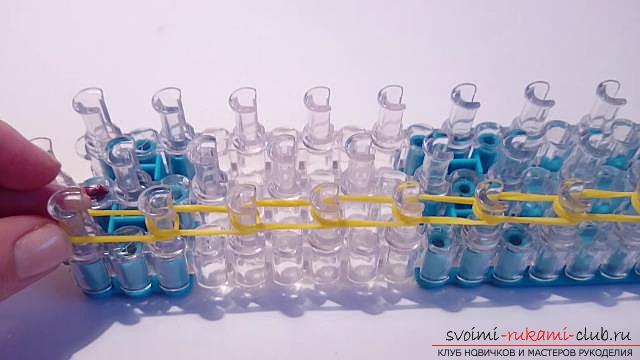 21. The final elastic (contact) must be twisted so that it turns out 8-ka, and then put on the last column of the lowest row.
 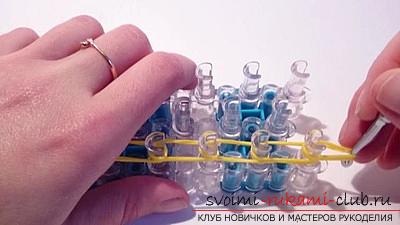 22. Use the hook to take the main rubber. In this case, the hook must be inserted into the hole, retracted, and the two lower loops stretched upward. Then make a dressing on the column that is in front. It is necessary to tie each rubber on the base of the machine.
 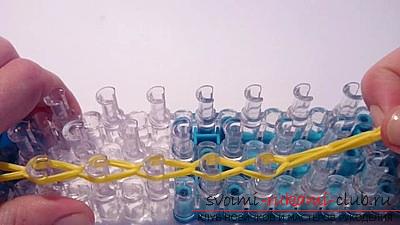 23. Similarly, each rubber should be tied. Then carefully remove them. The elastic from the 1st column will be held at the edge. This braid should be put aside for the time being.
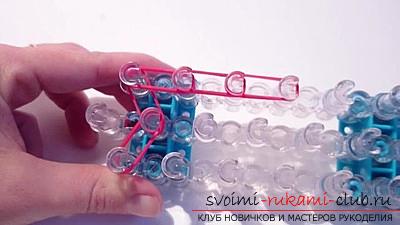
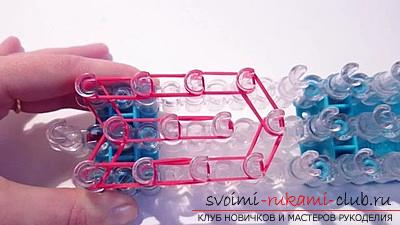
 24. The first two elastics should be placed on the 2nd column of the central row. Then you need to hold the round on the first column of the row, which is above. Next, you need to make a cake three times for two gum in the uppermost row. Next, you need to wrap on the first column of the row, which is from the bottom. Then it is necessary to make a nakid three times for two gum in the lowest row. After you need to throw the rubber band obliquely (from the 2nd column of the middle row to the 1st column of the bottom row). Then it is necessary to make a nakid three times for two gum in the lowest row. The next two gum should be thrown obliquely (from the 4th column of the lower and upper rows to the fifth column of the central row). As a result, the outline of our future castle will be released.
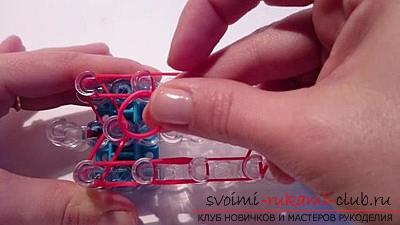
 25. We spend nakidy elastic bands in the central row. From the 2nd to the 3rd column we translate 1 rubber band, the next (3rd and 4th columns) - two red bands, but on the fourth and fifth columns - two black rubber bands.
 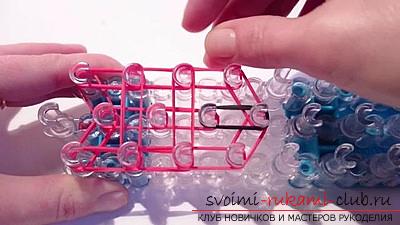 26. We spend the rubber bands on the vertical. On the 2 nd and 3 rd columns of the upper and lower rows, you need to throw in 2 gums.
  27. On the 4th column of the upper and lower rows it is necessary to throw one rubber, which will be twisted twice to ensure that the product at the very bottom has acquired a sharp shape.
 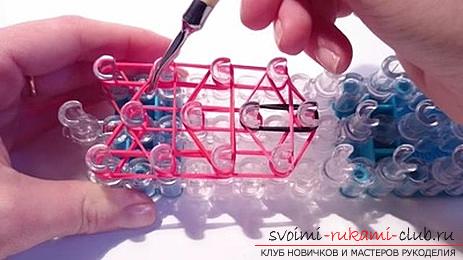 28. Next, draw the hook to the left edge of the vertical rubber bands behind the column that is on the left. As a result, triangles will be obtained.
 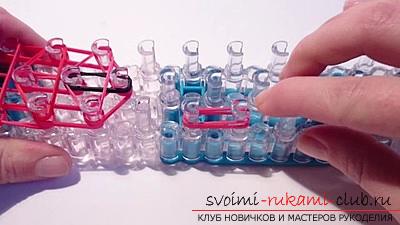 29. In order for the product to acquire a larger volume, you need to add to the top and bottom rows of a couple of rubber bands, previously tied. Then it is necessary to put two elastics on two empty columns in a row located below. After that, throw them on the column on the right. Then you need to throw on this column two more gum, and on the next column on the right - also two gums. Next, you need to wrap another rubber band on the final column on the right, wrap it in the form of a figure eight twice. The result is three rings. After that, you can hook a hole, take the rubber bands to the right side, and then knit the two lower bands in the previous column. Similarly, you need to tie all the other gum. 30. Then you can hook into the hole of the 1st connected column, grab the rubber from the columns, and then remove each elastic band.
 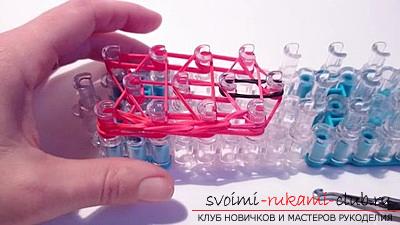 31. This rubber band must be added to the bottom row of the product on the 1st column. Next, take the other edge, throw the last two loops on the 4th column of the lowest row. Similarly, you need to tie all the other gum.
  32. Next, you should hold the cap of the second pigtail, which turned out, on the first column of the row, located at the top. Find the end of the two rings, stretch them, and then throw them on the 4th row of the row above.
  33. Now you need to wrap the one final rubber on the 5th column of the central row, in which all the rubber bands are fastened. Next, you need to wrap this gum on the final column, wrap it in the form of a figure eight twice. The result is three rings.
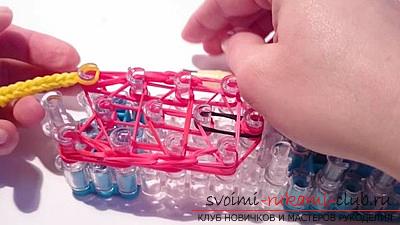
 34. Then you need to take a pigtail yellow, which was woven earlier. If there is a desire, it is possible to connect the key and lock through the highest key loop.
 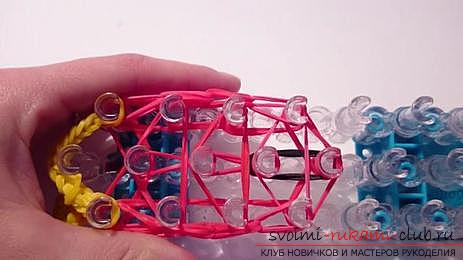 Then you need to hook through twoThe loops that are at the end of the pigtail are yellow. We draw the nakid from these loops on the final column of the top ryadochka. 35. Two loops, which are located on the opposite edge, must be placed on the first column of the row below. 36. Using a hook, you should tie all the rubber bands. You need to start with the final bands of the center row. At the same time, we remove the red rings, then pull out two loops of black color and translate them to the previous column of the central row. Hook should be carried through the same hole, and the rings placed on top, should be pulled back, capturing two gums and transferring them to the column in the top row. Those two gums that remained below (from the row row from the bottom), you need to translate to the column of the lowest row. First you need to tie gum from the top, and then from the bottom row.
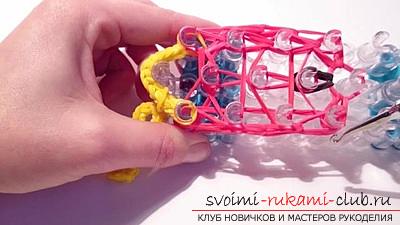
 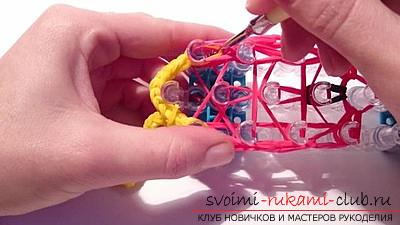 Next, we take out with the help of a hook each elastic band4th column of the row, located at the top, until we go to the bottom two loops. After carefully pulling the data loops and translate them to the previous column of the central row. 37. On the 3rd column, located at the top, it is necessary to retract the elastic bands, which have a horizontal position, then pull out the 2 lower rubber bands and translate them to the column located on the left side. Similarly, you need to tie all the other gum. On the first column of the row, located at the very top, you need to remove the yellow gum, pull out the two lower elastic bands of red color, and then transfer them to the 2nd column of the central row. Having made a circular movement by hook, it is necessary to release these rubber pieces so that they remain intact.
 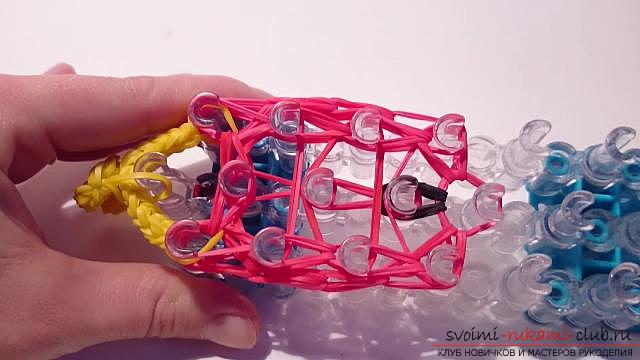 38. On the 1st column, located below, it is necessary to retract the rubber bands, which have a horizontal position, then pull out the 2 lower rubber bands and translate them to the column located on the left side. Similarly, you need to tie all the other gum. On the first column of the row, located at the very bottom, you need to remove the yellow gum, pull the two lower elastic bands of red color, and then transfer them to the 2nd column of the central row. Having made a circular movement by hook, it is necessary to release these rubber pieces so that they remain intact.
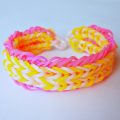
  39. Before making the bandage of the center column, you need to add one more black rubber to our heart-shaped product. It will act as a well of the castle. Then hold the caulking rubber in black, and then make three turns. As a result, there will be four rings on the base of the hook. Then you need to hook the hole in the 3rd column, pull out the two rubber bands from the red, and before you move them to the column on the left, you must drop the rings from the hook to the given rubber bands of red color. Spend the cake on the column. 40 Then you need to tie an elastic band from this column. This will be the final rubber. 41. Our heart-shaped product is ready. Before carrying out the removal of the heart from the machine, you need to fix each elastic band of the 2nd central column. Then you need to hook in the hole in the column, take back each rubber, and then pull the tool to the left of the column and draw a rubber band around it in red. Then pull it with your fingers in the side, and the hook itself along the line of the rubber bands of this column. The second part of the rubber should be thrown over the hook, pass through the first part, making a dump from the hook. The result is a bundle. Then the knot should be thrown on the finger and remove all the rubber bands from the base of the machine. 42. At the end of our work process, you need to give the product a heart shape, slightly straightening it. The knot should be tightened as tight as possible. And then disguise it behind the product. That's all! A gift for yourself is ready for Valentine's Day.
Comments
Related posts:
 How to weave the original bracelet from the rubber bands "Houston". Step-by-step recommendations, description of technology and photos
 With our own hands we create crafts from threads - a keychain-heart. A master class with a photo will show how to weave a keychain.
 How to make an original gift by March 8, step-by-step photos and description of creating bouquets of flowers from sweets
 How to make your own hands an original gift to a guy by February 14, step by step creation of a fragrant sachet and bag with 10 reasons for love
 An original bracelet made of rubberized rubber in the form of chamomiles with her hands with detailed descriptions and photos.