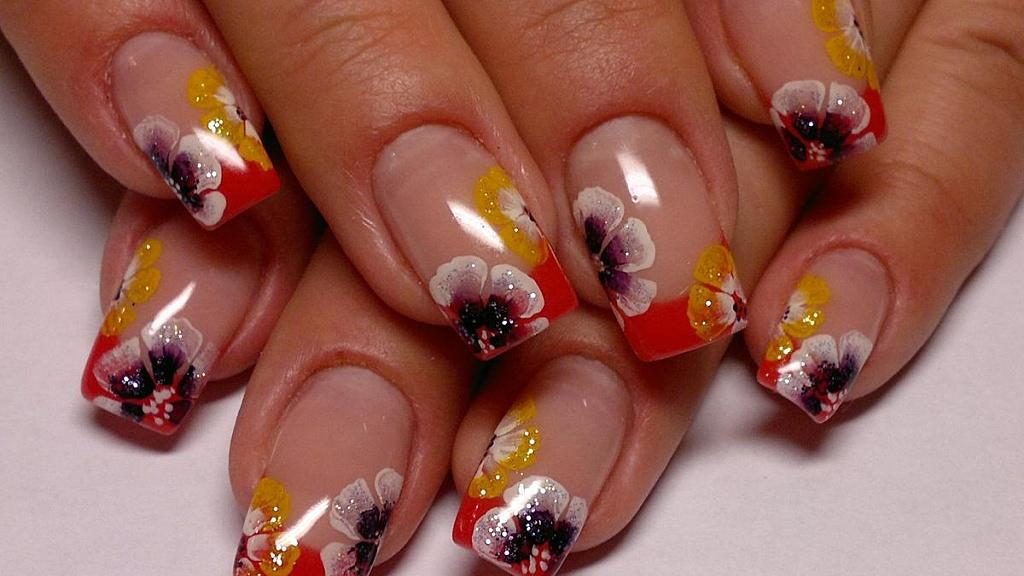
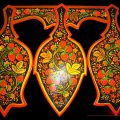
Painting on nails or Chinese painting - photo and video master classes
Chinese painting is one of thethe most popular branches of the design of nail art and presents a number of opportunities, thanks to which you can decorate your nails. The motif of Chinese painting is determined by a simple element - flower patterns or other vegetation. This technique is used with the "one stroke" property. 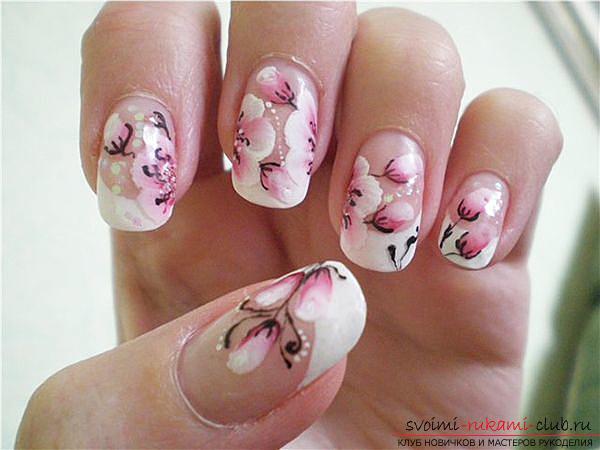
Painting on nails or Chinese painting - photo and video master classes
The main instrument is theA special brush is flat type, on which you can simultaneously apply two types and colors of paint. After that, the master needs to make a certain number of strokes with different lengths, as well as using a different shape. In general, two types of brushes are used: Natural, as well as artificial type for high-quality processing. Also, as an adornment item we will need a special acrylic paint. The main provisions of the Chinese painting Collect all these materials and you can start trial work. To begin with, you should take a regular piece of paper and make a few smears to determine your shortcomings and try to fix them. Feel how these strokes are applied and how you can decorate the appearance of the drawing with your own hands. In Neil-Art, it is best to use harmonious colors that match each other. For example, the option is dark blue with blue. Or, a variant of pink in the used combination with a dark red color. So, you got the first excursion into the sphere of Chinese painting. The first smears on paper have already been made, it's time to try your hand at real art designed for nails. To do this, we will need a special inventory, which will help realize the painting of the Chinese version. Materials:
- We will use the base varnish.
- Take acrylics in white, yellow, black, green, pink, dark purple.
- Cover to complete the transparent color.
Instruments:
- A brush of Chinese painting.
- Brush "Neil-Art."
- Dots
First of all, it is necessary to prepare the platesnails in order to apply an image to them. Next, you need to remove the skin of the cornea (protruding) and cuticles on the nails. Next, we carry out the procedure of cosmetic repair of nails with the help of a nail file, give a beautiful shape and length to our canvases on the fingers. After that, we take the base lacquer material and apply exactly one layer on the nails. The paint must be squeezed out onto the palette (a saucer, preferably white, is suitable). We continue to draw flowers 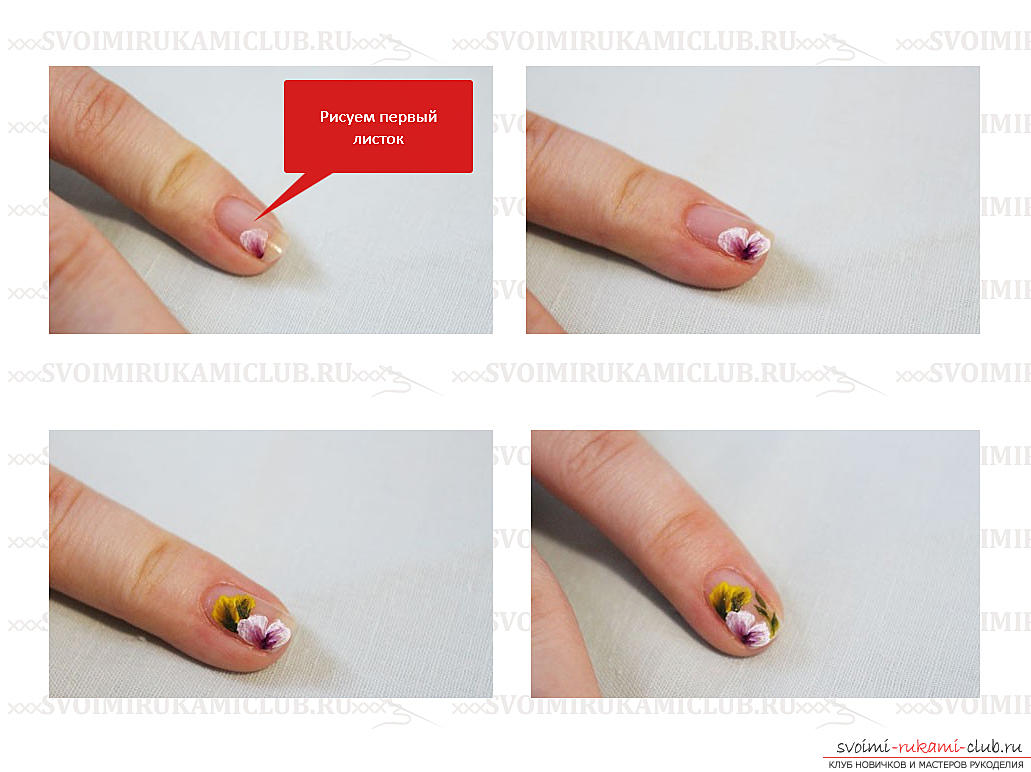 Next, we are working on color finishing. To do this, you need to take the colors of white and purple to make the first petal for our future flower. In the same way, we repeat the pattern for our next petal.
  After this, it is necessary to wash the brush in solutionwater and type yellow with green on the brush. Then, near the petals, you need to draw two leaves. Smears for our work should be done in the form of a "zigzag", so that special teeth are formed in the edges of the leaf.
 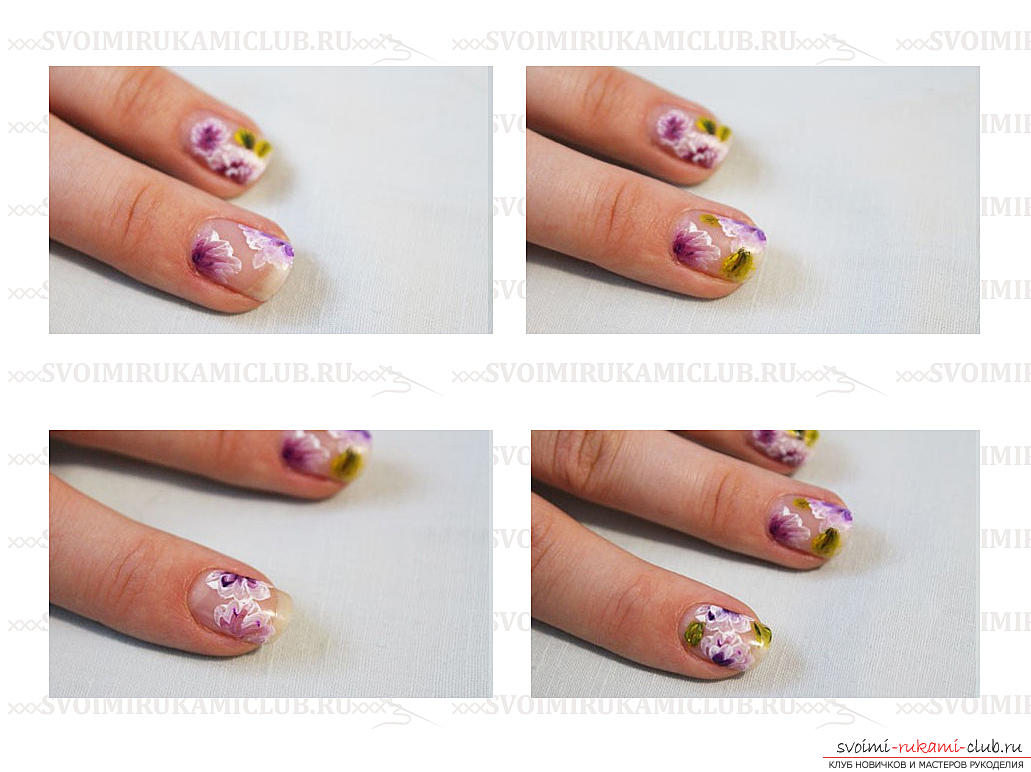 After that, with the help of a fine brush we doa thin branch, which will also be with the leaves. After that, we make a list of the next nail. For him, we use a rounded sheet, as in the figure. Then, make a large part of the flower near the free edge, to the side. We will also make a series of petals. After that, we'll make the leaves in the same form as described in the early version. Next, we draw the nail using the base in the middle finger. The index finger is decorated with a set of a couple of flowers. We also supplement the drawing with the help of leaflets. Using dotz, we must make the core of the flower. This is done with a thin brush, which is drawn in black (acrylic).
 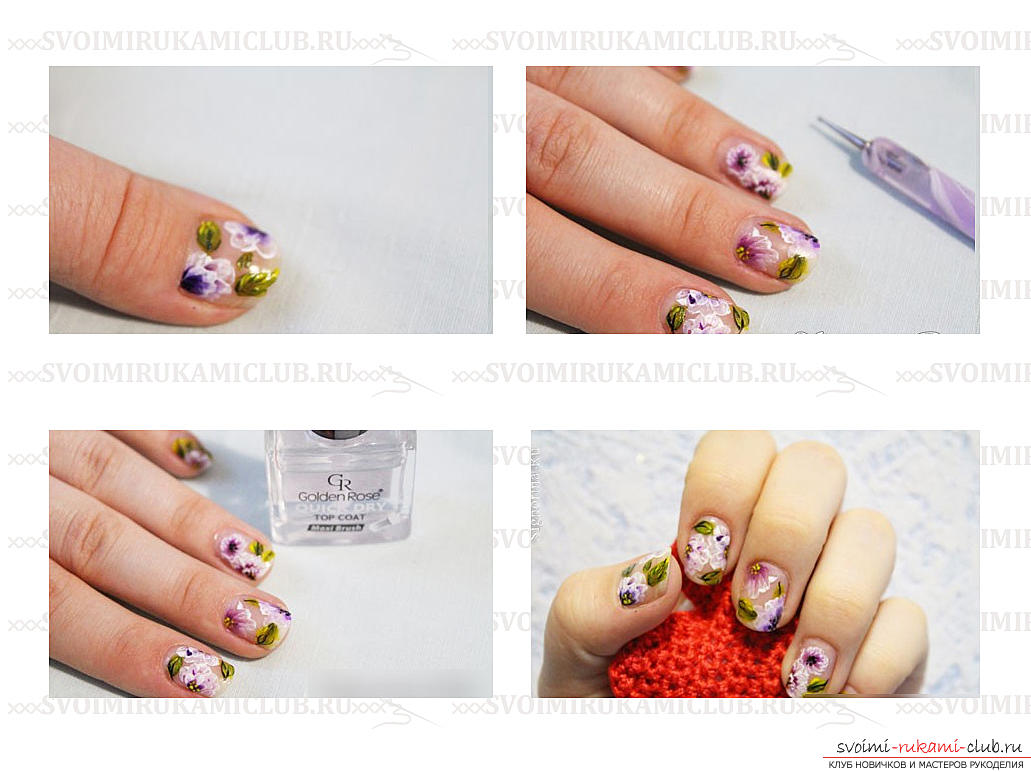 Drying and finishing operations
  Then, we wait until the lakh dries and coversall products with finishing varnish. The product is finished, the picture is finished. With the help of this lesson you can also draw a separate type with your ideas, or by modifying the structure of the sheets and the author's choice.
Comments
Related posts:
 How to weave animals of gum: photo and video workshops
 Clothing for dolls of gum: photo and video workshops
 Photo and video master classes on knitting pinets of berry knitting needles
 Flowers of the tapes with their own hands the video and photo workshops
 Painting dostochki in khokhloma style - master class and instruction