Paper chandelier - how to make a lamp with your own hands
Do you dream to add brightness to the nursery or refreshyour workplace in the house? Or maybe you are a lover of the East, from which came the fashion for these so tender little things? Then you, undoubtedly, should read how to make a paper lamp with your own hands - unusual original things in an instant will add a drop of magic to any corner of the house! We guarantee - your guests will ask for a long time where you bought this designer lamp, and upon learning that you made it yourself, they will ask you to tell you how to make a chandelier from paper with your own hands and its step-by-step instructions. In this master class, we will show as many as four ways how to make a lamp out of paper, look and choose the option that is right for you. The content of the article:
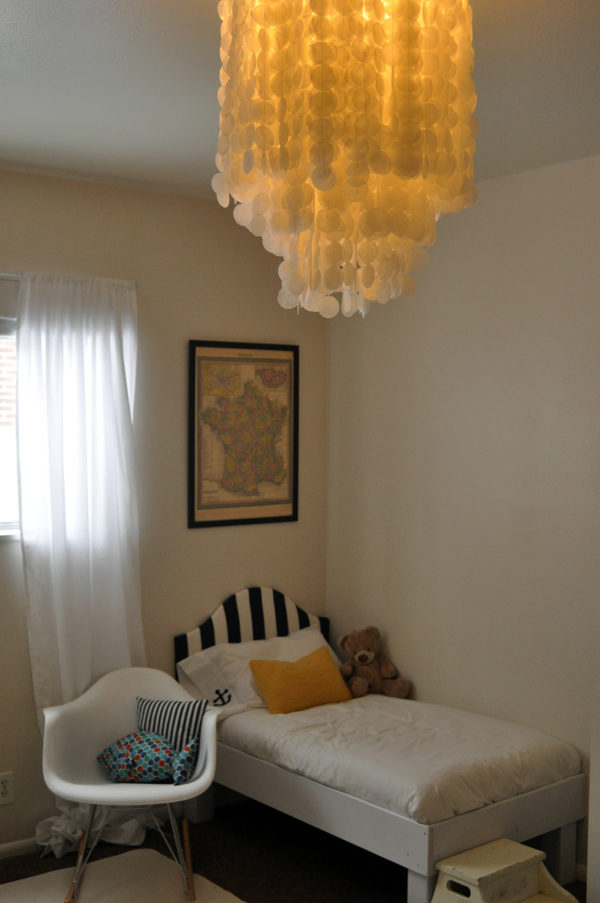
Master class number 1: Chandelier "Coral inspiration"
 To create this delicate lamp, prepare:
- Color paper of any color;
- PVA glue or glue stick;
- Staples;
- Compass;
- Scissors;
- The line;
- Colored yarn;
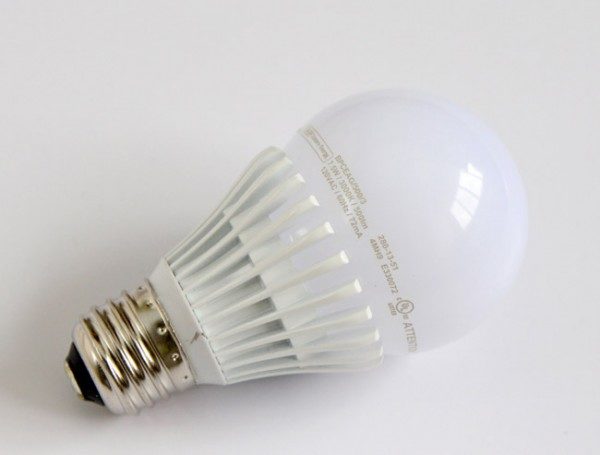
- LED lamp (in no case incandescent lamp);
- Wire with a switch.

 Step by Step Instruction: Step 1
- On a colored sheet with a compass draw a semicircle 1 cm wide.
- With each line we increase the diameter of the semicircle.
- Note that there will be quite a few sheets. After cutting the semicircular strips and cut them into pieces of 2-5cm.

 Step 2
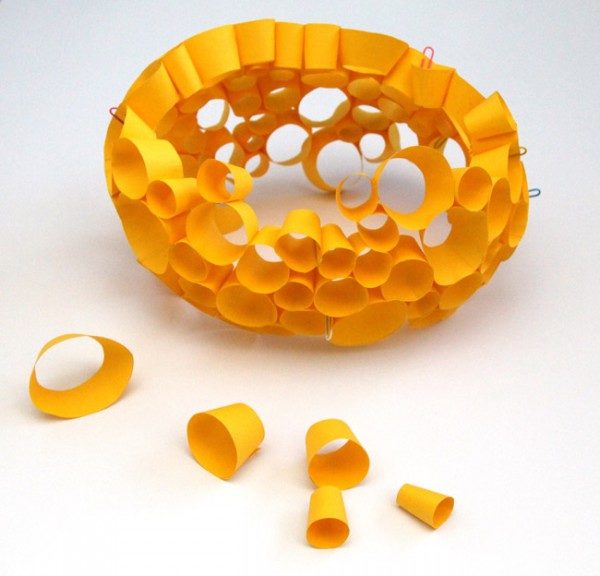
- Roll and glue the resulting strips, making one side more of the other - this makes it easy to glue them together into a dome-shaped form. After that you can connect them with glue pieces of five.
- Glue the clusters together, strengthening them with clips until the glue dries. Glue until you have a circle with a small hole under the lamp.
Of course, you can fantasize, and your lamp will be slightly different than ours. 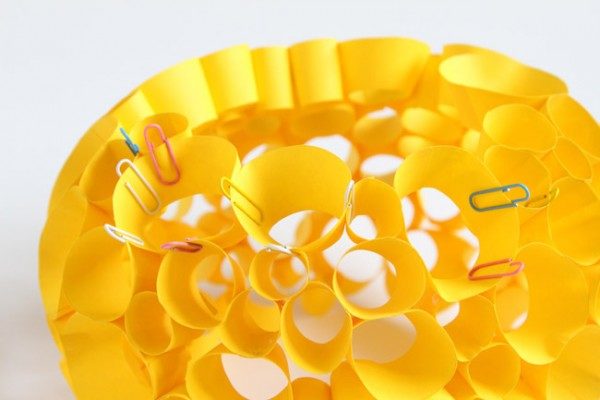 Step 3 Now, while our glue is finallydries, let's decorate and our wire. Take for this yarn any color you like and gently begin to rewind the wire with it. Try not to leave unevenness, winding the yarn on the previous layer. You can drop a drop of glue on the end of the yarn in order to strengthen it.
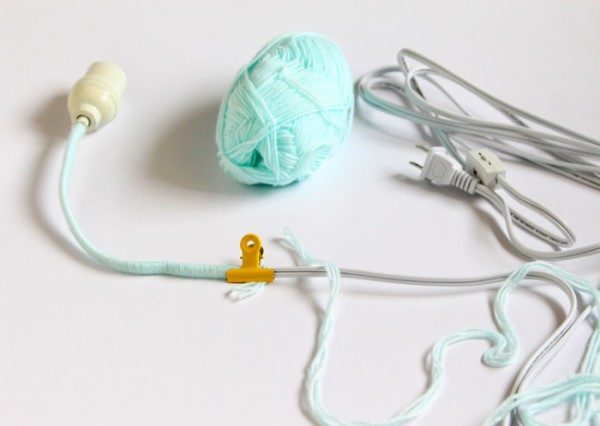
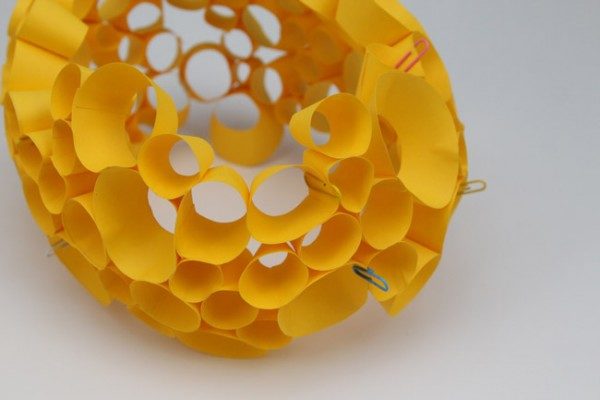 Step 4 Let's make a holder for LEDlamps. To do this, we tie it on three sides (it is advisable to measure the distance evenly) with the line to our glued strips, and the other ends to the clip, which we’ll first stretch to the type of triangle.
 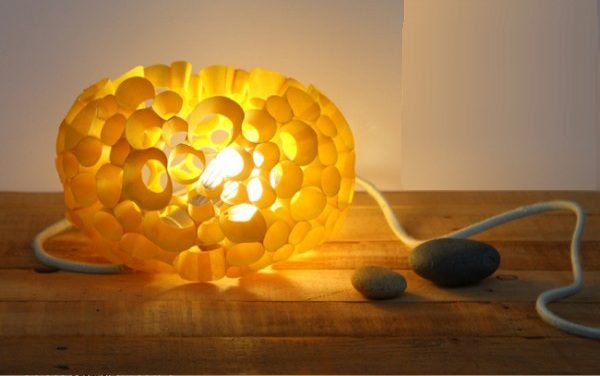 Everything! It remains only to place the lamp in a circle and screw it to the wire. You can hang such a lamp both separately and in combination with, for example,.
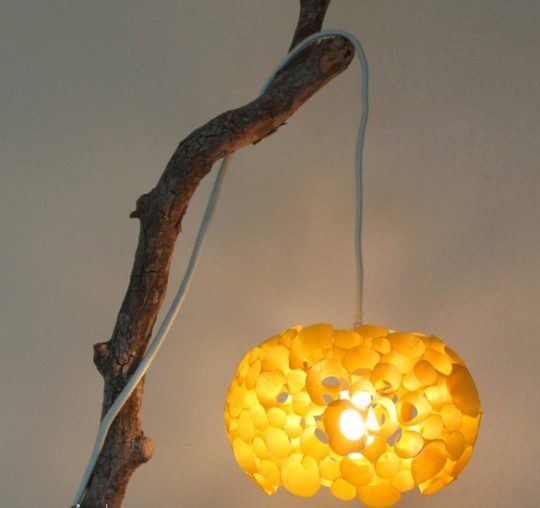
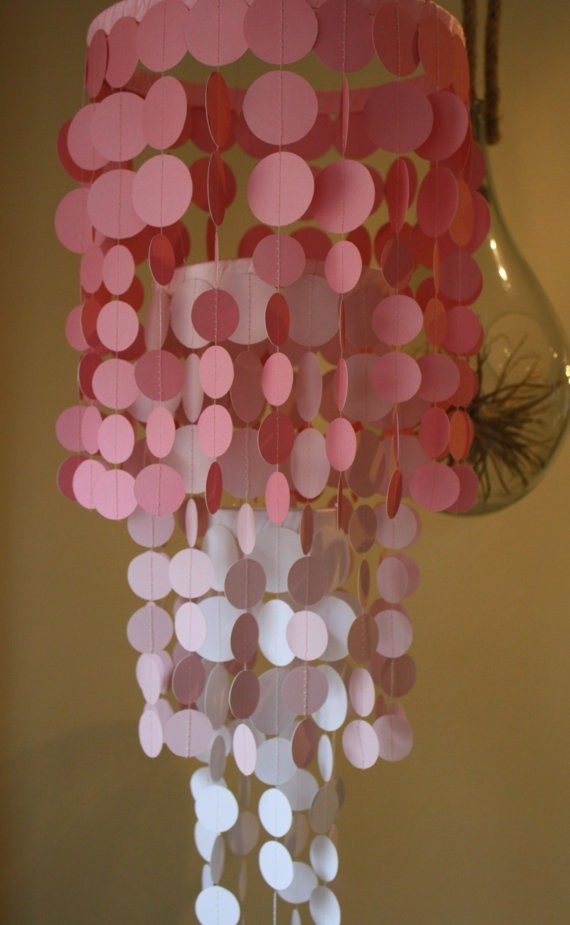
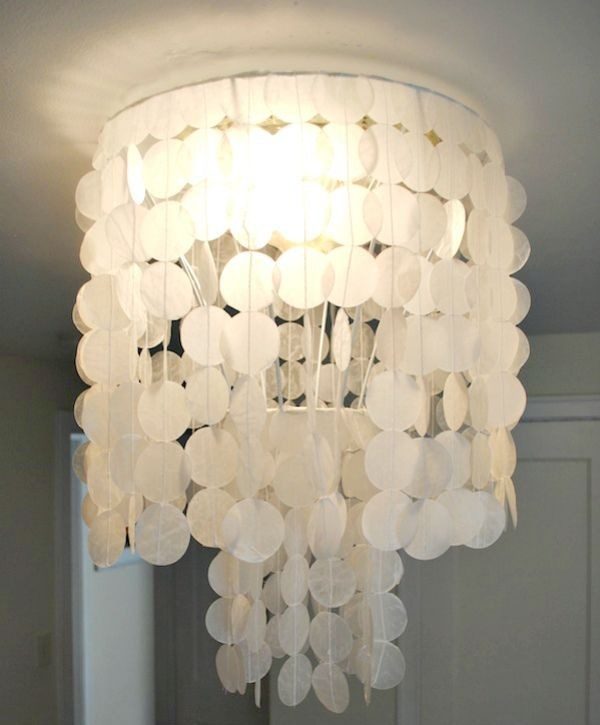
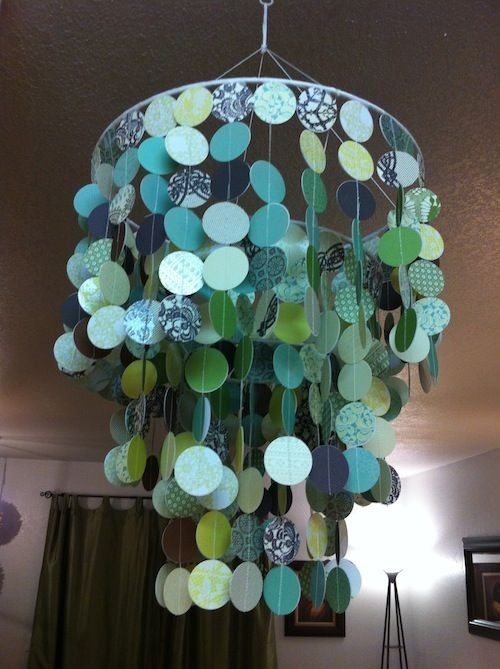
Master class number 2: Chandelier made of rice or parchment paper
We offer you a new master class, onwhich we teach you to make lamps from rice paper. There is nothing complicated, as it may seem at first glance, in the making, and you can connect all the household members to this fascinating occupation. The design lamp will be suitable both for the nursery, and for your bedroom. Instead of rice paper, you can buy a roll of parchment paper for baking. 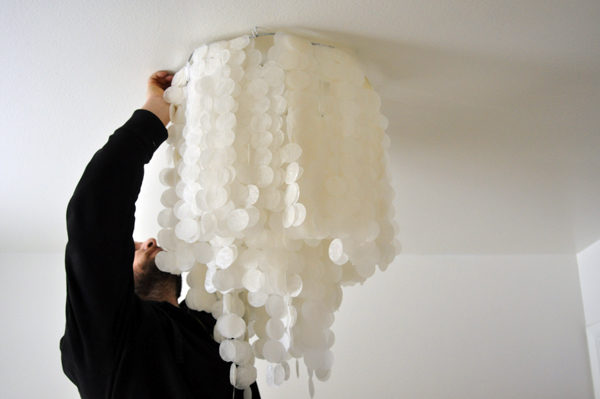 So, to make a lamp you need:
- Unwanted lampshade;
- A thin wire;
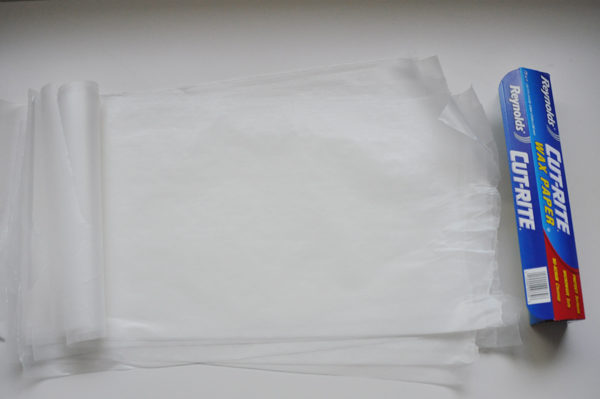
- Several rolls of rice paper;
- Iron;
- Paper cutter;
- Sewing machine.
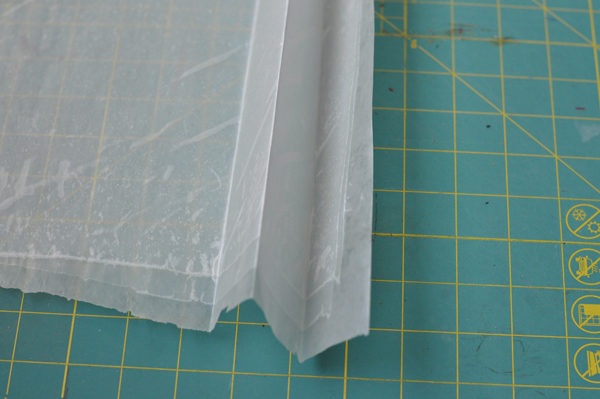
Self-fabrication Step 1 Takeunnecessary lampshade (you can buy a cheap new one) and remove everything from it, leaving only the base. If your lampshade is similar to ours - then add a wire in the middle, properly securing it. 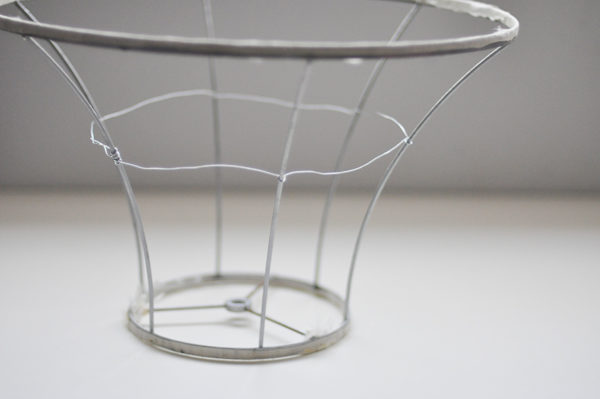 Step 2
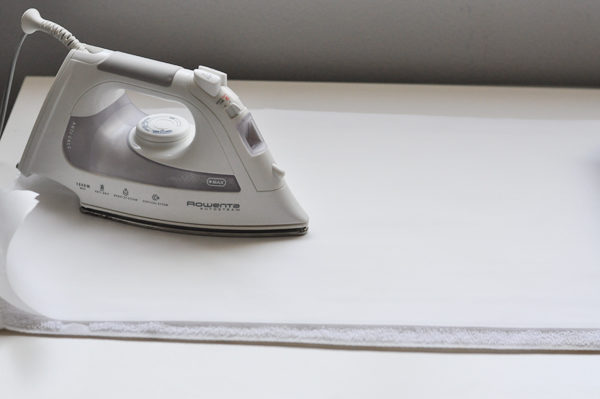
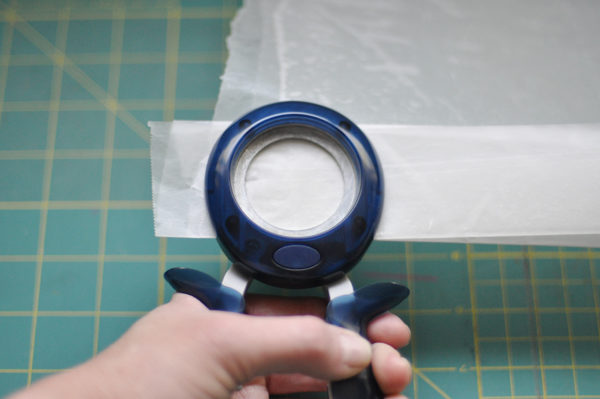 Step 3
Do not forget to use only LED lamps, in order to avoid a fire. 
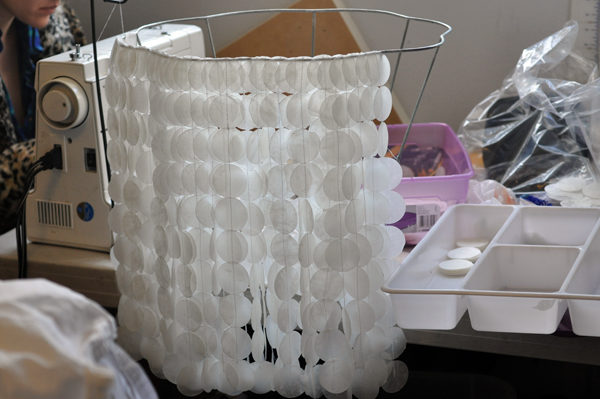 This beautiful chandelier is the result of painstakingwork, after which you will admire your work and be proud of yourself for a long time. On our site you will find many more ways to diversify your home lighting, for example:
- can or.
- for lovers of modernism.
- Or for lovers of eco-style.
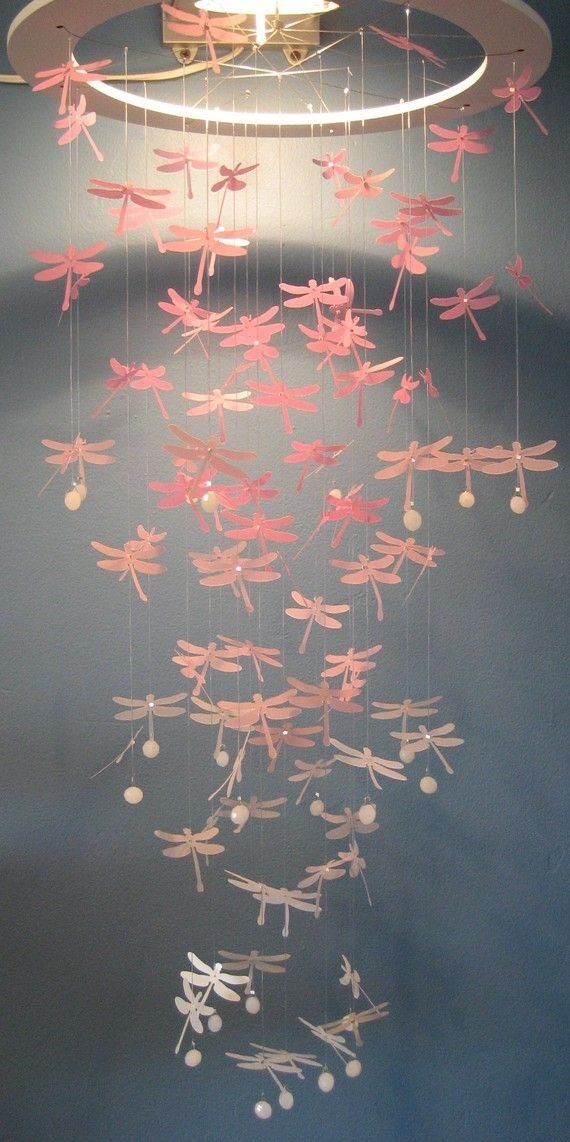
 Also, you can paint at your discretioncircles of rice paper in any shade, based on the color scheme of the room. If you want to hang this lamp in the nursery, you can add, for example, glass angels on long gold threads - again, choose the appropriate accessories for different rooms, this will add warmth and originality.
 ATTENTION: Do not forget that incandescent bulbs heat up the paper very much, which can cause it to ignite. For paper lamps and fixtures, use only LED lamps.
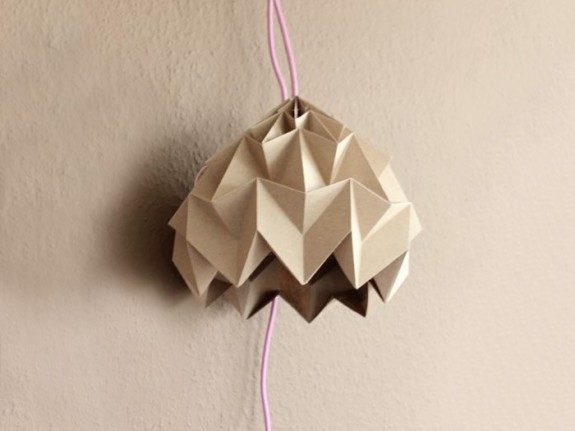
Master class number 3: Paper origami chandelier
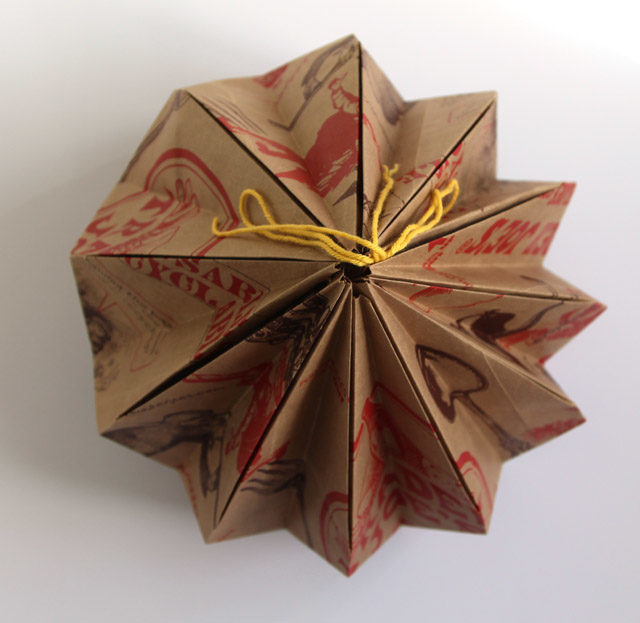
 This beautiful bright lamp really resembles ripe berry! To make it, take the following:
- 2 paper bags so that when gluing a half meter bag is obtained (preferably with an interesting print);
- LED lamp (in no case incandescent lamp);
- Wire with switch;
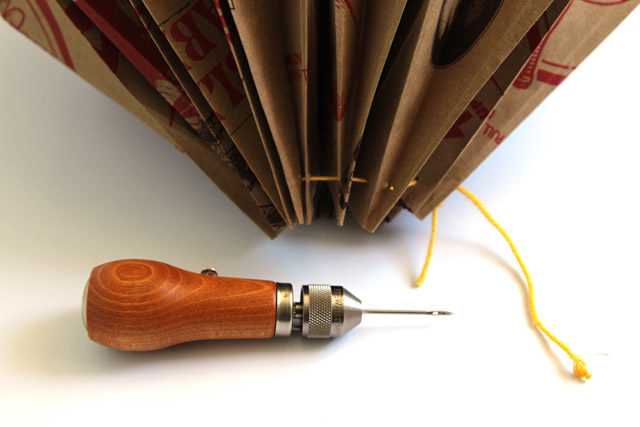
Step 1 We advise you to start practicingfolding origami. We brought you a scheme for proper folding - you can resize it to your liking. As soon as you decide that training is no longer needed, proceed to the preparation of the paper bag. Remove the handles and cut the bottom of the bags and glue them together to make one large paper bag. 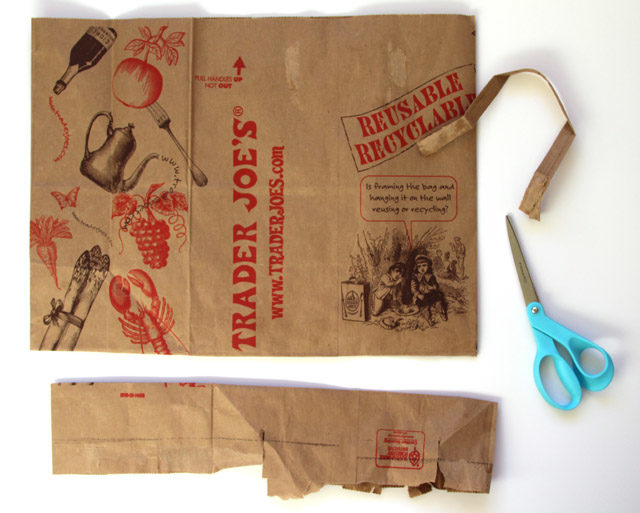 Step 2 Fold the resulting bag in half, and then fold the harmonica halves so that you get 16 identical curved bands. Then fold the two outer bands diagonally.
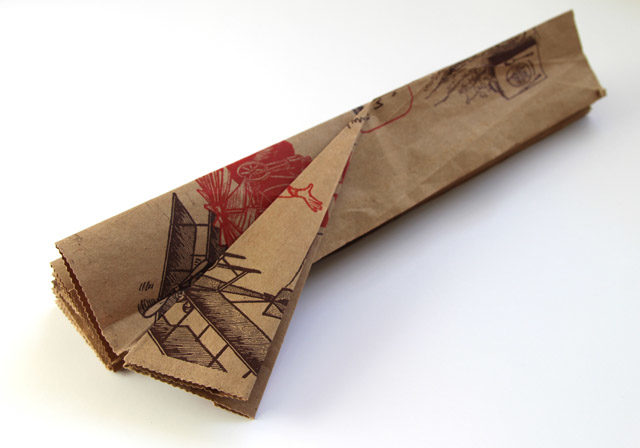
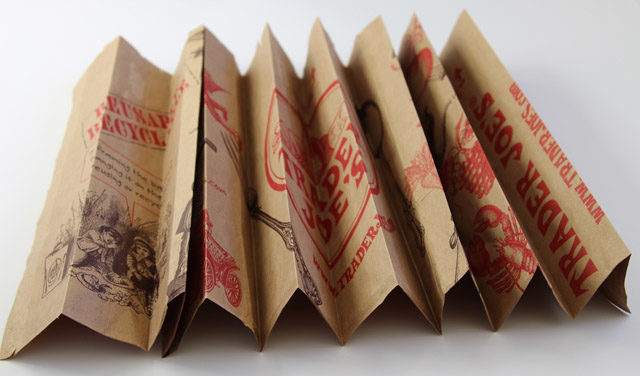


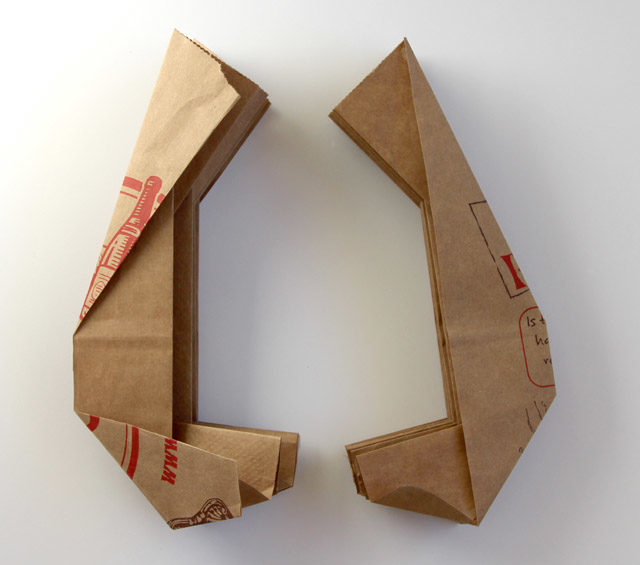
 Follow the simple schemes and you will getbeautiful lamps for home decoration. You may have to practice a little in order to ideally add origami, but you will not regret, because origami is a whole world of various interesting things created by your own hands. And your children will be simply delighted with your skillful hands!
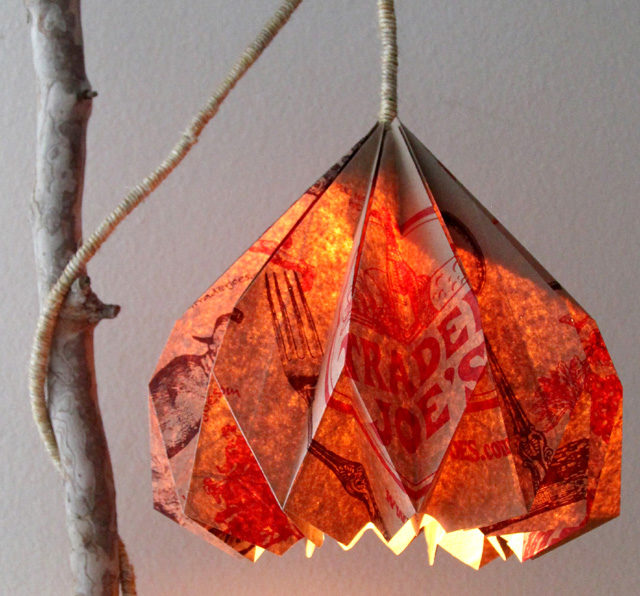
Master class number 4: Corrugated paper lamp
 To make an unusual lamp will need:
- Corrugated paper 88 × 44cm;
- Ruler;
- Spoke;
- Glue;
- A thread;
- Cable;
- LED lamp (in no case incandescent lamp).
Step 1
- Using a ruler mark the sheet of paper at regular intervals and fold the accordion on the markup.
- When helping yourself with a knitting needle, fold a folded piece of paper diagonally, first on one side and then unrolling, on the other.
- Expand the sheet - you should have a double sheet marked with rhombuses.
Step 2
- Connect the marked lines according to the photo, it is desirable that the sheet was not strongly dented at this time - otherwise the appearance of the lamp will be spoiled.
- It remains only to interconnect the top of the lamp with each other so that it does not disintegrate, and fasten the cable with the LED lamp.
 Watch out for safety - do not use ordinary incandescent bulbs, they heat the paper very much and it can catch fire.
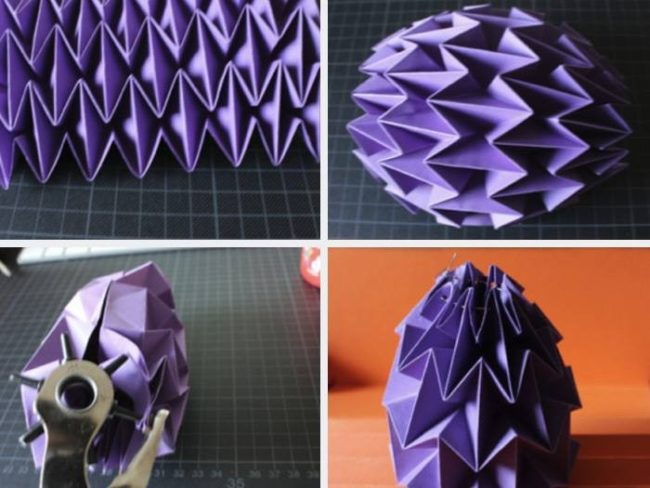
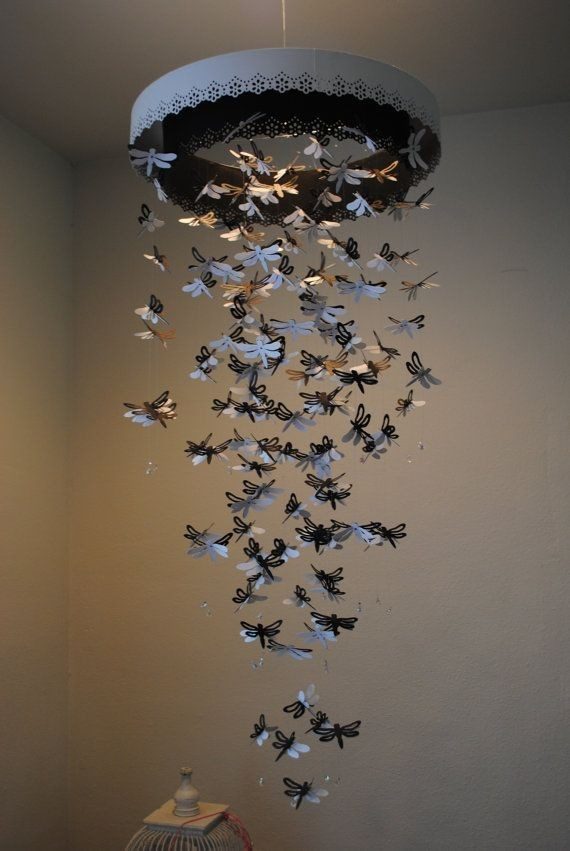
Paper Butterfly Chandeliers
The most popular paper chandelier is a butterfly chandelier. And such a love for this product is not easy:
- Firstly, it looks very elegant and expensive.
- And secondly, making is very simple, you can even attract a child.
Such an elegant lamp will be well combined with any style of interior, and it is also appropriate in the living room or dining room, and even in the children's room.  Manufacturing Technique:

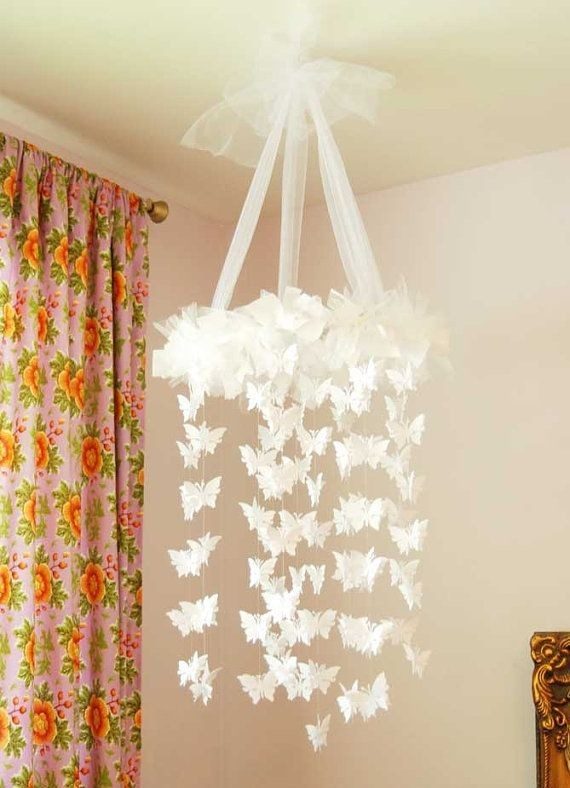
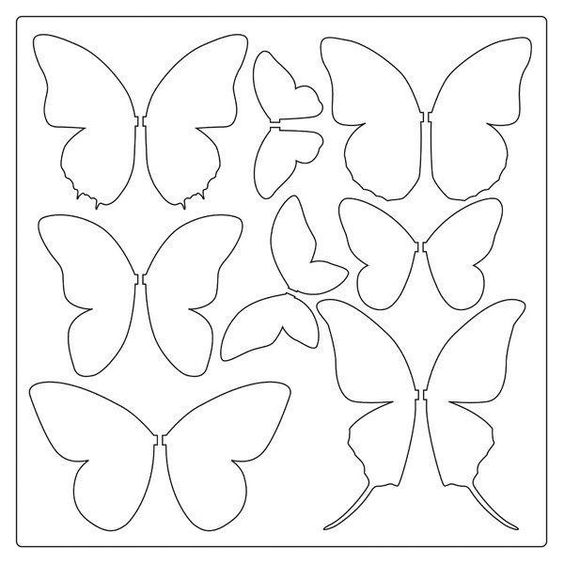
 Butterfly pattern In order to make a chandelier withbutterflies, just take a pattern, scale it to your size. It looks very nice if you make butterflies of several sizes, for example, 3-4 diameters. Using a pencil, put a sketch on the paper and cut it out.
- It is best to cut with a stationery knife or straight nail scissors without rounding.
- It is better to use paper that is more dense and which does not attract dust, for example, a velvet structure. Since you have to often vacuum such a chandelier
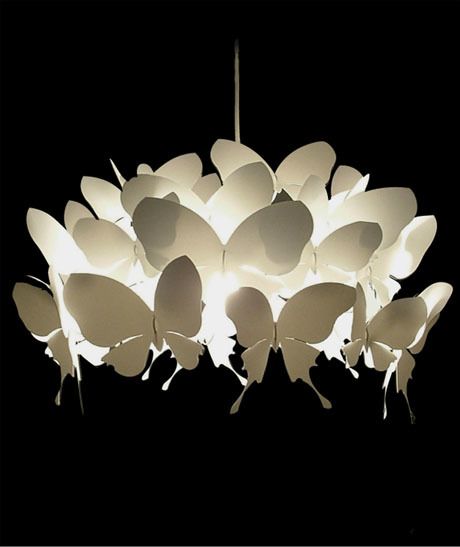
 Also a very beautiful option is obtained if you make a ball out of a wire; we take as a base a stray suspension from a chandelier and place several butterflies with a glue gun.
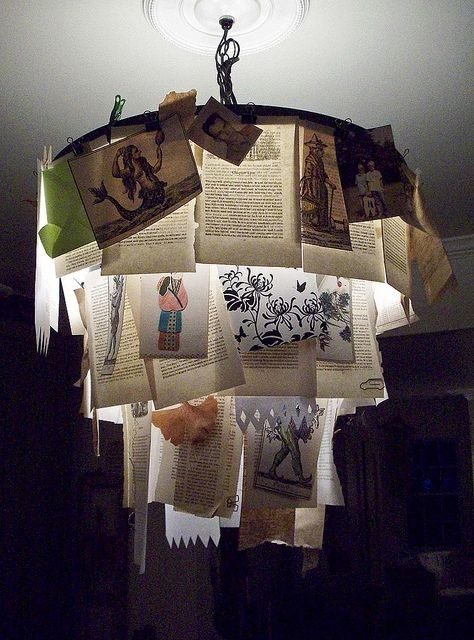
Chandelier paper ball
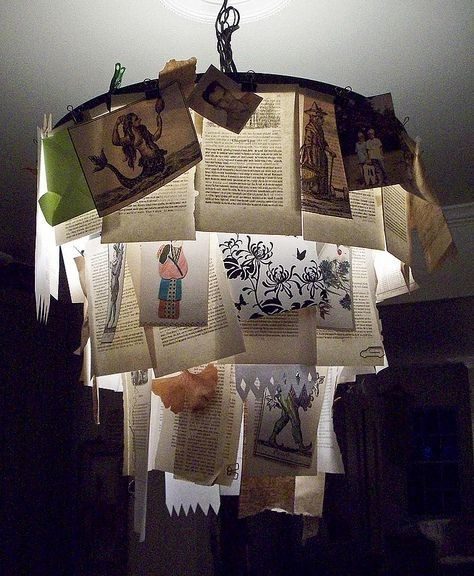
For the basis of these chandeliers take readyChinese lamp ball of rice paper. Usually they are very cheap up to 1-2 dollars. But you can decorate it as you like, and paper tartoletkami, unnecessary card, newspaper or sheets of old books. We publish a few ideas on the decor of the chandelier-ball paper. 


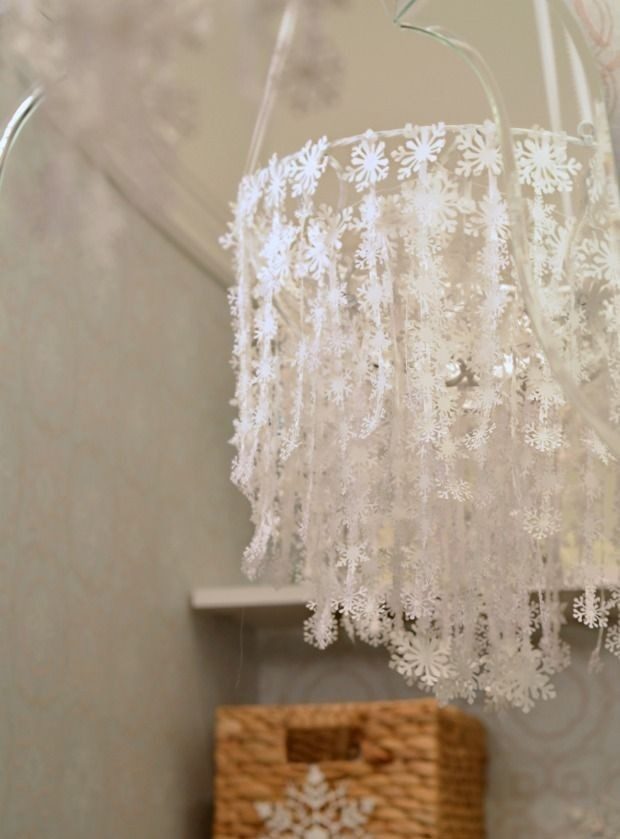
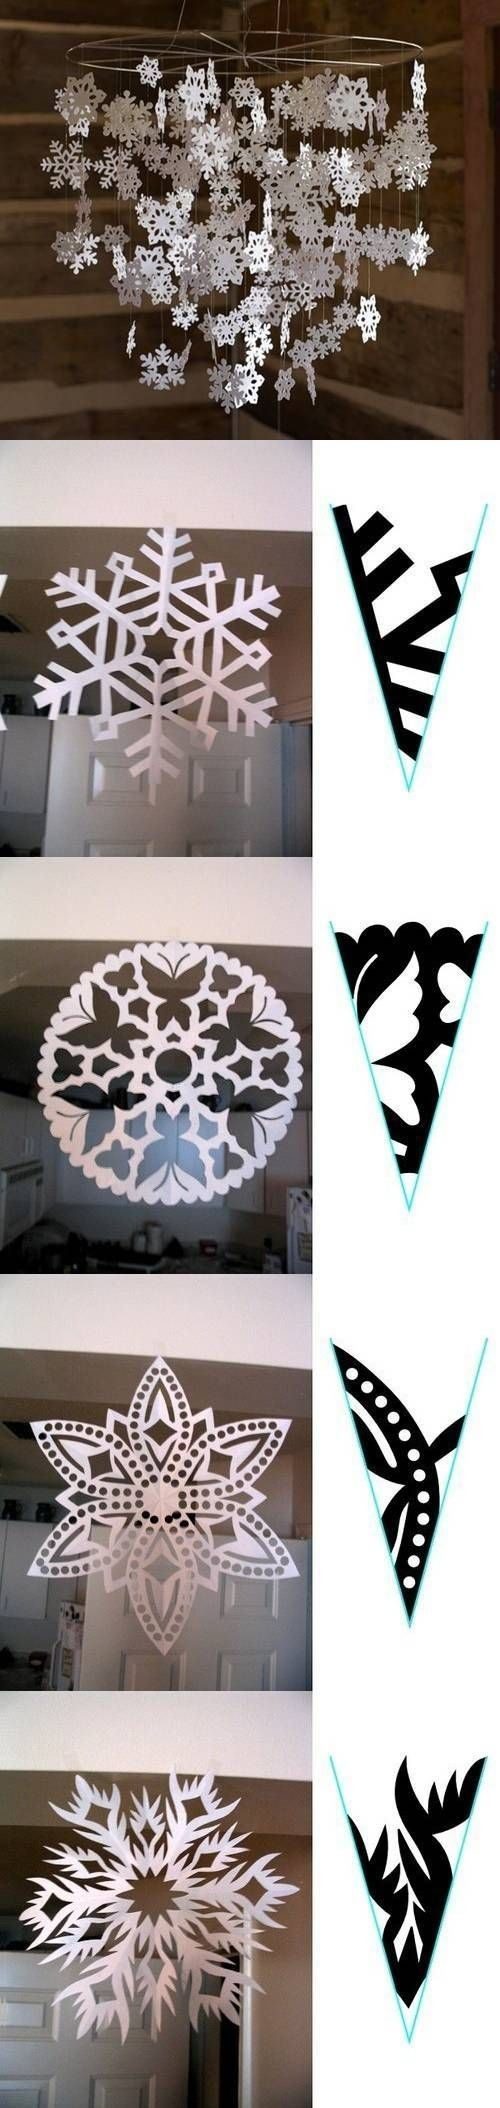
Lamp for the New Year of paper
Having an idea for the New Year is to use an old lampshade and string snowflakes of various shapes on a string. Very impressive and beautiful. Below are some photo ideas of this decor for the new year. 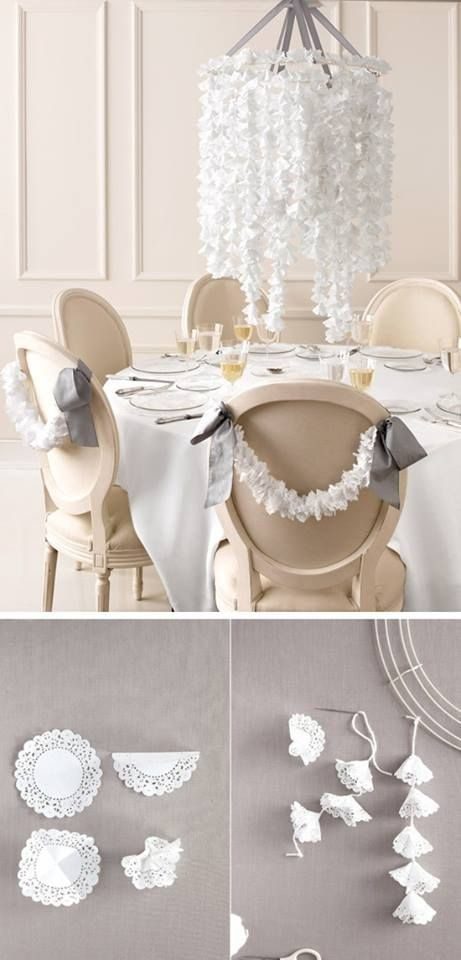
 To polish their skills, as well as to replenisha collection of unusually beautiful lamps, see more ideas and. Sure, among them you will find many of those that you definitely want to create!
Comments
Related posts:
 How to make a clove from paper with your own hands
 How to make a monkey out of paper with your own hands
 How to make a house. Volumetric hand-made articles made of paper.
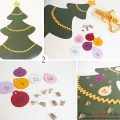 New Year's decor with their own hands, Christmas trees made of paper, how to make an original Christmas tree of paper with their own hands.
 New Year's crafts, the creation of Christmas decorations from paper, the various creation of paper balls with their own hands, how to make a beautiful garland of paper with their own hands.