
Paper rose in the technique of origami is easy to fold, using a detailed description and step-by-step photos
Paper rose in the technique of origami will be beautifulan addition to any gift or an excellent decor element. In itself, the creation of this wonderful crafts is quite interesting and not at all complicated. Following the instructions, each person can do this wonderful flower without spending a lot of time on work. Each flower is beautiful in its own way. It conceals in itself a pristine beauty, attraction, tenderness or passion. The aromas of these plants always attracted attention and caused admiration. One of the special colors that exist on the planet is the rose. It is she who has unusual beauty, majesty. Has a variety of shades and species, each of which can cause a lot of feelings and emotions. Considering all the qualities of this wonderful flower, many artists and sculptors portrayed and depicted it in their works. Yes, and handymen needlewomen, too, do not bypass it. And, of course, the rose is an integral part when creating various diy from paper. Paper roses, at times, can not be distinguished from the real ones. In today's article, we will tell you about one of the options for creating a paper rose in origami technique. This simple addition process will allow you to personally make yourself and loved ones happy with a beautiful flower that has retained its color and shape for a long time. 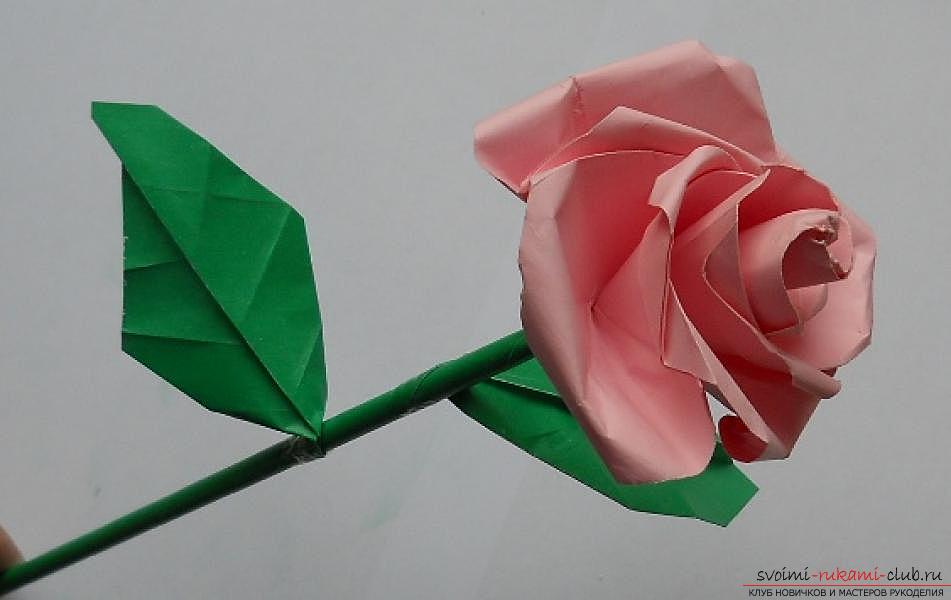 First we need to make a rosebud. For this purpose it is necessary to take a square sheet of paper of the desired color. Given that roses come in a variety of shades, you can take absolutely any color. We need to fold the paper along two diagonal straight lines, as well as vertical and horizontal straight lines. All angles, not only upper, but also lateral, we will slajivat towards the bottom edge. We will bend the sheet in the following way: along the vertical and horizontal straight lines, the so-called "valley", and on the diagonal straight line (we use only one) - the "mountain". Thus, as a result, we will get a double-shaped square. Further, along the line that passes through the middle part of the lower side to the right and the middle part of the left upper side, it is necessary to bend the upper layer of the resulting part into the right side. How to correctly do it all you can see in the photo below.
 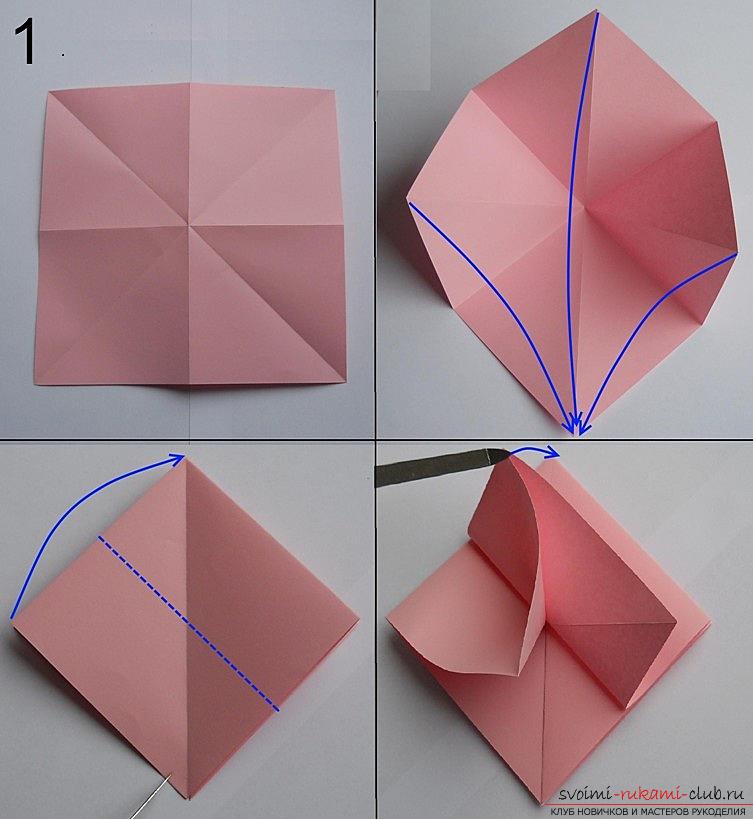 The cut of the workpiece and the edge of the inflexible layer mustto coincide. The lower corner must be placed so that it coincides with the upper one. The pocket that was formed, we need to fold along the horizontal line. The resulting part we turn in relation to the vertical axis. Now repeat all the manipulations necessary to fold the top layer.
  While working on adding the receivedpocket, the workpiece will receive a peculiar shape resembling an arrow. Now from above we need to open the workpiece. To make this as simple as possible, we will be guided by the following photos and checkpoints, which we can see on it. We need to take the top corner down. If we look from above, then we see that the layers from the center diverge downwards in the form of a cross.
 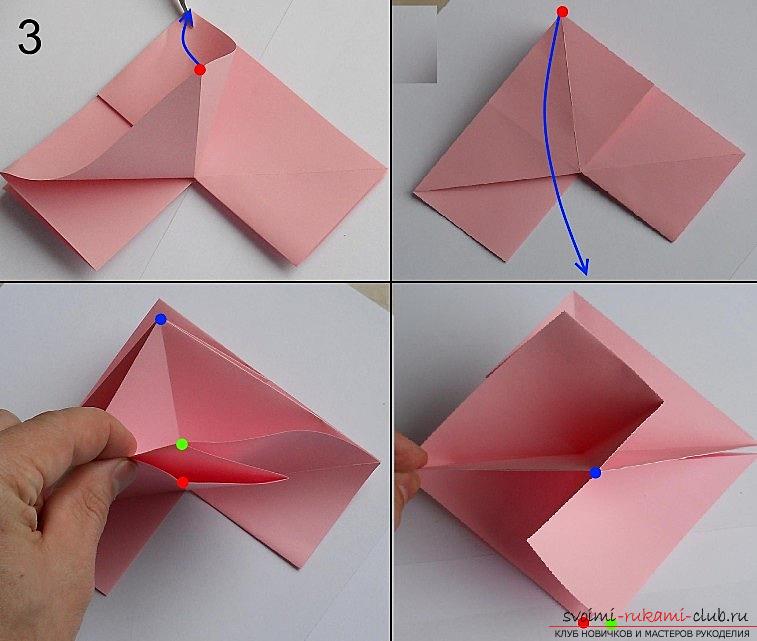 Now the layers of the workpiece that diverge needtake your fingers in such a way that they are between them. We put the workpiece in the second hand and, with the help of rotational movements, we will fold the flower petals into a bud. Of course, during work, the workpiece will take a somewhat crumpled appearance. This point should not embarrass you. It is this effect that will provide the texture, volume and necessary relief to the produced bud to make it more realistic. In the central part of the rosebud, all the paper layers, rolled up into a tube, must be so applied that in the future they can not turn around. Now we divide the corners of the workpiece in different directions and slightly straighten it. The inner lobes of the rose we need to fold. Now you need to combine the edges that are marked in the photo. Next we will outline the line that we will need for the following additions.
 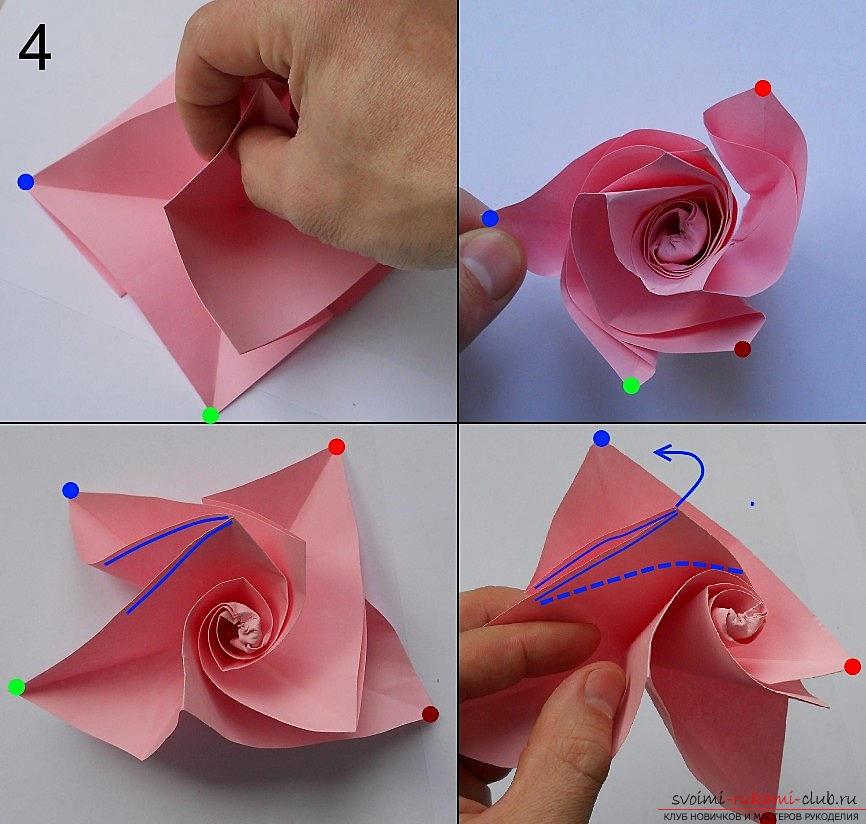 Now you need to bend the angle in the direction ofreverse side (back) along the fold line. Then you need to make an inner crease, rather shallow and return the petals back to their original position (vertical). The next three petals, inside the bud, we will form the same way. It remains to form the outer petals. One of these petals, we need to roll up in the form of a tube for a regular paper clip, unbent.
 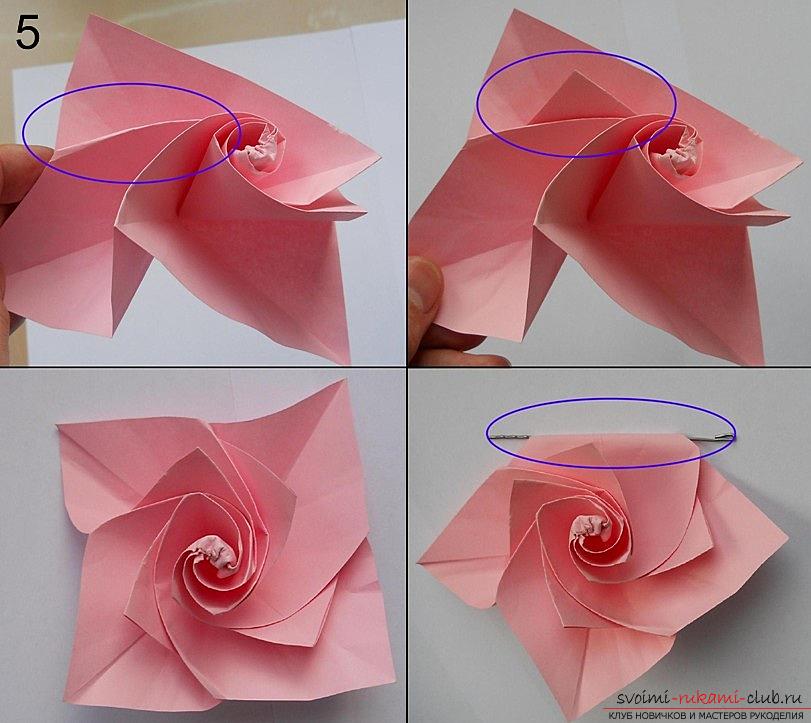 By the same principle, we will shapeedges and other petals. Internal lobes we will fix, too, using a clerical clip. By twisting the inner layers of the flower, we give the final shape to the bud.
 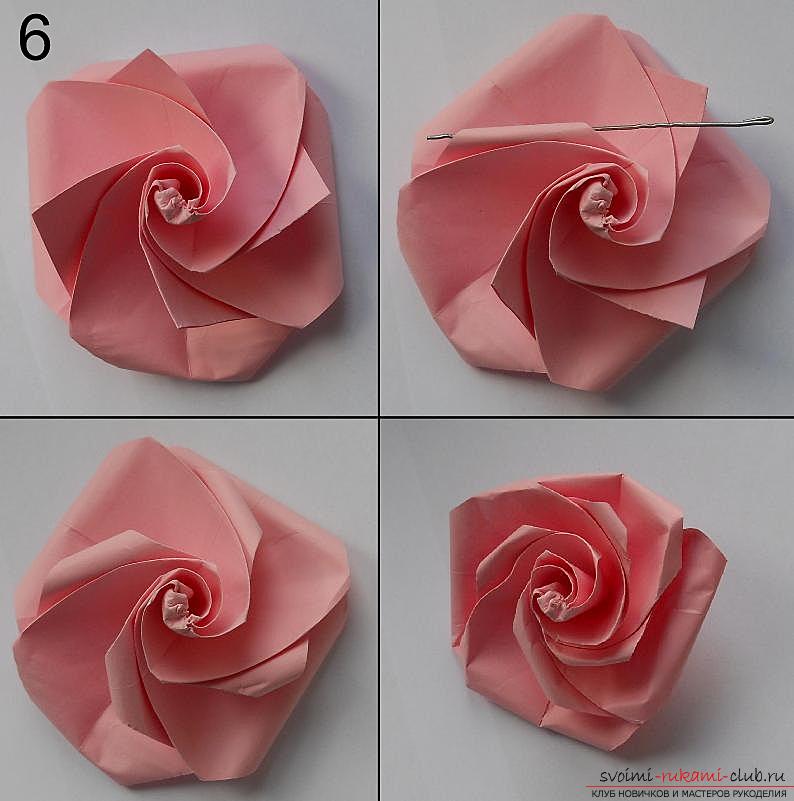 From paper of beautiful green color of the necessary formwe will make green leaves for the flower. We need to fold the paper along a diagonal straight line. Carefully fit the corners into the inner part. As you can see in the photo, in one part we will fold the corners inside. As a result, the sheet will take the form of a drop. Having made small folds on the slanting, we will create a relief surface of the sheet. The final, final form of the sheet will help to give a zigzag fold, not very deep, made along its length.
 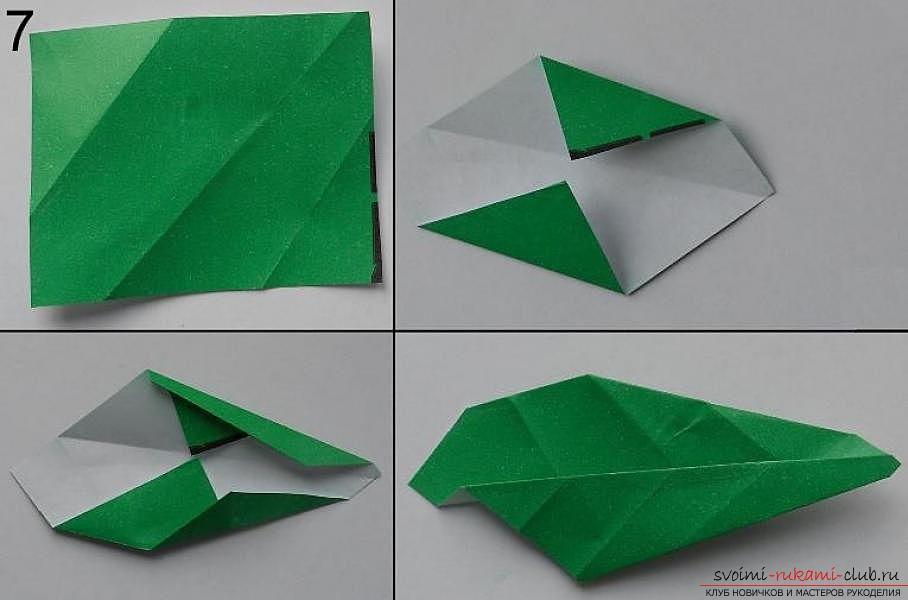 We make the stem for the flower from the paper you needGreen shade, which we turn into a fairly thin tube. The edge of the resulting detail, the one that is thinner, we'll take a bit of a snap, as seen in the photo below, and carefully combine the two separate flower details together. As a fastener, Scotch tape is ideal.
  It remains to make the final step. To the flower was full, most reminiscent of the present flowering plant, we carefully combine both the details - a stem with ticks and a bud. To do this, the stem is simply inserted into the folds of the bud itself. A paper rose in origami technique is ready.
Comments
Related posts:
 You can easily make sakura flowers in origami technique using diagrams and descriptions
 How to add funny dynamic figures from paper in origami technique for children of 7 years.
 How to fold a nicely napkin or hand-made paper in origami technique, schemes for children of 8 years.
 How to make neckties and a bow tie in Kansas technique, detailed master classes with step-by-step photos and a description of the process.
 How to make a sharp rose in quilling technique? Master class in technique and photo