Peacock bead: weaving a three-dimensional figurine with our own hands (diagram)
Content
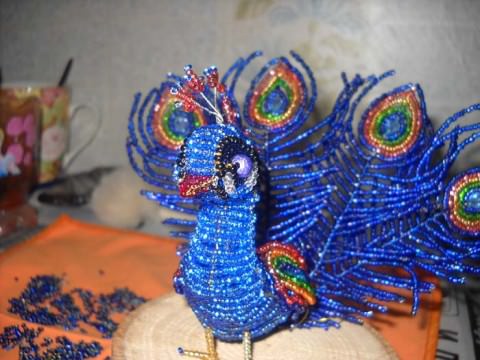
Peacock is a truly royal bird. Such an article, made of beads, will give the room a charm. In order for a peacock of beads to turn out neat it is necessary to have some beadwork skills. We will try to describe the master class in great detail, so that even the novice masters can figure it out.

Master class of peacock weaving from beads
First you need to prepare the following material:
- Beads of blue, red, black, white, yellow, green;
- Beads of blue color;
- Beaded wire;
- Nippers;
- pliers.
When buying beads, you should not save. As a result, it will depend on the appearance of the product. If you take poor-quality material, then the work will be dim. And the paint from a poor-quality bead can start to slough off quickly enough.
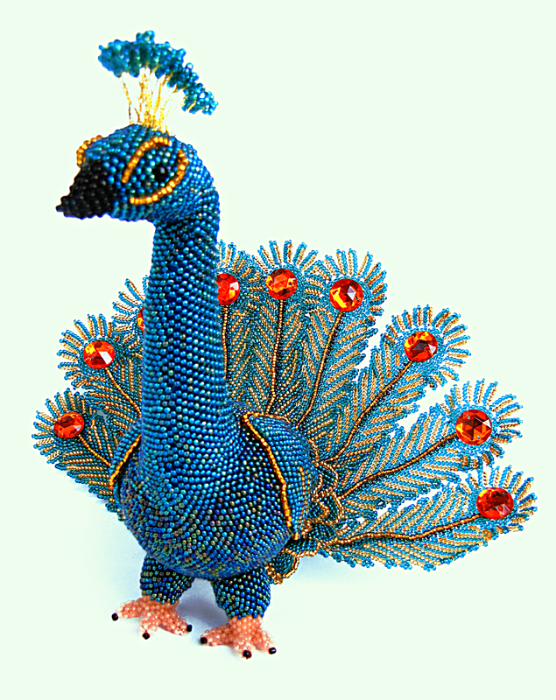
If everything is ready, then you can start creating a miracle - a bird. Peacock consists of the head, neck, body, wings and tail. Let's start the master class with the description of the execution of the head.
Head We start with weaving the beak of a peacock. We need red beads, wire length of 5 centimeters.
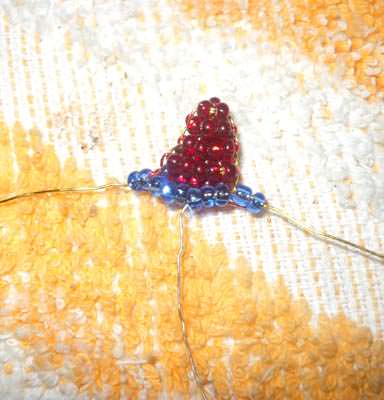
Cut the workpiece into 2 equal pieces (2.5 centimeters);
Similarly, perform the underside of the beak. Only in the course of work it is attached to the top. This part of the work requires special care. Otherwise, the connection points will look rough.
When this detail of the peacock is ready you need to make eyes. We need two blue beads, black, white and blue beads. The eyes of the peacock are made by French weaving techniques.
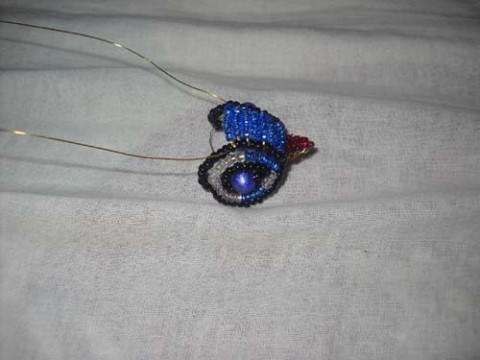
Similarly, you need to make the second eye of a peacock. Only work is done in a mirror.
It remains to connect the eyes with the beak, for this:
- We pass a piece of wire in the last row of the beak and at one end the rim of the right eye of the peacock. The same action is repeated with the left eye;
- Blue beads, which will connect the bird's eyes,Threaded on both sides of the wire. We pass it through the beads rim of the eye. String and connect it with the peacock's eyes. Thus, we weave the whole head of a peacock. The amount of material used depends on the size of the elements executed, the wishes regarding the size of the peacock. However, do not forget to follow the proportions.
Neck 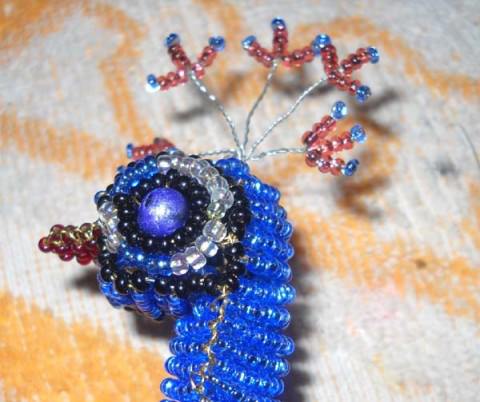
When the eyes are fully connected, make a neck. It is performed in exactly the same way as the beak. The number of beads to the bottom increases by 3-4 pieces. The length of this peacock element depends on your vision of the craft and should not be too long or short.
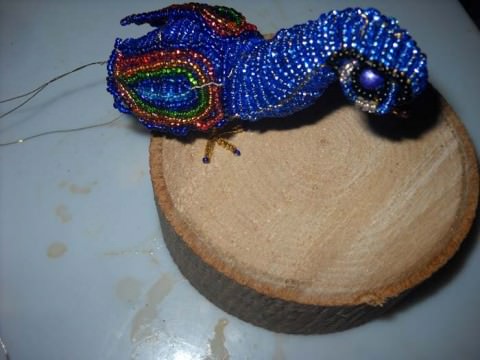
Body In order to make the body neededBlue beads. The body is the extension of the neck. The way of weaving is similar to the neck. Only the amount of beads in the first half of the trunk increases (in each row, you need to add 1-2 pieces). The second half of the body is narrower. Gradually remove the same number of elements as added. The lower trunk should be slightly larger than the top.
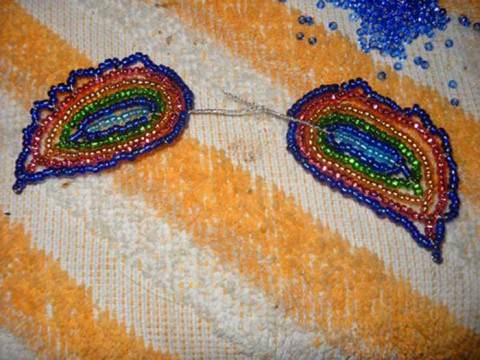
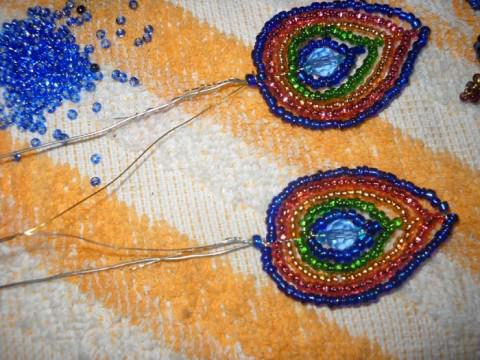
Wings To make wings you need to take materialFive different colors. The scheme of weaving the wing is carried out by the French method. For the main row, dial blue beads (7-10 pieces). Next, at your discretion, weave the following multi-colored arcs. Ready peacock wings must be carefully attached to the trunk. They should be adjacent to the peacock's body.
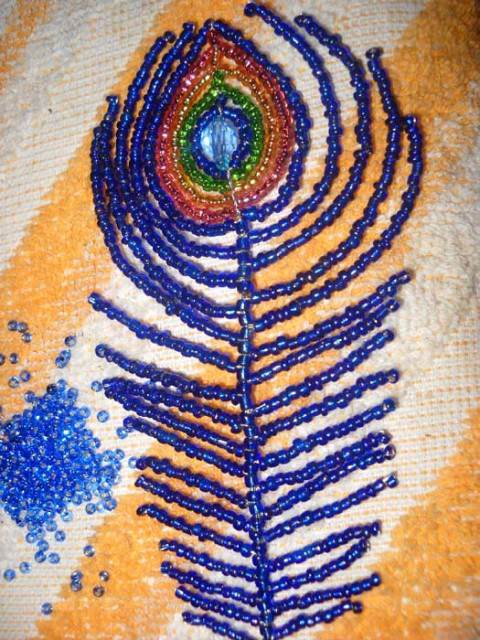
Tail Peacock is famous for its tail. Each peacock's feather is iridescent. It is performed in mixed technique. The tip of the peacock's feather is weaved by the French method. The main series consists of beads and 2 beads. Then you need to weave 4-5 multi-colored rows.
The peacock feather comes to an end in needle technique. The scheme of weaving in this way is simple. So that the peacock feathers do not fall down, a skeleton is needed. It must be rigid and pass through the center of the pen. Suitable copper. The length of the peacock's tail is 13-15 centimeters.

It remains to attach the tail, made in needle technique paws and you can admire your creation. You can decorate the bird's head with short feathers. They can be performed in needle technology.
This concludes our master class. Beads do not necessarily take those colors that we took. You can take any other combination. This applies to the primary color. The main thing is that it should be bright. After all, a peacock of beads should "burn" when it hits the sun. Such a craft will always please the eye!
Video: Lessons of weaving peacock elements from beads
Comments
Related posts:
 Turtle from beads scheme for creating a three-dimensional figurine (video)
 Christmas balls from beads: options for decoration by own hands (diagram)
 Cyclamen from beads: weaving a delicate flower with our own hands
 Goat from beads own hands (scheme)
 Dolphin of beads: weaving by our own hands according to the scheme (video)