The finest decorations for the house with your own hands will perfectly fit into your interior, and perfectly fit for a gift
 Needlework has always been famous for its wonderful pastimeamong girls, girls, women. In all ages and at all times needlework was a daily attribute of a woman, a girl. But also handicrafts are considered a factor of good taste and beautiful upbringing. From a young age the girl was accustomed to fine work of weaving, yarn and sewing. A new toy for a child is always a holiday and entertaining pastime. But to buy a toy and give it to her is not at all the feelings that you get if you make a gift yourself, with your own hands, and after you give it, you will see how your baby will enjoy a wonderful gift.
  A toy made by own hands together witha child is a joy doubly and a great benefit for the overall development of the baby. When you use your child to help, it will be the most pleasant thing for every parent - to make fakes for your home with your little assistant. We will tell you about how you can make an original soft toy, in the manufacture of which your child can take an active part. Handicraft for the home will bring you both joy and benefit, and will take you and the child. A master class for the production of a funny elephant will be illustrated with photographs that will help you in more details and understand how to start and how to get started in general. Such a toy can be a wonderful gift for a child, and handicrafts with their own hands are useful for the educational process, and will give the kid a lot of fun. We have prepared for you an interesting master class, which describes in detail the process of making a beautiful decoration with your own hands with photoinstruction.
 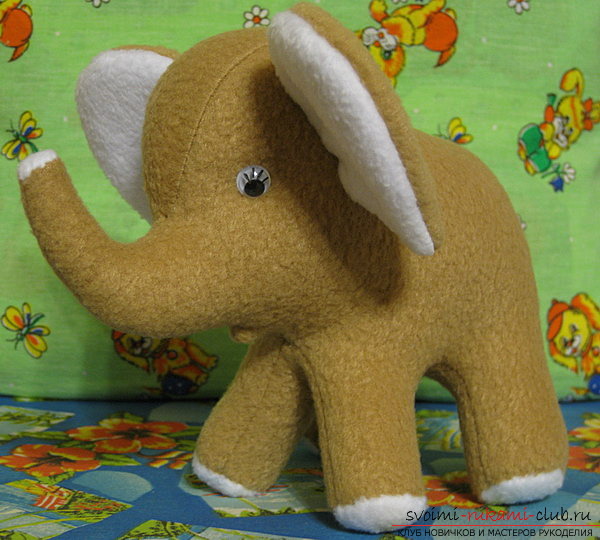 So, what materials and tools do we needyou need to create a soft toy (almost all the necessary things for work you can find at home or buy goods for needlework in specialized stores for creativity) 1. Synthepon for packing2. Thin pastel color jersey3. Mulina thread of blue color and cotton - under the color of crafts4. Cardboard or heavy paper5. Sewing machineDeclaration of a soft toy (parts) - Two parts for the trunk- One piece for the back- Two parts for the legs- Four for the sole- One for the tail- Four for the ear
 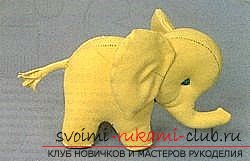 Let's take a picture and transfer it to a millimeterpaper, increasing to the desired size. From thick paper or cardboard, we cut out templates-individual details of the elephant-and outline the outlines, spreading out patterns on knitted fabric. Torso and legs of the elephant draw together. First, we cut out the whole body, we circle on the fabric, and then cut the template along the line indicated by the dotted line, we circle the legs separately. Now we need to cut the fabric, leaving half a centimeter on all sides - gaps on the seams. Scissors will make cuts for the ears of the elephant (in the indicated places on the trunk)
 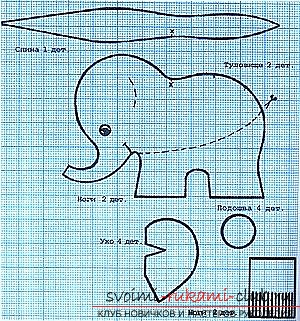 We stumble darts on the details of the ears.We sweep, we spend on the sewing machine preliminary having combined their facial sides in pairs. That edge, which will be sewn to the trunk, is left loose. We connect the details of the soft toy with elastic seams - "knitted" or "forward needle". We make several cuts along the edge, taking out a notch before (leaving a few centimeters to the line). We stuff the ears of the elephant with a small amount of sintepon, turning out the details of the ears on the front side.
 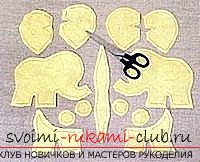 We fold one leg and torso partsface down to each other, sweep away, spend. We leave free edges for sewing soles. We sweep the toy on the belly line and put it on the machine. Combining the marks, sweep the back piece and one of the halves of the trunk. From the beginning of the elephant's trunk to the hind legs, we squander, leaving a small area on its back free. Similarly, sew the second half of the trunk with the back.
 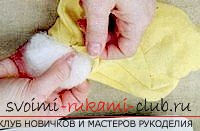 We put in the incisions on the trunk of the elephant ears so that they are inside the craft and then sewed. We spend the trunk on the machine and turn it to the front.
 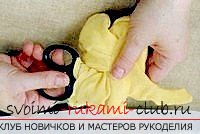 We tightly fill the sylphon with the elephant's trunk throughnot a sewn site on the back and try to distribute the sintepon evenly. Let's start making the tail - we cut the lines along the tail parts, fold the tube and sew small stitches so that the brush turns out. To the inside of one of the parts of the trunk the tail is sewn. Using a hidden seam, sew a hole on the back, secure the thread and cut off the excess end.
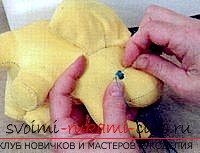
  Then we sew the soles. We put the cut out detail of the soles on the leg of the elephant face up, edges bend inward, sew around the circle with small stitches. In the same way, we also sew the remaining parts of the soft toy. Double-sided smooth surface with plank embroider eyeselephant (blue thread mulina). Such a product is perfect for your child, it will adequately take an empty corner of your interior and will warm your eyes. Indescribable joy and pride at the same time that you created this miracle yourself with your own hands. Create, fantasize, fulfill your ideas into reality, and you will become a professional of your own favorite business.
Comments
Related posts:
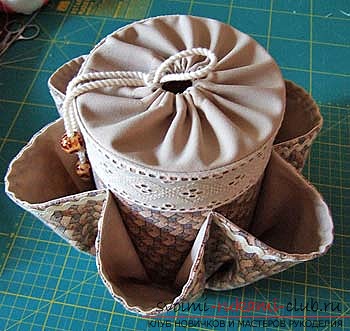
 Useful crafts for home. Organizer for things with their own hands.
 Master-class of making their own toys for decorating a Christmas tree - Christmas ribbons made of ribbons.
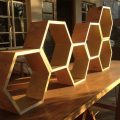 Original shelves for the house with their own hands in the form of bee honeycombs
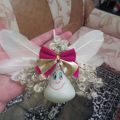
 Gifts for mom with their own hands, how to make a gift on March 8 with their own hands, advice and recommendations for making crafts with children.
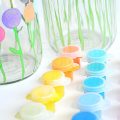
 Needlework for the house with your own hands: crafts made of light bulbs for the 2015 contest, funny handicrafts by your own hands