
Step by step drawing of still life with watercolor paints is a simple task even for beginners
Drawing a still life with paintswatercolors in several stages is available for both children and adults, even if they are just starting to learn how to work with paints. It will not take long to complete the drawing. Following the step-by-step instructions, you can easily paint on your own hands a beautiful still life on the autumn theme. Today, the colors of watercolors are known to everyone without exception from early childhood. Each of us painted them once in our lives. Already in the kindergarten and school, children are taught to handle the brush and paints, apply strokes, create simple drawings. But not long ago, until the nineteenth century, watercolor was not so popular among painters. It is believed that the birthplace of this paint is China. It was in this country that paper was invented, on which the masters depicted their masterpieces with the help of this kind of paints. Gradually, watercolor took its place and it was used by many famous artists all over the world. The technique of drawing with such colors allows to achieve a special effect of some mysticism, illusiveness, translucency, ease of composition of the created picture. Only at first glance it seems that the drawing process in this technique is complex. In fact, there is absolutely nothing impossible. You can easily cope with the drawing, taking advantage of our lesson in phased drawing. In today's article, you will learn about drawing still life with watercolor paints. This autumn still life can draw almost everyone. Initially, we need to choose the nature that we want to depict in our drawing. To still life really turned bright and beautiful, vegetables or fruits should be chosen different. They should differ in color, shape and size. We will take as a natural vegetables, namely eggplant, cucumber and carrots. The vegetables chosen by us for the nature fully meet all the requirements, differ from each other in all respects. Now we will prepare materials and tools. We need the simplest and most standard set.
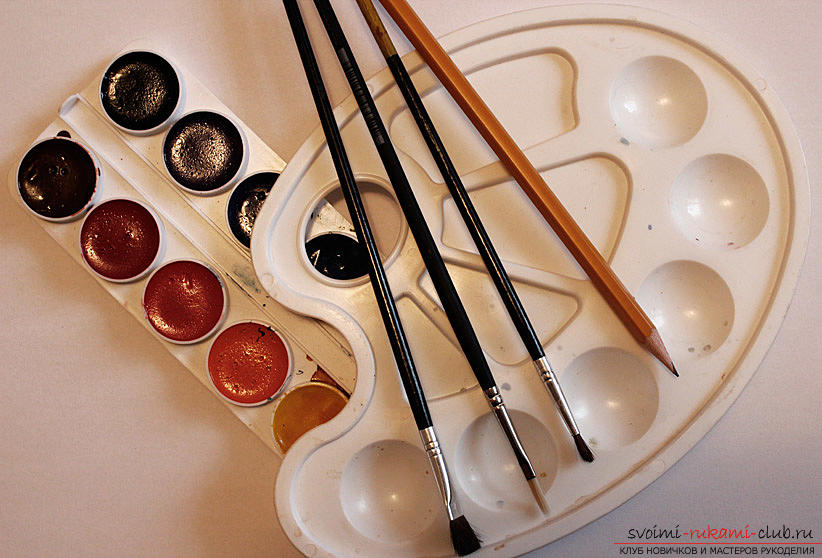
- White sheet of paper for watercolor paints
- Brushes for drawing
- Capacity with water
- Pencil simple
- Eraser (just in case)
- Palette
 Before you start working on drawingstill life, it is necessary to slightly moisten the paint of the colors that we need. We begin with the first stage of drawing. We need to make a sketch with a simple pencil. We need simply light, barely noticeable lines, draw out the contours of vegetables. At this stage, we determine which side of the light is falling on them. To make it easier to navigate, we sketched the sun on a sketch, which will be erased with the eraser. Also, we need to note the outline of the shadow, which we will depict later. The second stage When the sketch is ready, you can start working with watercolor. To do this, we take one element of the picture and moisten it with a wet brush. In our drawing, the cucumber became the first element for drawing. Now we collect very light green paint on the brush and apply it to the cucumber.
 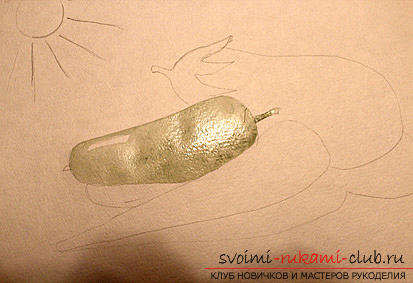 Remember. We will not use clean color solutions. To get this or that color, we will need to mix the colors with each other on the palette we prepared. While the surface of the cucumber is wet, we will darken it a little. Only be sure to leave a slight flare on the top of the vegetable.
 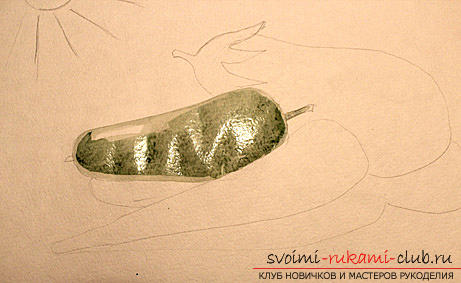 Third stage Leave the cucumber to paint on itdried out, and proceed to drawing the second one. Now we will decorate the carrot. We do this in exactly the same way as in the previous case with a cucumber.
  Figure we depict gradually, moving from light shades to darker. When drawing with watercolors you need to tone the tone.
 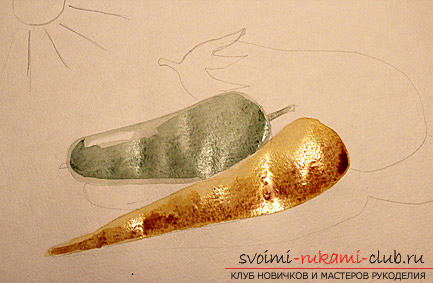 Fourth stage We still have one more vegetable not drawn. This is eggplant. We will draw it, as in the case of the other two vegetables, using the same principle.
 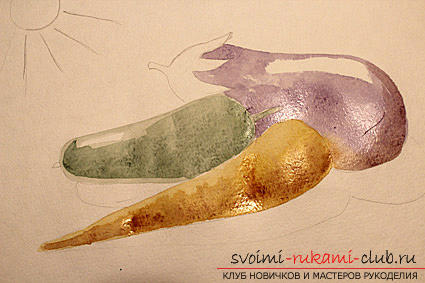 It is necessary to remember the presence of solarhighlights. In the case of highlights, everything depends on how glossy the surface of the object itself is. The more it shines, the more prominent and brighter the sunlight will be. The size of such a glare directly depends on the size of the vegetable, and its color solution depends on how smooth the surface is. In our case, there is no glare on the carrot at all, and in the eggplant it will be the largest, as its glossy skin. And the brightness of the glare on the eggplant will be the greatest. The fifth stage Let's return to the initial stage of work, drawing a cucumber. Add to his image one more, a dark tone that will be identical to a natural vegetable, and also emphasize the features of its shape.
  Sixth stage We carry out similar actions with twoother vegetables. In this case, it is necessary to try to optimally convey all the features of each individual object, texture, color, size. Form. Remember, every cavity is a darker shade. The deeper cavity also has a darker color.
  The peculiarity of all elements should be emphasized inaccordance with a natural vegetable. Seventh stage To look at the picture, it did not seem like it was hanging in space, we need to draw shadows that fall from the image of vegetables. It seems that they lie on the surface. The darkest shadows are under the vegetables and closer to them.
  We need to draw greenery for the eggplant's drawing. Eighth stage Since carrots turned a little pale and inexpressive, we need to fix it and give it a natural color. Therefore, we take orange saturated paint and apply it to carrots. If the tone is not again intense enough, repeat the procedure again.
 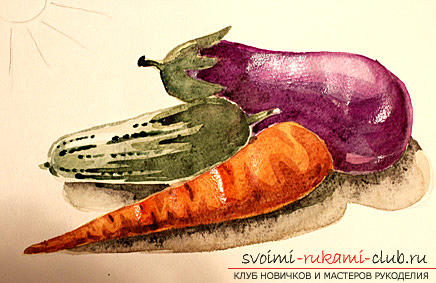 On the cucumber we will draw a saturated green colorgrooves, as well as pimples characteristic for this vegetable. As for carrots, we will make a groove on it a bit darker than the main color. Now let's move on to the eggplant. The side of it, which is not in the zone of light, we will make it darker. Paint for this we take more intense, saturated shade. In the palette, we must have a sufficient number of colors, or rather each color should be no less than three shades. For a while, we need to put the picture aside, let the paint dry. Then we look very carefully at all the details. If something we do not like, we have a chance to correct this oversight and add other tones to images that are darker than those already in the picture. If everything suits you and you are happy with what you see in the picture, then the work can be considered complete. In the work on this figure, the main principleis to draw by wet. No less important point is the mandatory mixing of different colors to get the right shade. The main thing is to experiment with color and shades and not to work with pure colors.
Comments
Related posts:
 Uncomplicated step-by-step drawing of the sea depths with the help of gouache will help master this technique of painting
Uncomplicated step-by-step drawing of the sea depths and their inhabitants with the help of gouache will help to master this technique of painting
Uncomplicated step-by-step drawing of the sea depths with the help of gouache will help master this technique of painting
Uncomplicated step-by-step drawing of the sea depths and their inhabitants with the help of gouache will help to master this technique of painting
 Step by step drawing with a pencil squirrel does not seem too difficult for a child
 Step-by-step drawing with a watercolor of a bird will not cause you any difficulties if you follow the instructions
 Easy drawing an anime girl's face, it will become even easier if you use a step-by-step scheme