Pictures of beaded embroidery and beading for beginners
Content
- The main stages of the embroidery pattern beading
- Video: Learn to embroider with beads
- Beading paintings on the machine
- Video: The process of weaving beads on the machine
- Knitted fabric by mosaics and cross
- Picture of beads on the adhesive-based
- The compositions of beads
- What you need to know for beginners
- Video: Learning panel weaving of beads
Now it is very common getting various kinds of crafts and crafts made with their own hands. Such techniques as
beading and occupy a special place amongthe most popular handicrafts. This type of embroidery and beading closely intersects with the technique of "cross". Therefore, many of the paintings on the beaded embroidery patterns for the cross. The main feature in this embroidery its depth and unusual gleam.
The main stages of the embroidery pattern beading
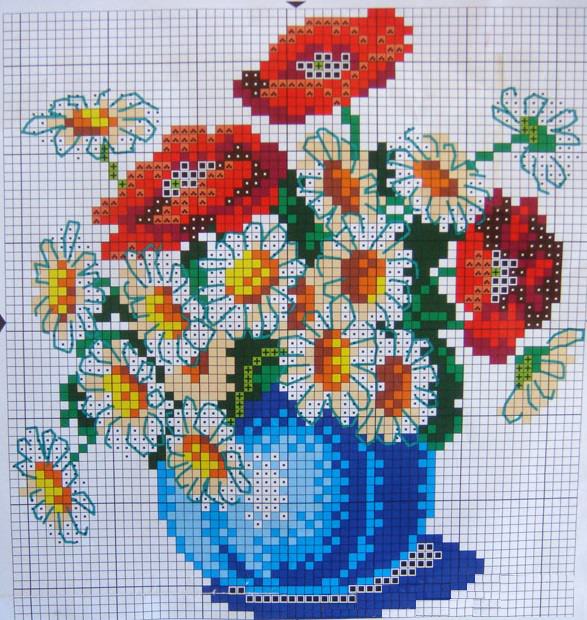
Master class for creating pattern beaded embroidery on the way of its technological essence resembles the cross-stitch. The first thing to do - choose the scheme. AT
There are special presets, which are veryeasy to use. As the circuit if the current range is not appropriate, you can use any favorite picture or photo with a picture of an idol. The selected image is treated with a special program marking a bubbly cells.
After these preparatory work andequipped workplace, where there are schemes blank canvas, monofilament or monofilament, a special needle for embroidery, small scissors, a small spoon, beads, container beneath it, a line can begin a master class to create masterpieces of their own hands.
To start, you need to pull the canvas on the hoop. Canvas can also be replaced by any linen or cotton fabric with a dense structure and smooth surface. The main thing that it did not have patterns. It is necessary to immediately determine the future picture size beads, as well as which side is more convenient to start embroidery.
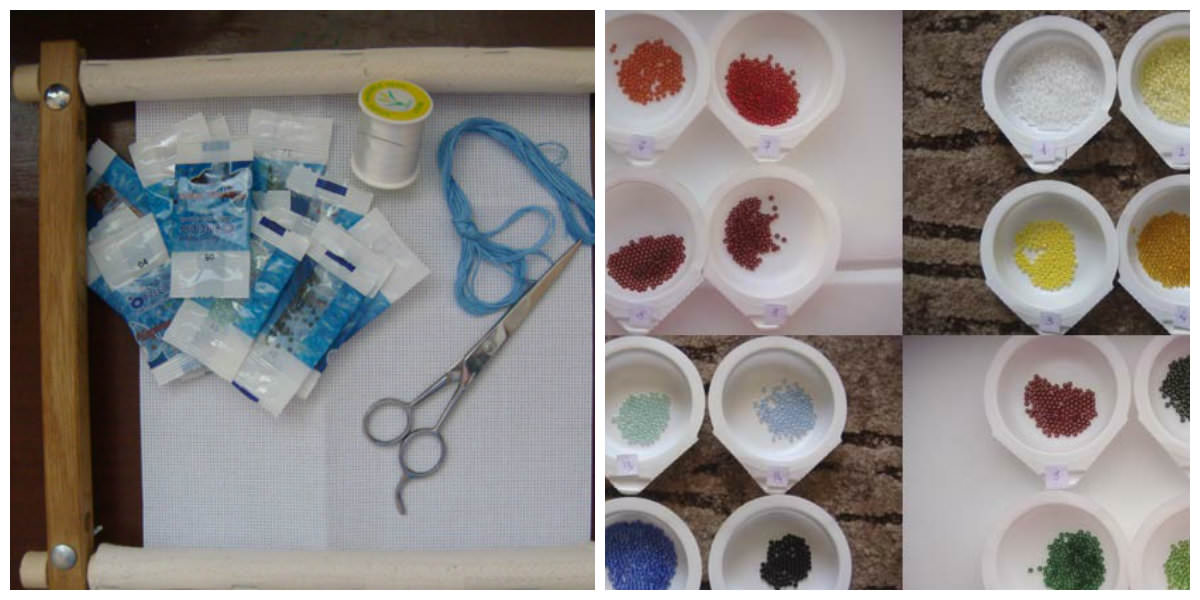
The edges of the canvas process. Sort the beads in a small container, from beads to get comfortable in the process of embroidery, and mark their numbers, as in the following scheme:
Choose comfortable needle and thread for embroidery. It is better to use a special beading thread, which will be invisible when weaving.
Better just to make the calculation of beads, glass beads, andother possible decorative elements for making paintings. It should also try to think about what areas during weaving will one or the other beads.
We begin weaving. The thread is secured by means of insertion of the needle from the wrong side. Then it is output on the front side, and leave a small tip. A piece of thread should be left on the wrong side. The needle is pulled to the other side and displays inside. So repeated several times.
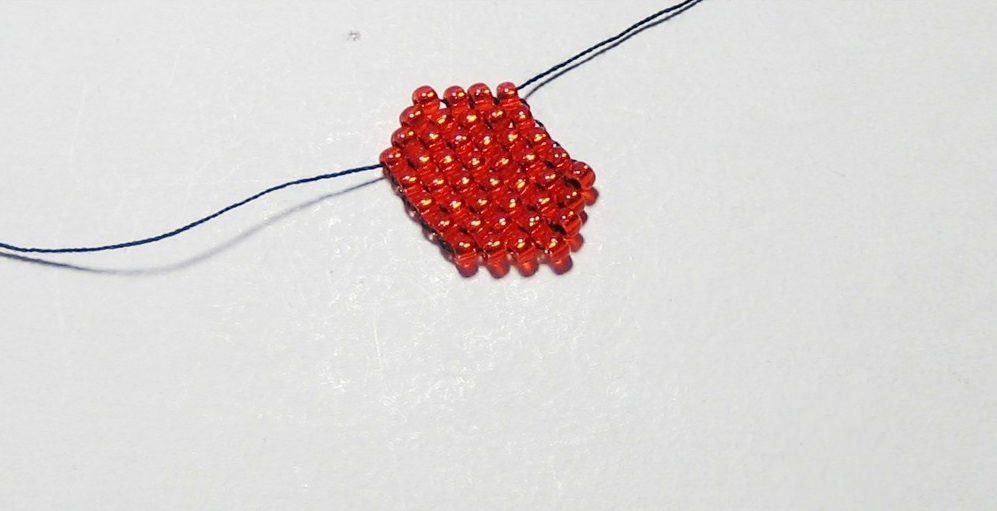
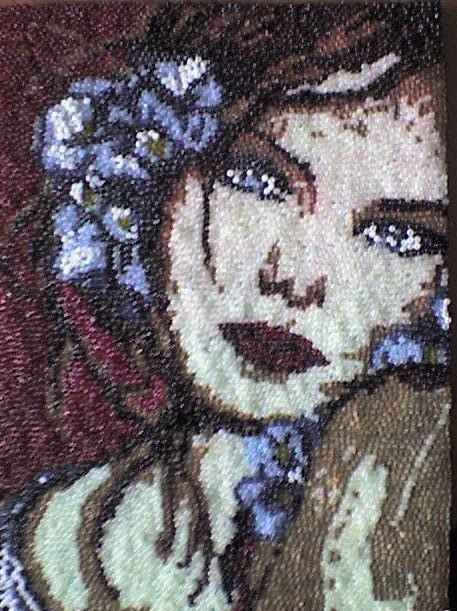
When you try to use a sewing weaving method of the account. It is essentially similar to cross stitch, but this technique is used incomplete stitches as in Figure 1:
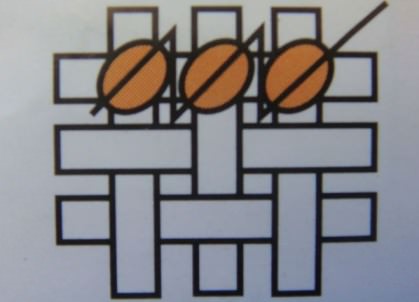
Driving 1Vybiraetsya first bead,appropriate color scheme. In cell presented visually, the needle is introduced from the inside into the bottom left corner. On the needle is threaded beads and removed from the upper right corner. Then introduce the needle in the bottom left corner of the next cell. To string another bead and insert the needle into the right corner. So a number of embroider scheme. Always make sure the required color beads.
To move the needle in the subsequent number must be entered from the inside of the upper right corner on the front side. Each bead will now be fixed from the top down.
The tip of the thread is fastened by means of interlacing between the fibers of the fabric, but only from the inside. The tip should be no more than one centimeter.
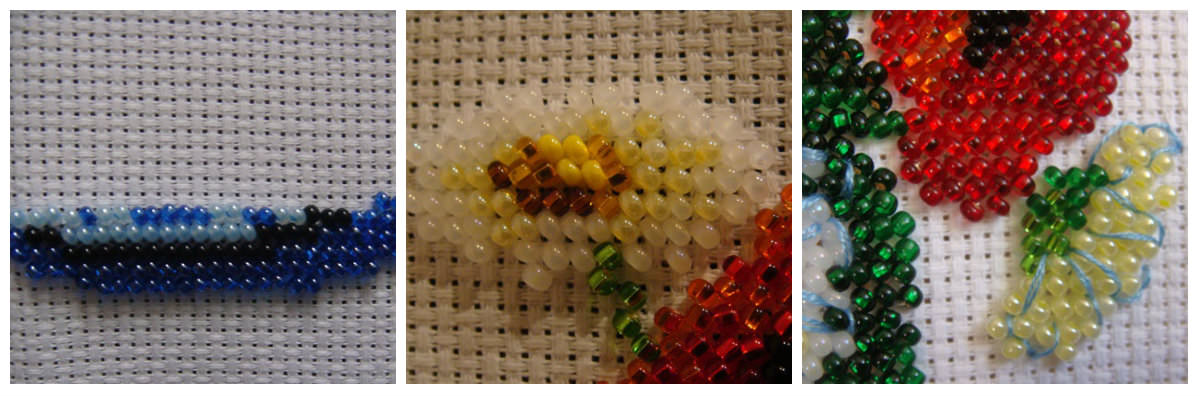
The finished painting beads before the issue framed wash in soapy water, dried with a towel, iron. Make a picture of their own hands can be hung on any wall.
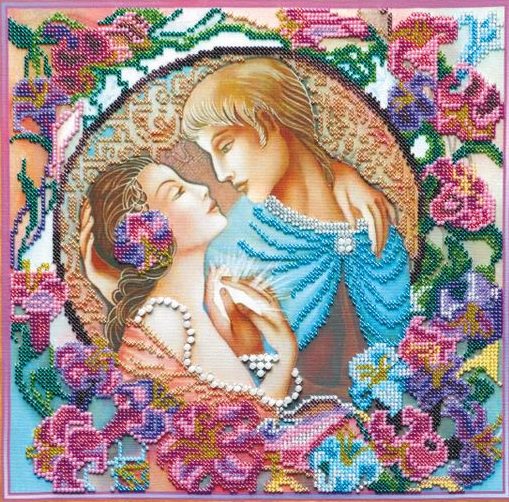
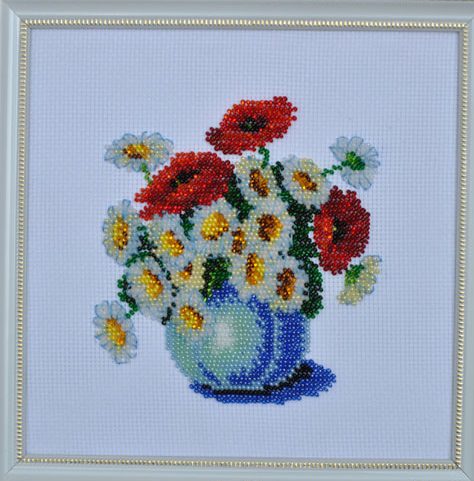
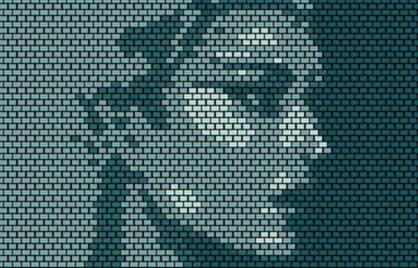
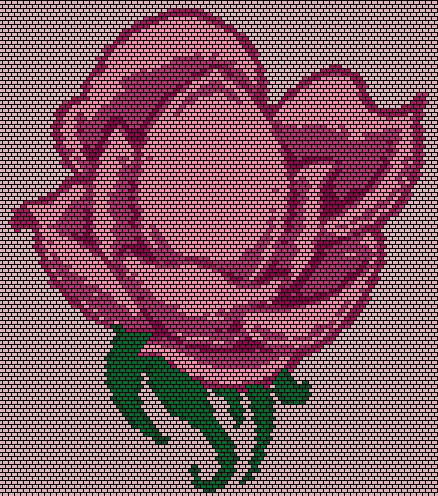
Here as in the photo looks like embroidery in finished form:
Video: Learn to embroider with beads
Beading paintings on the machine
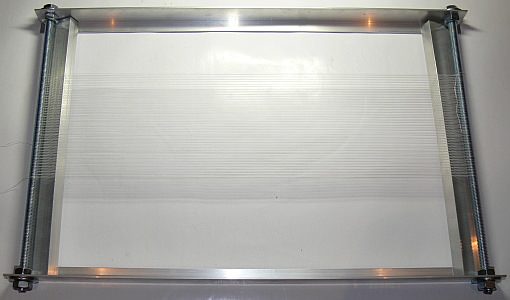
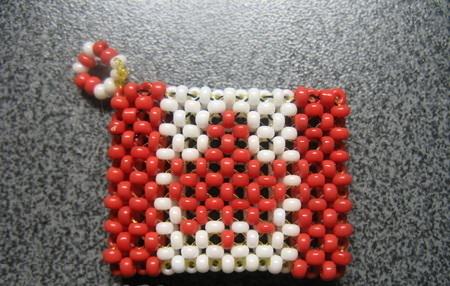
Enough common and easiest optioncreating paintings Bead weaving is on the machine with or without the web. Master-class of this technique is quite simple and fun. If not at hand the required machine, as in the photo, you can use the simple wooden frame with nails hammered. They should be placed at the bottom and top parallel to each other at a distance of five millimeters (preferably in bead size).
Such weaving quite time-consuming, but the results are sure to please. For this beading thread must be tensioned as tightly as possible.
weaving stages:
On a working thread gaining the required number of beads, which corresponds to the color scheme chosen scheme;

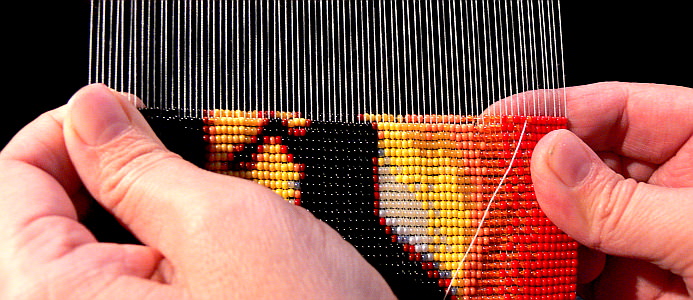
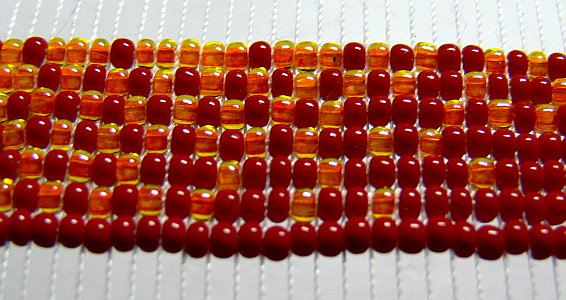
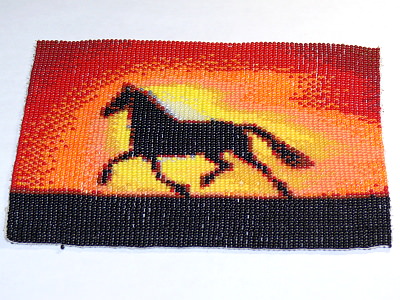
This weave is very convenient to carry out, if you use common schemes under the cross. The resulting panel of beads can be glued on cardboard and place in a frame hanging on the wall.
Video: The process of weaving beads on the machine
Knitted fabric by mosaics and cross
A few kinds of techniques such as mosaic,brick weaving and beading cross allow you to create web without canvas, special machines or devices. Simple circuits used in embroidery cross, thanks to a worldwide network of opportunities and programs can be easily adapted to these kinds of weaving.
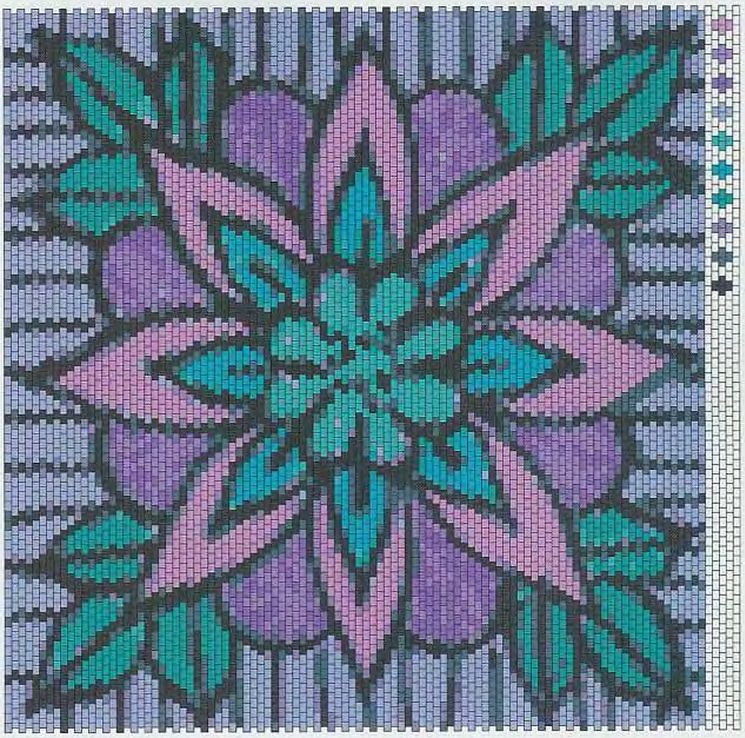
Weaving method mosaic choosing any favorite circuit and adapting it for beadwork mosaic can get to work:
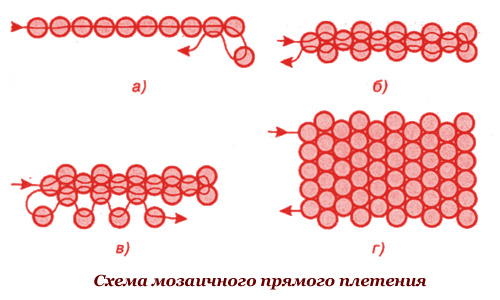
First we need to understand how many beads located in the same row. If the picture includes an even number of beads, then working thread strung odd number;
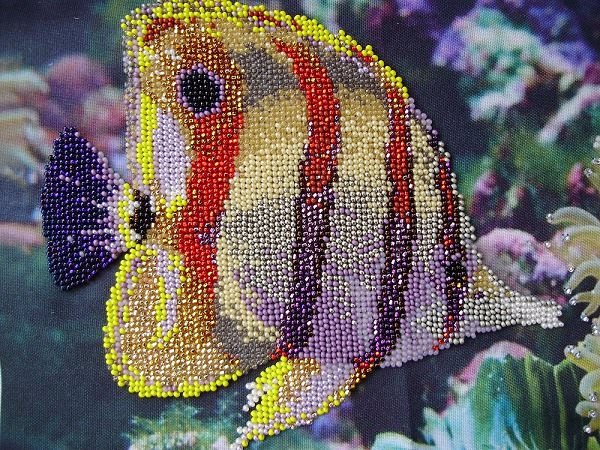
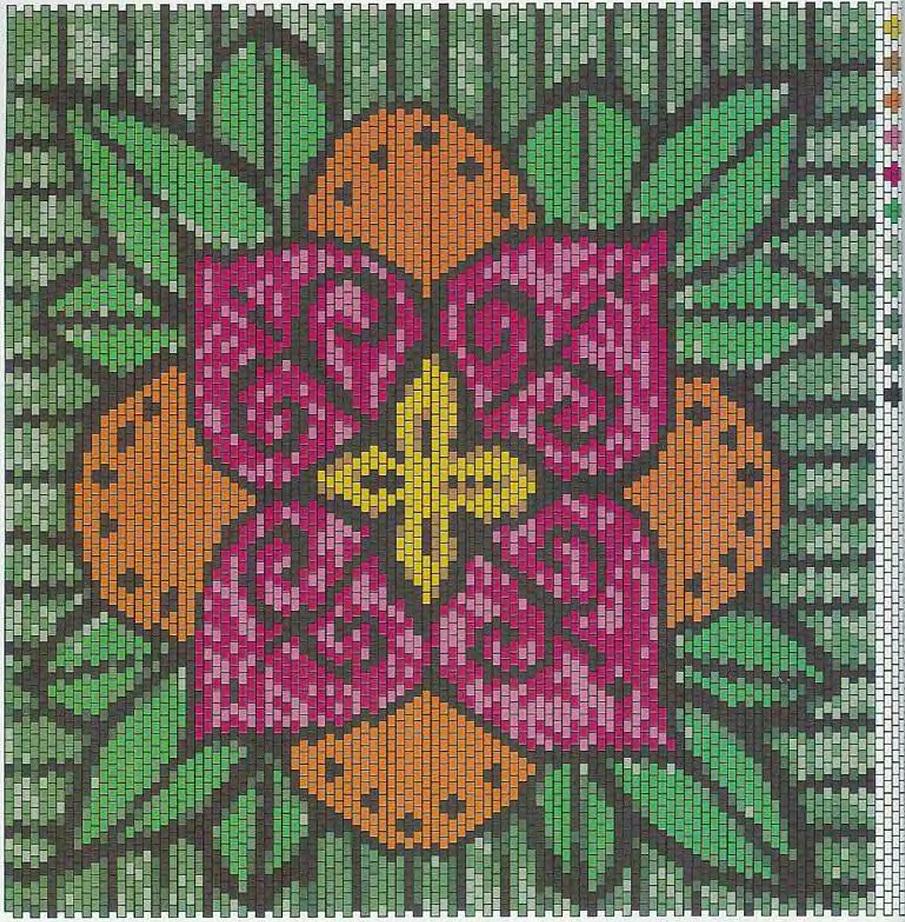
Schemes for weaving paintings mosaic method can be seen below:

Weaving method Beading cross the so-called way of the cross is considered to be quite simple and convenient. Carry it like this:
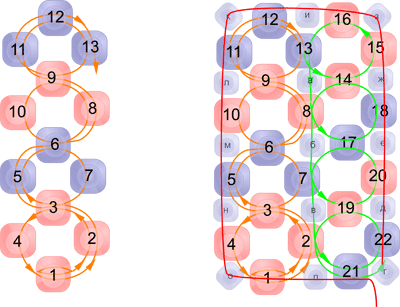
On gaining four beads thread and a needle through the first stretch, so as to form a ring;
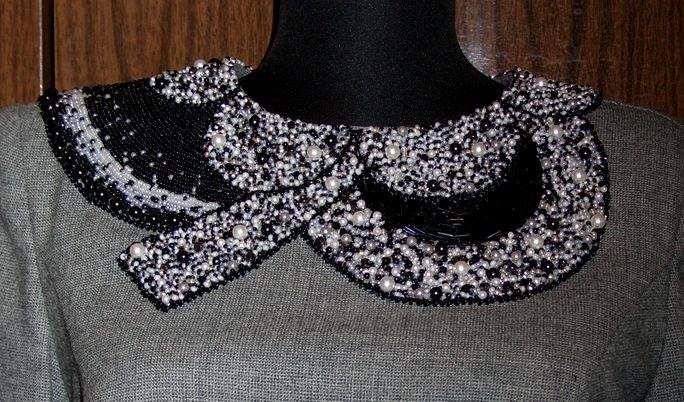
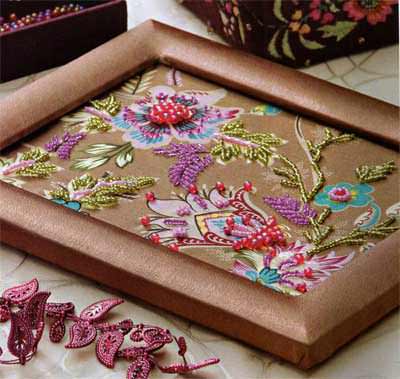
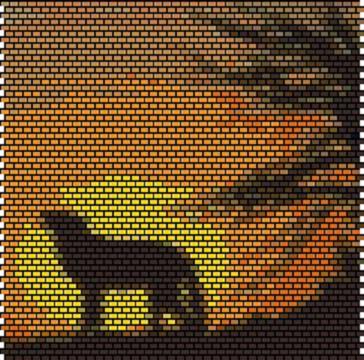
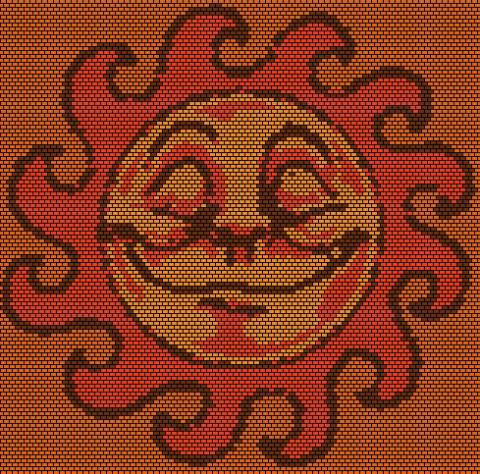
For this kind of beading can alsochoose schemes that are designed for normal embroidery cross. Best of all, if the resulting fabric will be formalized in a frame. For this purpose it is necessary to stick to a tight framework, to make for a while the press to remove the bumps and give the picture a stretched appearance. Such netting option is ideal for pictures on the wall. In the photo you can see the finished result of the work in this technique:
Picture of beads on the adhesive-based

Master-class on the creation of pictures from beads not only offers weaving, but also the use of the method on glue. In addition to the sewing method to create a picture of the beads can be used adhesive method.
Stages of work
When the outline is dry, you can start small plots prokleivat beads. The adhesive should be applied in small layers to excess is not flowed over the beads;
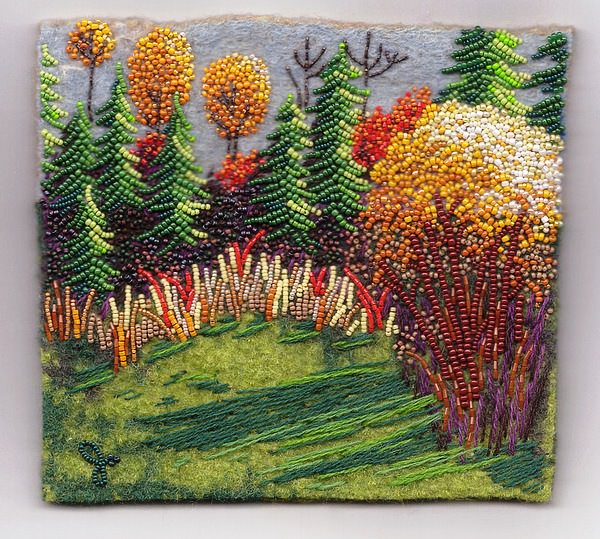
The compositions of beads
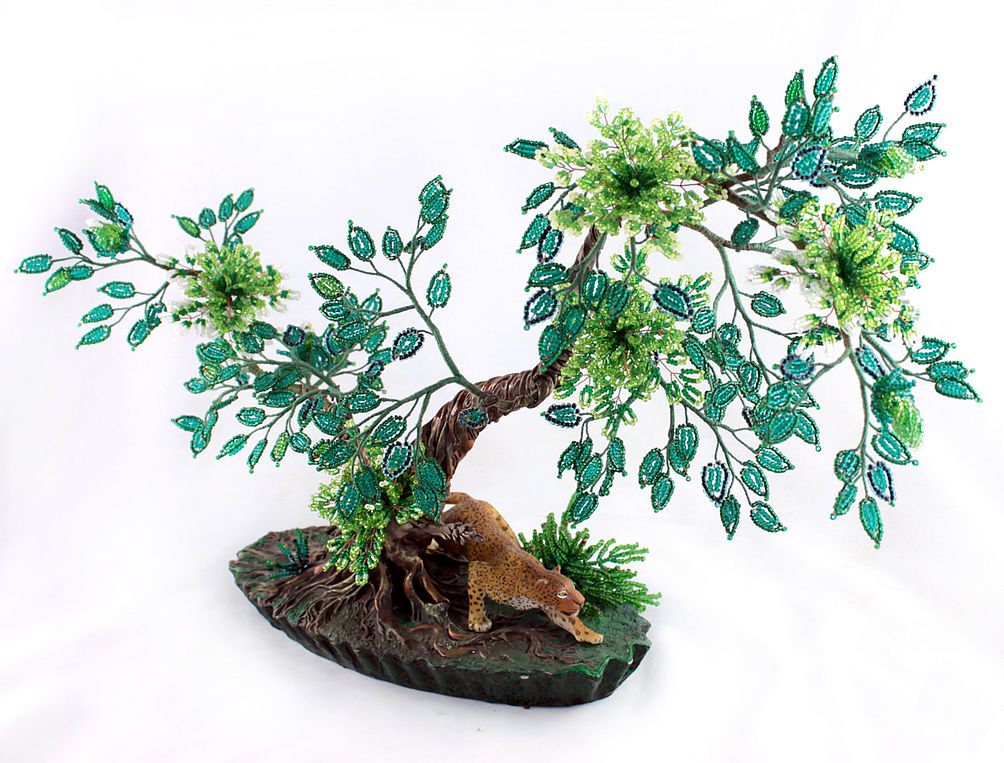
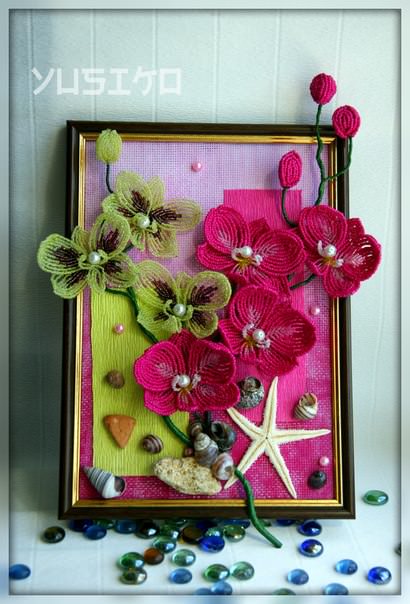
Now beading reached an all-time peakpopularity. Bead jewelry making, various forgery, bags, key chains and other accessories. Artwork created with their own hands, always finds its place in any interior. The compositions of the beads are not only original, but also because of the volume beading, give a similar picture special charm. They can easily be attached to any wall.
With a special talent and skill, you can create these bouquets that are difficult to distinguish from the real colors. For the most original masters have workshops on the creation of trees
. The compositions of beads to which the bonsai tree, look just fascinating. They are so realistic that it seems just about in the wind stir twig or leaf.
In general, using beads image in its manufacturing out uncomplicated, the main bit of patience and a great desire to create masterpieces of their own hands.
What you need to know for beginners
Creating a panel of beads can be made beautifuldecor, which can be easily hung on the wall, decorate the interior of any room. For beginners there is a special workshop that will help you understand the basic principle of art.
Schemes for beginners is better to take the easiest. The best option to print color images with step by step directions. The main thing that there were fewer flowers. For beginners in the sale has everything necessary to facilitate the process of bead weaving: a special seam ripper, which helps to remove failed or wrongly there is not sewn, woven or glued beads; Monofilament for stringing beads; small scissors, boxes of beads, line.
It should adhere to the principle - to embroider or weave strictly on the lines or left to right. Randomness in this technique, it will be too noticeable, and the picture will become a makeshift beads and sloppy appearance.