Pine and Chestnut of Beads: Patch the beautiful trees (photo)
Content
The masters,
Pine, is considered easy to weave. Create yourself, a lot of needles, it does not take much time and effort. Please be patient and you will succeed.

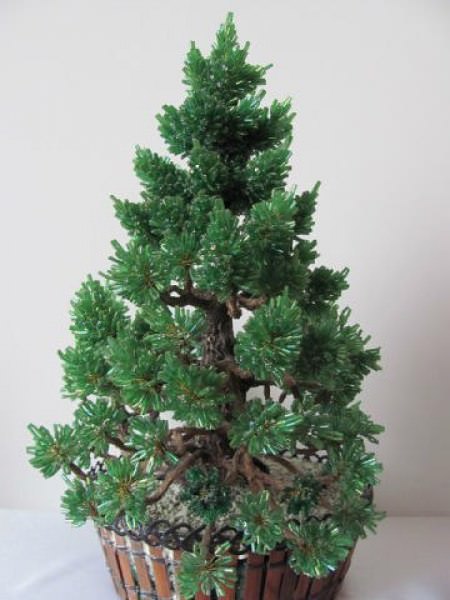


How to Weave a Pine from Beads
To make our master class on weaving pine, we need such accessories:
- Emerald beads;
- wire;
- Brown thread.
All our work consists in the fact that we are engaged in beadworking of needles for pine, using a needle system.
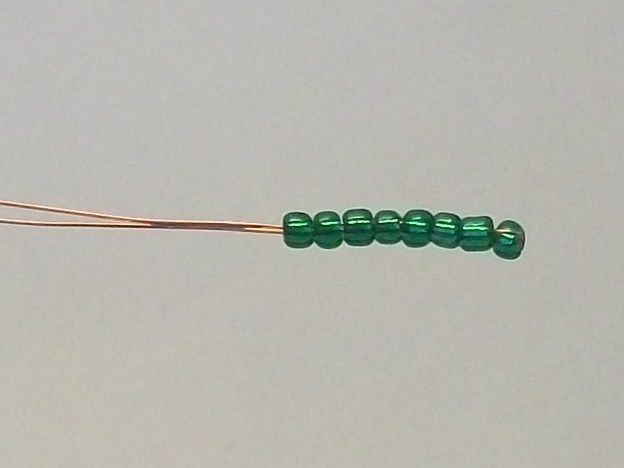
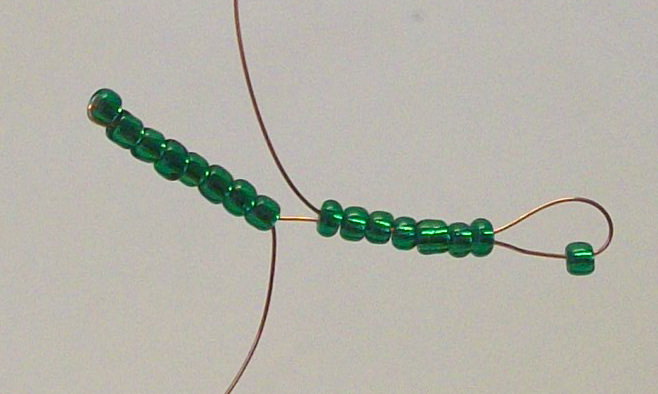
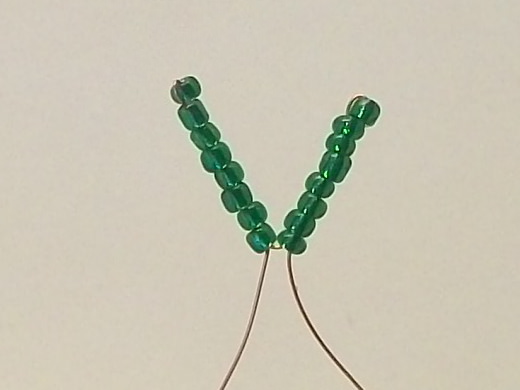
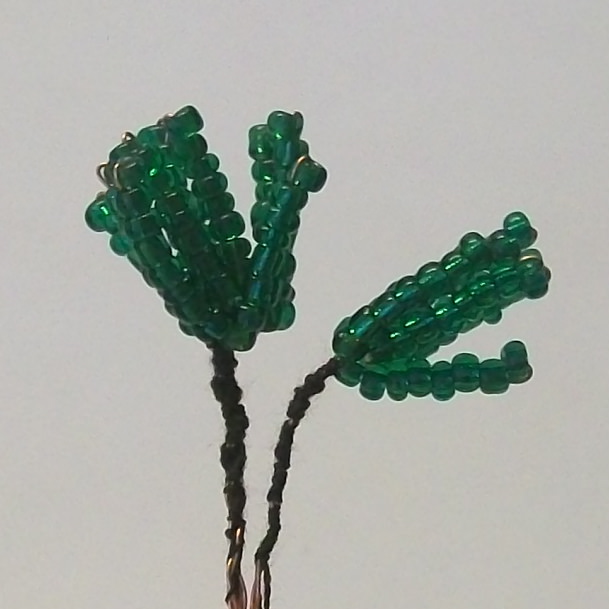
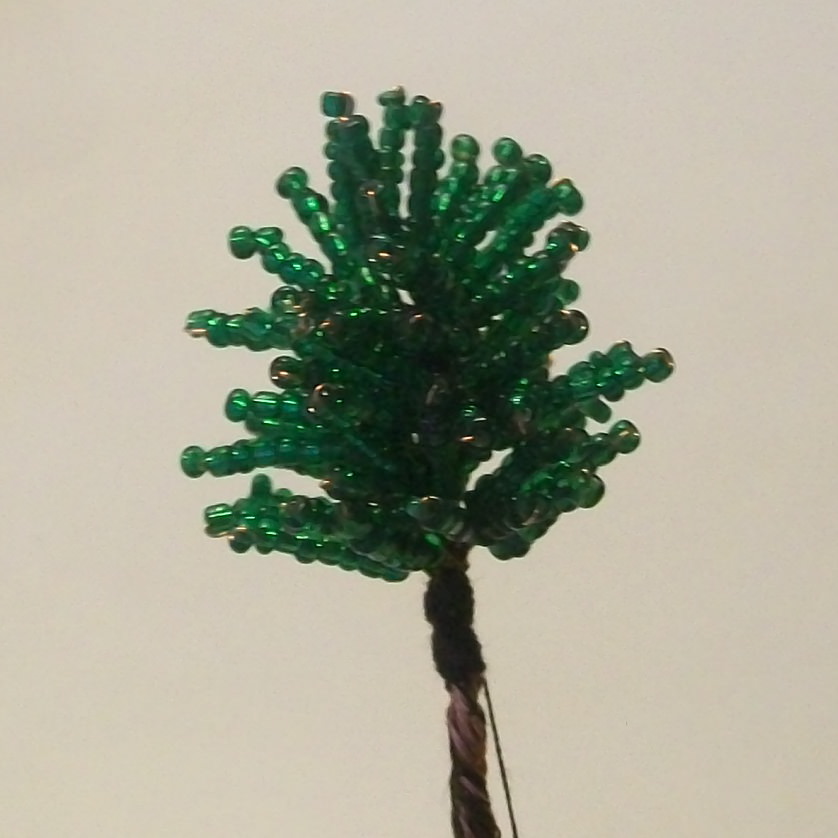
Take a piece of wire, 30 cm long andType eight pieces of emerald beads on it. Step back from the edge of 10 cm, go around one bead and pierce the rest of the beads with the other end as shown in the photo, and tighten. In the end, we got the first needle.

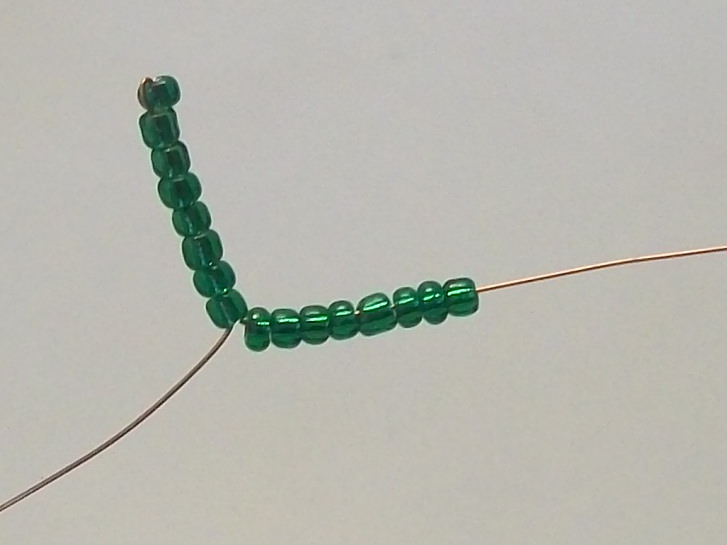
Without stopping, we continue to make our weaving of pine. On the same material, we collect eight more pieces of beads. Do exactly the same manipulations that were described in the text above.
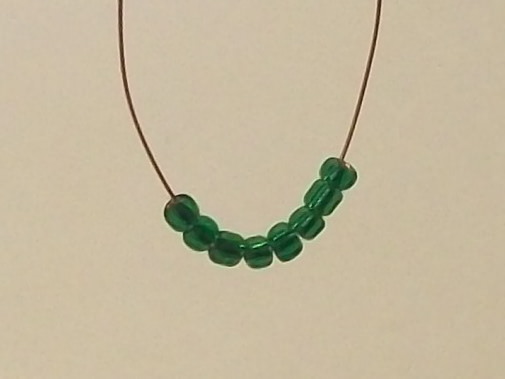
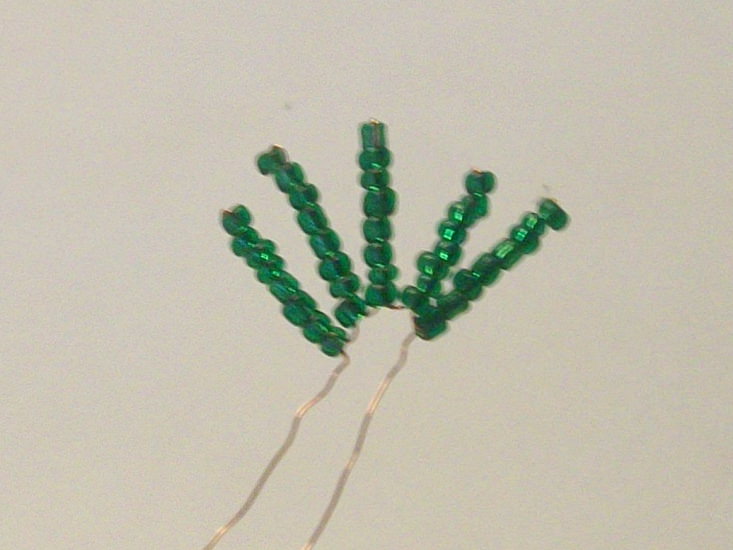
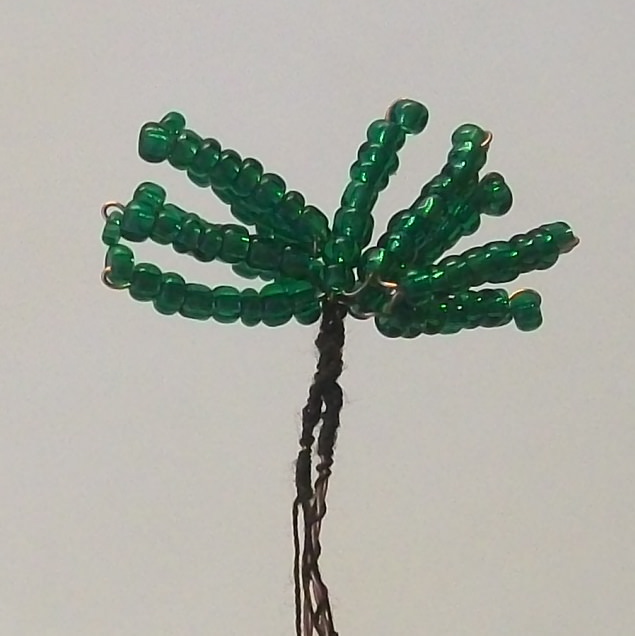
Create the following three needles for pine. Twist the edges of the wire together, and we have a pine branch formed from the beads.
The accumulation of wire, it is necessary to tighten with a thread. In the middle of the weaving, it will become our trunk.
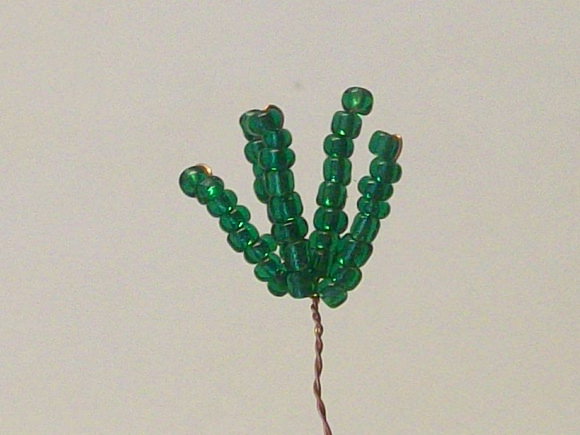
From the number of branches, the volume and splendor dependsOur pine beads. Our master class, designed for beadwork of a small pine tree, it will take 130 beads out of beads for it. To create a larger tree, you need to make twigs as many branches as possible.
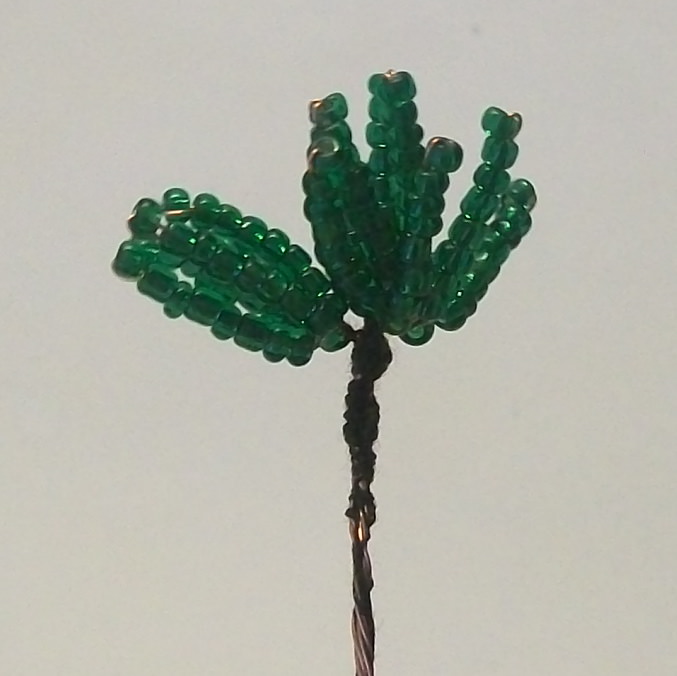
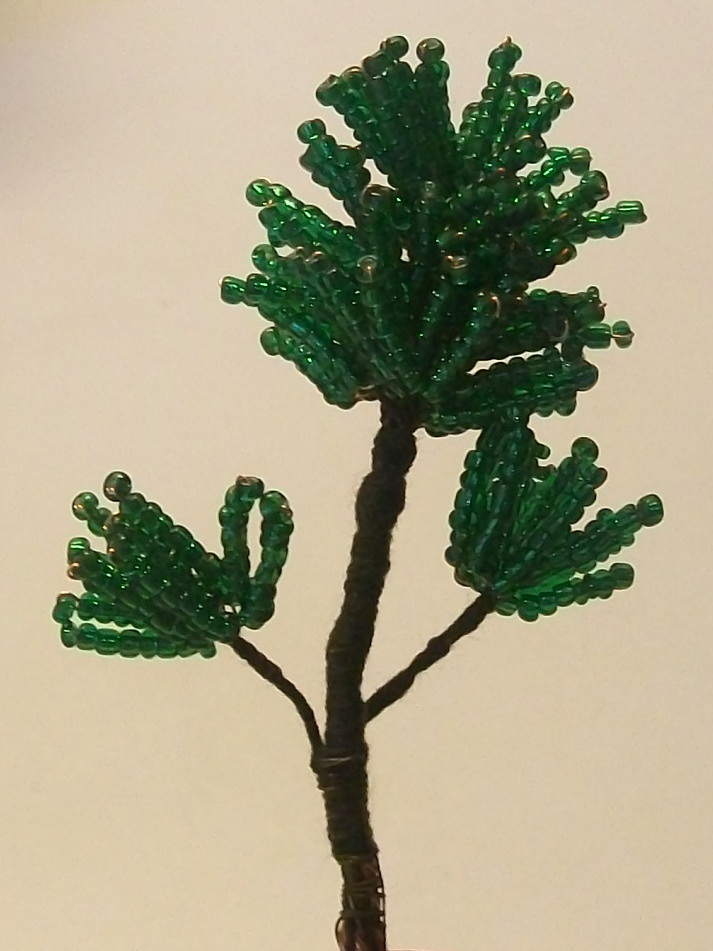
We begin to make large branches for our
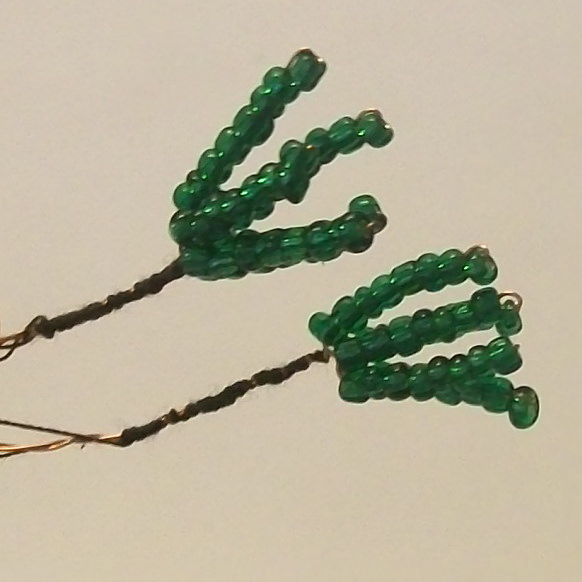
. Take our workmanship and pin their friendto friend. Add one more, just put it higher than the previous ones. Exactly the same manipulations, and do with other branches. You should be formed on one branch, 20 small ones. Wrap all the brown thread.
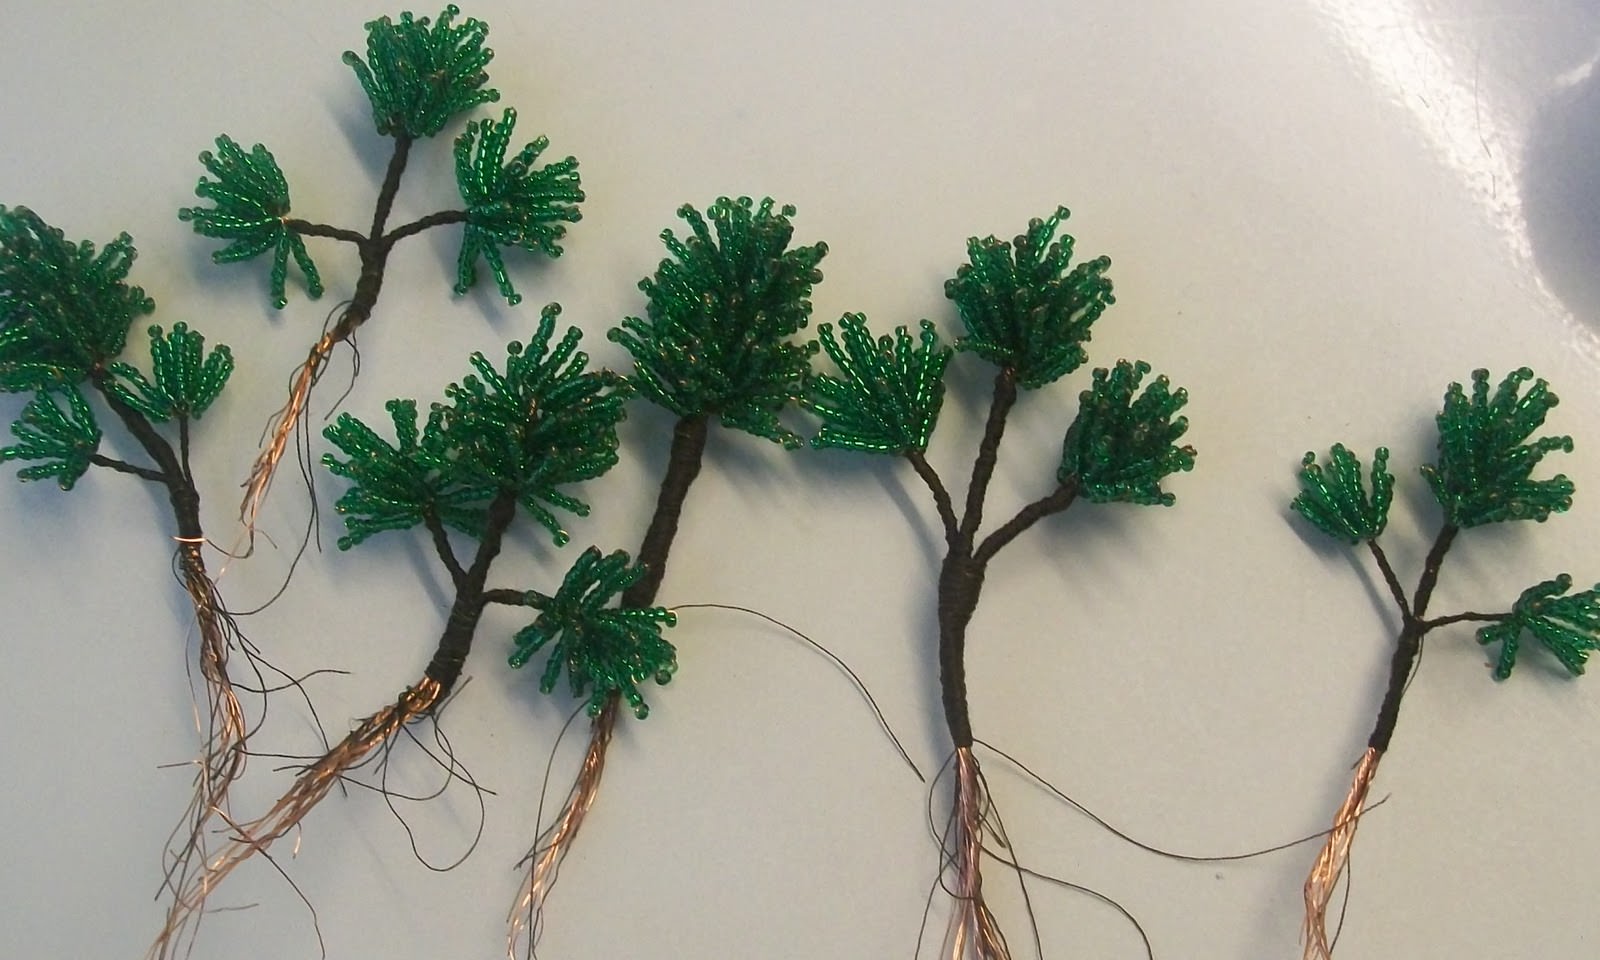
The rest of our pine blanks are created in exactly the same way as the previous ones, they will differ only in the number of small twigs. We make them as follows:
- Two pieces, which include fifteen small twigs;
- Three branches, in which there will be ten small pieces;
- Six branches, in each there will be five pieces;
- Four pieces, consisting of three small twigs.

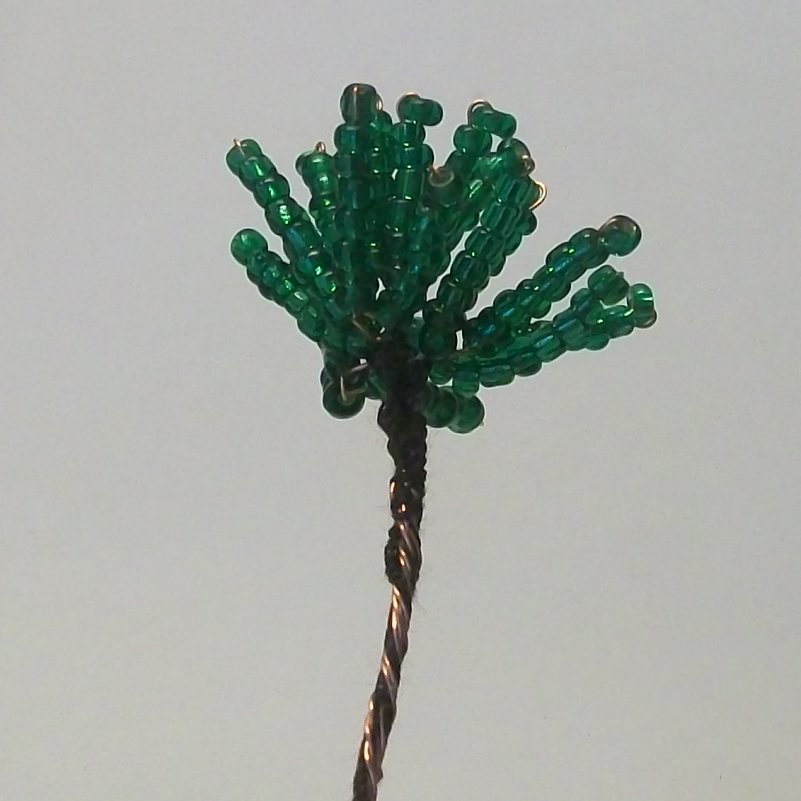
Of the remaining branches are smaller, we create large ones. Do not forget to roll everything up with brown threads, just do it very tightly.
What we have formed, we twist into five large branches.

We move on to collect our pinetogether. To our main workpiece, attach two branches, using another cut wire. Do not forget to wind the thread, brown. It remains to attach 3 large blanks with the same basic material.
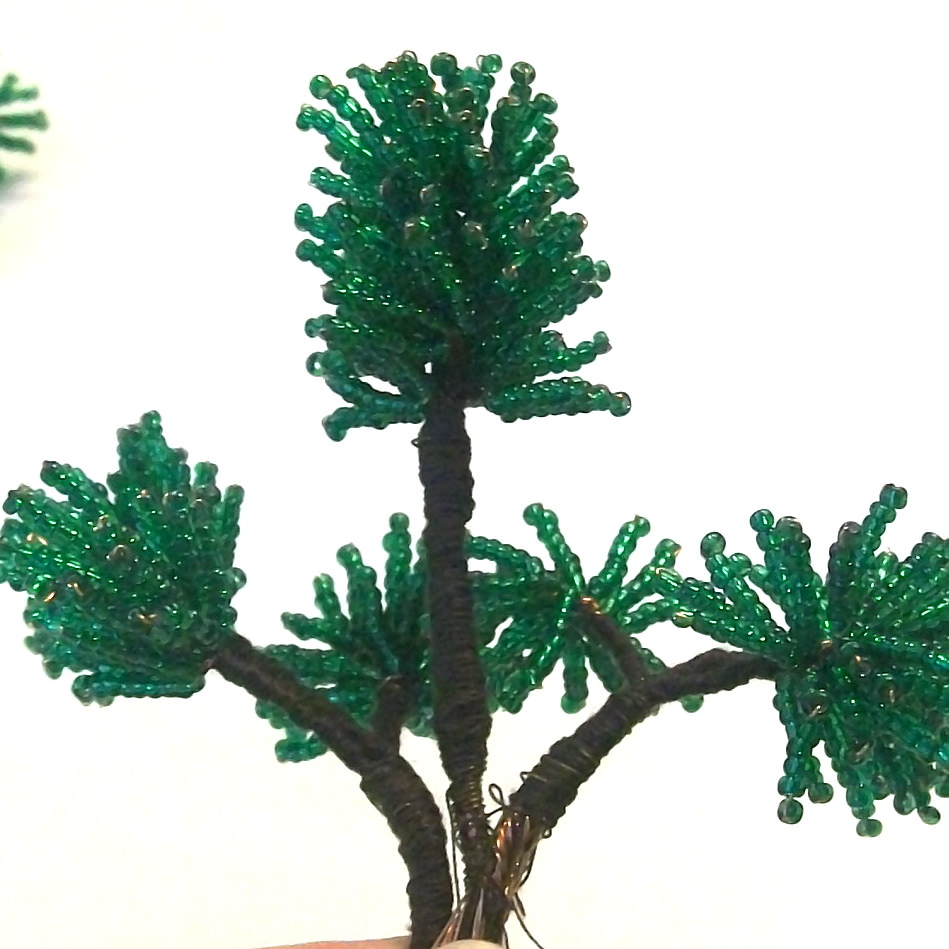


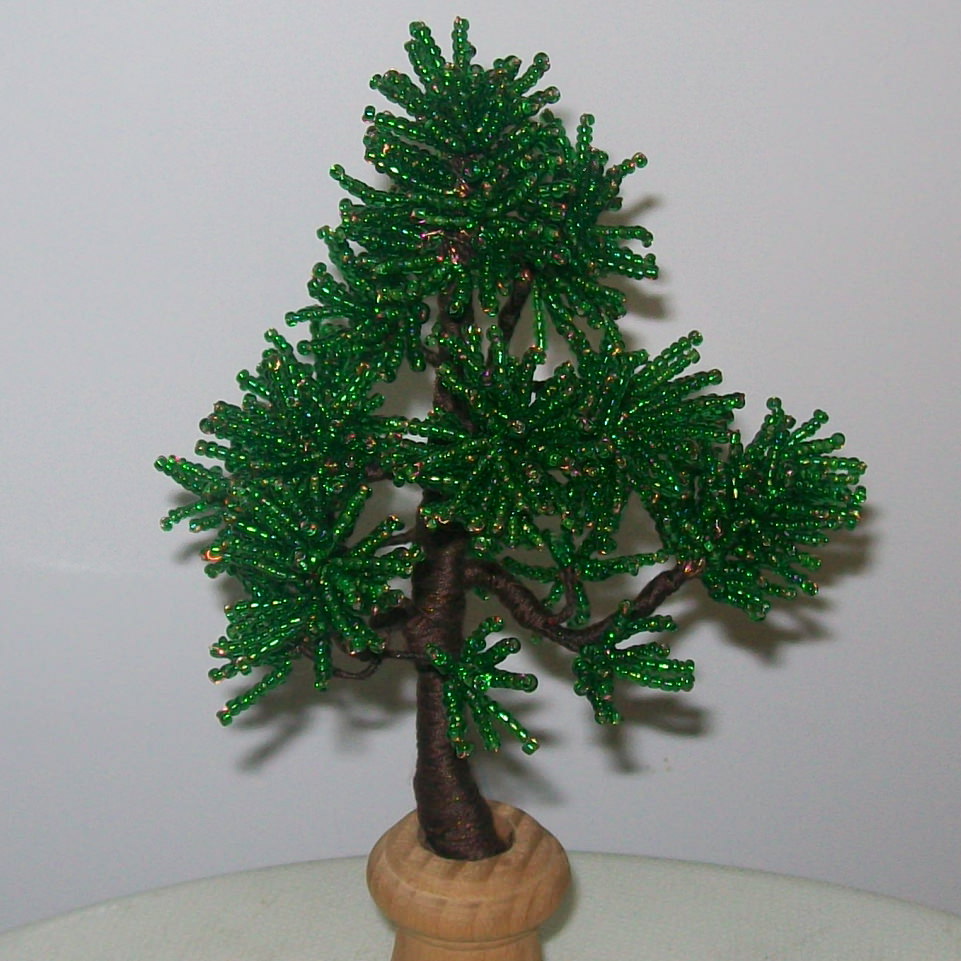
Our master class on making pine is finished. To give it, aesthetic appearance, put a pine tree in a beautiful and convenient container. Pour in a solution of gypsum and decorate the gaps with beautiful pebbles or moss.
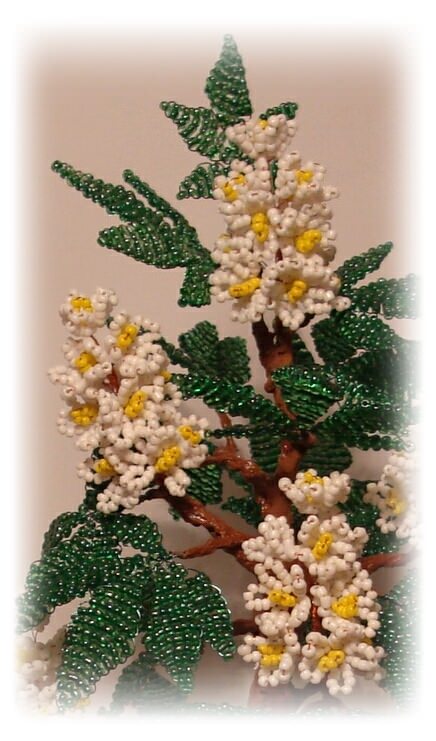
Blooming chestnut leaves an indelible impression in the shower. Its color, captivates glances with its luxurious beauty and heralds the arrival of a warm spring.
If you want to have a blossoming chestnut tree in your house, then our entertaining master class will suit you.
Master-class on chestnut weaving
To create a chestnut of beads, we will need such accessories:
- Green and salad beads;
- White and yellow beads;
- wire;
- Stationery clips;
- Brown threads;
- toilet paper;
- Solution of gypsum or alabaster;
- Convenient capacity.
A large cut of wire, it is necessary to divide into 60 pieces, the length of each will be 50 cm.
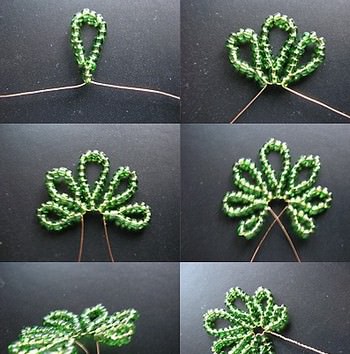
We begin to make chestnut leaves, do this as follows:
After you have the first piece of chestnut ready, unbend the work fitting and twist it. Take all the will power into a fist and create another forty-five leaves.
Create chestnut flowers 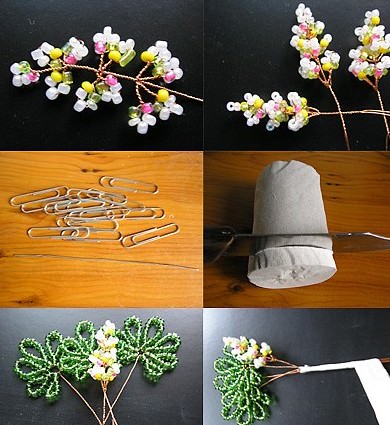
The penultimate stage of our master class, will teach us to create inflorescences for chestnut.
On the cut of the working accessories, type five beads of these colors: one salad, three light, one pink and yellow. It is advisable to do everything consistently so that the inflorescences look equally beautiful.
In the center of the line, a buttonhole is made of beads and wrapped in five turns.
The rest of the loops must be made closer to the trunk.
The next ridge, it is necessary to separate twoBy turns. From one side, make two nodules on the edge of the wire, and on the other, create only one knot. Make loops below so that the coils are pressed against the stem.
In each chestnut brush, there should be twelve buttonholes, and the edges of the line, twist down. Nodules need to be straightened, in order for the appearance of the inflorescence to be beautiful and believable.
It is necessary to weave fifteen such flowers.
Take a roll of toilet paper and saw off a piece 1 cm thick.
Loosen the metal clips and you will have a wide wire.
To get the first branch, take three leaves, one inflorescence and one clip. Fold them together and wrap them with paper. This is done so that the wire is not visible to the eye.
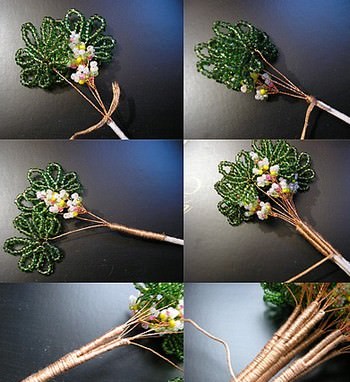
Approaching the end of our master class, it remains to do, only the finishing touches in the weaving of chestnut from beads. Tightly twist all branches with threads. The edges are hidden so that they do not come out.
The next billet, thread with a thread two centimeters, but do not remove the thread. Add two more branches and roll them. There are five pieces of such blanks.
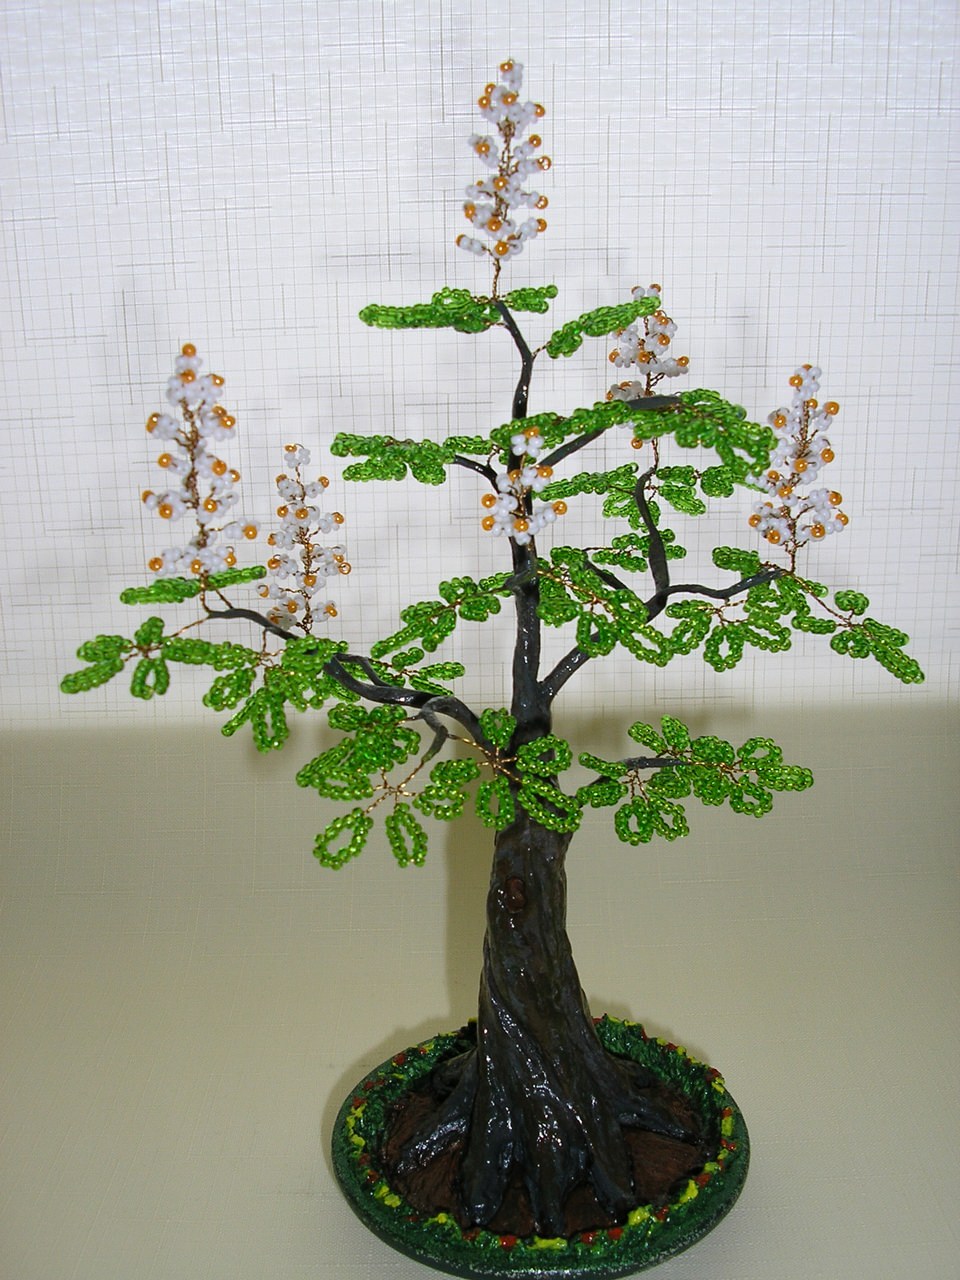
The edges of the metal need to be moved apartHand, that was the stability of our chestnut. Wind silver foil. Chestnut from beads, it is necessary to put in a beautiful container and pour a solution of gypsum or alabaster. Methods of decorating trees from beads, you can look at the video, on our website or see in the photo.

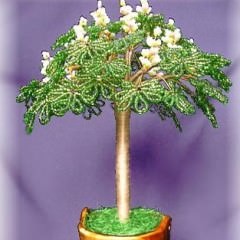
Our master class of weaving a chestnut tree from beads is finished. Such an article, will be a wonderful decoration of your interior.