Buratino with their own hands, wooden doll master class / Toys with their own hands, patterns, video, MK
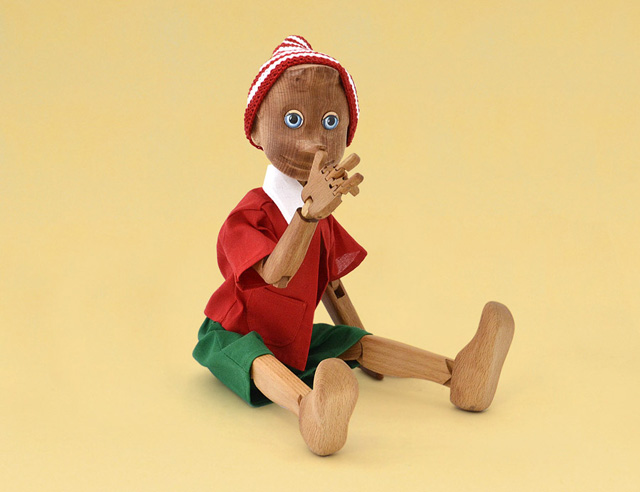
Papa Carlo in a famous fairy tale made Buratinofrom a piece of logs with their own hands, without any magic. Under the force of such an artwork and the modern master of applied art, who owns the basics of woodcarving. The most spectacular is a doll made of valuable wood (ebony, boxwood, etc.), in foreign souvenir shops, such an article can have a four-figure price. But if you are only practicing in the manufacture of wooden Pinocchio, you can use bars from inexpensive wood species - aspen or linden. 


Execution of blanks
The simplest Doll-Buratino with his own hands consists of the following workpieces-parts, which are made from solid blocks of wood:
- head - 1 child;
- housing - 1 child .;
- hand - 3 children. (the humerus, the elbow section and the hand);
- leg - 3 children. (thigh, calf, foot).
Smaller details (axis under the neck, key, nose, hair) can be made from the material left after cutting the main elements. 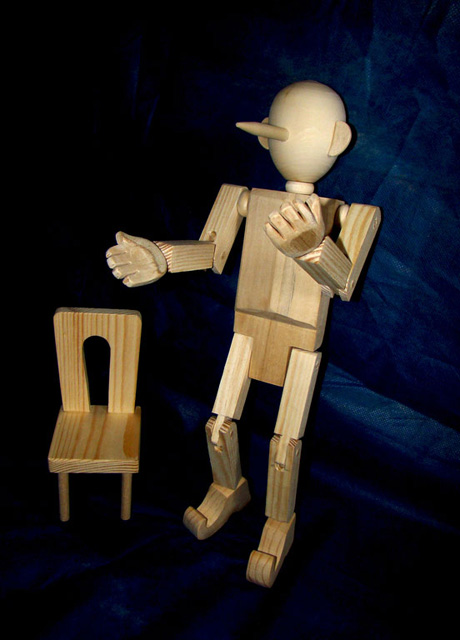 The easiest way to make doll items onturning and milling machine. Then the details will be smooth, streamlined, like factory products. However, if the home master does not have access to such equipment, it's not scary - you can cut all the details yourself with a knife on the wood of the chisels. For grinding the workpieces, fine abrasive paper is used.
Fastening of blanks
The movable connection of the details of the wooden toy provides two types of fastening:
- wire;
- articulated.
Connecting the elements of the toy wire to makethe simplest, but its significant drawback - it is suitable for small toys. If the article is taller than 30 cm, such fastening looks artisanal. Some masters use dense metal rings, inserting them into the elements that need to be connected. The ring connection looks neater than the wire, but the doll's limbs can not move freely in all directions. 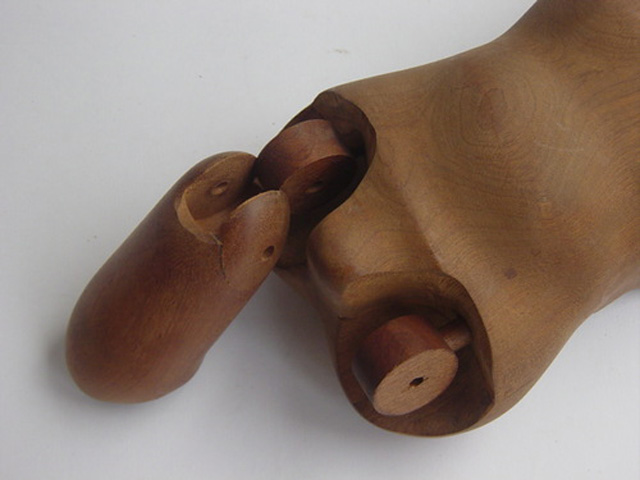 The best option is to make a swivelThe mount, which is used by craftsmen-puppeteers for centuries. The components of the hinge are a disk with a drilled hole in the middle and a fixing shaft that connects the disc to the doll's part.
Stages of assembly of the hinge
- inserting a disc into the detail of the future toy (a hole is cut a few mm wider than the thickness of the disc)
- fixing the disk with an axis drawn from a narrow wooden plate;
- in the edge of the disk is inserted one more axis, smaller diameter;
- turning the groove strictly along the diameter of the second axis in the element to be attached to our part;
- the last stage - the axis in the edge of the hinge disk is driven into the groove.
The hinge of this design is suitable for connectingany composition of a wooden toy - shoulder, elbow, knee. To achieve maximum density of the axes, puppet elements are used to limit the elements of the doll. With the help of delimiters, you can achieve turning of the limbs only in one direction, if this is not provided for by the design of the toy.
Work on trifles: from the nose to the iris of the eye
To make the doll "alive", small elements of the doll require a particularly careful execution: the nose, eyes, fingers, key, hair. 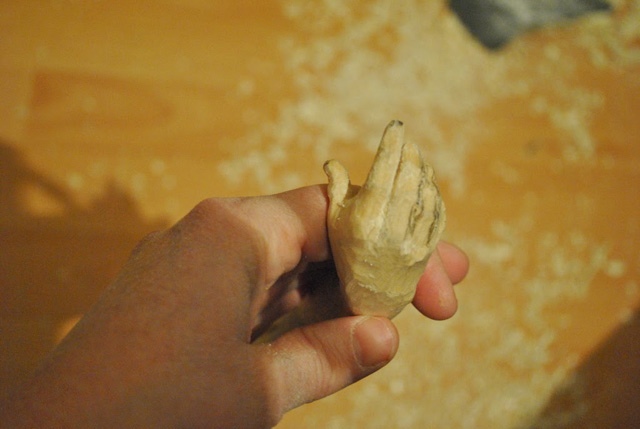 Let's start with the fingers of the brush. To make the hand look natural, and not look like one sloppy block, you need to give the bend of the fingers volume. Run it conveniently with the help of the so-called. a Bogorodsky knife designed specifically for woodcarving.
 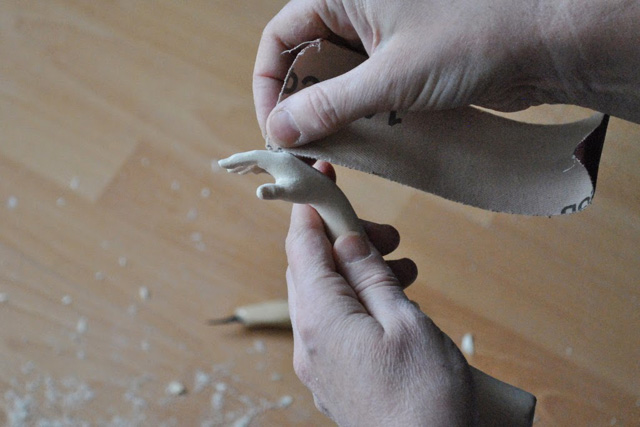 Required element of any wooden Pinocchio,which distinguishes it from the bourgeois Pinocchio - the golden key. In principle, as a part of this, a metal key from a Soviet-style cabinet, if one exists on the premises, will do. But if you want the doll to be made entirely of wood, the key will also have to be made with your own hands. The key can be hung either on the neck of Pinocchio, or make it so that the doll holds it. In the second case, you need to make a blank not for the brush, but for a clenched fist, which is not much more difficult. The blank is rounded, the contours of the fingers are cut with a knife and a chisel. The key itself in this case should have 2 elements. The first is an axis with a rectangular thickening at the end, which is inserted into the hole drilled in the workpiece. The second is the figured base of the key, which is ground from a separate piece of wood. At its base a hole is drilled, where you need to insert our axis. The key is ready. The individual stage of the work is the nose of the doll. Its complexity depends on the form of execution of the element. The easiest way is to carve a triangular cone on the lathe - the future nose of our Pinocchio. Fastening it is carried out by drilling a shallow hole in the face of the face into which the cone base is inserted. To keep the nose firmly, the base is fixed with carpenter's glue. You can also make a nose in the form of an integral element of the face of our doll (it will look more natural if it is slightly bent upwards). In this case, you need to take a bar of such thickness that it is enough for both the head and nose, located in the same plane.
 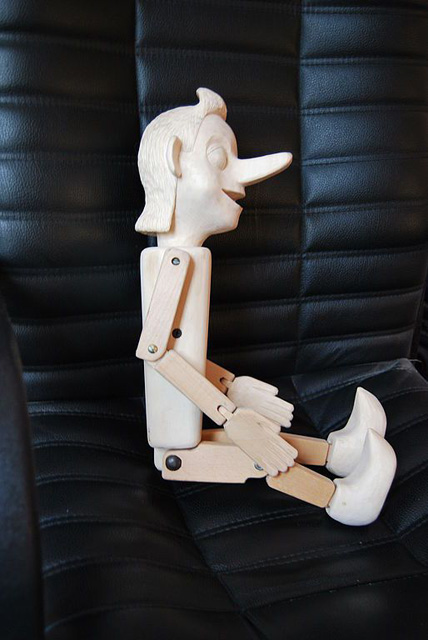 The eyes of the wooden Pinocchio are also made ofwood by inlay. You can just draw them on the surface, but the kind of toy will not be so solid. First, in the blank of the head, a "seat" for the eyes is selected, a shape is attached. Next, you need to paste a piece of wood of a lighter shade than the whole doll - it will be the white of the eye. Then, from a darker trimming of a tree, a iris is cut out and pasted with scissors, in the center of which the pupil can already draw a pupil. Our doll has found eyes.
  Hair Pinotino can be made from the remaining inThe process of working the chips, which are given a rectangular shape and a bend. Like the nose, the hair is attached to the workpiece of the toy head with glue. The final stage of the work - the craft is opened with varnish. After drying it, you can decorate a wooden boy with a sewn or crocheted garment.
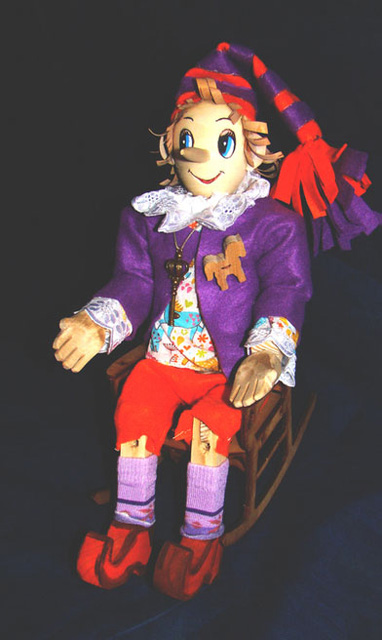
Comments
Related posts:
 Doll on the teapot with his own hands master class, patterns / Toys with his hands, patterns, video, MK
 Carnival costume of Pinocchio with their own hands. Master class and video / Toys with their own hands, patterns, video, MK
 Doll glove with your hands, parsley, Pinocchio, grandfather, fox, patterns / Toys with your hands, patterns, video, MK
 Doll pumpkin master class, patterns without a seam on the face / Toys with their own hands, patterns, video, MK
 A doll of cloth with his own hands, photo, ideas, master class, video / Toys with his hands, patterns, video, MK