
Preparation of New Year's articles with paper and cardboard - a master class and techniques
Different variations of New Year's toys can bemeet in the open air. Also, in different houses, Christmas trees are decorated in their own way. We are of the opinion that it is necessary to always look for something new and try completely unexpected variants of decorative design in an effort to get a high-quality result. But, what toys do you need to surprise your acquaintances and please your loved ones?
Preparation of New Year's articles with paper and cardboard - a master class and techniques
 There are a number of toy elements for the herringbone,which look non-standard and attract attention in their own way. For example, toys made from paper products. They are in their own way simple, but at the same time, they have a kind of charm that will manage to amaze all your guests. The lesson theme is very simple - to learn the simplest methods of creating toys from paper based on easy lessons with a full set of necessary tools. Also, you should consider several options, where a popular variant of polymer clay is also used - another solution, thanks to which your herringbone can significantly change and apply all the bulk qualities on itself. We must not forget that a Christmas tree is an art that unites people. Since in many of our families it is customary to decorate New Year trees for a tradition, one can also join a new kind of entertainment: the creation of such toys. Therefore, boldly call the whole family and now, prepare to learn new interesting and exciting lessons. The first toy is made of cardboard
 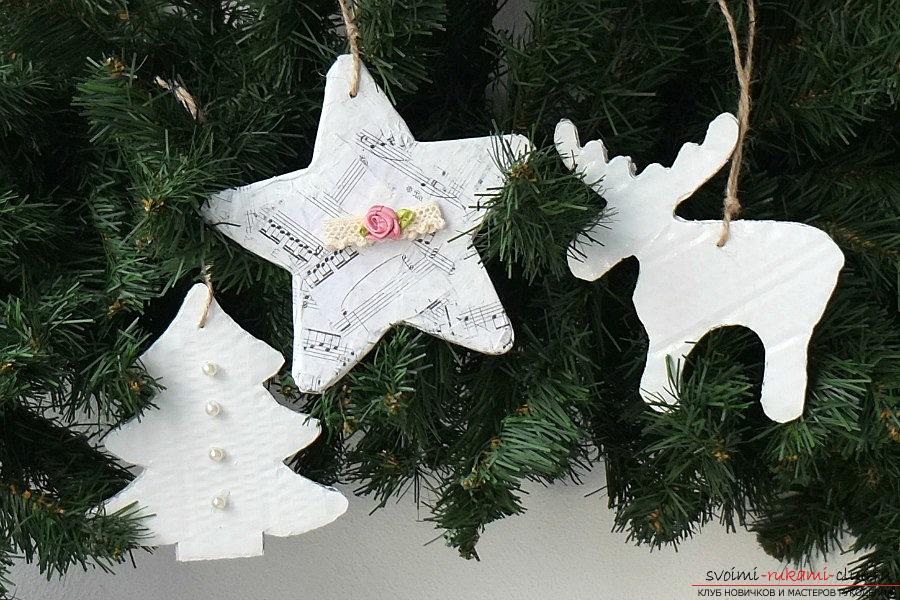 You will be surprised, but the usual Christmas tree toy,made with cardboard can look even better than some wooden ones. Especially if you know new techniques for processing this material. Using beads, braid and flowers, decorating the cardboard is extremely simple. And work follows the principle of decorating papier-mâché. Using acrylic paint, we will also make our decoration long-term.
- Prepare corrugated cardboard for processing
- Scissors should be used - they will be useful to us
- Also, you will need templates and pictures, for the New Year theme
- Take the sticky substance and prepare the hot glue
- You will need a standard measuring pencil
- Find acrylic paint, as well as a brush for decoration
- For decor you will need beads
- You will need a thin tape
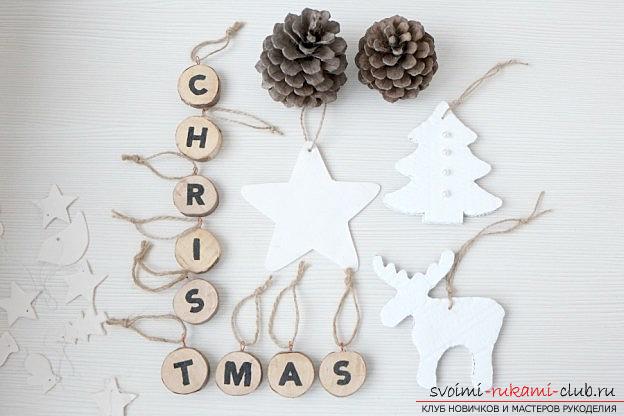
Toy for the New Year: cardboard products 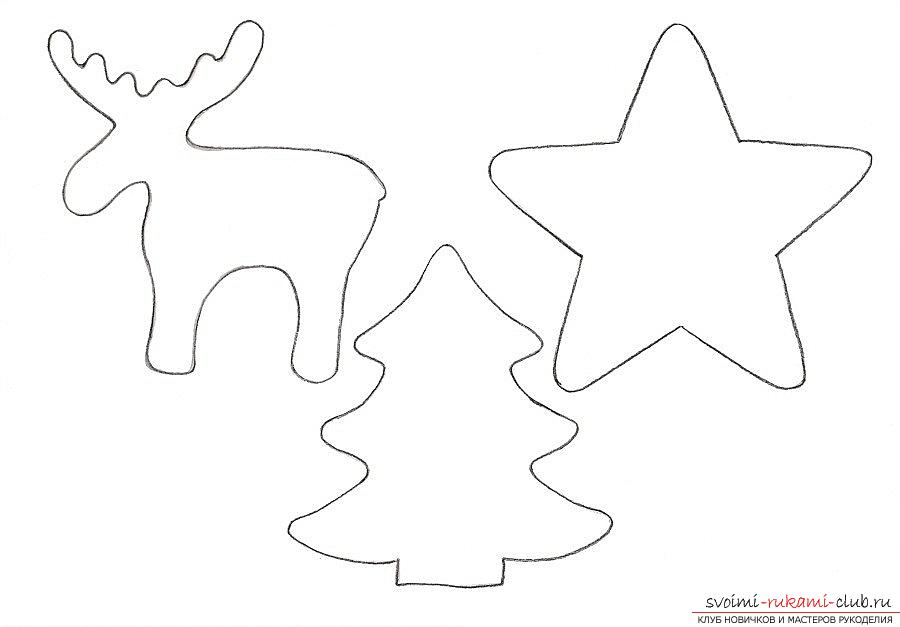 For a New Year's toy made with helpcardboard, it is very important to comply with the volume. Our blanks will have three layers and therefore will become convex. To begin with, you need to print and then cut out the formatted herringbone, the star and of course, the moose. Then, you need to outline the patterns for the cardboard and cut out three figures using each Christmas tree toy. Then, the workpieces must be glued by means of a sticky substance PVA. We put our product under the press and expect complete drying. Then, we get the options for the preparation of our three-dimensional toy.
 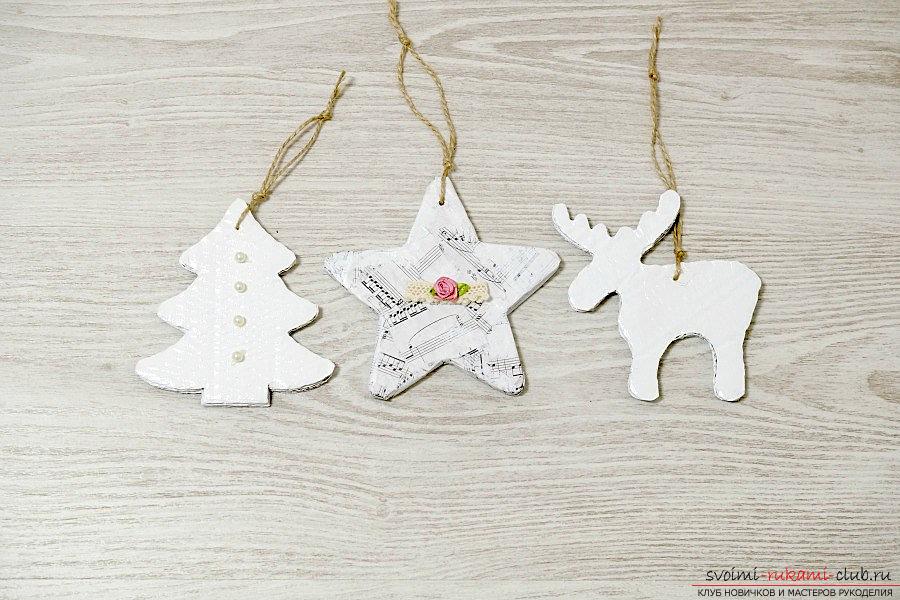 Take the star in order to process it with musicpaper. You can choose your own texture option. Notes must be torn and rumpled. Then, pieces of notes must be coated with sticky substance and then, glue the workpiece using the papier-mache principle. After, we take a herringbone and an elk. They need to be covered with a white paint from acrylic. It may be necessary to apply two layers. Then, when the blanks dry, we'll start to refine them. For workpieces, you can glue beads using hot glue. Stars can be decorated with a bow. Now, our decoration is completely ready. We make holes in order to hang our workpieces. The second toy: ECO-toy for the new year. It is also possible to make a high-quality and eco-friendly decor. For this, you can take a regular cut, which can be found in summer residents in the appropriate season.
- It will take a twig of a tree
- Need a file, or a jig saw
- Prepare our variants of stencils
- Take the pencil
- Prepare the acrylic paint and brush for processing
- You will need a screwdriver, or a drill with a thin version of a drill
- Take glue, preferably hot melt glue
- It will require thin braid
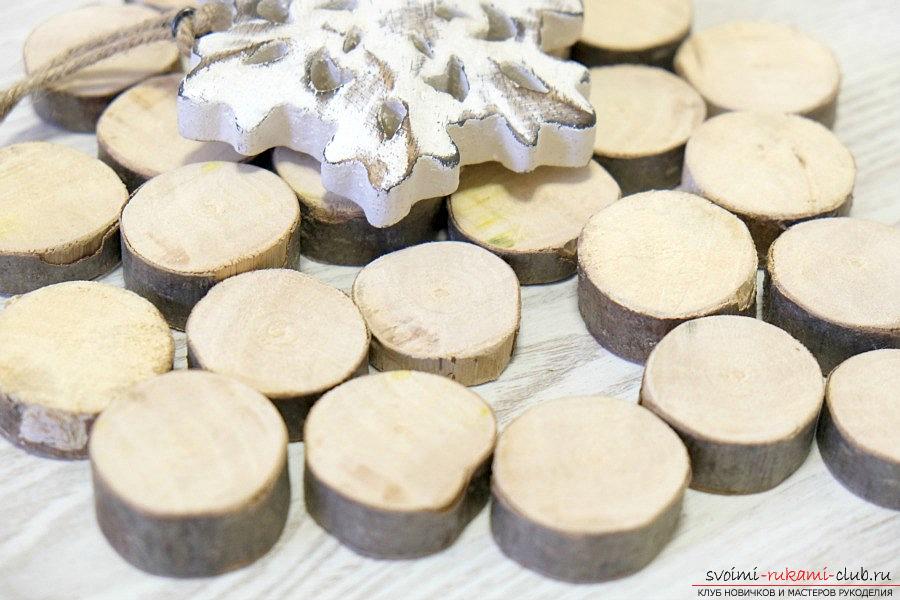 To begin with, it is necessary to make cuts and put onthey have small pictures, also letters in the corresponding paint, for example - black. You can also use a burner to decorate a beautiful cut. Then, the branch must be sawed with a round saw, using a thickness of 1 centimeter. Then, we make a printout of small pictures to circle their pencil on the cut. You can lay out the necessary word from the spills.
 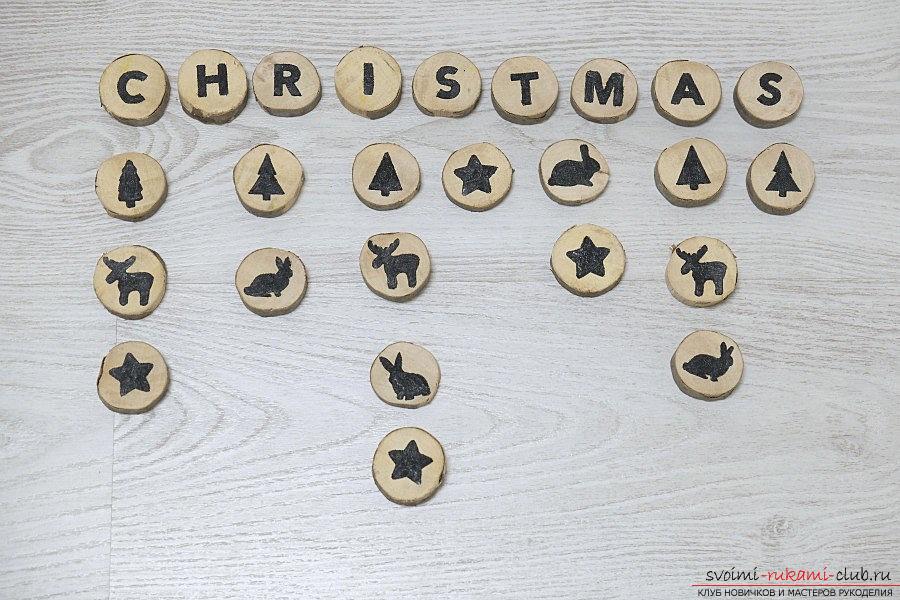 Then, the pictures should be painted with blackpaint and wait until they dry out. Then, you need to take a drill in order to make a small hole for 1 centimeter. We use the butt or the front of the product. Then, with a small piece of wire we make a loop in the product. The loop should be glued using a hot glue on the hole. Then, take the braid and decorate your smart Christmas tree!
 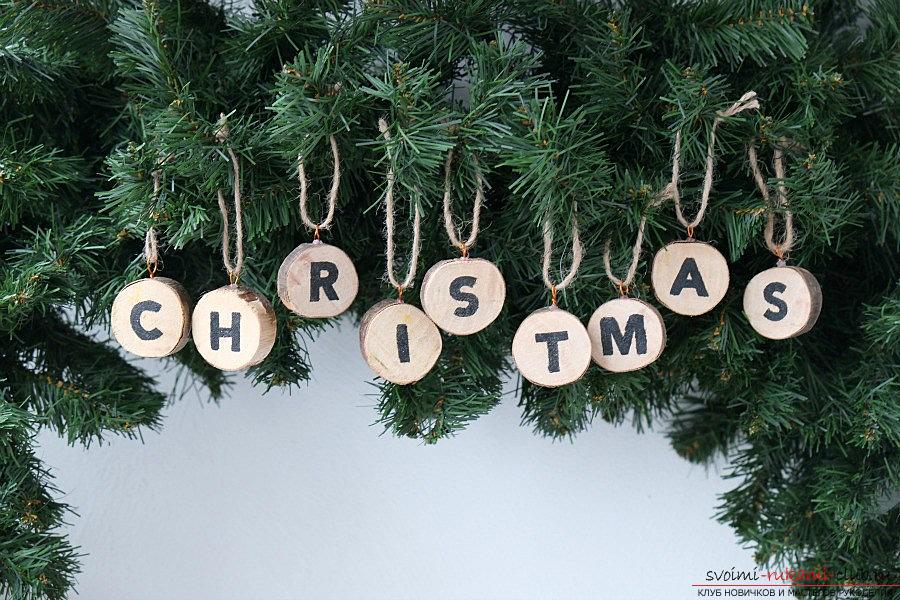 The third toy: A toy made of plastic for a Christmas tree Plastic figurines give opportunities for imagination. We have many solutions and unlimited resources to come up with something new. On polymer clay it is easy to paint, to make a pattern or to back up the necessary version of the decor. Considering that we make toys of white color, we will not decorate white clay.
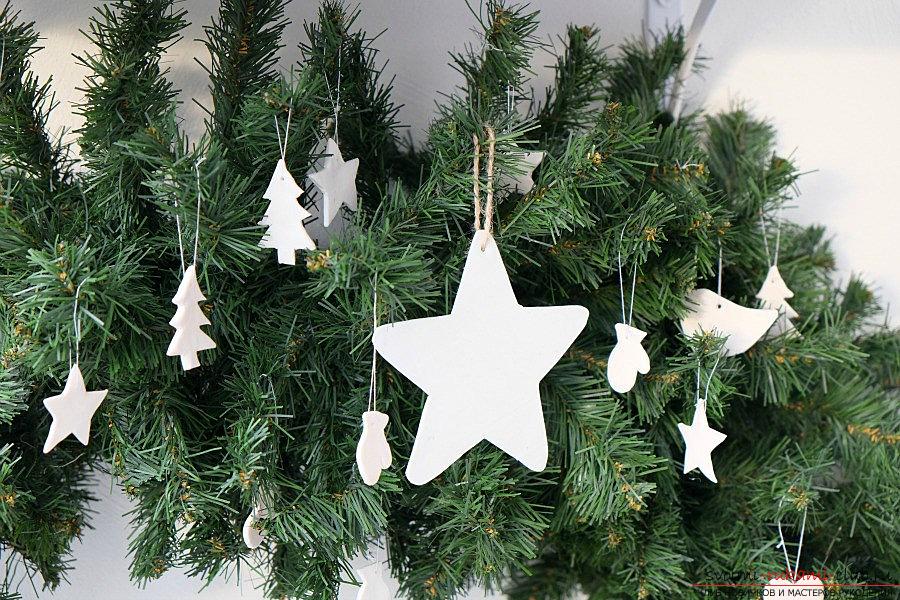
- Prepare a polymer clay material
- Make template blanks
- Also take a clerical knife for your work
- You will need a rolling pin, or a pencil without faces (round)
- Foil and baking sheet
- Oven
- Take a toothpick to process
- Thin film in thin form
To begin with, you need to stretch a small piececlay plastics with the help of hands. The work process is similar to working with a test. Also, pre-prepare templates for the images that you like. It is desirable that they have a clear line. The picture should be printed and then cut out the templates with the picture. Then, attach the picture to the plastic, so that you can then cut off excess elements with the help of a regular clerical knife. Then, the decoration for the tree, which we made, should be spread out on the folk and do with small toothpicks small holes for the element of the braid. Then, the decor is sent to bake in the oven. The temperature and waiting time are written on the package from your material. On the average - 10-15 minutes and about 100 degrees for products of a thin type. Then, decorations need to get out of the oven and wait until they cool. After, we put the braid on and hang it on our Christmas tree!
Comments
Related posts:
 This master class of weaving crafts from rubber bands will teach the creation of a rubber toy - an animal.
 How to make a boat out of paper or cardboard with your own hands
Master-class of making their own toys for decorating a Christmas tree - Christmas ribbons made of ribbons.
Turkish tourniquet from beads master class video knitting equipment
How to make a boat out of paper or cardboard with your own hands
Master-class of making their own toys for decorating a Christmas tree - Christmas ribbons made of ribbons.
Turkish tourniquet from beads master class video knitting equipment
 The lesson of creating a poodle with the help of quilling techniques for beginners - a master class