Preparation of an angel and other fairy-tale characters for a magical world - a master class
New Year's holidays are always differentthe opportunity to please close to bright and pleasant gifts. and yet, each of us has a great opportunity to participate in the huge process of preparing for decorating and decorating the appearance of the house. Special lessons and materials tell how, with the help of the simplest materials, we have the opportunity to build a quality and interesting version of the New Year's craft made by ourselves.
Preparation of an angel and other fairy-tale characters for a magical world - a master class
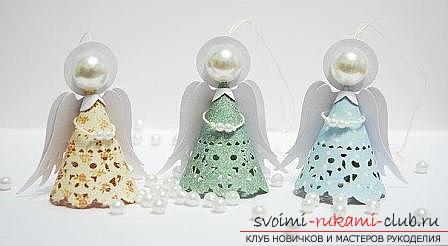 What process during the holiday is the mostmemorable and important for the family? Of course, gathering at the table. But, during the preparation of the holiday, it is equally important to decorate the tree and it is desirable to do this with the whole family. As an ideal action, which helps to strengthen the bonds of parents and children, and also teach them something new, work on hand-made articles. Moreover, you can use a variety of materials to make interesting and unique variations of the most incomparable, comfortable and thoughtful toys. Angel of paper
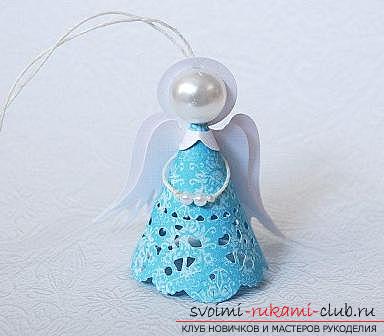
  Our first work will consist of paper andwill embody the beautiful and unique character of all the stories of Christmas - Angel! Simple work is always brilliant. Therefore, stock up on the necessary materials and proceed.
- The material of the openwork napkin for the base
- Take also a piece of white paper
- It is especially important to take a pen and an ordinary pencil
- You will need a tight thread
- It is necessary to take beads from mother-of-pearl, one large, one medium and two small
- Adhesive
- Scissors
- Binders
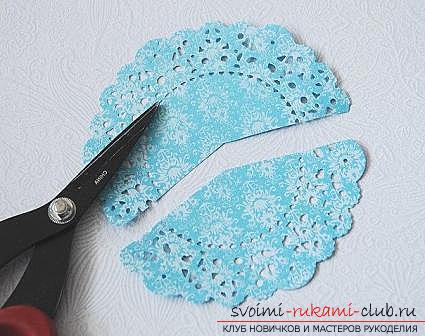
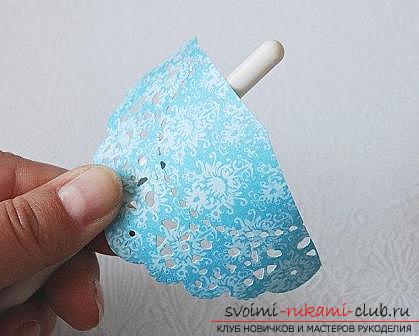 Begin to engage in creativity! To begin with, you need to take a paper napkin from the paper type to cut it in such a way as shown in the diagram. Then, take the jellied napkin from the paper again and cut it according to the following scheme. Then, we use an ordinary pencil in order to roll the made part into the shape of a cone. In this case, it is necessary to glue the sides of the cone and fix them with a binder, so that the workpiece has the ability to dry out and glue the product in the desired direction.
 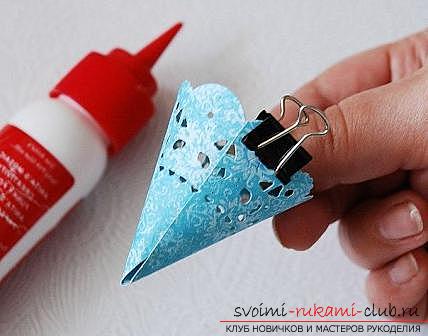 Master the angel The next task for workwill create a loop. This is necessary in order to hang the product to the Christmas tree. For such an action, an ordinary white string of dense appearance is suitable, which must be passed to the needle, tighten for one end a small knot, then, pierced with a mother-of-pearl bead in an average size. Then, you need to go inside the cone, and also use the nose to pull the thread out to the outside. After that, you need to measure the loop in the right size and with the help of a needle to go back: We do by acting through the form of a narrow spout to its middle, through the beadwork and again to tie the knot. The edges between each other once again bind to make greater reliability.
 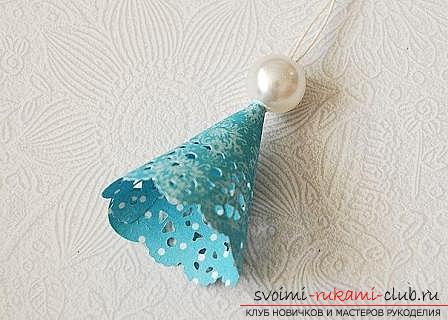 We form a loop with a pearl bead. Then, it is necessary to glue an angel to the shape of a halo, using a paper ring to be cut out. Also, you need to make a variant of the white collar, also glue it to the product. . Also, you need to cut a tight thread, then glue one side to the back, the second side must be wrapped with a thread on the front part - this will be an option for the angel's hands. It is necessary to tie a knot on a string, to string a small bead on a pearl shade. One bead will be stacked next to the version of the first bead to tie one of the nodules.
  Next, you need to wrap the thread around againdresses. It is necessary to cut a tight thread to glue one side on the angel's back. Then, wrap the thread on the front part - so the hands of the angel will form. Then, it is necessary to tie a small knot on the thread to string a bead of mother-of-pearl onto it. Another bead is placed next to the original, another nodule is imposed. Next, it is necessary to re-wrap the thread around the dress of the angel and glue it to the back, but already at the shoulder level. Then, it is necessary to make a turn around the entire perimeter of the dress and attach the product to the back. It only remains to prepare two versions of the back part for the wings, in larger size and smaller. We use white paper to fasten one and the other upper part to fix on the back of the angel. It only remains to cut two parts of the wing parts to make a smaller and larger wing using a white sheet of white paper. Then, initially we make a fastening on the upper part, and then - on the bottom, to fix on the back of the angel. It turns out the ideal version of the angel on his back. Difficulties in working with the process of preparing an angel should not arise. Thus, rather we proceed to work, to decorate the Christmas tree - to get a beautiful forest beauty, decorated with such bright characters.

